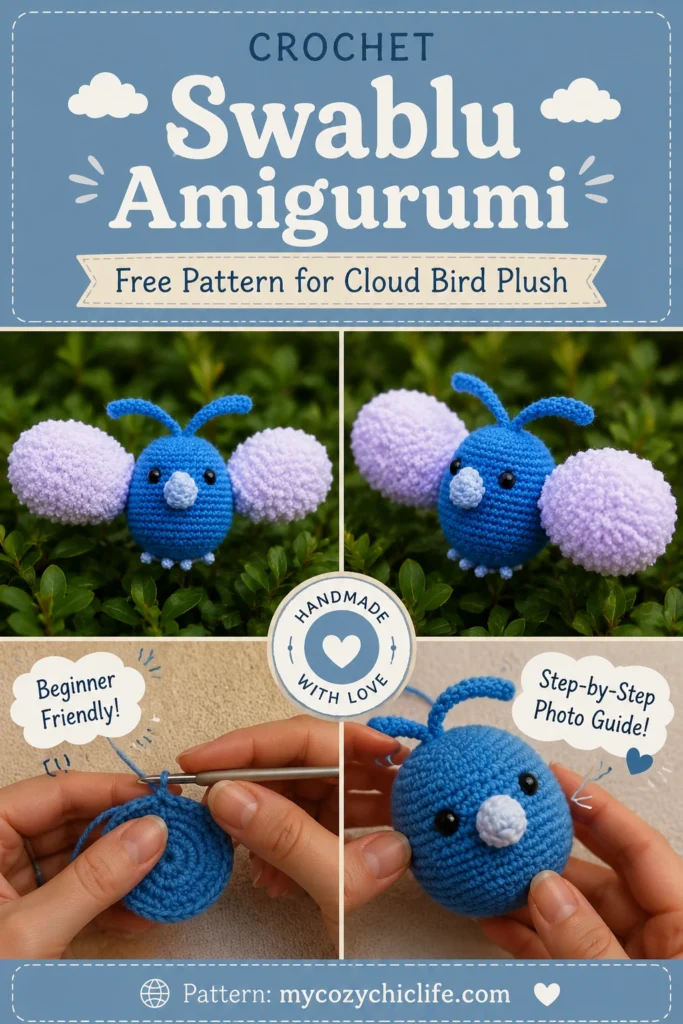
Calling all Pokémon fans and crochet lovers! 🐦☁️
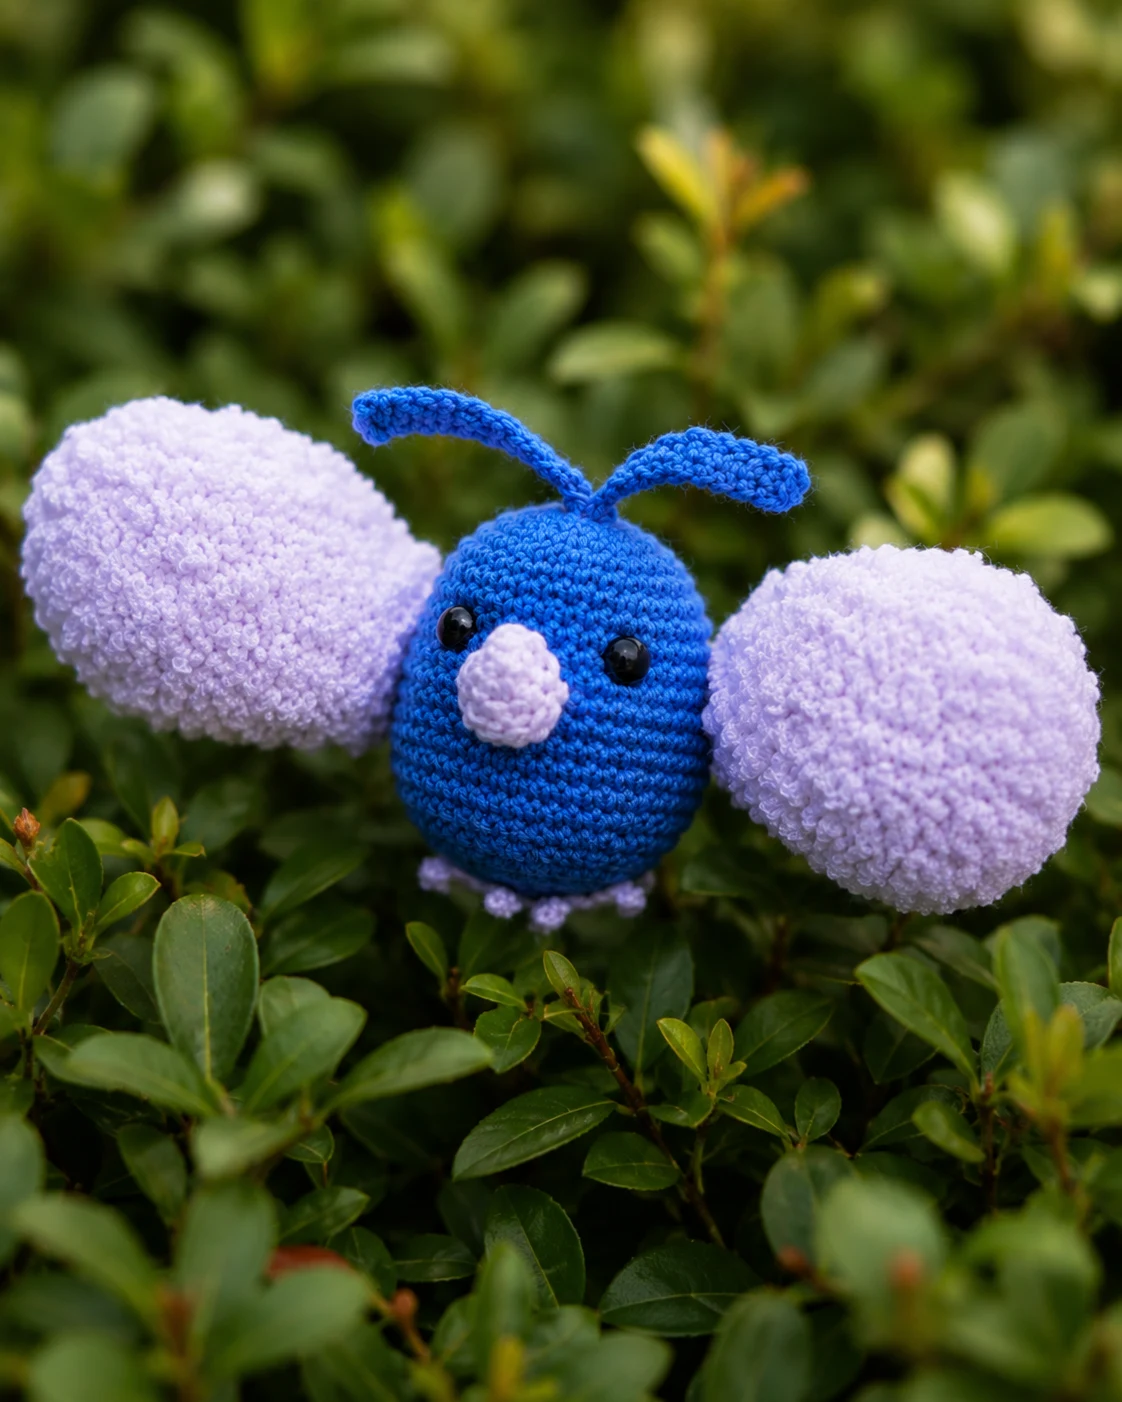
If you have been searching for the perfect project that combines your love for Pokémon with the joy of handmade crafts, look no further. This Crochet Swablu Pokémon Amigurumi is a fluffy cotton bird known for its cloud-like wings and gentle personality. In the Pokémon world, Swablu is famous for perching on people’s heads like a cute little hat—and now you can make your own!
Whether you want to display it on a shelf, keep it on your desk, turn it into a keychain, or gift it to a fellow Pokémon trainer, this tiny character adds joy and cuteness wherever it goes.
Love making Pokémon-inspired projects? You might also enjoy my Free Triceratops Amigurumi Pattern or the Crochet Dragon Ornament for more fantasy creatures.
Why Crochet a Swablu Amigurumi?
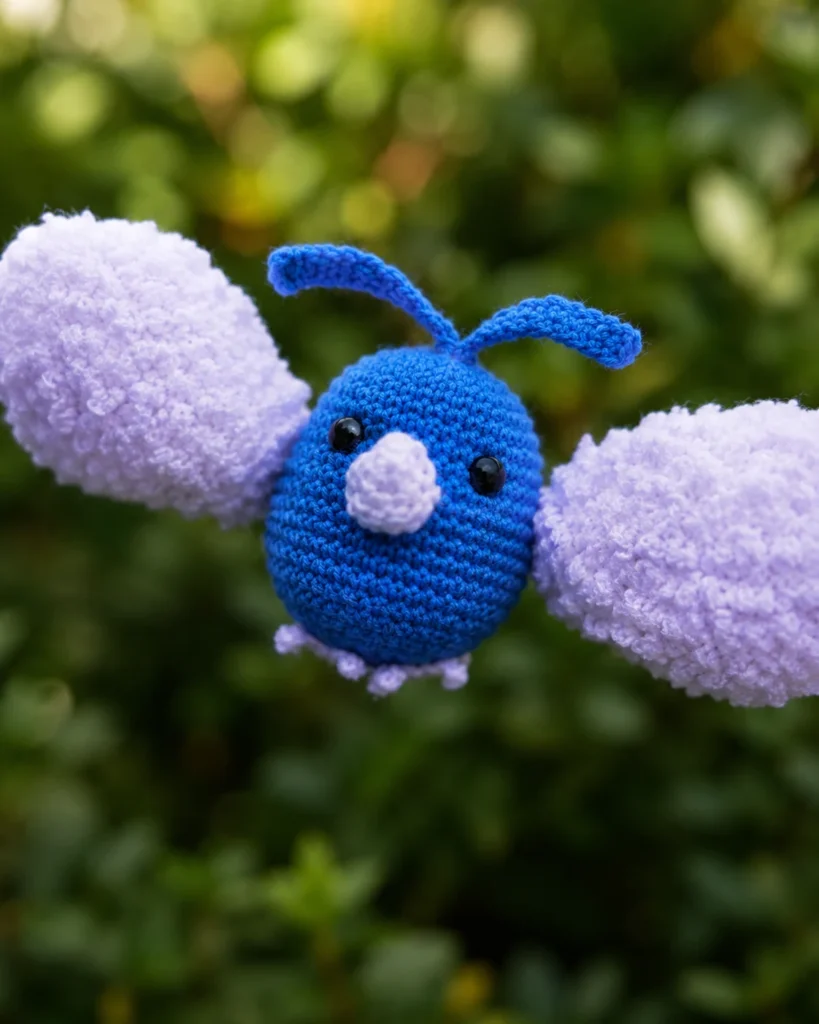
Swablu’s soft blue body and fluffy white “cotton” wings make it one of the most endearing Pokémon. Fans adore its innocent look and sky-blue palette. Crocheting it allows you to capture that playful spirit in a handmade keepsake.
| Reason | Why You’ll Love It |
|---|---|
| Portable | Small enough to take anywhere |
| Giftable | Perfect for Pokémon fans of all ages |
| Customizable | Make shiny versions or add accessories |
| Relaxing | A stress-relieving craft session |
Project Overview & Skill Level
This Swablu amigurumi stands approximately 4–6 inches (10–15 cm) tall, depending on your yarn and hook size. It features:
- A round body
- A head with fluffy cotton accents
- Two cloud-like wings
- A small tail
- Tiny feet
Skill Level: Beginner to Intermediate
- You should know: magic ring, single crochet, increases, decreases
- No advanced stitches required
New to amigurumi? Start with my No-Sew Mini Octopus Pattern to practice basic techniques.
Materials & Supplies
Gathering the right supplies makes the entire process smooth and enjoyable. Here is everything you need for one Swablu:
| Category | Item | Quantity/Size |
|---|---|---|
| Yarn (Light Blue) | Main body and head | 50–70g |
| Yarn (White) | Wings, head fluff, tail | 30–40g |
| Yarn (Black/Dark Gray) | Eyes/eyebrows | Small amount |
| Yarn (Yellow – Optional) | Shiny Swablu variation | 50g |
| Hook | 3.5mm or 4mm | — |
| Safety Eyes | 8–10mm pair | 2 pieces |
| Stuffing | Polyester fiberfill | As needed |
| Other | Yarn needle, scissors, stitch markers | — |
| Optional | Keychain ring, fabric glue | — |
Yarn Recommendations
- Soft worsted-weight acrylic (like Red Heart, Stylecraft, or Lion Brand) works beautifully
- Cotton blends hold shape well and wash easily
- Avoid chenille or velvet yarn for this pattern (stitches may disappear)
Crochet Abbreviations (US Terms)
| Abbreviation | Meaning |
|---|---|
MR | magic ring |
sc | single crochet |
inc | increase (2 sc in one stitch) |
dec | decrease (sc 2 together) |
slst | slip stitch |
ch | chain |
[…] | total stitch count |
Step-by-Step Crochet Pattern Instructions
Head (Fluffy Top – White Yarn)
The head forms the fluffy cloud-like top of Swablu. Start with white yarn.
- R1: Magic ring, 6 sc. [6]
- R2: inc in each st. [12]
- R3: (sc, inc) x6. [18]
- R4: (2 sc, inc) x6. [24]
- R5: (3 sc, inc) x6. [30]
- R6–R10: sc in each st (5 rounds). [30]
- R11: (3 sc, dec) x6. [24]
- R12: (2 sc, dec) x6. [18]
- R13: (sc, dec) x6. [12]
- 💡 Stuff firmly before closing.
- R14: dec x6. [6]
- Close hole, cut yarn, leave a long tail for sewing.
Extra Fluffy Texture
After completing the head, add small white loops or surface crochet stitches on top for that signature cloud look. You can also brush the white yarn lightly with a wire pet brush for extra fluffiness.
Body (Light Blue Yarn)
Swablu’s body is a simple oval shape. Start with light blue yarn.
- R1: Magic ring, 6 sc. [6]
- R2: inc x6. [12]
- R3: (sc, inc) x6. [18]
- R4: (2 sc, inc) x6. [24]
- R5: (3 sc, inc) x6. [30]
- R6–R12: sc in each st (7 rounds). [30]
- R13: (3 sc, dec) x6. [24]
- R14: (2 sc, dec) x6. [18]
- 💡 Start stuffing here. Continue stuffing after each round.
- R15: (sc, dec) x6. [12]
- R16: dec x6. [6]
- Close hole, cut yarn, leave a long tail for sewing.
Wings (Make 2 – White Yarn)
Swablu’s wings should look like fluffy clouds or fans.
- Ch 8.
- Row 1: Starting from 2nd ch from hook: sc, hdc, 2 dc, hdc, sc, slst in last ch.
- Row 2: Turn, ch 1, sc in each st across, with 2 sc in the center stitch for shaping.
- Row 3 (Optional edging): slst around the entire wing for a cleaner edge.
- Cut yarn, leave a long tail for sewing.
Alternative wing method (round):
- R1: Magic ring, 8 sc. [8]
- R2: (sc, inc) x4. [12]
- R3: (sc, inc, sc) x4. [16]
- R4: sc in each st. [16]
- Flatten and fold slightly before sewing.
Tail (White Yarn)
The tail consists of 3 small feather-like pieces joined together.
Make 3 separate pieces:
- R1: Ch 6, starting from 2nd ch from hook: sc, hdc, dc, hdc, sc.
- Cut yarn, leave tails.
Assembly:
- Arrange the 3 pieces in a fan shape.
- Sew them together at the base.
- Attach the tail to the back of the body.
Feet (Make 2 – Light Blue or Yellow Yarn)
- R1: Magic ring, 6 sc. [6]
- R2: sc in each st. [6]
- R3: (sc, inc) x3. [9]
- R4–R5: sc in each st (2 rounds). [9]
- Do not stuff feet.
- Flatten and sew to the bottom of the body.
Facial Details
- Attach safety eyes between Rounds 6–8 of the head (or embroider with black yarn for children’s toys).
- Eyes should be approximately 4–5 stitches apart.
- Embroider a tiny smile or beak using black or dark gray yarn.
- Add small white eyebrows above the eyes for extra expression.
Need help with face embroidery? Check out my Miffy Pillow Pattern for detailed face tutorials.
Assembly Process
Now comes the exciting part—bringing your Swablu to life!
| Step | Action |
|---|---|
| 1 | Sew the head to the body securely. Use multiple passes for stability. |
| 2 | Attach wings to the sides of the body (between R6–R9). |
| 3 | Sew the tail to the back center of the body. |
| 4 | Attach feet to the bottom front of the body. |
| 5 | Add any extra fluffy accents to the head. |
Take your time with assembly. Good sewing makes the difference between “cute” and “professional-looking.”
Helpful Beginner Tips
| Tip | Why It Matters |
|---|---|
| Maintain tight stitches | Prevents stuffing from showing through |
| Use stitch markers | Keeps your place in spiral rounds |
| Stuff gradually | Add small amounts and shape as you go |
| Work in good lighting | Reduces eye strain and mistakes |
| Leave long yarn tails (15–20 cm) | Makes sewing parts together much easier |
| Take breaks | Avoid hand strain and frustration |
Common Mistakes to Avoid
Even experienced crocheters sometimes make small errors. Here are the most common mistakes and how to avoid them:
| Mistake | Solution |
|---|---|
| Loose tension | Go down one hook size; keep stitches tight |
| Forgetting stitch markers | Always mark the first stitch of each round |
| Overstuffing | Stuff until firm but not stretched—shapes distort if overfilled |
| Understuffing | Add more filling until the piece holds its shape |
| Wrong eye placement | Count stitches carefully before attaching; pin them first |
| Weak sewing | Sew multiple times in a star pattern; knot securely |
| Short yarn tails | Always leave 15–20 cm for sewing parts together |
Creative Customization Ideas
Make your Swablu truly one-of-a-kind:
| Idea | How To |
|---|---|
| Shiny Version | Use yellow yarn instead of light blue for the body |
| Pastel Fantasy | Try pink, purple, or mint green for a magical look |
| Mini Keychain | Use a 2.5mm hook and thinner yarn for a 2–3 inch version |
| Accessories | Add a tiny crocheted hat, scarf, flower crown, or bow |
| Sparkle Wings | Use glittery or fluffy yarn for wings |
| Family Set | Crochet normal, shiny, and baby sizes together |
| Bag Charm | Attach a lobster clasp and keychain ring |
FAQ Section
What is the best yarn for amigurumi?
Soft acrylic yarns like Red Heart Super Saver, Stylecraft Special DK, or Lion Brand Vanna’s Choice are ideal. They hold shape well, are budget-friendly, and come in many colors.
How do I make the plush firm?
Use tight stitches, a smaller hook (3.5mm instead of 4mm), and gradual stuffing—add small amounts at a time and shape with your fingers.
Can I sell finished Swablu amigurumi?
Yes! You may sell finished items made from this pattern (small batches, handmade). Please do not sell or redistribute the pattern itself.
How long does this project take?
Most beginners finish in 3–5 hours. Experienced crocheters may complete it in 2–3 hours.
My Swablu keeps falling over. What do I add?
Add a small weight (glass beads in a fabric pouch) to the bottom of the body before stuffing.
Finishing Touches
- Weave in all ends neatly using a yarn needle.
- Brush the white parts lightly with a wire pet brush for extra fluffiness.
- Add a keychain ring to the top of the head if desired.
- Attach a small ribbon around the neck for a charming accent.
You Did It! 🎉
Congratulations! You have crocheted your very own Swablu Pokémon Amigurumi. Whether it is your first amigurumi or your fiftieth, this fluffy cloud bird is sure to bring smiles every time you look at it.
Share your creation! Tag me or leave a comment below. I would love to see your Swablu—normal, shiny, or pastel fantasy version!
Remember: Gotta crochet ’em all! 🧶✨
More Free Patterns You Will Love
| Pattern | Skill Level |
|---|---|
| No-Sew Mochi Bunny | Beginner |
| Miffy Pillow | Beginner |
| Free Triceratops Amigurumi | Intermediate |
| Crochet Dragon Ornament | Advanced |
| No-Sew Axolotl | Beginner |
| Amigurumi Seahorse Keychain | Beginner |
Happy Crocheting!