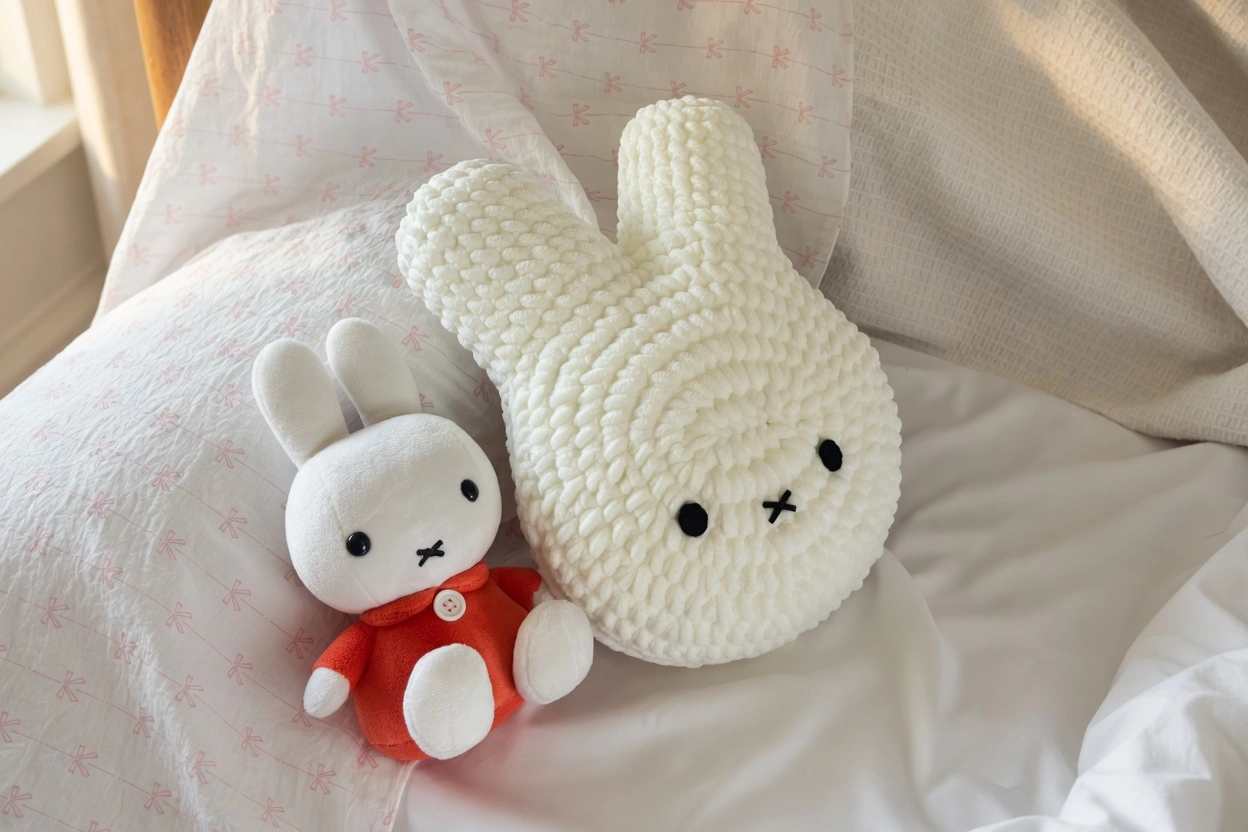
There’s something wonderfully satisfying about crocheting a project that looks impressive but is surprisingly simple to make. This Miffy Pillow crochet pattern by Chubbiesbyash checks every box: it’s no-sew, requires no magic ring, uses only basic stitches, and results in a chunky, huggable pillow that looks straight out of a cozy home decor magazine. Whether you want a cute addition to your couch, a handmade gift, or a comfy companion for a little one, this pattern delivers.
The best part? Even if you’ve never crocheted amigurumi before, you can make this. The construction is straightforward — two flat circles joined together, with ears built right in. No fiddly sewing, no tricky ring starts, and the chunky chenille yarn means it works up fast. Let’s walk through everything you need to know.
Why This Miffy Pillow Pattern Stands Out
Most plushie and pillow patterns require sewing multiple pieces together at the end, and that assembly step is often where beginners lose confidence. A slightly uneven ear or a poorly attached limb can throw off the whole project. This pattern sidesteps that problem entirely.
The pillow is constructed from two crocheted circles that are joined together using a clever front-loop and back-loop technique. The ears aren’t sewn on separately — they’re formed naturally from the remaining stitches after the circles are joined. It’s an ingenious construction method that produces a clean, professional-looking result every time.
And because the pattern starts with a chain rather than a magic ring, it’s accessible to crocheters who haven’t yet mastered that technique. The chain start creates the same oval center and works just as well for building outward in rounds.
Materials You’ll Need
Before you begin, gather the following supplies:
- Yarn: Chunky chenille yarn, approximately 7mm thick (about 300g total) in white or your preferred color, plus black cotton or acrylic yarn for the eyes
- Hooks: 6mm crochet hook for the pillow body and ears, 2.5mm hook for the eyes
- Notions: Stitch markers, darning needle, scissors, and glue
- Stuffing: Polyester fiberfill — you’ll need a generous amount since this is a pillow-sized project
- Optional: Black felt cloth for the mouth (alternatively, you can embroider it with black yarn)
The chunky chenille yarn is key to this project. It gives the pillow its soft, plush texture and means the stitches work up quickly. At around 7mm thickness, each round grows fast, so the entire pillow can be completed in just a few hours.
Crochet Abbreviations
Here’s a quick reference for the abbreviations used in this pattern:
Ch – Chain | st – stitch | R – round/row | sc – single crochet | inc – increase | dec – decrease | slst – slip stitch | * – repeat | [ ] – total stitch count per round
The Full Pattern
Important Note Before Starting
This pattern uses joined rounds for the circle panels. At the end of each round, make 1 slip stitch into the first stitch to join, then start the next round with Ch1. The Ch1 and slst are not included in the total stitch count. Using the same yarn weight and hook size as specified is highly recommended for the best results.
Circle Panel (Make 2)
Use white yarn (or any color you prefer) and start with a slip knot.
- R1: Ch7, starting from 2nd ch from the hook, 1inc, 4sc, 4sc (all into the last ch), into the lower parts of the ch, 4sc, 1inc, 1slst (into the 1st sc) [16]
- R2: Ch1, 16inc, 1slst [32]
- R3: Ch1, (7sc, 1inc) × 4, 1slst [36]
- R4: Ch1, (1sc, 1inc, 1sc) × 12, 1slst [48]
- R5: Ch1, 48sc, 1slst [48]
- R6: Ch1, (3sc, 1inc) × 12, 1slst [60]
- R7: Ch1, (2sc, 1inc, 2sc) × 12, 1slst [72]
- R8: Ch1, (5sc, 1inc) × 12, 1slst [84]
Cut the yarn and make a second identical circle.
Preparing for Joining
This step is crucial for getting the ears positioned correctly. On each circle, find the last stitch and count backwards from it — counting the last stitch as one — up to the ninth stitch. Place a stitch marker in that ninth stitch. Then, starting from the stitch next to the first marker, count forward 25 stitches and place a second marker there. You should now have two markers with exactly 24 stitches between them (not counting the markers themselves). Repeat this process on the second circle.
Joining the Circles
Place the two circles together with the right sides facing each other and the wrong sides facing you. Align the stitch markers so that each pair sits directly opposite one another.
When joining, insert your hook through the front loop only (FLO) of the top circle and the back loop only (BLO) of the bottom circle for each stitch. Begin at any pair of stitch markers and single crochet all the way around until you reach the second pair of markers. You should have a total of 60 single crochets from the joining process. At the end, Ch1 and cut the yarn.
This FLO/BLO joining technique creates a neat, almost invisible seam that sits naturally along the edge of the pillow.
Ears
After joining, you’ll have 24 stitches remaining on each circle — these form the ear openings. Locate the 12th stitch on each circle (on opposite sides) and place a stitch marker in each. These stitches should be directly across from one another.
- R1: Starting from the marked stitch on the front circle, 12sc along the front circle, 1sc into the connecting stitch (from the joined circles), 12sc along the lower circle [25]
- R2–R7: 25sc [25]
- R8: (3sc, 1dec) × 5 [20]
- R9: 10dec [10]
Cut the yarn and close the ear. For the second ear, follow the same process but leave a long yarn tail when you bring in the yarn at the beginning — this tail will be used to close the gap between the two ears.
Eyes
Switch to black yarn (milk cotton or acrylic) and a 2.5mm hook.
Start with a slip knot and Ch3.
- R1: Starting from the 2nd ch from the hook, 1inc, 3sc (all into the last ch), into the lower part of the ch, 1sc
Cut the yarn, leaving a long tail if you plan to sew the eyes onto the face. If you prefer gluing them, weave in the ends instead.
Final Touches
Use the long yarn tail from the second ear to close the gap between the two ears. Then sew or glue the eyes onto Round 3 of whichever circle you’d like to be the face, spacing them 8 stitches apart. For the mouth, you can cut a small X-shape from black felt cloth and glue it on, or embroider it directly using black yarn.
Stuff the pillow generously before fully closing it — you want it plump and huggable.
Tips for the Best Results
Stick to the recommended yarn and hook size. The pattern is designed around chunky 7mm chenille yarn and a 6mm hook. Using different weights will change the size and proportions significantly. If you want a larger pillow, it’s better to add more increase rounds to each circle rather than simply switching to thicker yarn.
Use stitch markers generously. The marker placement for joining and ear construction is the trickiest part of this pattern. Take your time with this step and double-check your counts before you start crocheting the join.
Watch the video for the joining technique. The FLO/BLO joining method is simple once you see it in action, but it can be confusing to read about. The video tutorial by Chubbiesbyash walks through each step clearly.
Don’t skimp on stuffing. A flat, under-stuffed pillow won’t have that satisfying round shape. Pack it firmly — the chenille yarn has enough stretch to accommodate a generous fill without distorting the stitches.
What Makes This Construction So Clever
The brilliance of this pattern is in how the ears emerge organically from the structure. By leaving a gap when joining the two circles, you create natural openings that become the ear bases. The 24 stitches on each side of the gap are worked in rounds to form tall, tapered ears that stand upright — exactly like Miffy’s iconic silhouette. There’s no guesswork about ear placement, no pinning and sewing, and both ears end up perfectly symmetrical because they’re built from the same structural gap.
The chain start is another thoughtful choice. Many beginners struggle with magic rings, especially in chunky yarn where they can be bulky and difficult to tighten. Starting with a chain and working into both sides of it creates the same oval foundation without any of that frustration.
A Pillow Worth Making
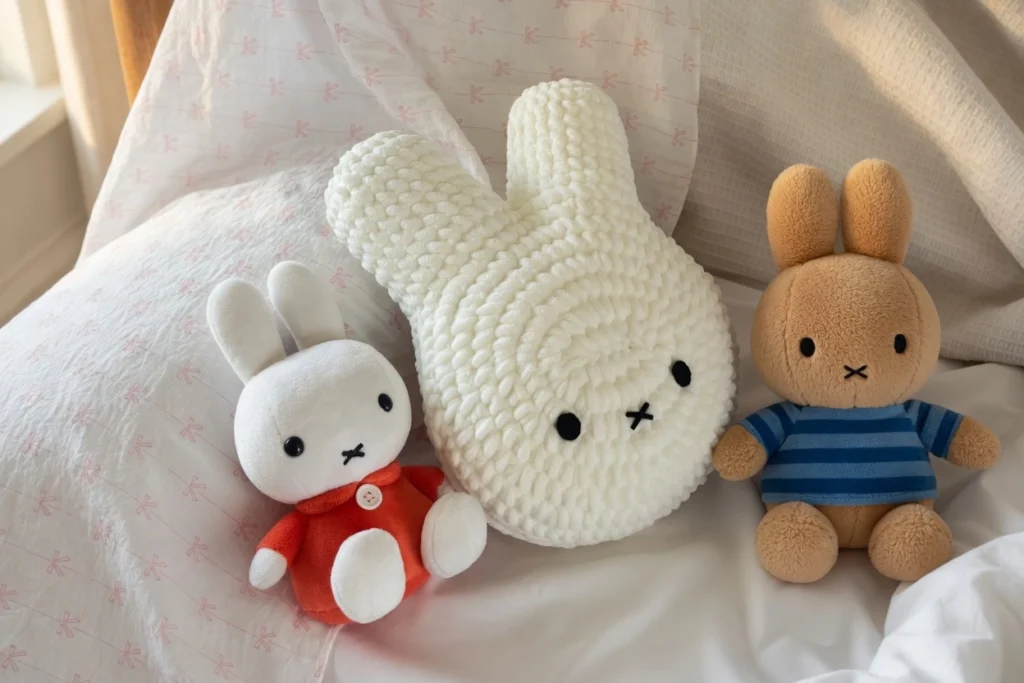
Crafters who have completed this pattern consistently describe it as one of their favorite makes. The chunky yarn means it works up in just a few hours, and the no-sew construction keeps the process enjoyable from start to finish. The finished pillow is substantial — soft, squishy, and immediately recognizable as Miffy with those tall ears and simple dot eyes.
It also makes an exceptional handmade gift. Whether for a baby shower, a birthday, or just because, a hand-crocheted Miffy pillow has a warmth and charm that store-bought decor simply can’t match.
Pattern Credit
This free pattern was designed by Chubbiesbyash. You can find more of their patterns, video tutorials, and adorable crochet creations on their blog at chubbiesbyash.com, as well as on their Instagram and YouTube channel. If you make a Miffy Pillow using this pattern, crediting the designer helps support their work and keeps free patterns available for the entire crochet community.
Happy crocheting — and enjoy your new cuddly Miffy Pillow!