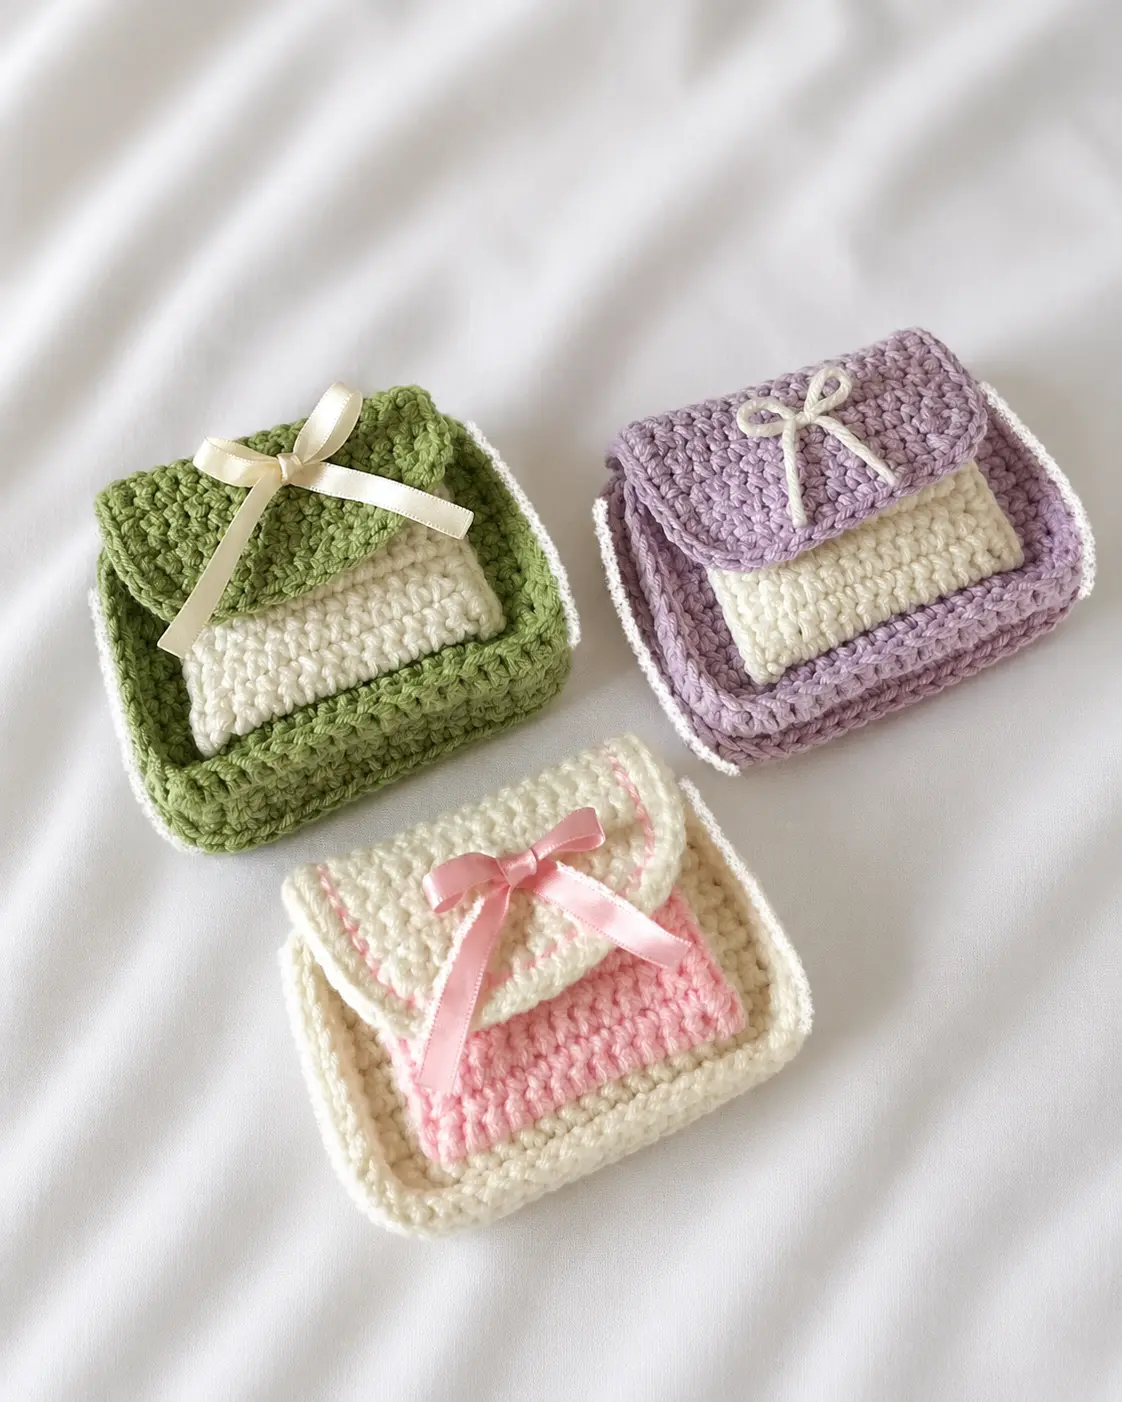
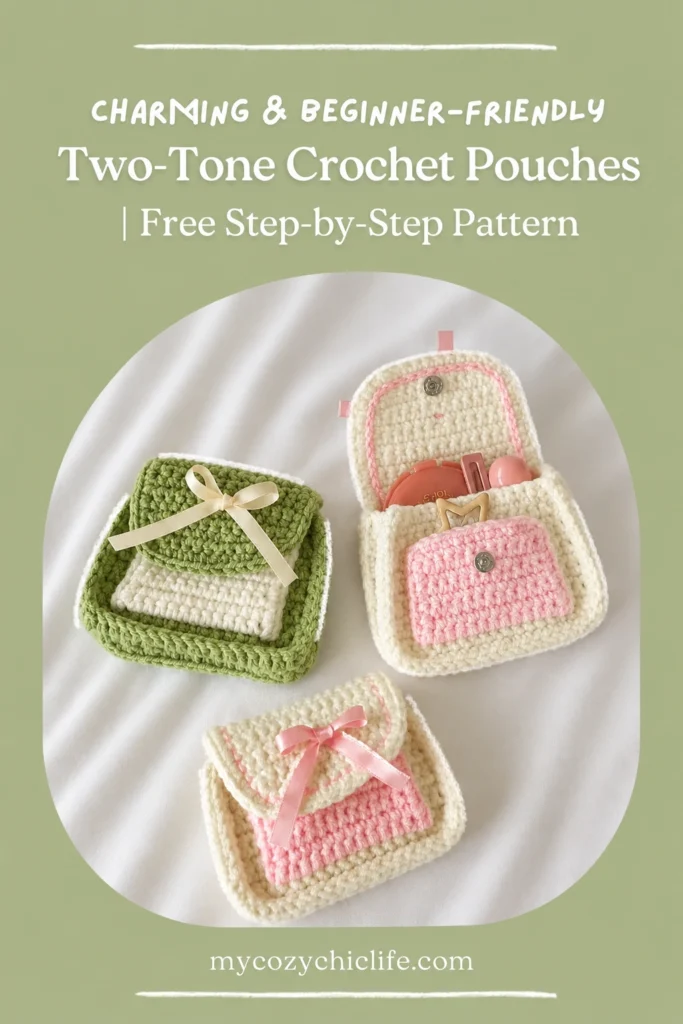
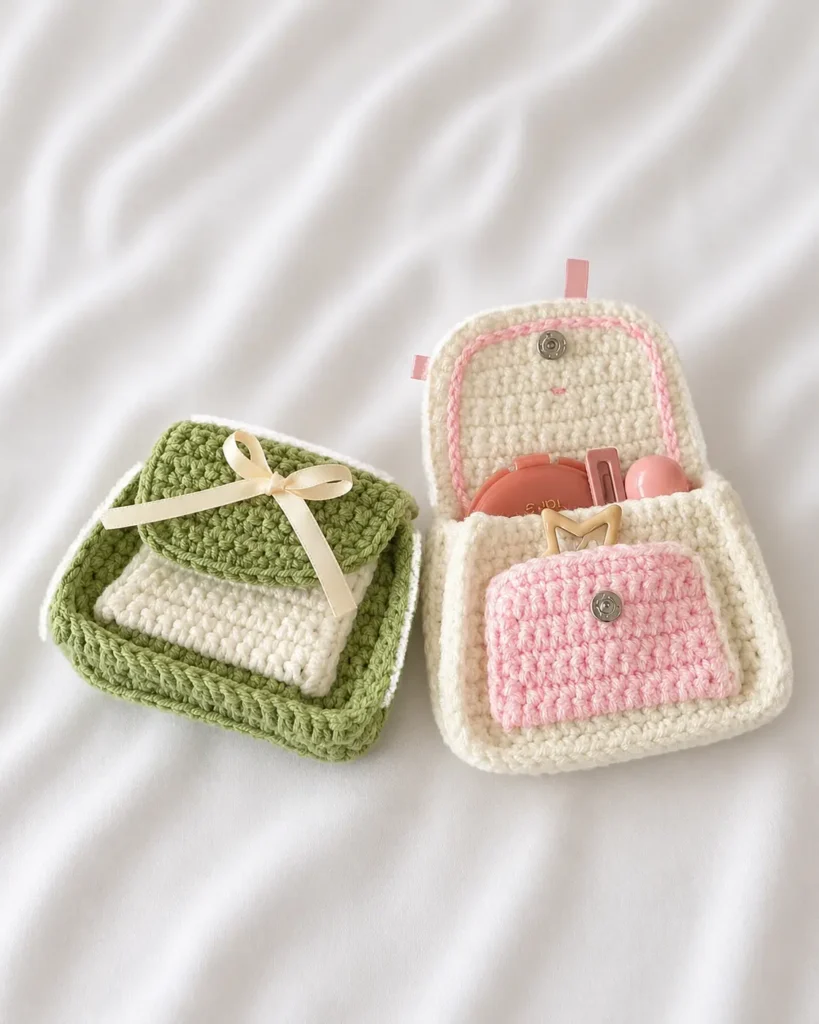
If you love the delicate, romantic “coquette” aesthetic, this two-tone crochet pouch is about to become your next favorite project. Perfect for holding lip balms, coins, earbuds, or small keepsakes, this little pouch features a beautifully shaped flap, a contrasting front pocket, and a dainty ribbon bow.
Best of all? This pattern is completely beginner-friendly. If you know how to chain and single crochet, you can make this. Grab your favorite yarn colors, settle into your favorite cozy spot, and let’s get stitching!
Materials Needed
- Yarn: Sport or light DK weight yarn in two colors (e.g., Light Purple for the main body [~50g] and White for the accents [~10g]). Cotton or acrylic blends work beautifully.
- Crochet Hook: 3mm
- Darning Needle: For weaving in ends and sewing
- Scissors
- Snap Buttons: One set (usually a male and female metal or plastic snap)
- Pink Blusher or Pink Chalk Pastel: For a subtle rosy tint on the bow (optional, but adds that perfect coquette touch!)
- Satin Ribbon or Yarn: About 8 inches of 0.6cm width satin silk or extra white yarn for the bow
Crochet Abbreviations (US Terminology)
- Ch – Chain
- St(s) – Stitch(es)
- R – Round / Row
- Sc – Single crochet
- Dec – Decrease (Sc two stitches together)
- Slst – Slip stitch
- BLO – Back Loop Only
- FLO – Front Loop Only
- [ ] – Total stitch count at the end of each row
Important Notes Before You Begin
- This pouch is worked in rows, not in the round.
- At the end of every row, chain 1 (Ch 1) and turn your work. The Ch 1 does NOT count as a stitch.
- To get a neat, flat piece, make sure you are inserting your hook under both top loops of each stitch unless the pattern specifically calls for BLO or FLO.
Part 1: The Back Panel
(Use your main color, e.g., Light Purple)
- Foundation: Make a slip knot and chain 19.
- Row 1: Starting from the 2nd chain from the hook, make 1 sc in each chain across. [18 stitches]
- Rows 2 – 10: Ch 1, turn. Make 1 sc in each stitch across. Repeat this for 9 rows total. [18 stitches]
- Row 11: Ch 1, turn. Decrease, 14 sc, decrease. [16 stitches]
- Row 12: Ch 1, turn. 1 sc in each stitch across. [16 stitches]
- Row 13: Ch 1, turn. Decrease, 12 sc, decrease. [14 stitches]
- Fasten off and weave in ends.
Part 2: The Side Gusset (Connecting Panel)
(Use your main color)
- Foundation: Make a slip knot and chain 7.
- Row 1: Starting from the 2nd chain from the hook, make 1 sc in each chain across. [6 stitches]
- Rows 2 – 44: Ch 1, turn. Make 1 sc in each stitch across. Repeat for 43 rows total. [6 stitches] Note: This creates a long, narrow strip that will give your pouch its 3D depth.
- Do not fasten off yet.
How to Connect the Back Panel:
Hold the Back Panel and the Gusset with their right sides facing you. You will be working single crochets through both layers at the same time to join them.
Starting at the top left corner of the Back Panel, insert your hook through the end of Row 1 of the Back Panel and the end of Row 1 of the Gusset.
- Work 13 sc down the left side of the Back Panel.
- Work 18 sc across the bottom edge.
- Work 13 sc up the right side of the Back Panel.
Fasten off and weave in ends.
Part 3: The Front Panel & Pocket Prep
(Use your main color)
- Foundation: Make a slip knot and chain 19.
- Row 1: Starting from the 2nd chain from the hook, make 1 sc in each chain across. [18 stitches]
- Row 2: Ch 1, turn. 3 sc, (in the FLO of the next 12 stitches make 1 sc), 3 sc. [18 stitches] (By working the middle 12 stitches in the Front Loop Only, you are leaving the Back Loops free. This is where we will attach the pocket later!)
- Rows 3 – 10: Ch 1, turn. Make 1 sc in each stitch across (under both loops). Repeat for 8 rows total. [18 stitches]
- Row 11: Ch 1, turn. Decrease, 14 sc, decrease. [16 stitches]
- Row 12: Ch 1, turn. 1 sc in each stitch across. [16 stitches]
- Row 13: Ch 1, turn. Decrease, 12 sc, decrease. [14 stitches]
- Do NOT fasten off.
Part 4: Making the Pocket
(Switch to your accent color, e.g., White)
- Locate the 12 Back Loop Only (BLO) stitches you left empty in Row 2 of the Front Panel.
- Insert your hook into the first BLO, attach your white yarn, and pull up a loop.
- Pocket Row 1: Ch 1, make 1 sc in each of the 12 BLO stitches across. [12 stitches]
- Pocket Rows 2 – 8: Ch 1, turn. Make 1 sc in each stitch across. Repeat for 7 rows total. [12 stitches]
- Fasten off, leaving a long tail (about 12 inches) for sewing.
Closing the Pocket:
Thread your darning needle with the long white tail.
- Left Side: Whip stitch the left edge of the pocket closed by sewing through the outside loops of the white pocket stitches and the corresponding purple panel stitches.
- Move to the Right Side: Instead of cutting the yarn, weave your needle horizontally through the stitches at the bottom of the pocket to bring the yarn over to the right side.
- Right Side: Whip stitch the right edge closed. Weave in the end securely.
Part 5: Attaching the Front Panel
Go back to your main color yarn attached to the Front Panel.
Just like you did with the back panel, hold the Front Panel and the remaining open edge of the Gusset with right sides facing you.
- Work 13 sc down the left side.
- Work 18 sc across the bottom.
- Work 13 sc up the right side.
Fasten off and weave in ends.
Part 6: The Flap & Contrasting Border
(Use main color for the flap, accent color for the border)
- Locate the rightmost stitch of Row 13 on the Back Panel (the side without the pocket). Insert your hook, pull up a loop of your main color, and chain 1.
- Flap Rows 1 – 10: Make 1 sc in each of the 14 stitches across. Ch 1, turn at the end of each row. Repeat for 10 rows total. [14 stitches]
- Flap Row 11: Ch 1, turn. Decrease, 10 sc, decrease. [12 stitches]
- Flap Row 12: Ch 1, turn. Decrease, 8 sc, decrease. [10 stitches]
- Fasten off the main color.
Adding the Surface Slip Stitch Border:
To get a perfectly smooth, contrasting edge without adding bulk, we use the surface slip stitch method.
- Turn the pouch so the inside of the flap is facing you.
- Insert your hook into the bottom right corner stitch, grab your white yarn, and pull up a loop.
- Insert your hook into the next stitch to the left, yarn over, and pull through both the fabric and the loop on your hook (this is a surface slip stitch).
- Continue this up the right side, across the top 10 stitches, and down the left side.
- Fasten off and weave in ends.
Part 7: Final Touches & Embellishments
1. Sewing the Snap Button:
Using your darning needle and a length of main color yarn (or thread), sew the female half of the snap button to the center of the front pocket. Sew the male half of the snap to the inside center of the flap. Ensure they line up perfectly when the flap is folded down.
2. Making the Coquette Bow:
Cut an 8-inch piece of white satin ribbon (or white yarn). Thread your darning needle with it. Insert the needle into the top center edge of the flap, bringing both tails out to the front. Tie a tight, neat ribbon bow. Trim the ends at an angle so they don’t fray.
3. The “Blusher” Trick:
For that ultimate coquette vibe, take a small, fluffy makeup brush, dip it lightly into your pink blush, and gently dust the center of your white bow. This gives the yarn a soft, vintage, rosy tint!
You Did It!
Take a step back and admire your beautiful new pouch. It’s functional, incredibly cute, and uniquely yours. Every stitch is a reflection of your creativity.
Love No-Sew & Beginner-Friendly Patterns?
If you had fun making this pouch, you’ll love these other simple projects on the blog:
- Try making a cuddly companion with our No-Sew Mochi Bunny Crochet Pattern.
- Decorate your space with this Miffy Pillow Crochet Pattern.
- If you love underwater creatures, this No-Sew Axolotl Free Amigurumi Pattern is a must-make!
Looking for Cute Crochet Accessories?
- Make a matching keychain with this Amigurumi Seahorse Keychain.
- Or try something quirky with this Green Alien Cat Amigurumi Keychain.
Happy crocheting! 🧶✨