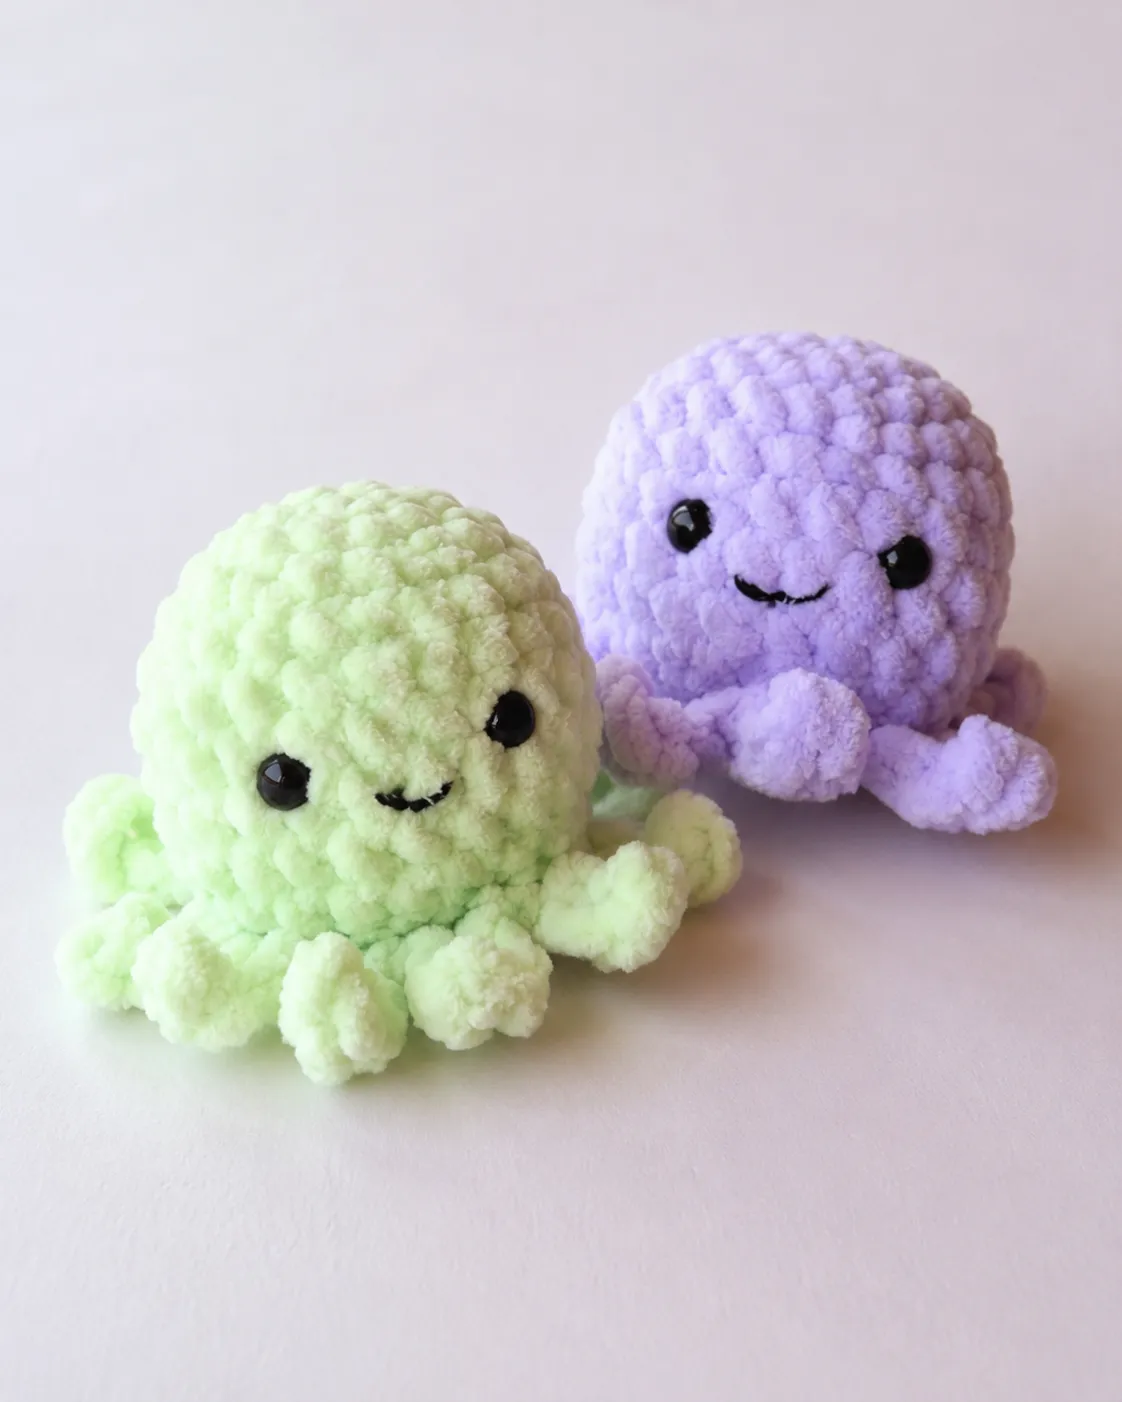
Dive into the enchanting world of underwater amigurumi with this polished crochet octopus doll pattern! There’s something magical about transforming a simple ball of yarn into a charming sea creature with character and personality. This free pattern will guide you through creating an adorable octopus with smooth shaping, perfect proportions, and those delightful tentacles that make this project so special.
Whether you’re new to amigurumi or looking to expand your handmade collection, this octopus pattern offers a rewarding experience that results in a professional-looking finished piece. The ocean theme provides endless opportunities for color play, making each octopus uniquely yours.
Why Crochet an Octopus Doll?
Octopus amigurumi has become incredibly popular in the crafting community, and it’s easy to see why. These charming sea creatures have a distinctive silhouette that’s immediately recognizable, yet each one can be customized to reflect your personal style. The combination of a smooth, rounded head with multiple tentacles creates visual interest and a satisfying challenge for crafters of all skill levels.
Beyond their appeal as decorative pieces, crochet octopus dolls make wonderful gifts for ocean lovers, children (with appropriate safety modifications), or anyone who appreciates handmade artistry. They’re also excellent for selling at craft markets or online, as their photogenic nature makes them perfect for social media sharing.
If you enjoy making sea creatures, you might also love our no-sew mini octopus free crochet pattern for a quicker project, or the amigurumi seahorse keychain free crochet pattern for another ocean-themed creation.
Materials Needed
Before starting your octopus doll, gather these supplies:
- Worsted weight yarn in your main octopus color (approximately 150 yards)
- Small amounts of contrasting yarn for details (optional)
- 2.75mm or 3.25mm crochet hook (adjust based on your yarn weight)
- Polyester fiberfill stuffing
- Safety eyes (9mm or 12mm) or black yarn for embroidered eyes
- Tapestry needle for sewing and weaving in ends
- Stitch markers
- Scissors
- Optional: blush powder or fabric marker for cheeks
For the best results, I recommend using a cotton or cotton-blend yarn, which provides excellent stitch definition and a smooth finish that enhances the “polished” look of your octopus. Acrylic yarn works well too and creates a softer, more squeezable finished doll.
Crochet Octopus Pattern: Detailed Instructions
Part 1: The Octopus Head
Round 1: Start with a magic ring, ch 1 (does not count as a stitch), work 6 sc into the ring. Join with a sl st to the first sc. (6 stitches)
Round 2: Ch 1, 2 sc in each stitch around. Join with a sl st. (12 stitches)
Round 3: Ch 1, sc in next stitch, 2 sc in next stitch; repeat from * to * around. Join with a sl st. (18 stitches)
Round 4: Ch 1, sc in next 2 stitches, 2 sc in next stitch; repeat from * to * around. Join with a sl st. (24 stitches)
Round 5: Ch 1, sc in next 3 stitches, 2 sc in next stitch; repeat from * to * around. Join with a sl st. (30 stitches)
Round 6: Ch 1, sc in next 4 stitches, 2 sc in next stitch; repeat from * to * around. Join with a sl st. (36 stitches)
Round 7: Ch 1, sc in next 5 stitches, 2 sc in next stitch; repeat from * to * around. Join with a sl st. (42 stitches)
Rounds 8-14: Ch 1, sc in each stitch around. Join with a sl st. (42 stitches)
If using safety eyes, insert them now between rounds 10-12, spacing them about 8-10 stitches apart. This is the perfect time to check the positioning and expression before the head becomes too firm.
Round 15: Ch 1, sc in next 5 stitches, sc2tog over next 2 stitches; repeat from * to * around. Join with a sl st. (36 stitches)
Round 16: Ch 1, sc in next 4 stitches, sc2tog over next 2 stitches; repeat from * to * around. Join with a sl st. (30 stitches)
Begin lightly stuffing the head, adding more as you complete the remaining rounds.
Round 17: Ch 1, sc in next 3 stitches, sc2tog over next 2 stitches; repeat from * to * around. Join with a sl st. (24 stitches)
Round 18: Ch 1, sc in next 2 stitches, sc2tog over next 2 stitches; repeat from * to * around. Join with a sl st. (18 stitches)
Finish stuffing the head firmly. Fasten off, leaving a long tail for sewing.
Part 2: The Tentacles
Make 8 tentacles using the following pattern. You can make them all the same color or alternate between two colors for a more interesting look.
Row 1: Ch 20, starting in the 2nd chain from hook, work 1 sc in each chain across. (19 stitches)
Row 2: Ch 1, turn, sc in each stitch across. (19 stitches)
Rows 3-10: Repeat Row 2. (19 stitches)
Fasten off, leaving a long tail for sewing. Repeat to make 7 more tentacles.
For a more polished look, consider making the tentacles slightly tapered by decreasing one stitch at each end for the last few rows. This creates a more natural appearance and makes the tentacles look more delicate.
Part 3: Assembly
- Using your yarn needle and the tail from the head, sew the bottom opening closed with a whip stitch, but don’t cut the yarn yet.
- Position the tentacles evenly around the bottom of the head, spacing them approximately 3 stitches apart. Sew each tentacle securely to the head, making sure to attach them firmly enough to withstand play.
- To create a natural curl in the tentacles, gently roll them around your finger or a pencil and hold for a few seconds. You can also use a light steam treatment if your yarn is appropriate for it.
- If you didn’t use safety eyes, embroider eyes using black yarn. Make two small circles or French knots, positioning them similarly to where safety eyes would go.
- Using pink yarn or a fabric marker, add small blush circles on the cheeks for a sweet expression.
- Optionally, embroider a small smile using a single strand of black yarn.
- Weave in all remaining ends carefully.
Tips for a Polished Finish
The “polished” look of your octopus comes down to attention to detail in these key areas:
- Consistent tension: Try to maintain the same tension throughout your work. Inconsistent tension can lead to uneven shaping and visible gaps.
- Invisible decreases: Instead of standard sc2tog, try using invisible decreases for a smoother appearance, especially on the head.
- Even stuffing: Add stuffing gradually and distribute it evenly. Avoid overstuffing, which can stretch your stitches and create gaps, or understuffing, which results in a floppy shape.
- Strategic eye placement: The position and spacing of the eyes dramatically affect the expression. Take time to experiment with placement before securing them.
- Clean sewing: When attaching tentacles, use small, even stitches and try to hide them within the existing stitches of the head.
For more tips on creating polished amigurumi, check out our no-sew mochi bunny crochet pattern which includes detailed finishing techniques.
Color Inspiration
The color choices for your octopus can dramatically change its character:
- Classic ocean: Deep blues and teals with lighter accents
- Coral reef: Vibrant corals, pinks, and oranges
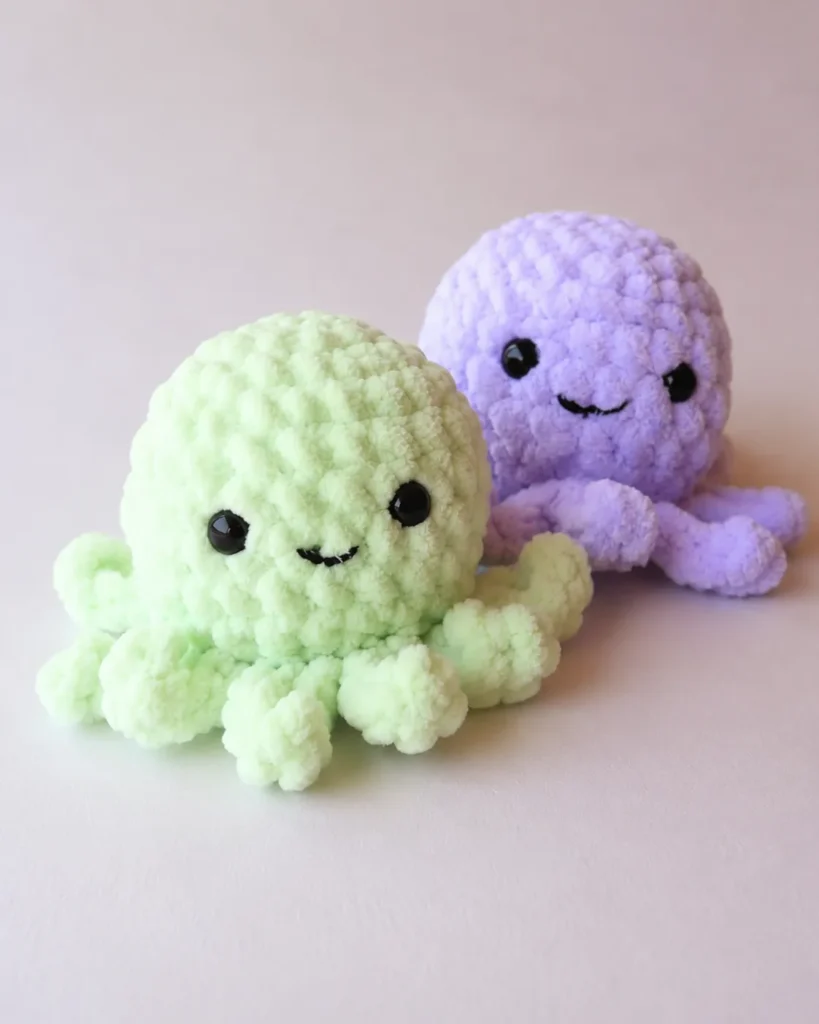
- Pastel dream: Soft lavender, mint, and baby blue
- Realistic: Purple-red with subtle color variations
- Fantasy: Bright purple, turquoise, or even rainbow tentacles
- Monochrome: Different shades of the same color for a sophisticated look
Consider making a whole family of octopuses in different colors for a stunning display or gift set.
Customization Ideas
Make your octopus uniquely yours with these creative additions:
- Suction cups: Add small circles of lighter yarn to the undersides of the tentacles
- Two-tone tentacles: Create a gradient effect by changing yarn color partway through each tentacle
- Accessories: Add a tiny sailor hat, bow, or flower
- Textured tentacles: Alternate between single crochet and reverse single crochet for a rippled effect
- Glow-in-the-dark: Use glow-in-the-dark yarn for a magical deep-sea creature
- Patterned body: Add small spots or stripes to the head for visual interest
- Different expressions: Experiment with various eye sizes and mouth shapes to create different personalities
Common Problems and Solutions
Problem: My octopus head is lumpy or misshapen.
Solution: Ensure you’re increasing evenly and at the correct intervals. Also, check that your stuffing is distributed evenly without clumps.
Problem: The tentacles are different lengths.
Solution: Count your chains carefully at the start of each tentacle, and make sure you’re working the same number of rows for each one.
Problem: My octopus won’t sit upright.
Solution: This could be due to uneven tentacle placement or insufficient stuffing in the bottom of the head. Try redistributing the tentacles or adding more stuffing to the lower portion of the head.
Problem: The stuffing is showing through my stitches.
Solution: Try using a smaller hook size or tightening your tension. You might also be overstuffing—try removing a small amount of filling.
Problem: The safety eyes are pulling through the fabric.
Solution: Use safety eye backs or washers, and ensure you’re placing them where the fabric is thickest (not on increase or decrease rounds).
Care Instructions
To keep your crochet octopus looking its best:
- Hand wash in cool water with a mild detergent
- Gently squeeze out excess water (avoid wringing)
- Reshape while damp and air dry flat
- For spot cleaning, use a damp cloth with a small amount of soap
- Avoid direct sunlight, which can cause fading
- Store in a cool, dry place when not in use
- Keep away from Velcro or rough surfaces that could snag the yarn
Creative Uses for Your Octopus Doll
Beyond being a delightful decoration, your crochet octopus can serve many purposes:
- Nursery decoration: Hang from a mobile or place on a shelf in an ocean-themed nursery
- Photo prop: Use for newborn or children’s photo shoots
- Educational tool: Help children learn about ocean life
- Stress relief: The soft, squeezable texture makes it perfect for tactile comfort
- Market display: Create an eye-catching arrangement for craft fairs
- Gift topper: Attach to a package for a unique presentation
- Travel companion: Small enough to bring along on adventures
For more adorable amigurumi ideas, check out our free triceratops amigurumi crochet pattern or the crochet green alien cat amigurumi keychain free pattern.
Why Octopus Amigurumi Is So Popular
Octopus amigurumi has become a staple in the crochet community for several reasons:
- Distinctive silhouette: The combination of a round head and multiple tentacles creates an immediately recognizable shape
- Satisfying challenge: While not overly complex, the multiple tentacles provide enough variety to keep the project interesting
- Customization potential: The simple shape lends itself to endless color and detail variations
- Photogenic nature: These dolls photograph beautifully, making them perfect for social media sharing
- Universal appeal: Both children and adults find octopuses charming and engaging
- Therapeutic crafting: The repetitive nature of making multiple tentacles can be meditative and relaxing
Time and Skill Assessment
This crochet octopus pattern is suitable for advanced beginners who are comfortable with basic amigurumi techniques:
- Skill Level: Advanced Beginner
- Time to Complete: 4-6 hours for experienced crocheters, 6-8 hours for beginners
- Best For: Weekend projects, gift-making, market prep
- Age Recommendation: 12 and up (with safety modifications for younger children)
The pattern uses basic stitches (single crochet, increase, decrease) but requires attention to detail for the polished finish. The most time-consuming part is creating and attaching the eight tentacles, but this repetitive work is also quite meditative.
Frequently Asked Questions
Q: Can I make this octopus larger or smaller?
A: Absolutely! To make a larger octopus, use thicker yarn and a larger hook, adjusting the stitch counts proportionally. For a smaller version, use finer yarn and a smaller hook.
Q: Is this pattern suitable for a baby toy?
A: With modifications, yes. Replace safety eyes with embroidered eyes, ensure all parts are securely attached, and use washable yarn. Some crocheters also make the tentacles shorter for baby safety.
Q: How can I make the tentacles curl more?
A: You can create more curl by adding increases along one edge of the tentacle, which will naturally cause it to curve. Alternatively, you can shape the tentacles after completion by wrapping them around a pencil and applying gentle steam (if appropriate for your yarn).
Q: My octopus keeps falling over. What can I do?
A: Try adding a small weighted base (like a circle of plastic canvas or a few glass beads in a fabric pouch) inside the bottom of the head before closing. This will lower the center of gravity and help it sit upright.
Q: Can I sell items made from this pattern?
A: Yes, you can sell finished items made from this pattern. However, please don’t sell or distribute the pattern itself as your own.
Conclusion
Creating a polished crochet octopus doll is a rewarding project that combines simple techniques with attention to detail for impressive results. The distinctive shape, customization possibilities, and charming finished appearance make this pattern a favorite among crocheters of all skill levels.
As you work through this pattern, remember that the “polished” look comes from consistency and care rather than advanced techniques. Take your time with the increases and decreases, distribute your stuffing evenly, and pay attention to the placement of features. These small details will elevate your octopus from a simple amigurumi to a professional-looking handmade treasure.
Whether you’re making your first octopus or your tenth, each one will have its own personality and charm. That’s the magic of handmade items—they carry a piece of the creator in every stitch.
So dive in and let your creativity flow! Before you know it, you’ll have a delightful ocean friend to keep you company or gift to someone special.
If you enjoyed this pattern, you might also like our free crochet dragon ornament advanced amigurumi pattern for when you’re ready to tackle a more challenging project, or the free crochet snoopy keychain amigurumi pattern for another fun character to add to your collection.