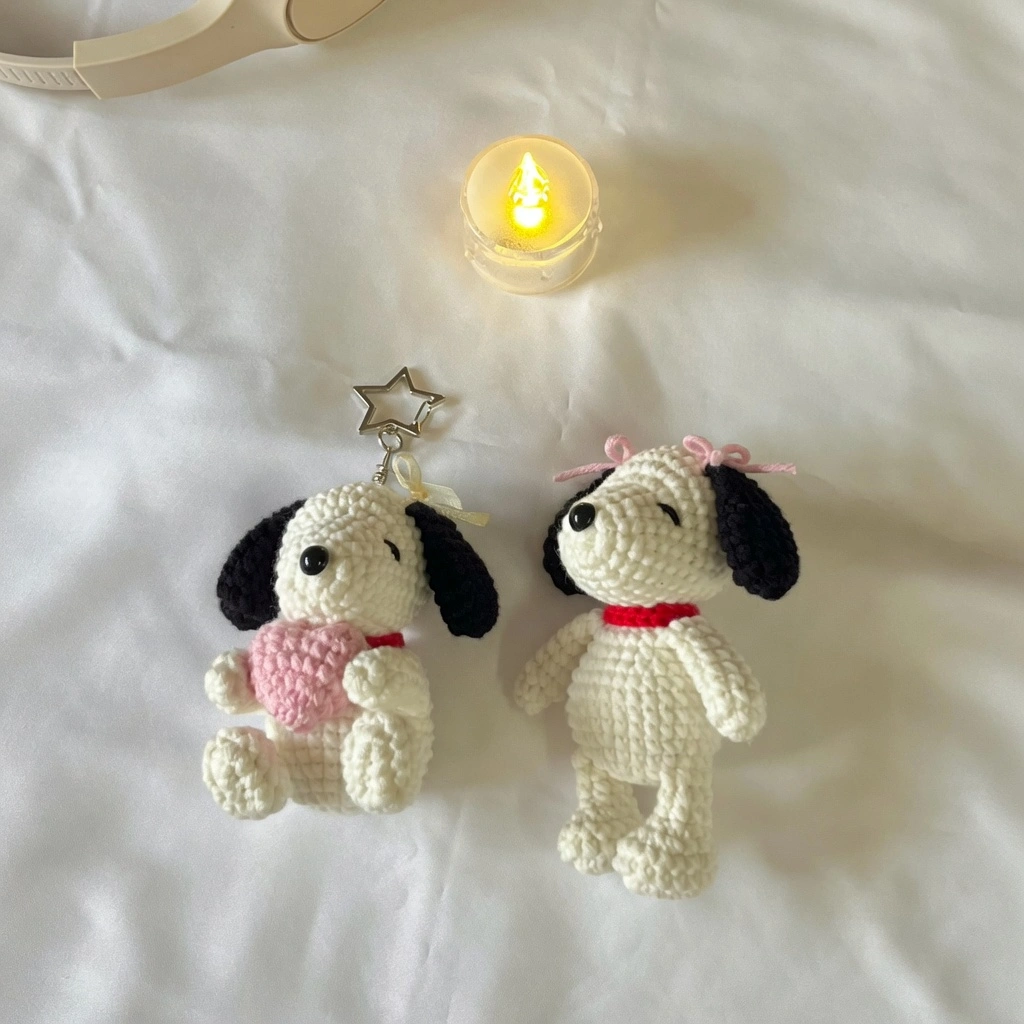
There are certain characters that transcend generations, and Snoopy is at the top of that list. This free crochet Snoopy keychain pattern by Chubbiesbyash lets you create your own miniature version of the world’s most beloved beagle — complete with his iconic black ears, red collar, and a tiny pink heart held in his paws. Even better, the pattern includes instructions for two different body poses: a standing version with legs and hands crocheted directly into the body, and a sitting version with limbs sewn on separately.
With over 1,400 shares and consistently enthusiastic reviews from makers who call it “easy to follow” and “amazing,” this pattern has proven itself as a crowd favorite. It uses basic amigurumi stitches and a joined-round construction for the body that keeps everything clean and well-structured. A detailed YouTube video tutorial accompanies every section, walking you through each step visually.
Whether you’re making it as a keychain for yourself, a gift for a Peanuts fan, or a batch project for craft fairs, this Snoopy is the kind of pattern that looks impressive but is surprisingly approachable. If you’ve already tackled beginner keychains like our Green Alien Cat Amigurumi Keychain, this Snoopy is a satisfying next step that introduces joined rounds, multi-piece construction, and accessory details.
What Makes This Snoopy Pattern Stand Out
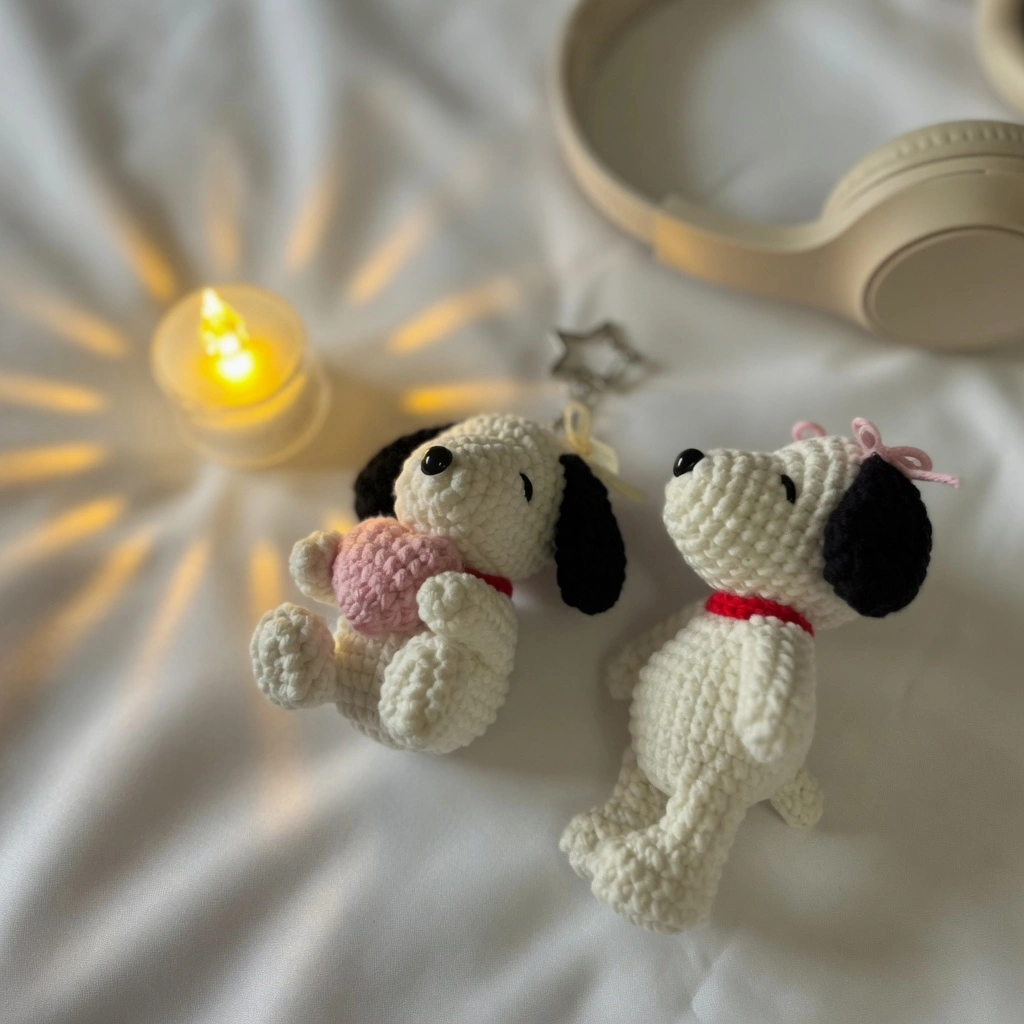
The two-pose option is the first thing that sets this pattern apart. The standing body uses a clever technique where the legs and hands are crocheted directly into specific body rounds — no sewing required for those pieces. The sitting body is constructed as a simple shape with the limbs sewn on afterward, giving you more control over positioning and posture. Both versions produce a recognizable, charming Snoopy, and many makers end up creating one of each.
The details are what really bring this keychain to life. The legs start from a foundation chain that creates an oval foot shape — just like Snoopy’s rounded paws in the comics. The head is sculpted with increases concentrated in the middle rounds to create the elongated snout that’s so characteristic of the character. The black floppy ears, red slip-stitch collar, and tiny crocheted pink heart all add layers of personality that elevate this far beyond a generic dog keychain.
The mini heart is a particularly sweet addition. It’s crocheted from two small halves that are joined and worked into a single piece, then attached to Snoopy’s hands so he’s holding it against his chest. It’s the kind of detail that makes people stop and look closer.
Materials You’ll Need
- Yarn: Cotton, acrylic, or sport yarn (5-ply) in white (approximately 50g), plus small amounts of black, red, and pink
- Hook: 2.5mm crochet hook
- Nose: 5mm plastic eye (used as the nose)
- Stuffing: Polyester fiberfill
- Tools: Darning needle, glue, scissors
- Hardware: Keychain ring
The white yarn makes up the vast majority of this project — head, body, legs, and hands are all white. The black is used only for the ears and face embroidery, the red for the collar, and the pink for the mini heart and ribbon. You’ll need very little of each accent color.
Crochet Abbreviations (US Terms)
mr – magic ring | ch – chain | st – stitch | R – round/row | sc – single crochet | inc – increase | dec – decrease | hdc – half double crochet | dc – double crochet | slst – slip stitch | * – repeat | [ ] – total stitch count per round
The Full Pattern
Legs (Make 2)
Begin with white yarn and a slip knot.
- R1: 5ch, insert hook into 2nd ch from hook and crochet along each chain: 1inc, 2sc, 4sc (into the same last chain), continue into the lower parts of the chain: 2sc, 1inc [12]
- R2: 1sc, 1inc, 3sc, 2inc, 3sc, 1inc, 1sc [16]
- R3: 1sc in each stitch [16]
- R4: 4sc, 4dec, 4sc [12]
- R5: 2sc, 4dec, 2sc [8]
Start stuffing and continue stuffing after each round.
- R6–R7: 1sc in each stitch (2 rounds) [8]
Close the leg by crocheting the opposite stitches together with 4sc. Cut the yarn and leave a long tail.
Hands (Make 2)
Start with white yarn and a magic ring.
- R1: 8sc in mr [8]
- R2–R7: 1sc in each stitch (6 rounds) [8]
Do not stuff. Close by crocheting opposite stitches together with 4sc [4]. Cut the yarn and leave a long tail.
Standing Body
Note: This section uses joined rounds. Connect with a slst into the 1st sc after every round. Start every new round with Ch1, beginning from the stitch you just slip stitched into. Ch1 and slst are NOT included in the total stitch count.
Start with white yarn and a magic ring.
- R1: 8sc in mr, 1slst into 1st stitch [8]
- R2: 1ch, 8inc, 1slst [16]
- R3: 1ch, (1sc, 1inc) × 8, 1slst [24]
- R4: 1ch, 4sc, 4sc (together with one leg), 8sc, 4sc (together with another leg), 4sc, 1slst [24]
- R5: 1ch, (3sc, 1inc) × 6, 1slst [30]
- R6–R9: 1ch, 1sc in each stitch, 1slst (4 rounds) [30]
Start stuffing and continue after each round.
- R10: 1ch, (4sc, 1dec) × 5, 1slst [25]
- R11: 1ch, (3sc, 1dec) × 5, 1slst [20]
- R12: 1ch, 3sc, 4sc (together with one hand), 6sc, 4sc (together with another hand), 3sc, 1slst [20]
Connect the hands the same way you connected the legs.
- R13: 1ch, (1sc, 1dec, 1sc) × 5, 1slst [15]
Stuff the body and cut the yarn, leaving a long tail.
Sitting Body
Note: Same joined-round construction as the standing body.
Start with white yarn and a magic ring.
- R1: 8sc in mr, 1slst [8]
- R2: 1ch, 8inc, 1slst [16]
- R3: 1ch, (1sc, 1inc) × 8, 1slst [24]
- R4: 1ch, 1sc in each stitch, 1slst [24]
- R5: 1ch, (3sc, 1inc) × 6, 1slst [30]
- R6–R9: 1ch, 1sc in each stitch, 1slst (4 rounds) [30]
- R10: 1ch, (4sc, 1dec) × 5, 1slst [25]
- R11: 1ch, (3sc, 1dec) × 5, 1slst [20]
Start stuffing and continue after each round.
- R12: 1ch, 1sc in each stitch, 1slst [20]
- R13: 1ch, (1sc, 1dec, 1sc) × 5, 1slst [15]
Stuff the body more. Cut the yarn and leave a long tail.
Sewing limbs onto the sitting body: Sew the legs vertically onto R5–R7 of the body. Position them in your preferred posture before sewing. Sew the hands vertically onto R10–R12 of the body.
Head
Start with white yarn and a magic ring.
- R1: 7sc in mr [7]
- R2: 7inc [14]
- R3: 1sc in each stitch [14]
- R4: (1sc, 1inc) × 7 [21]
- R5–R6: 1sc in each stitch (2 rounds) [21]
- R7: 8sc, 5inc, 8sc [26]
- R8: 9sc, (1sc, 1inc) × 4, 9sc [30]
- R9–R13: 1sc in each stitch (5 rounds) [30]
- R14: (3sc, 1dec) × 6 [24]
- R15: (2sc, 1dec) × 6 [18]
Start stuffing.
- R16: (1sc, 1dec) × 6 [12]
- R17: 6dec [6]
Stuff a bit more. Cut the yarn and leave a long tail. Close the head, then sew it onto the body.
The increases concentrated in R7 and R8 create the bulge for Snoopy’s snout — this is what gives the head its characteristic elongated shape rather than a simple sphere.
Making the Face
Separate a strand of black yarn into 3 individual strands. With a darning needle, embroider the eyes on R7 of the head, 5 stitches apart. Use a 5mm plastic eye for the nose and glue it onto R1 of the head, centered between the two eyes.
Collar
Start with red yarn and a slip knot.
Make 18ch, insert hook into the 2nd chain and make 17slst into each chain [17].
Cut the yarn, leave a long tail, and sew it around the neck.
Ears (Make 2)
Start with black yarn and a magic ring.
- R1: 8sc in mr [8]
- R2: (1sc, 1inc) × 4 [12]
- R3–R6: 1sc in each stitch (4 rounds) [12]
- R7: (1sc, 1dec) × 4 [8]
- R8: 1sc in each stitch [8]
Do not stuff. Close by crocheting opposite stitches together with 4sc [4]. Sew the ears vertically onto R11–R13 of the head.
Mini Heart
Start with pink yarn and a magic ring.
- R1: 6sc in mr [6]
- R2: (1sc, 1inc) × 3 [9]
Cut the yarn. Make a second piece the same way, but do NOT cut the yarn after the second piece.
Joining the two halves (R3): Insert your hook into the last stitch of the first piece and make 1sc into that stitch. Continue crocheting 1sc into each stitch of the 1st piece (9sc total on the 1st piece). Then make 1sc in each stitch of the 2nd piece. [18]
- R4: (7sc, 1dec) × 2 [16]
- R5: 1sc in each stitch [16]
- R6: (2sc, 1dec) × 4 [12]
Stuff the heart.
- R7: 6dec [6]
Stuff a bit more. Cut the yarn and close the heart. Sew or glue the heart to Snoopy’s hands. Sewing with white yarn is recommended for a neater finish.
Ribbon
Insert a darning needle into the middle stitch above one ear. Bring a pink yarn (or any color you like) through and tie a simple ribbon bow.
Tips for the Best Results
The joined-round technique is key to this pattern. Unlike continuous rounds (where you spiral without joining), this body uses a slip stitch join and chain-1 start for every round. This creates cleaner, more defined rounds — which matters on a small piece where every stitch is visible. Remember that the slst and ch1 do not count toward your stitch total.
Crochet the legs into the body carefully. For the standing version, R4 and R12 are the critical rounds where you attach the legs and hands directly. You’re working 4sc through both the body stitches and the leg/hand stitches simultaneously. Go slowly, make sure you’re inserting your hook through both layers, and count carefully.
Separate the black yarn for embroidery. The pattern calls for splitting black yarn into 3 strands for the eye embroidery. This gives you fine, delicate lines that suit the small scale. Using full-thickness yarn for the eyes would look bulky and overpower the face.
Position the plastic nose precisely. The 5mm plastic eye used as the nose goes on R1 — the very tip of the snout. Center it between the two embroidered eyes. A tiny dot of glue secures it permanently.
Make both versions. The standing Snoopy has a more dynamic, active posture. The sitting Snoopy has a relaxed, cuddly feel. Many makers create one of each and display them together. The patterns share the same head, ears, collar, and heart — only the body construction differs.
Where This Pattern Fits in Your Crochet Journey
This Snoopy keychain sits comfortably at the beginner-to-intermediate level. The individual pieces use simple stitches, but the joined-round body construction, leg/hand attachment technique (for the standing version), and multi-piece assembly add complexity that rewards careful attention.
If you’re just getting started with amigurumi keychains, our Green Alien Cat Keychain is a simpler single-color project that teaches the fundamentals of working in the round, stuffing, and assembling small pieces.
For those who prefer no-sew construction, our No-Sew Mochi Bunny and No-Sew Mini Octopus skip the assembly entirely — everything is built into the body as you crochet.
And if this Snoopy inspires you to try more character amigurumi with outfits and accessories, our Crochet Miffy in Overalls takes character amigurumi to the next level with a separate crocheted garment, headphones, and a tomato headband.
A Keychain with Heart — Literally
The tiny pink heart is what transforms this Snoopy from a great keychain into a perfect gift. Whether for Valentine’s Day, a birthday, a “thinking of you” gesture, or just because someone in your life loves Peanuts, a handmade Snoopy holding a heart carries a warmth that nothing store-bought can match.
The pattern also works beautifully for craft fairs. Snoopy is universally recognized across all ages, the keychain size keeps yarn costs low, and the two pose options let you offer variety without learning a completely different pattern. Add a tiny ribbon in different colors and each Snoopy feels personalized.
Pattern Credit
This free pattern was designed by Chubbiesbyash. You can find more of their character patterns, video tutorials, and adorable crochet creations on their blog at chubbiesbyash.com, as well as on their Instagram and YouTube channel. If you make a Snoopy keychain, crediting the designer supports their work and helps keep free patterns available for the crochet community.
Happy crocheting — and enjoy your adorable new Snoopy!