Crochet Sweet Treats Pattern
Crochet your very own delightful treats with this fun and whimsical crochet pattern! The “Crochet Sweet Treats Pattern” features an adorable ice cream cone and a cake slice, perfect for decorating your home, gifting to friends, or simply enjoying as a crochet challenge. This project is crafted using the Red Heart® Amigurumi™ yarn, ensuring that your creations are soft and visually appealing.
About the Crochet Project
This pattern allows you to create two different delightful desserts: an ice cream cone with two scoops of different colors and a classic cake slice adorned with frosting. The whimsical designs make them great as a decorative piece for your craft shelf or as playful toys for kids. The bright colors bring these treats to life, making each piece a unique creation of your own.
Materials
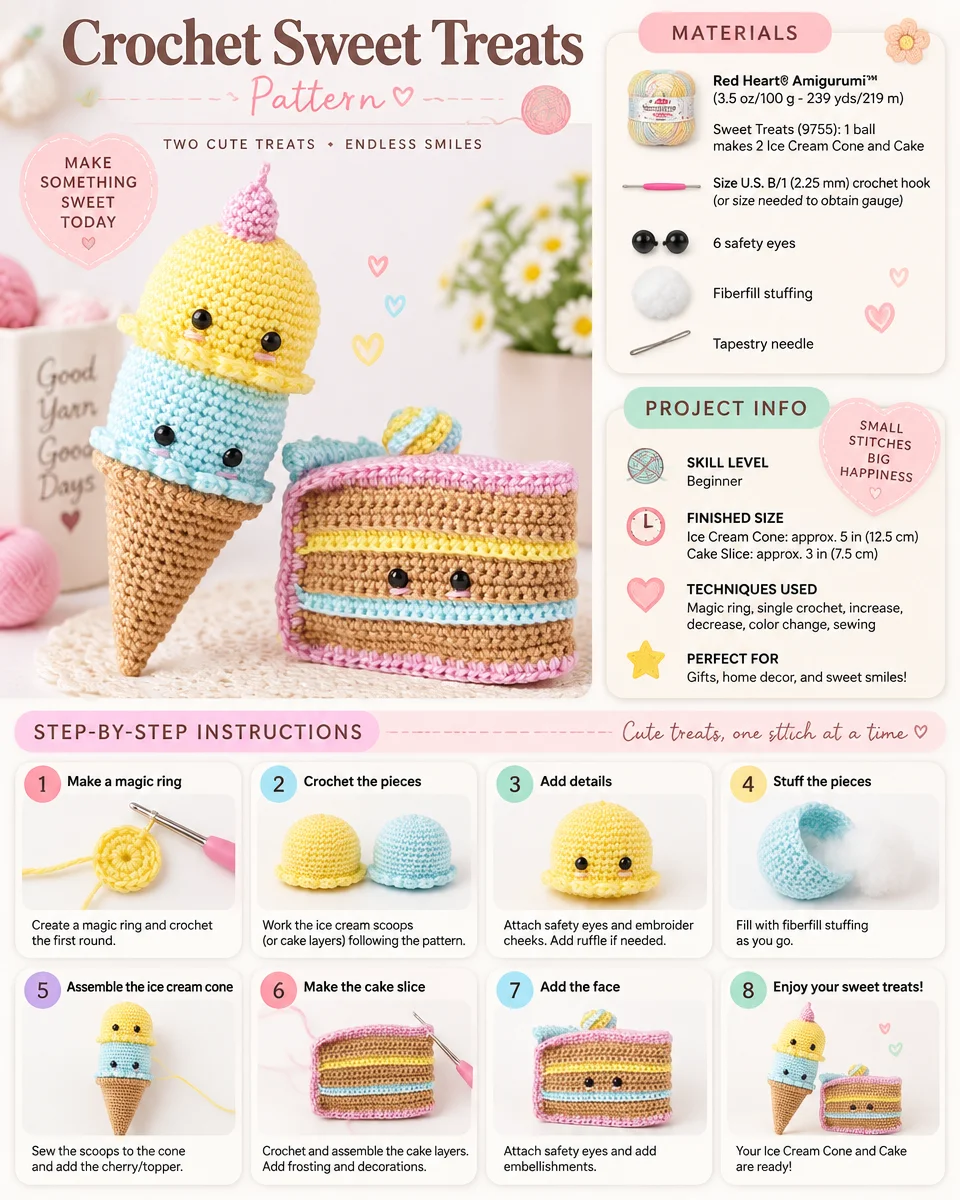
To complete the Crochet Sweet Treats project, you’ll need the following materials:
Yarn
- Red Heart® Amigurumi™ (3.5 oz/100 g; 239 yds/219 m)
- Sweet Treats (9755): 1 ball makes 2 Ice Cream Cone and Cake Slice
Crochet Hook
- Size U.S. B/1 (2.25 mm) crochet hook (or size needed to obtain gauge)
Notions
- 6 safety eyes
- Fiberfill stuffing
- Tapestry needle
Color Plan
Use the following colors for different parts of the treats:
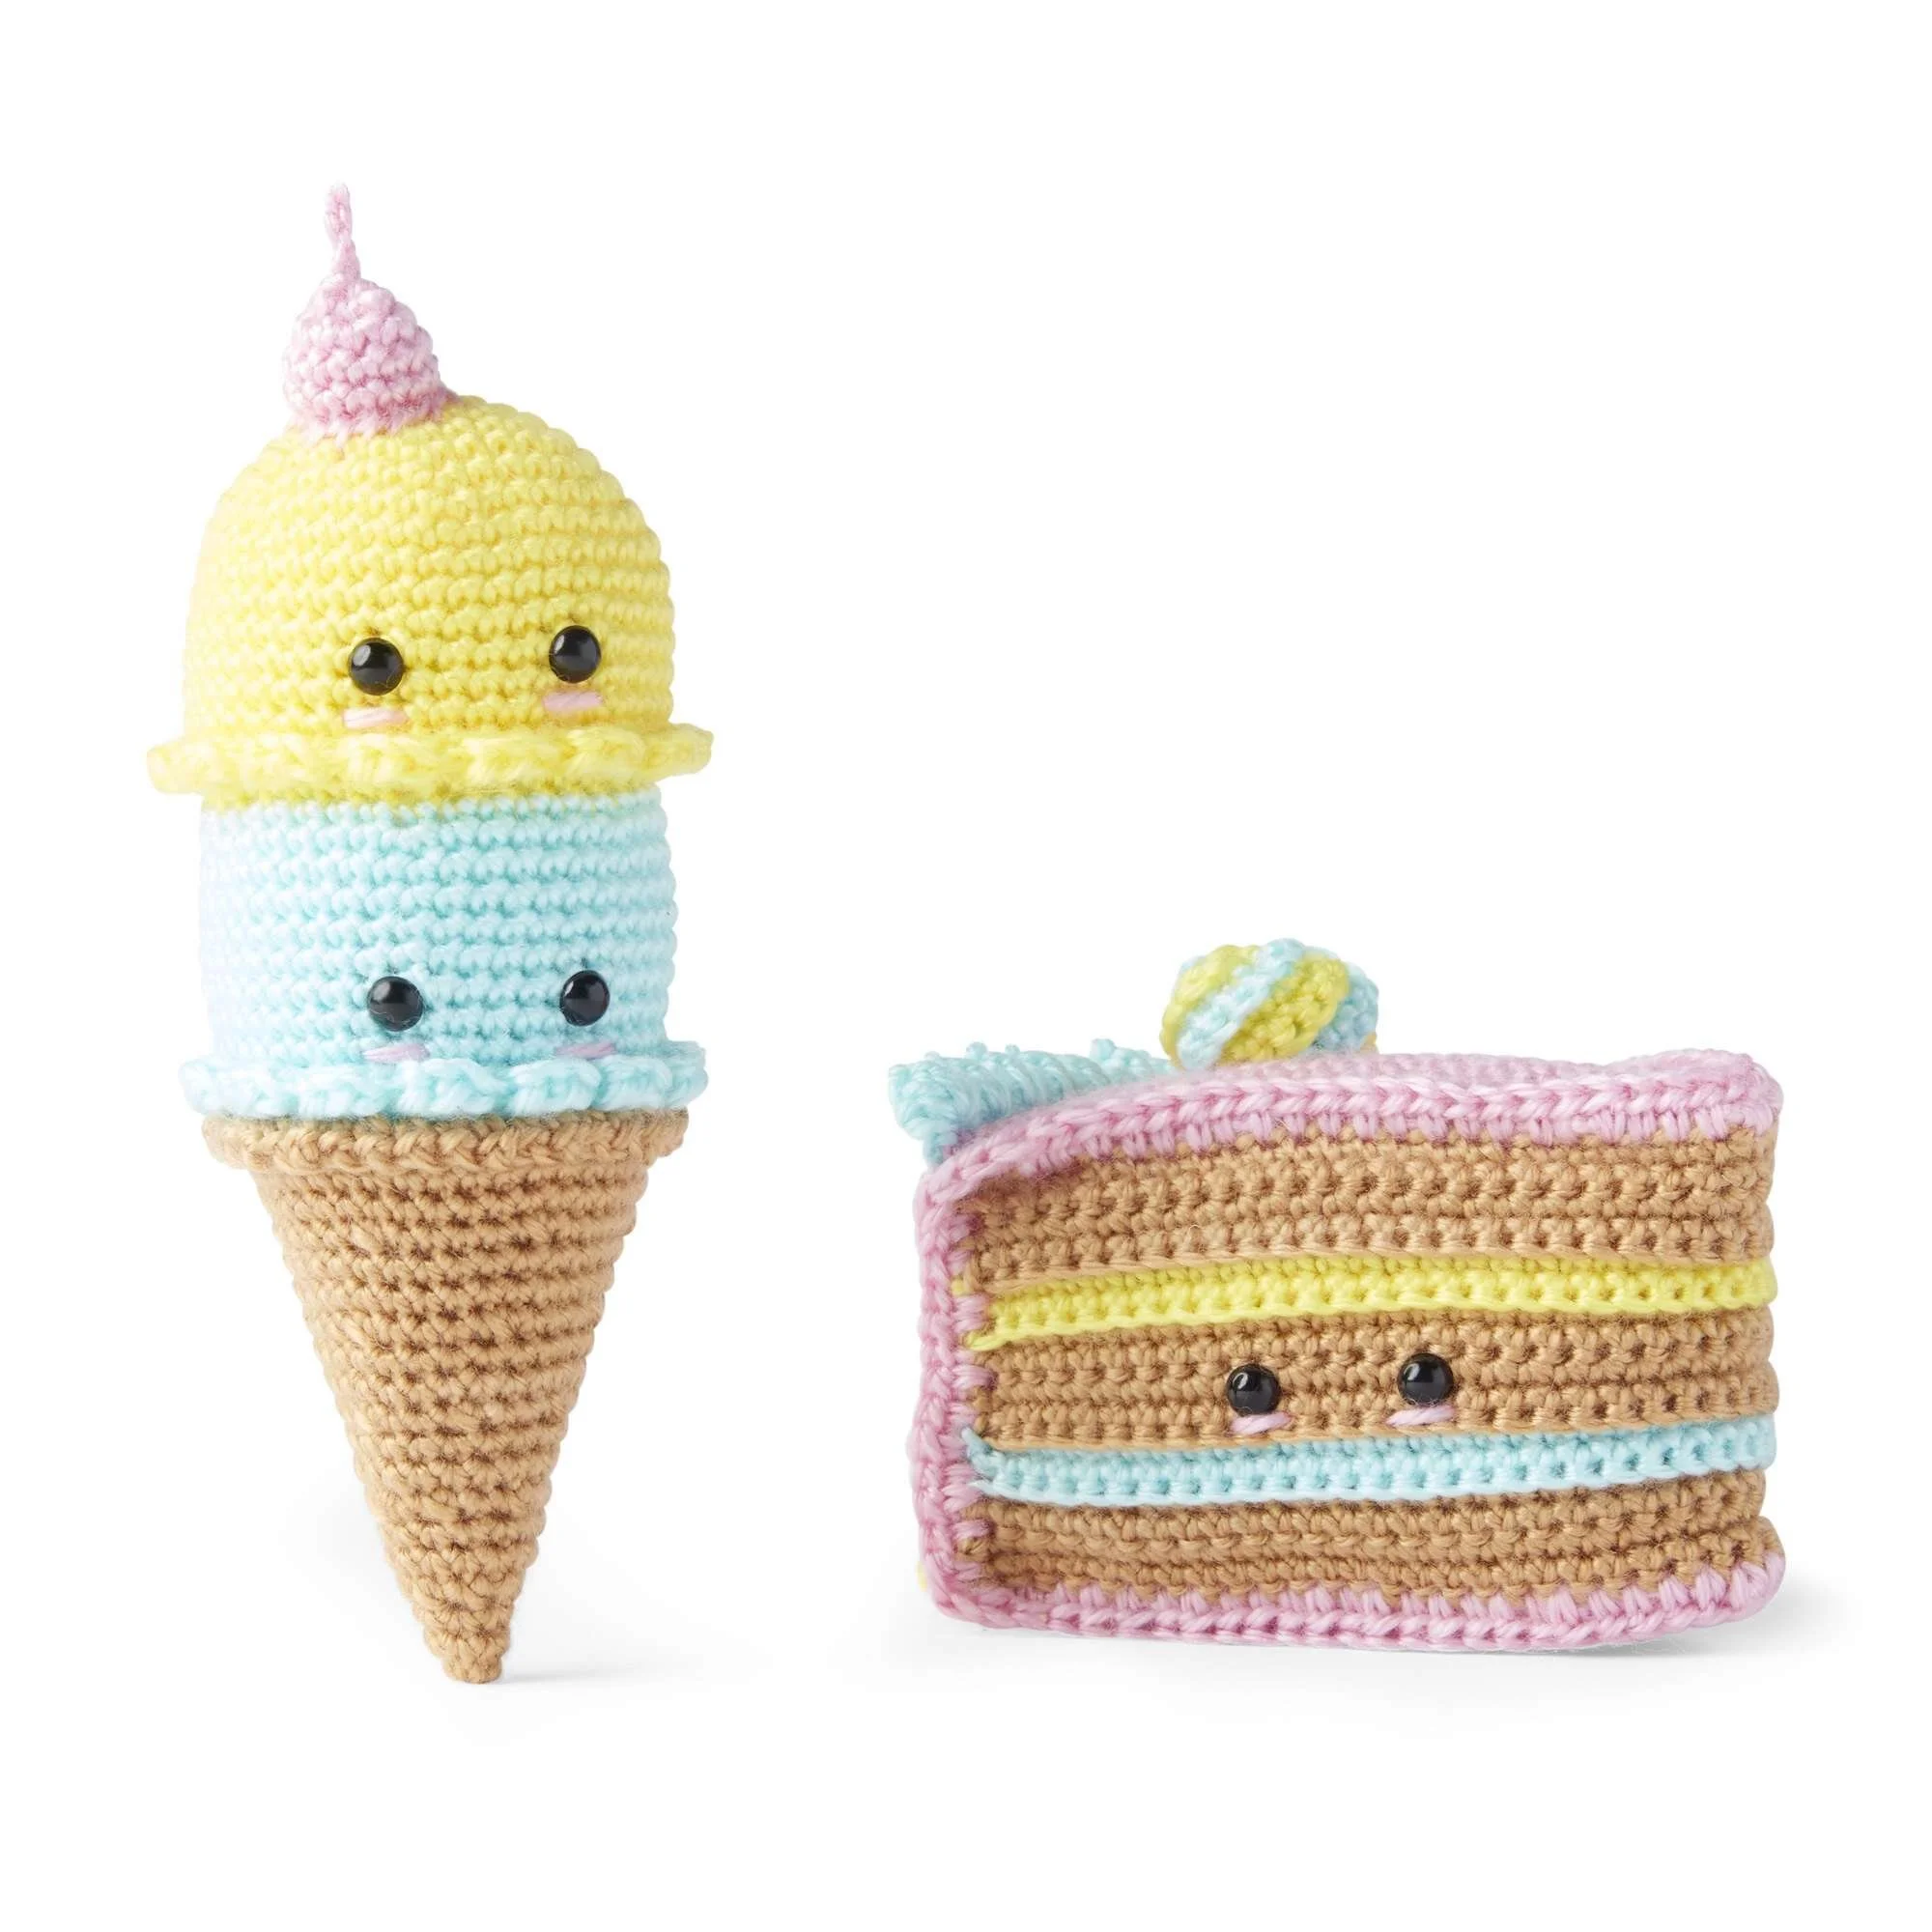
- Color 1: Yellow
- Color 2: Blue
- Color 3: Beige
- Color 4: Pink
Stitch-Count/Construction Conventions
- Where instructions say Working in front loops only or back loops only, work the stated stitches only in those loops of the specified round/row.
- Where instructions say Break Color X. Join Color Y, switch colors as indicated.
Instructions
Ice Cream Cone
Ice Cream Scoop 1
Start at the top with Color 1; ch 2.
- 1st rnd: 6 sc in 2nd ch from hook. Join. (6 sc)
- 2nd rnd: Ch 1. 2 sc in each sc around. Join. (12 sc)
- 3rd rnd: Ch 1. 1 sc in next sc. 2 sc in next sc. Rep from * around. Join. (18 sc)
- 4th rnd: Ch 1. 1 sc in each of next 2 sc. 2 sc in next sc. Rep from * around. Join. (24 sc)
- 5th rnd: Ch 1. 1 sc in each of next 3 sc. 2 sc in next sc. Rep from * around. Join. (30 sc)
- 6th rnd: Ch 1. 1 sc in each of next 4 sc. 2 sc in next sc. Rep from * around. Join. (36 sc)
- 7th rnd: Ch 1. 1 sc in each of next 5 sc. 2 sc in next sc. Rep from * around. Join. (42 sc)
- 8th to 15th rnds: Ch 1. 1 sc in each sc around. Join.
- 16th rnd: Working in front loops only, sl st in next sc. 3 hdc in next sc. Sl st in next sc. Rep from * around. Join.
- 17th rnd: Ch 1. Working in back loops only of 15th rnd, 1 sc in each of next 5 sc. Sc2tog. Rep from * around. Break Color 1. Join Color 2. (36 sc)
Ice Cream Scoop 2
- 18th rnd: With B, ch 1. Working in front loops only, 1 sc in each sc around. Join.
- 19th rnd: Ch 1. 1 sc in each of next 5 sc. 2 sc in next sc. Rep from * around. Join. (42 sc)
- 20th to 27th rnds: Ch 1. 1 sc in each sc around. Join.
- 28th rnd: Working in front loops only, sl st in next sc. 3 hdc in next sc. Sl st in next sc. Rep from * around. Join.
- 29th rnd: Ch 1. Working in back loops only of 27th rnd, 1 sc in each of next 5 sc. Sc2tog. Rep from * around. Break Color 2. Join Color 3. (36 sc)
Scoop Assembly Details (after Scoop 2)
- Secure safety eyes onto scoops as shown in the photo.
- Using Color 4, embroider blush below eyes as shown in the photo.
Ice Cream Cone (body)
- 30th rnd: With Color 3, ch 1. Working in front loops only, *1 sc in next sc. Ch 1. Rep from * around. Join.
- 31st rnd: Ch 1. Working in back loops only of 29th rnd, 1 sc in each sc around. Join.
- 32nd and 33rd rnds: Ch 1. 1 sc in each sc around. Join.
- 34th rnd: Ch 1. 1 sc in each of next 4 sc. Sc2tog. Rep from * around. Join. (30 sc)
- 35th and 36th rnds: Ch 1. 1 sc in each sc around. Join.
- 37th rnd: Ch 1. 1 sc in each of next 3 sc. Sc2tog. Rep from * around. Join. (24 sc)
- 38th and 39th rnds: Ch 1. 1 sc in each sc around. Join.
- 40th rnd: Ch 1. 1 sc in each of next 2 sc. Sc2tog. Rep from * around. Join. (18 sc)
- 41st and 42nd rnds: Ch 1. 1 sc in each sc around. Join.
- 43rd rnd: Ch 1. 1 sc in next sc. Sc2tog. Rep from * around. Join. (12 sc)
- 44th and 45th rnds: Ch 1. 1 sc in each sc around. Join.
- Finish stuffing cone firmly.
- 46th rnd: Ch 1. Sc2tog. Rep from * around. Join. (6 sc)
- 47th and 48th rnds: Ch 1. 1 sc in each sc around. Join.
- Fasten off, leaving a long end. Draw end tightly through remaining stitches.
Cherry
With Color 4, ch 4.
- 1st rnd: 6 sc in 2nd ch from hook. Join, leaving remaining ch-2 as Stem of Cherry. (6 sc)
- 2nd rnd: Ch 1. 2 sc in each sc around. Join. (12 sc)
- 3rd and 4th rnds: Ch 1. 1 sc in each sc around. Join.
- Fasten off, leaving long end.
- Stuff cherry firmly.
- Using long end, sew cherry onto Scoop 1 as shown in the photo.
Cake Slice
Cake Icing (rectangle + frosting)
Cake Icing: With Color 4, ch 3.
- 1st row: 1 sc in 2nd ch from hook. 1 sc in last ch. Turn. 2 sc.
- 2nd row: Ch 1. 2 sc in each sc to the end of the row. Turn. 4 sc.
- 3rd and 4th rows: Ch 1. 1 sc in each sc to the end of the row. Turn.
- 5th row: Ch 1. 2 sc in first sc. 1 sc in each sc to the last sc. 2 sc in last sc. Turn.
- Repeat 3rd to 5th rows until 26 rows from beginning have been worked, with 20 sc.
- 27th row: Ch 1. 1 sc in each sc to end of the row. Turn.
- 28th row: Ch 1. Working in back loops only, 1 sc in each sc to end of the row. Turn.
- 29th to 43rd rows: Ch 1. 1 sc in each sc to end of the row. Turn.
- 44th row: Ch 1. Working in back loops only, 1 sc in each sc to end of the row. Turn.
- 45th row: Ch 1. 1 sc in each sc to end of the row. Turn.
- 46th row: Ch 1. Sc2tog. 1 sc in each sc to last 2 sc. Sc2tog. Turn. 18 sc.
- 47th and 48th rows: Ch 1. 1 sc in each sc to end of the rows. Turn.
- Repeat 46th to 48th rows until 2 stitches remain, ending on a 46th row.
- Fasten off.
Top Edge Frosting
Top Edge Frosting: 1st row:
Join Color 2 with a sl st to the 1st front loop of the 27th row.
Working in front loops only, Popcorn in next st. Sl st in next st. Rep from * to last st.
(Popcorn. Sl st) in the last st.
- Fasten off.
Bottom Edge Frosting
Bottom Edge Frosting: 1st row:
Join Color 1 with a sl st to the 1st front loop of the 43rd row.
Ch 1.
Working in front loops only, *1 sc in next sc. Ch 2. Rep from * to last sc. 1 sc in the last sc.
- Fasten off.
Cake Layers
Stripe Pattern (for Cake Layers)
- With Color 3, 4 rows
- With Color 1, 2 rows
- With Color 3, 4 rows
- With Color 2, 2 rows
- With Color 3, 4 rows
(These 16 rows complete Stripe Pattern.)
Cake Layers Base
With Color 3, ch 51.
- 1st row: 1 sc in 2nd ch from hook. 1 sc in each ch to end of ch. Turn. 50 sc.
- 2nd row: Ch 1. 1 sc in each sc to end of row. Turn.
- The first 2 rows of the Stripe Pattern are complete.
- Repeat 2nd row until all 16 rows of the Stripe Pattern have been worked.
- Fasten off.
Cake Layers Face + Join Prep
- Attach safety eyes and embroider cheeks on Cake Layers as shown in the photo.
Joining Cake Layers and Cake Icing
Referring to the diagram, pin Cake Layers and Cake Icing together to help with joining.
1st rnd:
- Working through both thicknesses, join Color 4 with a sl st anywhere along meeting edges of Cake Layers and Cake Icing.
- Ch 2.
- Work hdc evenly around all edges.
- Stuff Cake firmly 2” [5 cm] before completing the joining edge.
- Join with a sl st to the first hdc.
- Fasten off.
Icing Dollop
Stripe Pattern (for Icing Dollop)
- With Color 1, 2 rows
- With Color 2, 2 rows
(These 4 rows complete Stripe Pattern.)
Icing Dollop Base
With Color 1, ch 11.
- 1st row: Sc2tog over 2nd and 3rd ch from hook. 1 sc in each ch to the last ch. 2 sc in the last ch. Turn. 10 sc.
- 2nd row: Ch 1. 2 sc in the first sc. 1 sc in each sc to the last 2 sc. Sc2tog. Join Color 2. Turn.
- 3rd row: With Color 2, ch 1. Sc2tog. 1 sc in each sc to the last sc. 2 sc in the last sc. Turn.
- 4th row: Ch 1. 2 sc in the first sc. 1 sc in each sc to the last 2 sc. Sc2tog. Join Color 1. Turn.
- 4 rows of Stripe Pattern complete.
- Keeping continuous Stripe Pattern, repeat 3rd and 4th rows until 12 rows in total are complete.
- Fasten off leaving a long tail.
Make Tube + Attach
- Using Color 1, sew ends together to create a tube.
- Gather top edge of the tube. Pull tight and secure. Do not break Color 1.
- Using the same tail, gather the bottom edge of the tube. Pull tight and secure.
- Sew the Icing Dollop to the top of Cake as shown in the picture.
Frequently Asked Questions
What crochet hook is used for this pattern?
For this pattern, a size U.S. B/1 (2.25 mm) crochet hook is recommended. You may adjust the hook size based on your personal gauge needs.
Is this project worked in rows or rounds?
The Crochet Sweet Treats Pattern primarily uses rounds for the construction of both the ice cream cone and the cake slice, allowing for a seamless, 3D finished product.
Does this crochet project require assembly?
Yes, assembly is required for this project. After crocheting the individual pieces, they will need to be securely sewn together.
How many safety eyes are needed for this pattern?
You will need a total of 6 safety eyes to complete the ice cream cone and cake slice.
How is the cherry attached to the ice cream scoop?
After completing the cherry, use the long end of the yarn to sew the cherry onto Scoop 1, creating a decorative finish that enhances the sweet treat’s look.
Conclusion
Creating these adorable Sweet Treats using this crochet pattern is a delightful experience that combines creativity and enjoyment. By following the detailed instructions and utilizing the specified materials, you can easily bring these scrumptious creations to life. Whether they serve as toys, decorations, or conversation starters, this project is sure to put a smile on anyone’s face! Happy crocheting!