Sammy & Stu Crochet Puppy Pattern
Creating your own adorable crochet puppers has never been easier with the Sammy & Stu Crochet Puppy Pattern! This charming amigurumi project is perfect for fans of handmade toys and can be made with just one ball of Red Heart® Amigurumi™ yarn. Whether you’re making a delightful gift for a child or a new friend for your pets, these little puppies will surely steal hearts.
About This Amigurumi Design
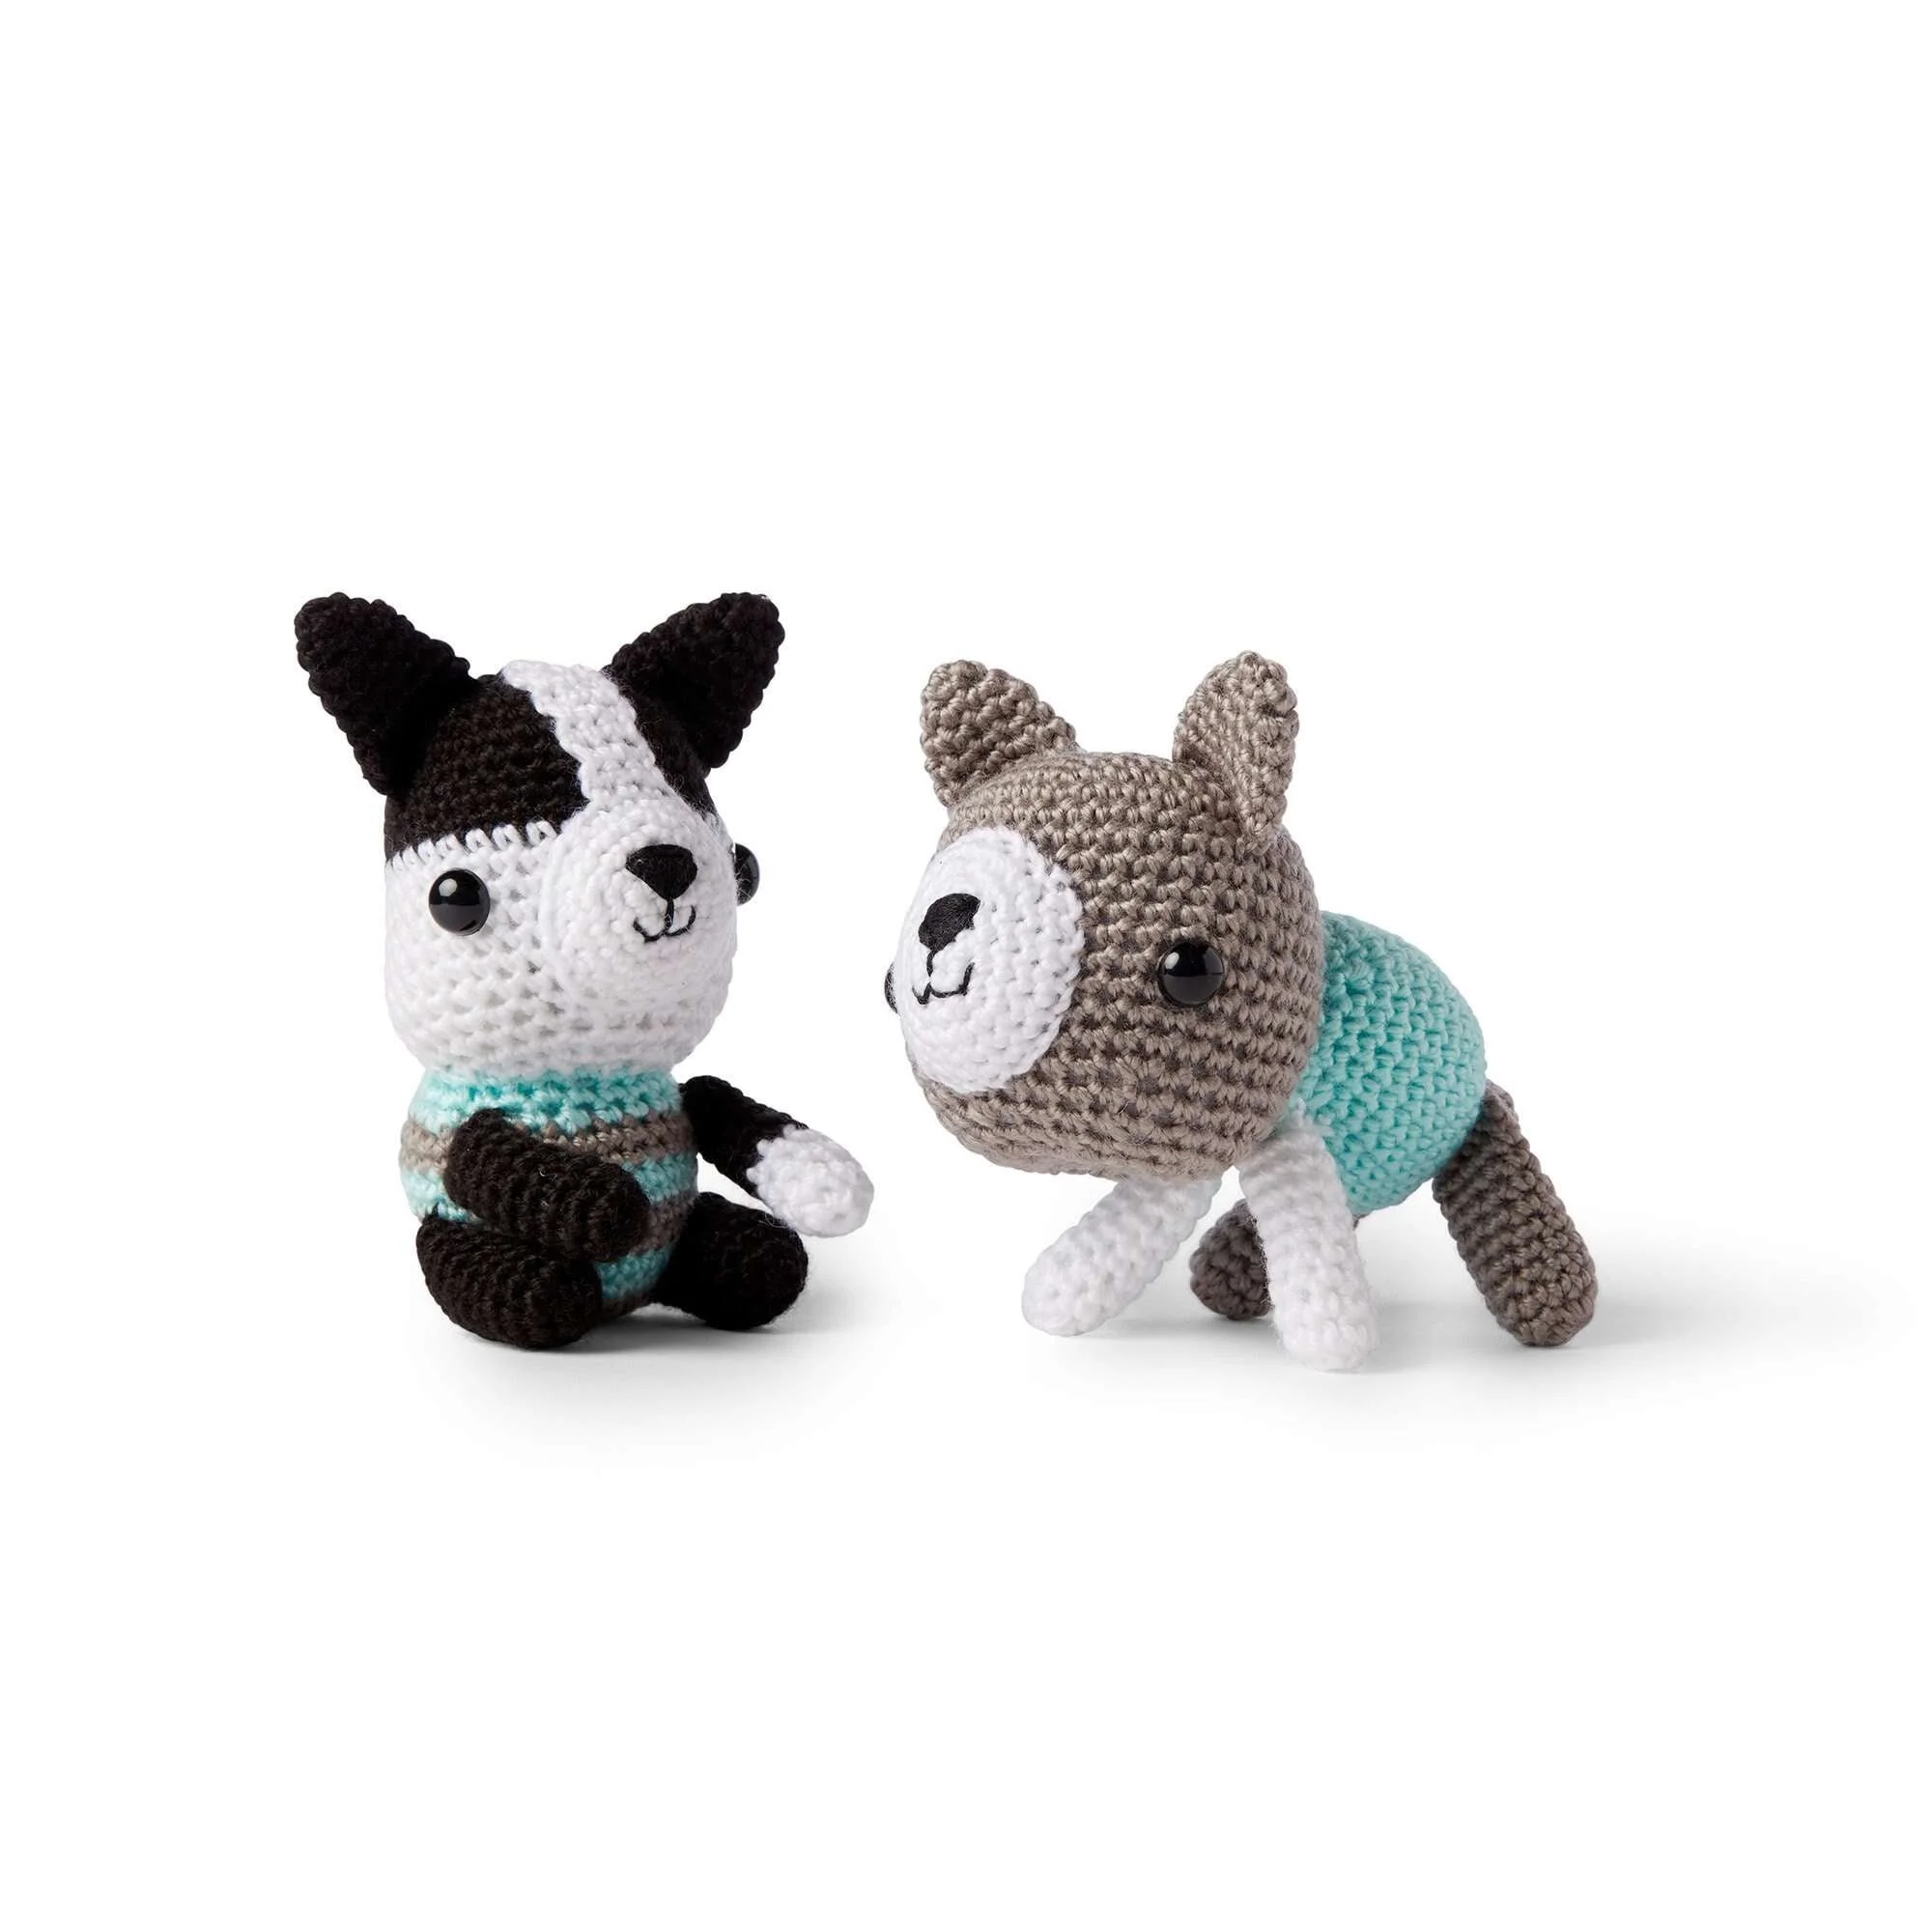
The Sammy & Stu crochet puppy pattern features two proud French Bulldog puppies, each made with simple stitches and joyful colors. This design captures the fascination of puppies with its plump bodies, expressive faces, and floppy ears. The project includes detailed instructions that guide you through each shape and construction step, making it comprehensible for all skill levels.
Materials
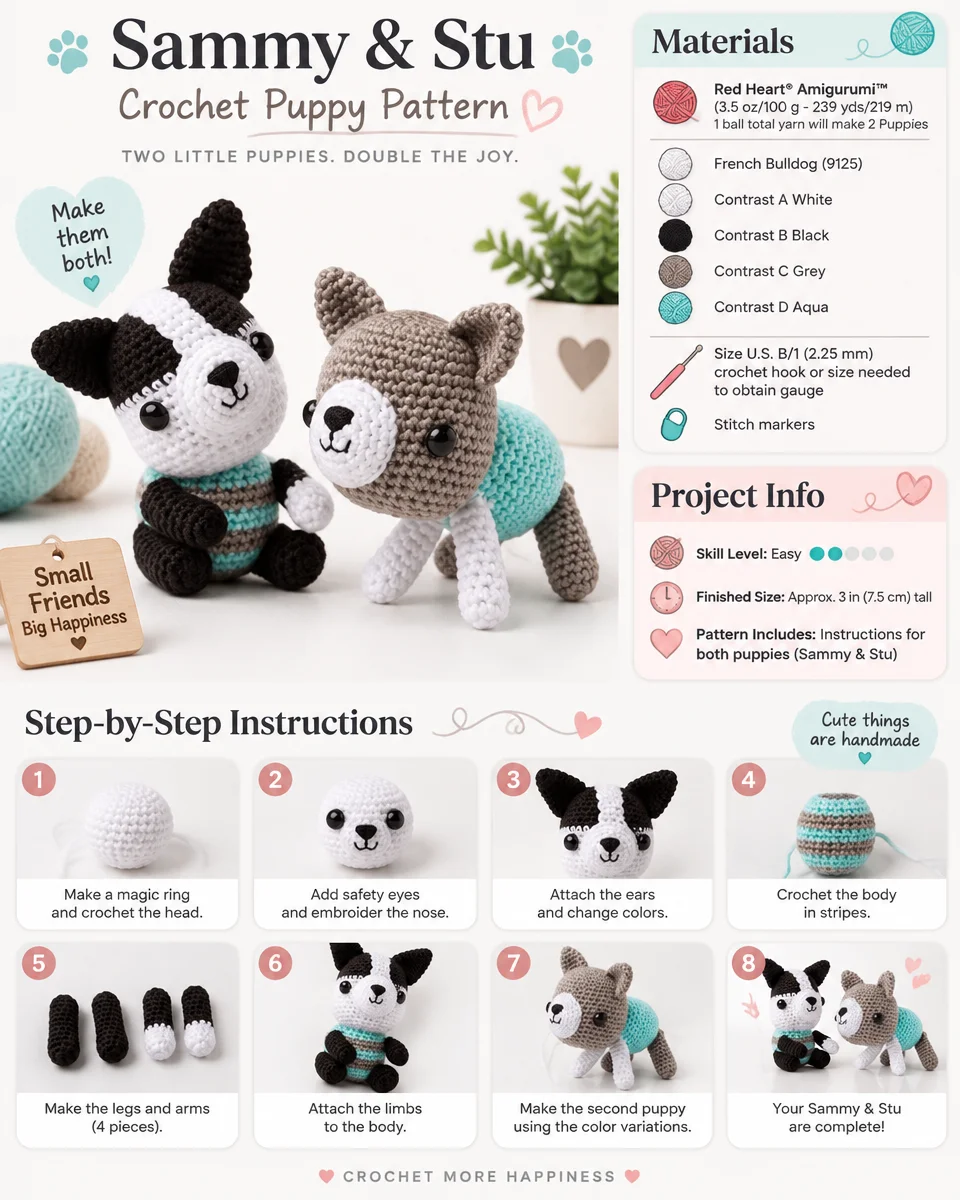
Before you get started, gather the following materials:
Yarn
- Red Heart® Amigurumi™ (3.5 oz/100 g; 239 yds/219 m)
- 1 ball (enough for 2 puppies)
- Contrast A: White
- Contrast B: Black
- Contrast C: Grey
- Contrast D: Aqua
- 1 ball (enough for 2 puppies)
Crochet Hook
- Size U.S. B/1 (2.25 mm) or size needed to obtain gauge.
Notions
- Stitch markers
- Stuffing
- Pair of ¼” [6 mm] safety eyes
- Black embroidery floss for nose and mouth
Crochet Abbreviations
- ch: chain
- sc: single crochet
- pm: place marker
- sl st: slip stitch
- sc2tog: single crochet two together
Pattern Notes
The pattern is accessible even to newcomers thanks to various components that work together seamlessly. Each section is crocheted individually and then assembled, resulting in a delightful puppy companion.
Head
The head is the focal point of your puppy, showcasing its character with features like eyes and mouth. Here’s how to crochet the head:
Head Instructions
Begin at top of head, with B, ch 2.
- 1st rnd: 6 sc in 2nd ch from hook. Do not join. 6 sc. PM at end of rnd.
- 2nd rnd: Work 2 sc in each of the next 6 sc. 12 sc.
- 3rd rnd: (1 sc in next sc. 2 sc in next sc) 6 times. 18 sc.
- 4th rnd: (1 sc in each of next 2 sc. 2 sc in next sc) 6 times. 24 sc.
- 5th rnd: (1 sc in each of next 3 sc. 2 sc in next sc) 6 times. 30 sc.
- 6th rnd: (1 sc in each of next 4 sc. 2 sc in next sc) 6 times. 36 sc.
- 7th to 11th rnds: 1 sc in each sc around. Break B at end of last rnd. Join A.
- 12th to 17th rnds: 1 sc in each sc around.
- 18th rnd: (1 sc in each of next 4 sc. Sc2tog) 6 times. 30 sts.
- 19th rnd: 1 sc in each sc around.
- 20th rnd: (1 sc in each of next 3 sc. Sc2tog) 6 times. 24 sts.
- 21st rnd: 1 sc in each st around.
- Following manufacturer’s instructions, attach safety eyes between 14th and 15th rnds, approx 10 sts apart.
- Lightly stuff muzzle and sew in place between eyes.
- Stuff head.
- 22nd rnd: (1 sc in each of next 2 sc. Sc2tog) 6 times. 18 sts.
- 23rd rnd: (1 sc in next sc. Sc2tog) 6 times. 12 sts.
- 24th rnd: (Sc2tog) 6 times. 6 sts.
- Finish stuffing head.
- Fasten off, leaving a long end. Thread end through all sts of last rnd. Pull tightly. Fasten securely.
Muzzle
The muzzle adds a unique touch to your puppy’s expression and enhances its charm.
Muzzle Instructions
With A, ch 2.
- 1st rnd: 5 sc in 2nd ch from hook. Do not join. 5 sc. PM at end of rnd.
- 2nd rnd: 2 sc in each of next 5 sc. 10 sc.
- 3rd rnd: (1 sc in next sc. 2 sc in next sc) 5 times. 15 sc.
- 4th rnd: (1 sc in each of next 2 sc. 2 sc in next sc) 5 times. 20 sc.
- 5th and 6th rnds: 1 sc in each sc around.
- Join with sl st in first sc at end of last rnd. Fasten off, leaving a long end for sewing.
- With black floss, using Straight stitch, embroider nose and mouth onto muzzle.
Ears
Ears lend an adorable aspect, capturing movement and playfulness.
Ears Instructions (Make 2)
With B, ch 2.
- 1st rnd: 5 sc in 2nd ch from hook. Do not join. 5 sc. PM at end of rnd.
- 2nd rnd: 1 sc in each sc around.
- 3rd rnd: 2 sc in each of next 5 sc. 10 sc.
- 4th and 5th rnds: 1 sc in each sc around.
- 6th rnd: (1 sc in next sc. 2 sc in next sc) 5 times. 15 sc.
- 7th rnd: 1 sc in each sc around.
- Join with sl st in first sc. Fasten off, leaving a long end for sewing.
Body
The body serves as the foundation of your puppy, tying all components together.
Body Instructions
Stripe Pattern
- With D – 2 rnds
- With C – 2 rnds
These 4 rnds form Stripe Pattern.
Begin at the bottom of body, with D, ch 2. Proceed in Stripe Pattern as follows:
- 1st rnd: 6 sc in 2nd ch from hook. Do not join. 6 sc. PM at end of rnd.
- 2nd rnd: 2 sc in each of next 6 sc. 12 sc.
- 3rd rnd: (1 sc in next sc. 2 sc in next sc) 6 times. 18 sc.
- 4th rnd: (1 sc in each of next 2 sc. 2 sc in next sc) 6 times. 24 sc.
- 5th rnd: (1 sc in each of next 3 sc. 2 sc in next sc) 6 times. 30 sc.
- 6th to 12th rnds: 1 sc in each sc around.
- 13th rnd: (1 sc in each of next 3 sc. Sc2tog) 6 times. 24 sts.
- 14th rnd: 1 sc in each st around.
- Join with sl st in first sc. Fasten off, leaving a long end for sewing body to head.
Front Legs
The front legs are crucial for creating the structure and posture of your puppy.
Front Legs Instructions (Make 2)
First Leg
- With B, ch 2.
- 1st rnd: 8 sc in 2nd ch from hook. Do not join. 8 sc. PM at end of rnd.
- Next 9 rnds: 1 sc in each sc around, stuffing leg as you work.
- Join with sl st in first sc at end of last rnd. Fasten off, leaving a long end.
- Sew open end of leg closed.
Second Leg
- Work as given for First Leg, working 4 rnds with A, then 5 rnds with B.
Back Legs
The back legs provide stability and form to your puppy’s stance.
Back Legs Instructions (Make 2)
- With B, ch 2.
- 1st rnd: 10 sc in 2nd ch from hook. Do not join. 10 sc. PM at end of rnd.
- Next 9 rnds: 1 sc in each sc around, stuffing leg as you work.
- Join with sl st in first sc at end of last rnd. Fasten off, leaving a long end.
Tiny Tail
Don’t forget the signature feature of every puppy: the tail!
Tiny Tail Instructions
- With B, ch 2.
- 1st rnd: 6 sc in 2nd ch from hook. Do not join. 10 sc. PM at end of rnd.
- 2nd and 3rd rnds: 1 sc in each sc around.
- Join with sl st in first sc at end of last rnd. Fasten off, leaving a long end.
Finishing
Now it’s time to assemble your puppies and bring them to life!
- Referring to the picture as a guide to placement, sew Ears to Head.
- Stuff Body and sew it to Head.
- Sew Front Legs to the upper front of Body.
- Sew Back Legs to the lower front of Body.
- Sew Tail to the center rear of Body.
Frequently Asked Questions
What crochet hook is used for this pattern?
You will need a Size U.S. B/1 (2.25 mm) crochet hook or size needed to obtain gauge.
Is this project worked in rows or rounds?
This pattern is worked primarily in rounds to create the body parts of the puppies.
How much yarn do I need for this project?
A total of 1 ball of Red Heart® Amigurumi™ yarn is enough to create 2 puppies.
Does this crochet project require assembly?
Yes, you will need to assemble the pieces after crocheting each component.
What are the finished dimensions of the puppies?
The pattern does not specify finished dimensions, but the each puppy will be approximately 6 inches tall depending on your tension and yarn used.
Conclusion
By following the Sammy & Stu Crochet Puppy Pattern, you’ll create two delightful puppies that are perfect for cuddles or as gifts. With each stitch, you’ll enjoy the process of crafting these adorable mascots, whether for a child, your pet, or simply as a charming piece of decor. Happy crocheting!