Stellan and Stanley Crochet Dinosaur Pattern
Crocheting amigurumi is an enjoyable and rewarding endeavor, and what could be more delightful than creating your own dinosaur characters? In this free crochet pattern, you will learn how to make the adorable Stellan and Stanley dinosaurs. Their vibrant colors and charming features will surely bring joy to children and adults alike.
About the Crochet Project
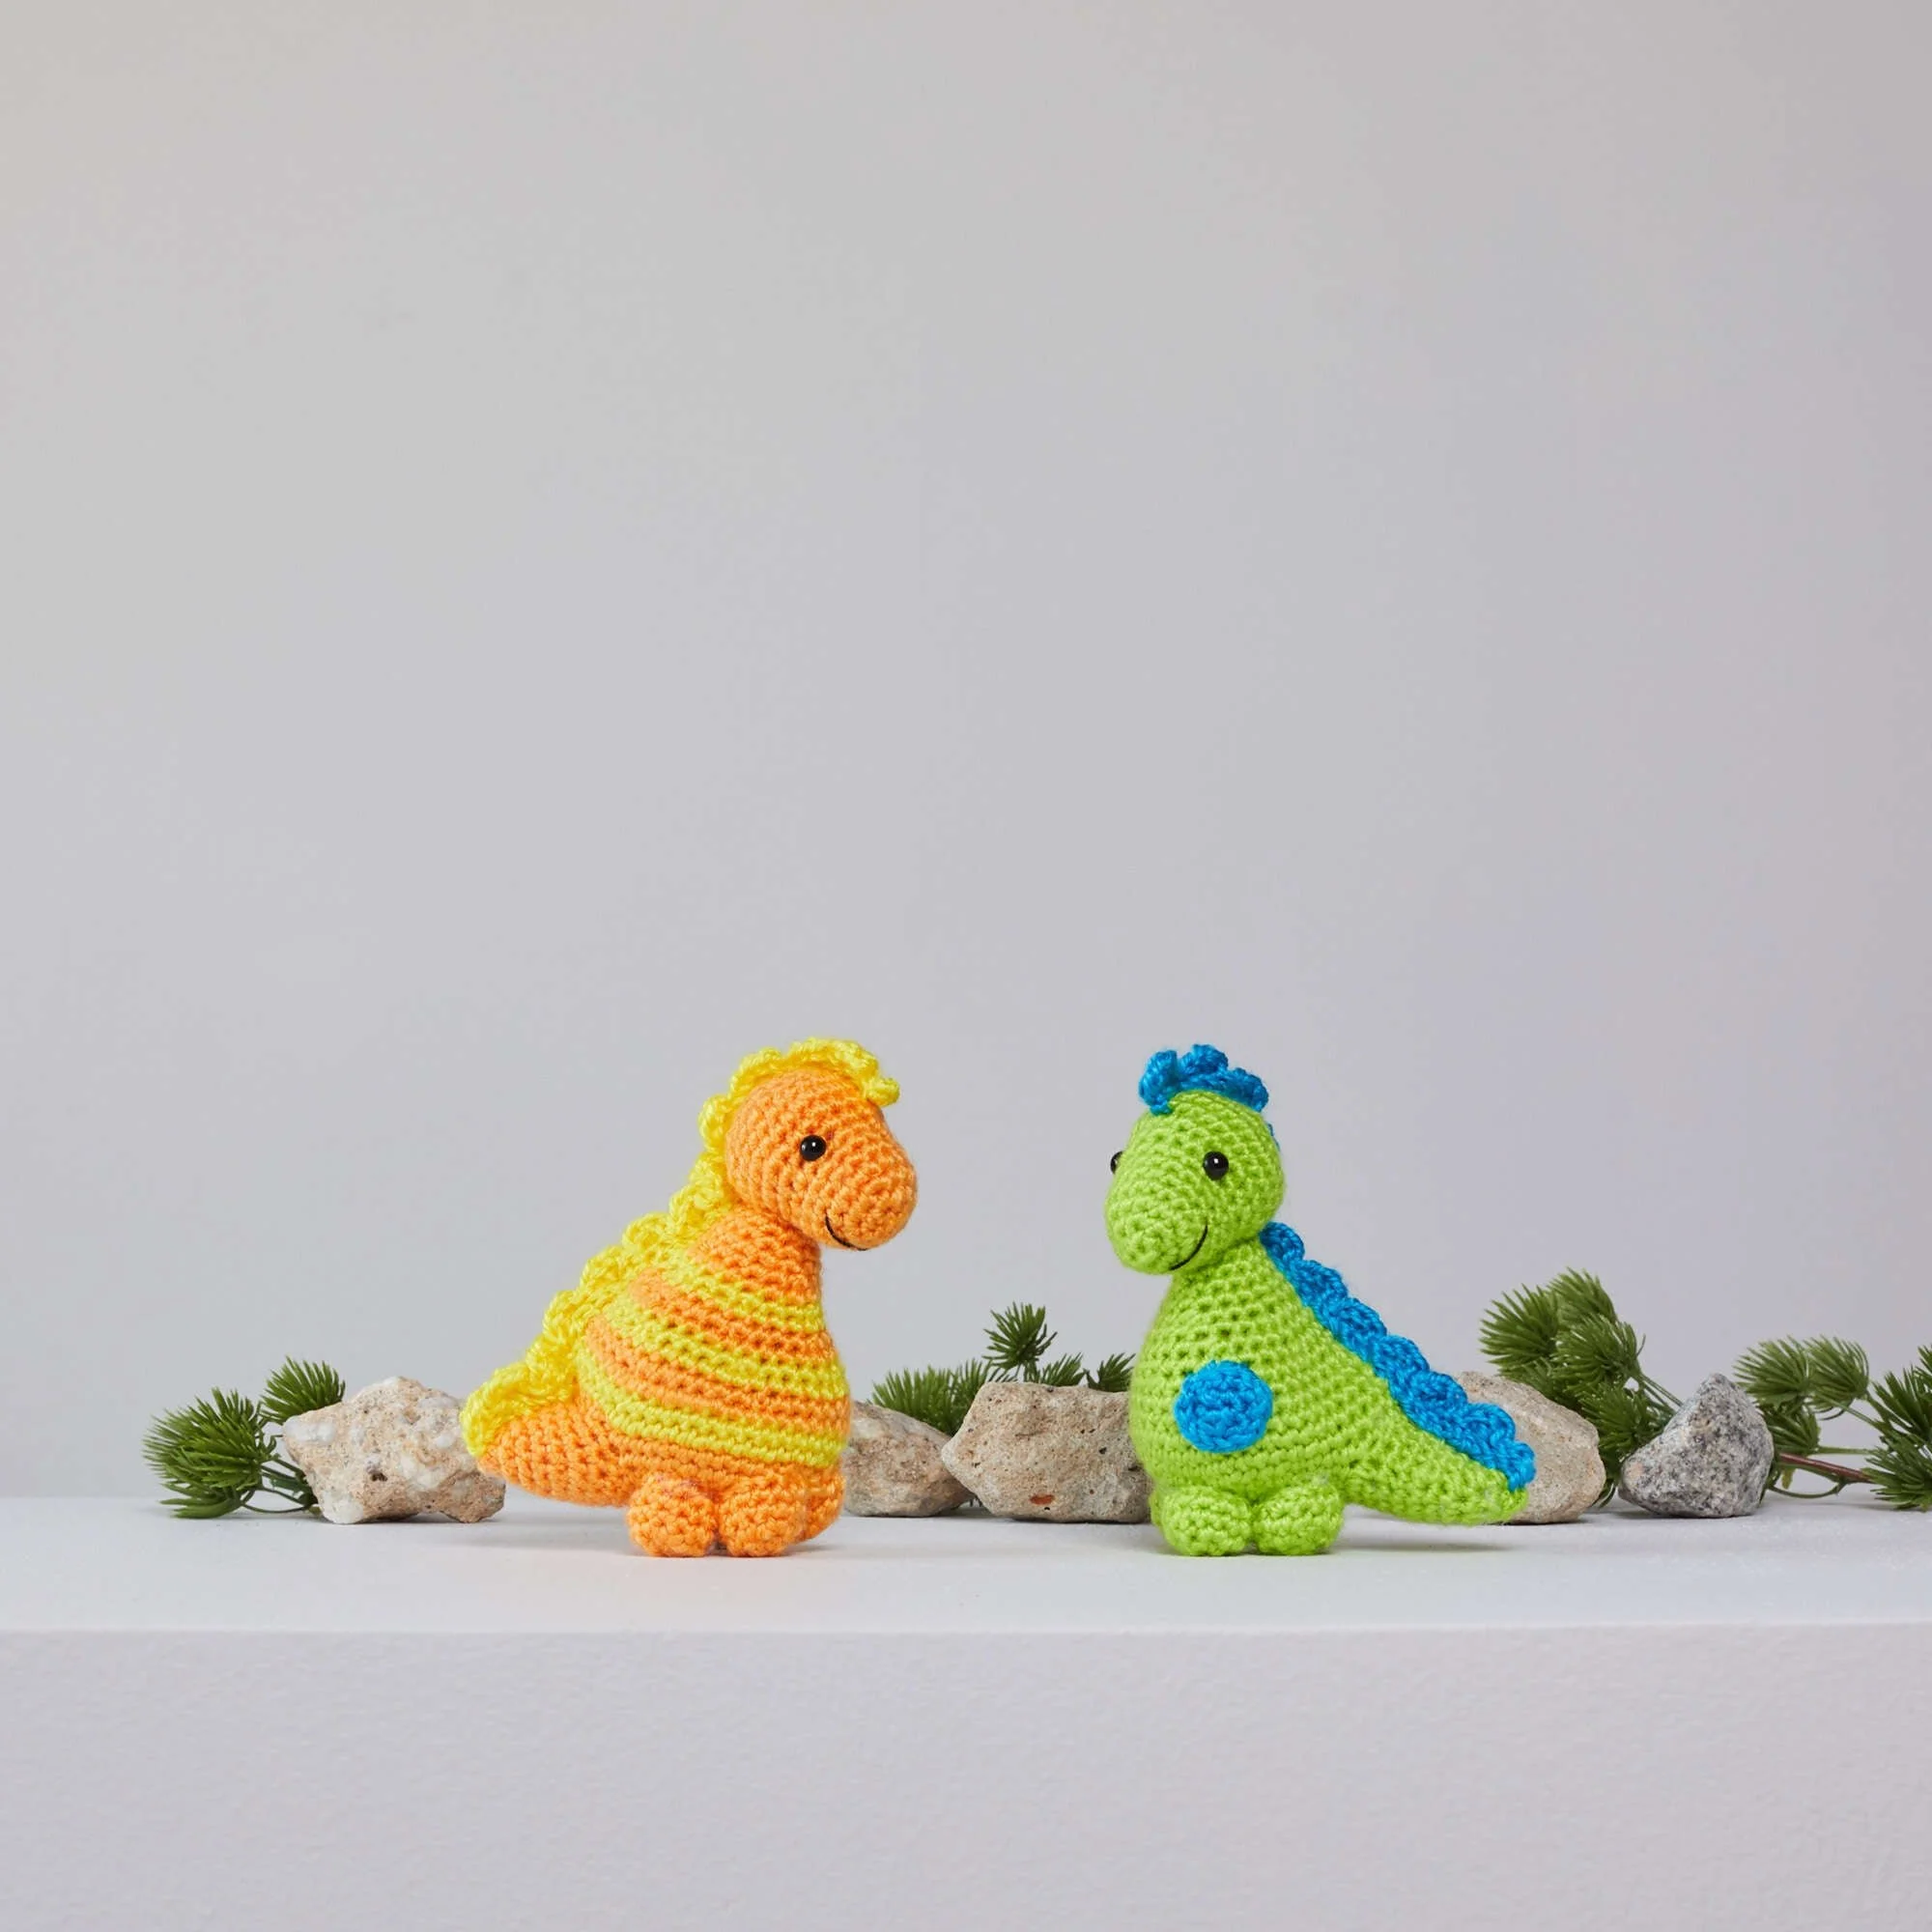
The Stellan and Stanley dinosaurs are designed to be soft, cuddly toys. They come in two variations, spotted and striped, allowing for creativity in color selection and personal style. Constructed using an adjustable ring method for the body and head, these dinosaurs are shaped through a series of cleverly crafted rounds. The pattern includes detailed instructions for each body part, ensuring your finished dinosaur will not only look great but will also have that perfect stuffed animal feel.
Materials
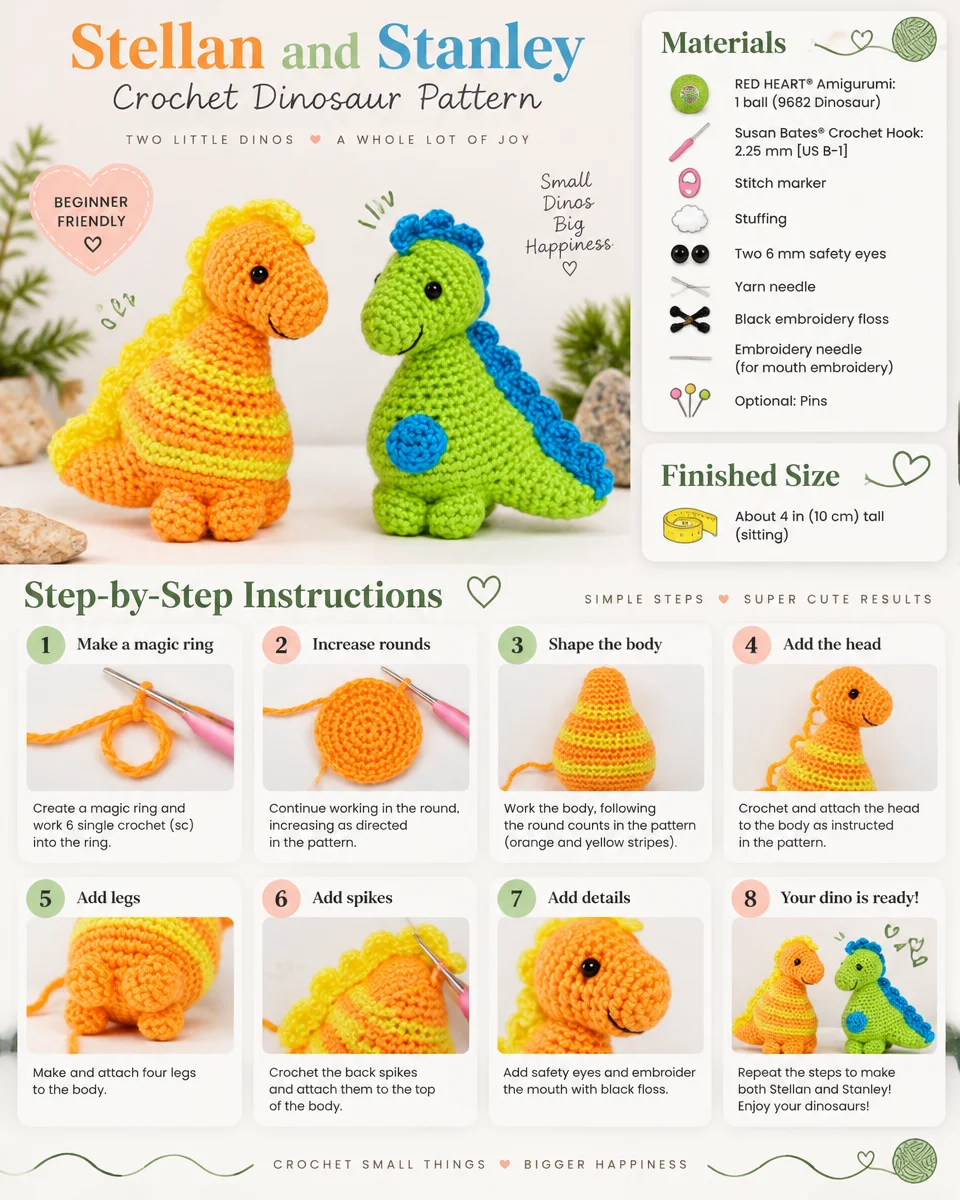
To create your Stellan and Stanley crochet dinosaurs, you’ll need the following materials:
- Yarn:
- RED HEART® Amigurumi: 1 ball (9682 Dinosaur)
- Crochet Hook:
- Susan Bates® Crochet Hook: 2.25 mm [US B-1]
- Notions:
- Stitch marker
- Stuffing
- Two 6 mm safety eyes
- Yarn needle
- Black embroidery floss
- Embroidery needle (for mouth embroidery)
- Optional:
- Pins
- Knee high stocking
- Plastic pellets for weighted stuffing
Crochet Abbreviations
Understanding crochet abbreviations is key to following this pattern successfully. Here are the abbreviations used throughout:
- sc: single crochet
- sc2tog: single crochet two stitches together
- ch: chain
- st(s): stitch(es)
- [ ]: work instructions within brackets the specified number of times
- ( ): instructions within parentheses indicate a sequence within a round
Special Stitch / Special Technique
Special Stitch
sc2tog (single crochet 2 stitches together):
[Insert hook in next stitch, yarn over and pull up a loop] twice, yarn over and draw through all 3 loops on hook.
Special Technique
Adjustable ring:
Wrap yarn into a ring, ensuring that the tail falls behind the working yarn. Grip the ring and tail between your middle finger and thumb. Insert the hook through the center of the ring, yarn over (with working yarn), and draw up a loop. Work stitches of the first round in the ring. After the first round of stitches is worked, pull gently on the tail to tighten the ring.
Assembly Overview (Piece Order and Placement)
- Sew the head to the body, positioning the face slightly to the side.
- Sew the legs to the bottom-most portion of the body. Position the back two legs directly in front of the tail and the front legs directly in front of the back legs.
Note: To get proper balance and make the dinosaur sit upright, it may be helpful to pin the legs before sewing in place. - Sew the spikes along the back of the body, beginning at the top of the head. Place the first spike about level with the middle of the eyes and follow the contour of the back of the head, neck, back, and tail. End by sewing the last slip stitch of spikes about even with the tip of the tail.
Note: It may be helpful to pin the spikes to the body before sewing in place. - Sew spots to the spotted dinosaur body and position spots randomly.
- With an embroidery needle and 2 strands of black embroidery floss, embroider a running stitch smile on the face of the dinosaur, about 3 rows below the last round of the muzzle at the end of the head. Weave the floss back through the head and knot securely, burying the yarn in the head and trimming excess as needed.
- Weave in and trim any remaining ends.
Pattern Instructions
Spotted Dinosaur Body (use yarn color A)
Beginning at the bottom of the body with A, make an adjustable ring.
Round 1 (right side):
Work 6 sc in the ring; do not join, work in continuous rounds (spiral)—6 sc.
Place a marker in the last sc worked to indicate end of round. Move marker up as each round is completed.
Round 2:
Work 2 sc in each of the next 6 sts—12 sc.
Round 3:
[Sc in next st, 2 sc in next st] 6 times—18 sc.
Round 4:
[Sc in next 2 sts, 2 sc in next st] 6 times—24 sc.
Round 5:
[Sc in next 3 sts, 2 sc in next st] 6 times—30 sc.
Round 6:
[Sc in next 4 sts, 2 sc in next st] 6 times—36 sc.
Make Opening for Tail
Round 7:
2 sc in next st, ch 8, skip next 8 sts, [2 sc in next st, sc in next 4 sts] twice, 2 sc in next st, sc in next 6 sts, [2 sc in next st, sc in next 4 sts] twice—34 sts and 1 ch-8 space.
Round 8:
Sc in each st and ch around—42 sc.
Rounds 9–11:
Sc in each st around.
Round 12:
[Sc in next 5 sts, sc2tog] 6 times—36 sc.
Round 13:
Sc in each st around.
Round 14:
[Sc in next 4 sts, sc2tog] 6 times—30 sc.
Round 15:
Sc in each st around.
Begin stuffing the piece with fiberfill or place the optional knee high filled with plastic pellets into the piece. Continue stuffing as work progresses.
Round 16:
[Sc in next 3 sts, sc2tog] 6 times—24 sc.
Round 17:
Sc in each st around.
Round 18:
[Sc in next 2 sts, sc2tog] 6 times—18 sc.
Round 19:
Sc in each st around.
Round 20:
[Sc in next 7 sts, sc2tog] twice—16 sc.
Round 21:
[Sc in next 6 sts, sc2tog] twice—14 sc.
Rounds 22 and 23:
Sc in each st around.
Finish stuffing the piece.
Fasten off, leaving a long tail for sewing the head to the neck. If needed, thread the beginning yarn tail through the stitches at the bottom of the piece and pull to close the opening. Secure and weave in the beginning tail only.
Striped Dinosaur Body (use colors B, then C, then stripe changes)
Beginning at the bottom of the body with B, make an adjustable ring.
Rounds 1–8:
Work same as Rounds 1–8 of spotted dinosaur body—42 sc.
Begin Striped Section
Remove the end of the round marker.
Reposition End of Round: Sc in next 4 sts, slip stitch in next sc and change yarn color to C (as you work the slip stitch).
Note: The yarn color changes are made at the end of rounds. Repositioning the end of round to the center of the back/tail will allow the color changes to be hidden beneath the back spikes that are added later.
Round 9:
With C, ch 1, sc in same st as slip st and in each st around; join with slip st in first sc—42 sc.
Note: Work first sc of all following stripe rounds in the same stitch as joining slip stitch.
Round 10:
With C, ch 1, sc in each st around; join with slip st in first sc and change to B.
Round 11:
With B, ch 1, sc in each st around; join with slip st in first sc.
Round 12:
With B, ch 1, [sc in next 5 sts, sc2tog] 6 times; join with slip st in first sc and change to C—36 sc.
Round 13:
With C, ch 1, sc in each st around; join with slip st in first sc.
Round 14:
With C, [sc in next 4 sts, sc2tog] 6 times; join with slip st in first sc and change to B—30 sc.
Round 15:
With B, ch 1, sc in each st around; join with slip st in first sc.
Begin stuffing the piece with fiberfill or place the optional knee high filled with plastic pellets into the piece. Continue stuffing as work progresses.
Round 16:
With B, [sc in next 3 sts, sc2tog] 6 times; join with slip st in first sc and change to C—24 sc.
Round 17:
With C, ch 1, sc in each st around; join with slip st in first sc.
Round 18:
With C, [sc in next 2 sts, sc2tog] 6 times; join with slip st in first sc and change to B—18 sc.
Cut C. Work remaining rounds with B only.
Round 19:
Sc in each st around; do not join, work in continuous rounds (spiral).
Place a marker in the last sc worked to indicate end of the round. Move the marker up as each round is completed.
Round 20:
[Sc in next 7 sts, sc2tog] twice—16 sc.
Round 21:
[Sc in next 6 sts, sc2tog] twice—14 sc.
Rounds 22 and 23:
Sc in each st around.
Finish stuffing the piece.
Fasten off, leaving a long tail for sewing the head to the neck. If needed, thread the beginning yarn tail through the stitches at the bottom of the piece and pull to close the opening. Secure and weave in the beginning tail only.
Tail (spotted: A, striped: B)
Note: If making a spotted dinosaur, use yarn color A. If making a striped dinosaur, use yarn color B.
Join yarn with a slip stitch in any stitch of the tail opening. In the next round, stitches are worked into each stitch (including the chains of the ch-8) around the tail opening.
Round 1:
Ch 1, sc in same st as joining and in next 15 sts—16 sc.
Place a marker in the last sc worked to indicate end of round. Move the marker up as each round is completed.
Rounds 2 and 3:
Sc in each st around.
Round 4:
[Sc in next 6 sts, sc2tog] twice—14 sc.
Round 5:
[Sc in next 5 sts, sc2tog] twice—12 sc.
Round 6:
[Sc in next 4 sts, sc2tog] twice—10 sc.
Round 7:
[Sc in next 3 sts, sc2tog] twice—8 sc.
Round 8:
[Sc in next 2 sts, sc2tog] twice—6 sc.
Fasten off, leaving a long tail. Thread the tail through the stitches of the last round and pull to close the opening. Weave in and trim the ends.
Head (spotted: A, striped: B)
Note: If making a spotted dinosaur, use yarn color A. If making a striped dinosaur, use yarn color B.
Make an adjustable ring.
Round 1 (right side):
Work 6 sc in the ring; do not join, work in continuous rounds (spiral)—6 sc.
Place a marker in the last sc worked to indicate end of round. Move marker up as each round is completed.
Round 2:
Work 2 sc in each of the next 6 sts—12 sc.
Round 3:
[Sc in next st, 2 sc in next st] 6 times—18 sc.
Rounds 4–7:
Sc in each st around.
Round 8:
[Sc in next 2 sts, 2 sc in next st] 6 times—24 sc.
Round 9:
[Sc in next 3 sts, 2 sc in next st] 6 times—30 sc.
Rounds 10 and 11:
Sc in each st around.
Round 12:
[Sc in next 3 sts, sc2tog] 6 times—24 sc.
Round 13:
[Sc in next 2 sts, sc2tog] 6 times—18 sc.
Round 14:
[Sc in next st, sc2tog] 6 times—12 sc.
Round 15:
[Sc in next st, sc2tog] 4 times—8 sc.
Attach the safety eyes between Rounds 7 and 8, about 7 stitches apart.
Fasten off, leaving a long tail. Thread the ending tail through the stitches of the last round and pull to close the opening. If needed, thread the beginning yarn tail through the stitches at the beginning of the piece and pull to close the opening. Weave in and trim the tails.
Legs (make 4 for each dinosaur) (spotted: A, striped: B)
Note: If making a spotted dinosaur, use yarn color A. If making a striped dinosaur, use yarn color B.
Make an adjustable ring.
Round 1 (right side):
Work 6 sc in the ring; do not join, work in continuous rounds (spiral)—6 sc.
Place a marker in the last sc worked to indicate end of round. Move the marker up as each round is completed.
Round 2:
Work 2 sc in each of the next 6 sts—12 sc.
Rounds 3 and 4:
Sc in each st around.
Stuff leg.
Fasten off, leaving a long tail for sewing leg to body. If needed, thread the beginning yarn tail through the stitches at the beginning of the piece and pull to close the opening. Weave in and trim the beginning tail only.
Spots (make 3 for spotted dinosaur) (with D)
With D, make an adjustable ring.
Round 1:
Work 12 sc in the ring; join with a slip stitch in the first sc.
Fasten off, leaving a long tail for sewing the spot to the body. If needed, thread the beginning yarn tail through the stitches at the beginning of the piece and pull to close the opening. Weave in and trim the beginning tail only.
Spikes (spotted: D, striped: C)
Note: If making a spotted dinosaur, use yarn color D. If making a striped dinosaur, use yarn color C.
Leaving a long beginning tail for sewing spikes to the body, ch 36.
Row 1:
Working in the back bumps only, slip stitch in 2nd ch from hook and in each ch across—35 slip sts.
Row 2:
Ch 1, turn, skip the first st, (3 hdc, slip st) in the next st, slip st in the next st,
[skip the next st, (slip st, 3 hdc, slip st) in the next st, slip st in the next st] 10 times,
skip the next st, slip st in the last st.
Fasten off, leaving a long tail for sewing spikes to the body.
Frequently Asked Questions
What crochet hook is used for this pattern?
The pattern recommends a Susan Bates® Crochet Hook: 2.25 mm [US B-1].
Is this project worked in rows or rounds?
This project is primarily worked in continuous rounds for the body, head, and limbs.
Does this crochet project require assembly?
Yes, the dinosaur parts, including the head, legs, spikes, and spots, must be sewn together during assembly.
Conclusion
Creating your own Stellan and Stanley dinosaurs is not only a fun and creative crochet project, but it also results in charming toys that can spark joy and imagination. With detailed instructions and vibrant yarn colors, you’ll be on your way to mastering this delightful amigurumi pattern. So gather your materials and let your creativity soar as you bring these adorable dinosaurs to life!