Sweet Crochet Sugar Skulls Pattern
Crochet enthusiasts will delight in creating these cheerful yet spooky crochet sugar skulls. Perfect for decorations, gifts, or festive displays, these amigurumi-like creations involve a mix of techniques, using bright colors and intricate details. Whether celebrating Día de los Muertos or just adding a whimsical element to your home décor, this pattern will guide you through crafting adorable sugar skulls.
Materials
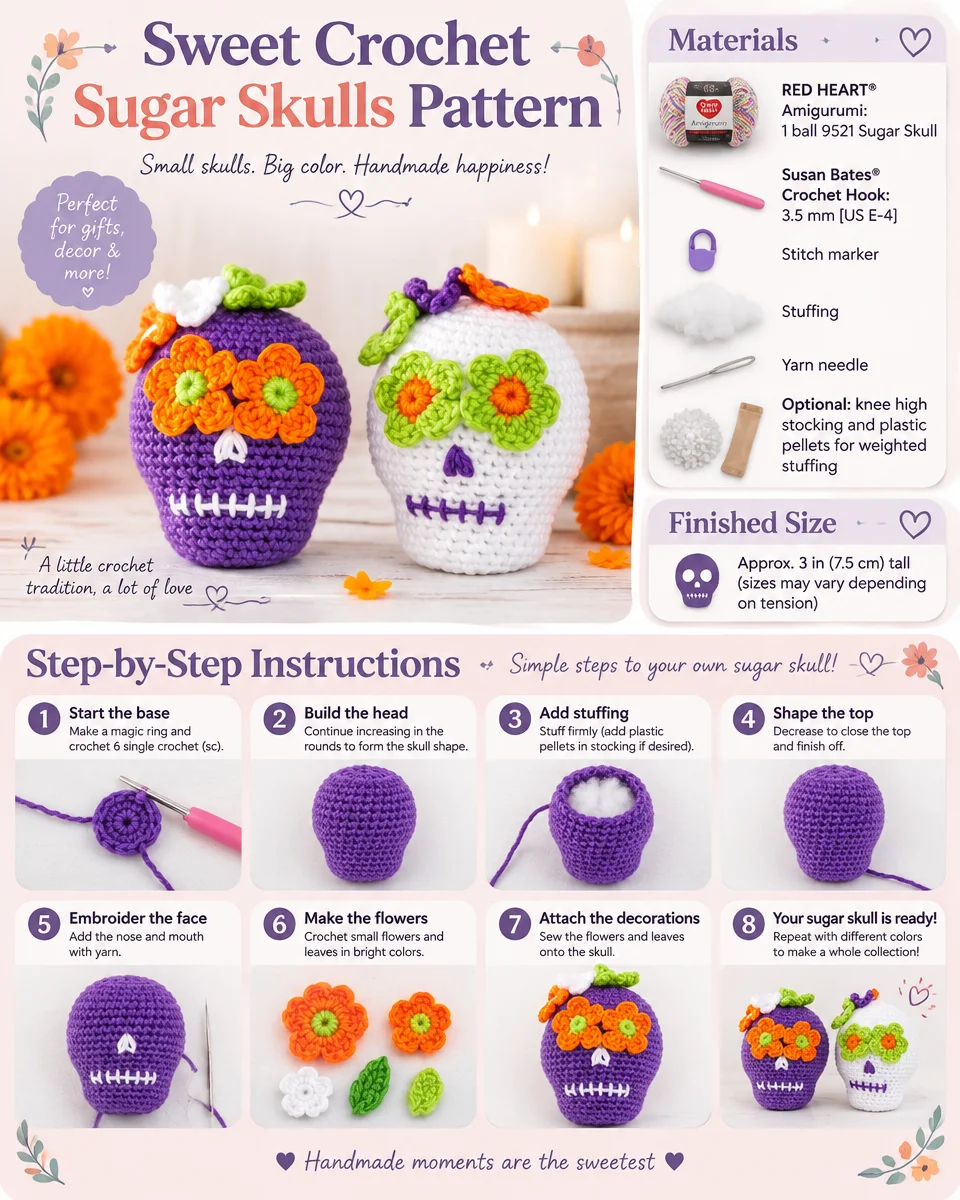
Yarn
- RED HEART® Amigurumi: 1 ball 9521 Sugar Skull
Crochet Hook
- Susan Bates® Crochet Hook: 3.5 mm [US E-4]
Notions
- Stitch marker
- Stuffing (fiberfill or optional knee-high stocking filled with plastic pellets for weighted stuffing)
- Yarn needle
Optional
- Plastic pellets for weighted stuffing
Crochet Abbreviations
- ch: chain
- sc: single crochet
- sl st: slip stitch
- dc: double crochet
- sc2tog: single crochet 2 stitches together
Special Stitch
sc2tog (single crochet 2 stitches together):
[Insert hook in next stitch, yarn over and pull up a loop] twice, yarn over and draw through all 3 loops on hook.
About the Crochet Project
This crochet pattern for sugar skulls incorporates amigurumi techniques, focusing on continuous rounds to form the head. With additional components like flower eyes and head flowers, this project encourages creativity in both color choices and designs.
The finished sugar skulls will be three-dimensional and can be customized to fit your holiday themes or personal design preferences. The skull shape is sturdy yet soft, making it great for children or as relatively weighty décor items.
Construction Overview
You’ll start from the top of the skull, working downwards using continuous rounds. This ensures the skull maintains its shape without the need to join each round. After completing the skull, you’ll create flowers for the eyes and three additional flowers for the top of the head. Finally, you’ll incorporate embroidered features to add character to your finished project.
Skull Instructions
Beginning
Start at the top of the skull with either A or B:
- Ch 3, slip st in the first ch to form a ring.
Round 1 (right side)
- Ch 1, work 6 sc in the ring.
- Do not join; work in continuous rounds (spiral) — 6 sc.
- Place a marker in the last sc worked to indicate the end of the round. Move the marker up as each round is completed.
Round-by-round Instructions
- Round 2: Work 2 sc in each st around — 12 sc.
- Round 3: [2 sc in next st, sc in next st] 6 times — 18 sc.
- Round 4: Sc in next st, [2 sc in next st, sc in next 2 sts] 5 times, 2 sc in next st, sc in last st — 24 sc.
- Round 5: [2 sc in next st, sc in next 3 sts] 6 times — 30 sc.
- Round 6: Sc in next 2 sts, [2 sc in next st, sc in next 4 sts] 5 times, 2 sc in next st, sc in next 2 sts — 36 sc.
- Round 7: [2 sc in next st, sc in next 5 sts] 6 times — 42 sc.
- Round 8: Sc in next 3 sts, [2 sc in next st, sc in next 6 sts] 5 times, 2 sc in next st, sc in next 3 sts — 48 sc.
- Rounds 9–17: Sc in each st around. Begin stuffing the piece with fiberfill, or place the optional knee high stocking filled with plastic pellets into place and continue stuffing with fiberfill as work progresses.
- Round 18: Sc in next 3 sts, [sc2tog, sc in next 6 sts] 5 times, sc2tog, sc in next 3 sts — 42 sc.
- Round 19: [Sc2tog, sc in next 5 sts] 6 times — 36 sc.
- Round 20: Sc in next 2 sts, [sc2tog, sc in next 4 sts] 5 times, sc2tog, sc in next 2 sts — 30 sc.
- Rounds 21–26: Sc in each st around.
- Round 27: [Sc2tog, sc in next 3 sts] 6 times — 24 sc. Stuff the piece.
- Round 28: Sc in next st, [sc2tog, sc in next 2 sts] 5 times, sc2tog, sc in next st — 18 sc.
- Round 29: [Sc2tog] 9 times — 9 sc.
Fasten Off / Closure
- Fasten off, leaving a long tail.
- Thread the tail through the stitches of the last round and pull to close the opening.
- Secure the tail and weave it into the inside of the skull.
Flower Eyes (make 2 for each skull)
Beginning
- Ch 3; slip st in the first ch to form a ring.
Round 1 (right side)
- Ch 1, work 10 sc in the ring.
- Join with a slip st in the first sc — 10 sc.
- Fasten off.
Round 2
- With right side facing, draw up a loop of the next color in the same sc as joining slip st,
- [ch 2, 2 dc in next st, ch 2, slip st in next st] 5 times — 5 petals.
- Fasten off, leaving a long tail for sewing the flower eye to the skull. Weave in the beginning tail.
Head Flowers (make 3 for each skull)
Beginning
- Ch 3; slip st in the first ch to form a ring.
Round 1 (right side)
- Ch 1, work 10 sc in the ring.
- Join with a slip st in the first sc — 10 sc.
Round 2
- Ch 2.
- 2 dc in the same st as joining slip st, ch 2, slip st in next st,
- [ch 2, 2 dc in next st, ch 2, slip st in next st] 4 times — 5 petals.
Fasten Off
- Fasten off, leaving a long tail for sewing the flower to the skull. Weave in the beginning tail.
Finishing
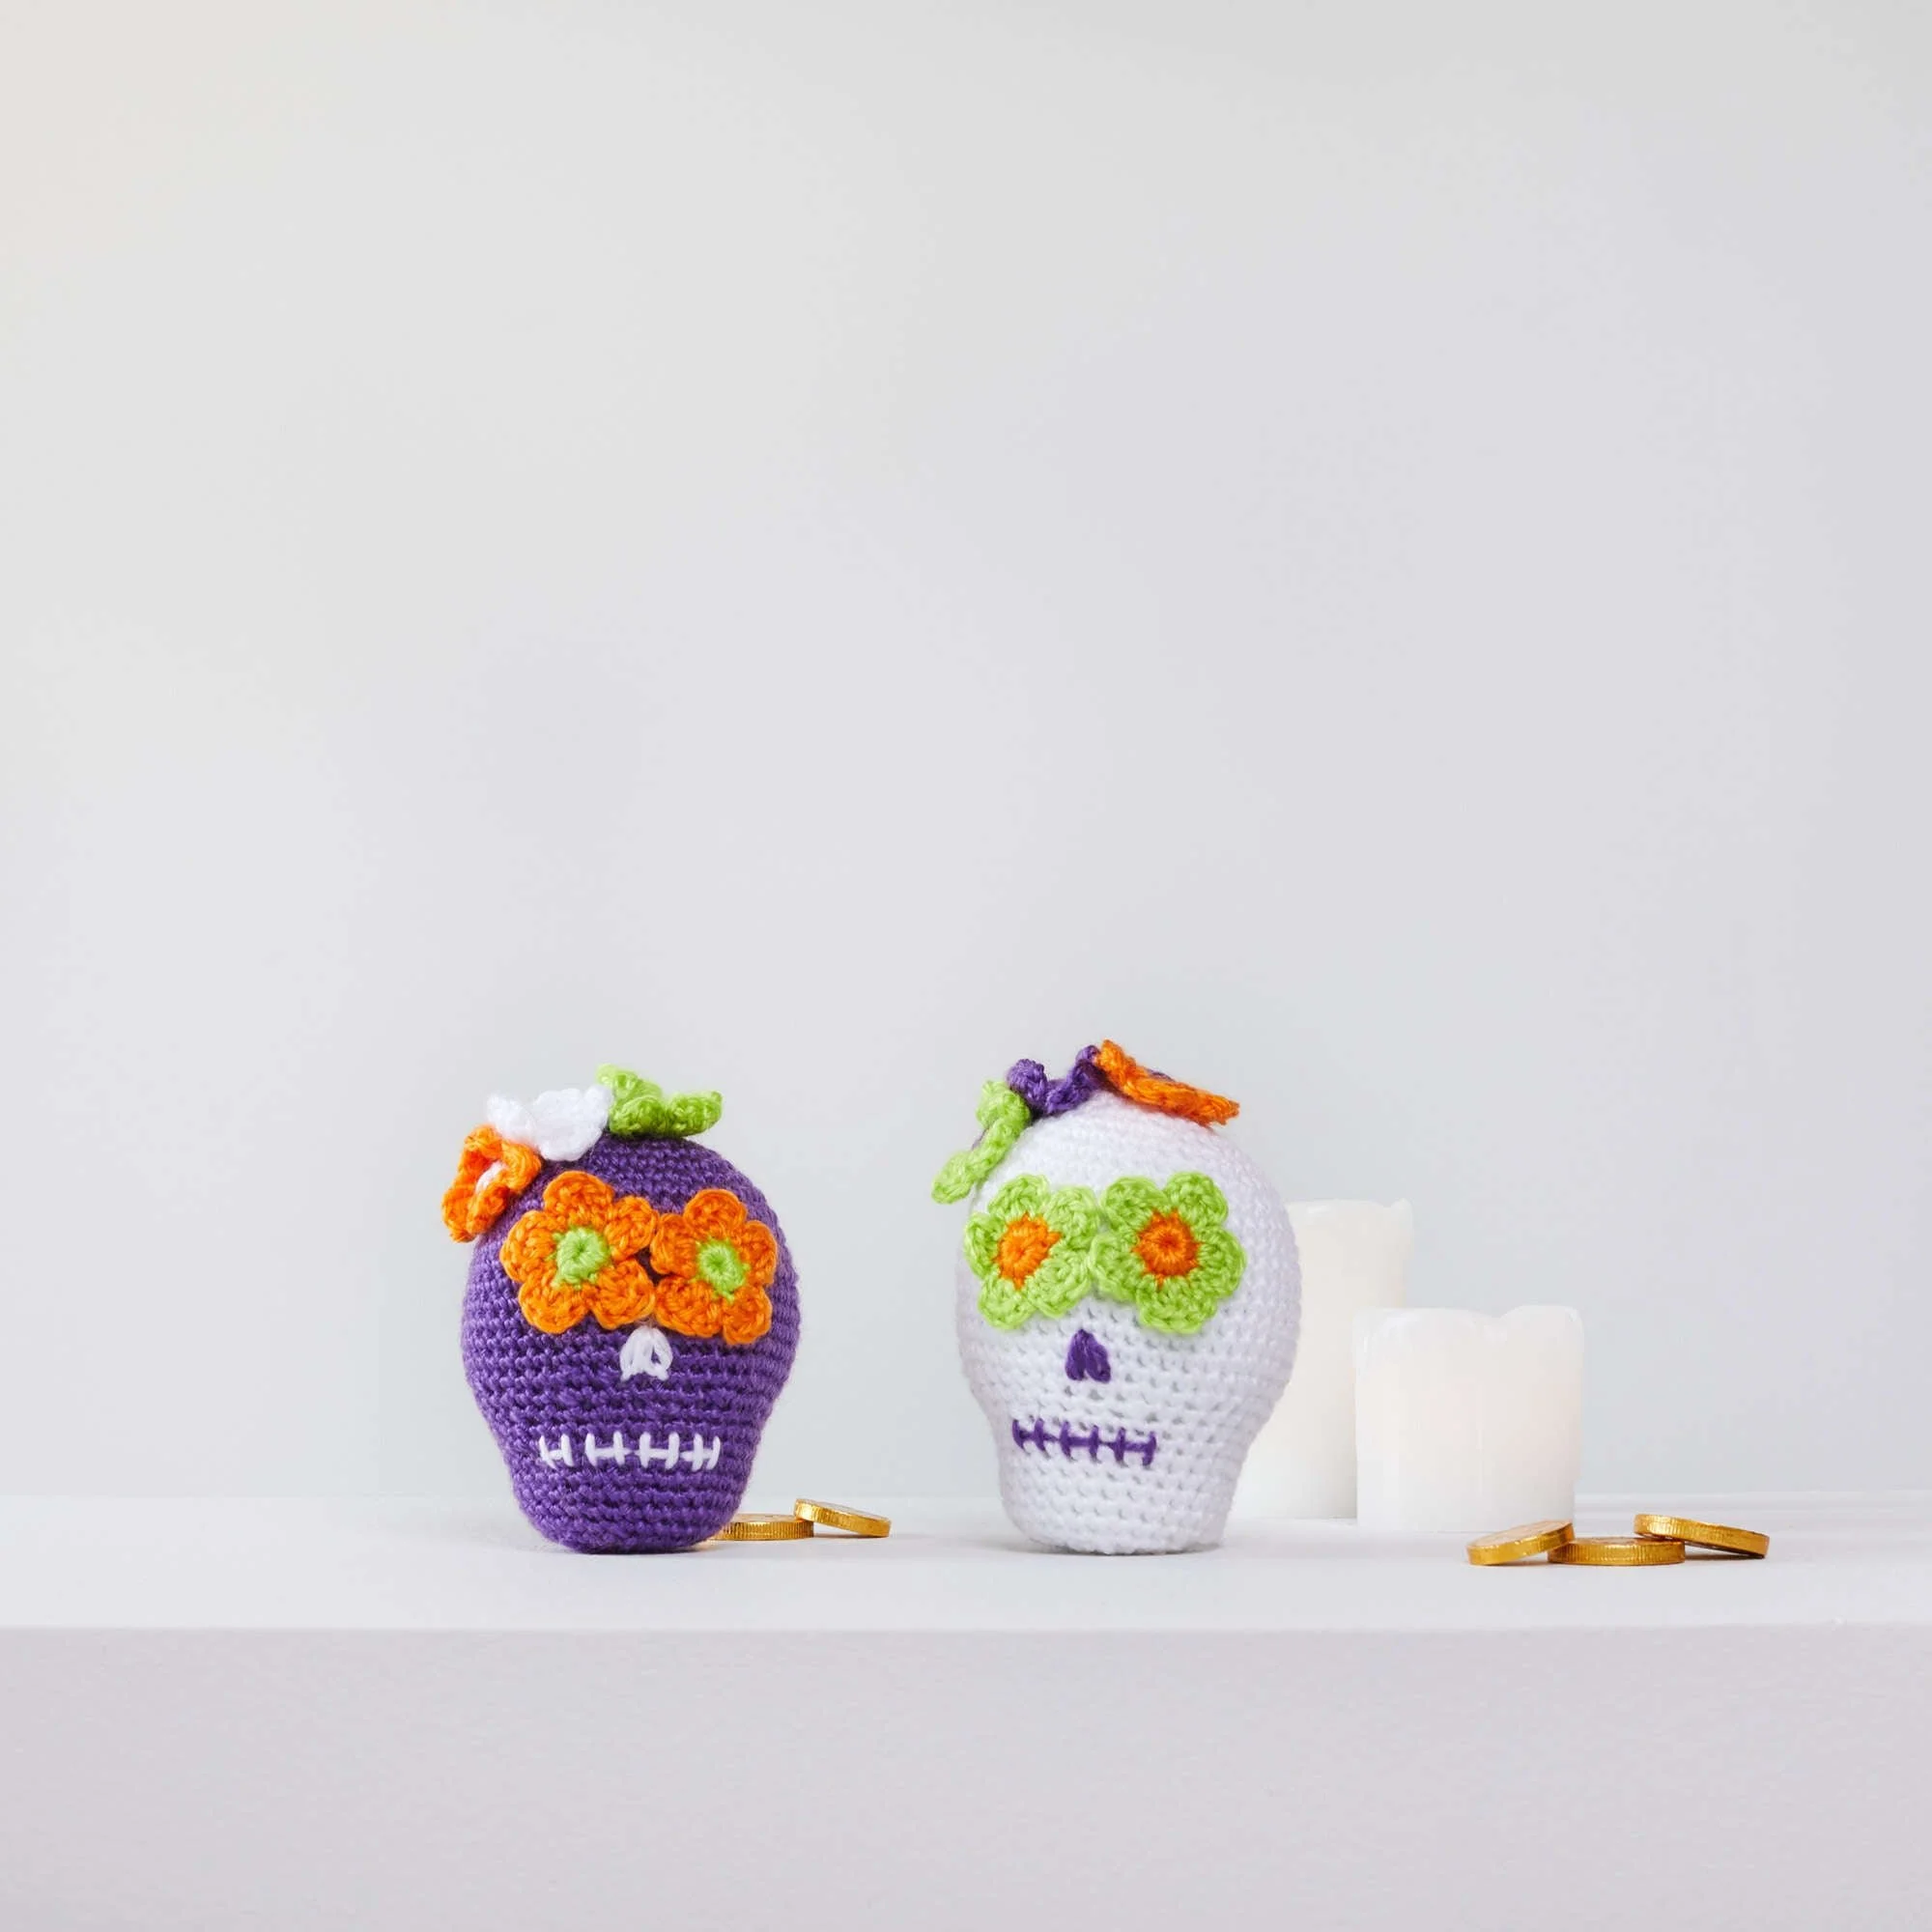
- Referring to the photograph as a guide to placement, use yarn tails or yarn scraps to sew the following pieces together:
- Sew flower eyes to the front of the skull.
- Sew head flowers to the top of the skull, positioned as desired.
- Use contrasting color yarn to embroider a star stitch through the center of the flowers and to the top of the head, leaving petals free.
Facial Features (embroidered; color depends on skull color)
- Mouth: Using a photograph as a guide, embroider a straight stitch mouth by creating a long horizontal line, then embroidering short vertical lines evenly spaced over the top of the horizontal line.
- Nose: Using a photograph as a guide, embroider two chain stitches for the nostrils. Position the narrow ends of the chain stitches together at the top and between the eyes for the top of the nose, and position the wide ends of the chain stitches about two rounds below and side by side.
Weave in and trim any remaining ends.
Frequently Asked Questions
What crochet hook is used for this pattern?
The pattern calls for a Susan Bates® Crochet Hook of size 3.5 mm [US E-4].
Is this project worked in rows or rounds?
This project is worked in continuous rounds.
Does this crochet project require assembly?
Yes, the project requires sewing of flower components onto the skull.
Conclusion
The Sweet Crochet Sugar Skulls Pattern is a delightful and engaging project that allows you to explore colors and techniques in crochet. With its playful and detailed design, these sugar skulls make for perfect collectibles or gifts. Enjoy crafting and sharing your creations with others!