Out of This World Crochet Spaceship Pattern
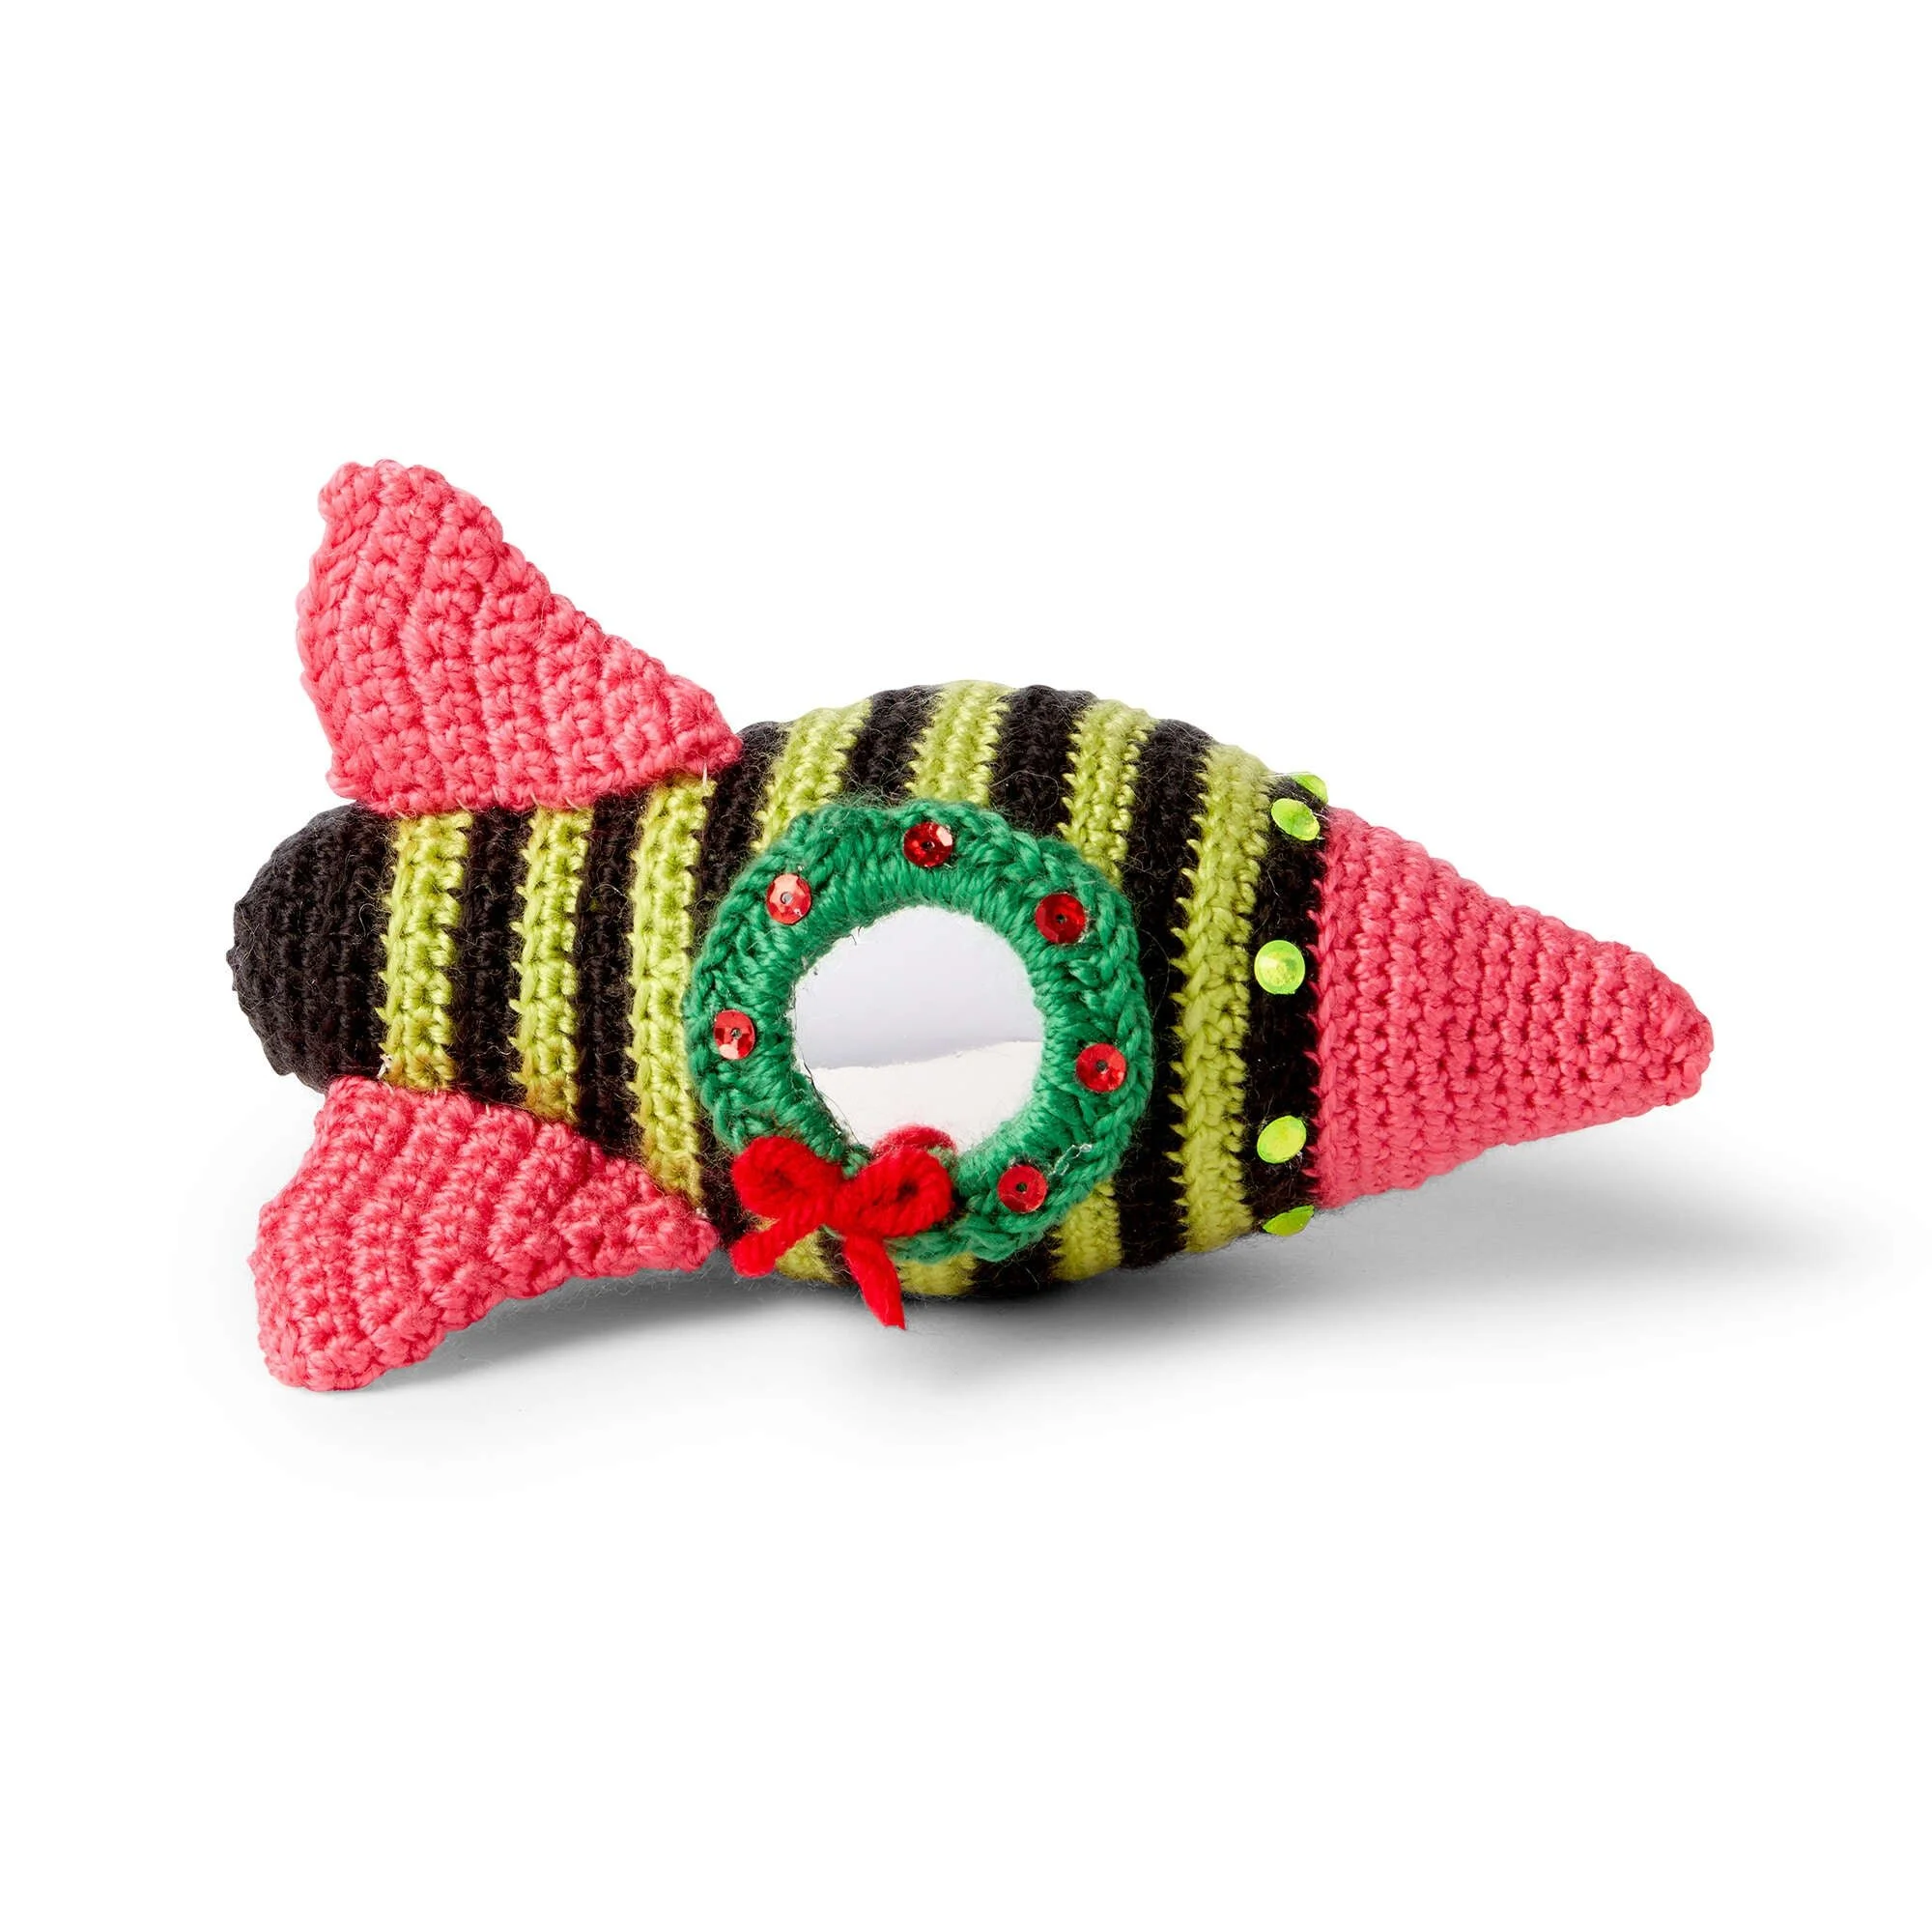
Crochet your very own delightful spaceship with this detailed crochet pattern. Perfect for adding a touch of whimsy to your home, this amigurumi-style piece combines colorful yarns and fun embellishments. Get ready to embark on a creative journey through the cosmos with your crochet hook!
About the Crochet Project
The Out of This World Crochet Spaceship Pattern is an adorable amigurumi project that features a cute spaceship design. Ideal for crochet enthusiasts, this project involves working in continuous rounds to form the body, fins, and a festive wreath. The finished spaceship is not only a fun toy for children but also makes a charming decoration for your home or a thoughtful gift for a friend.
Materials
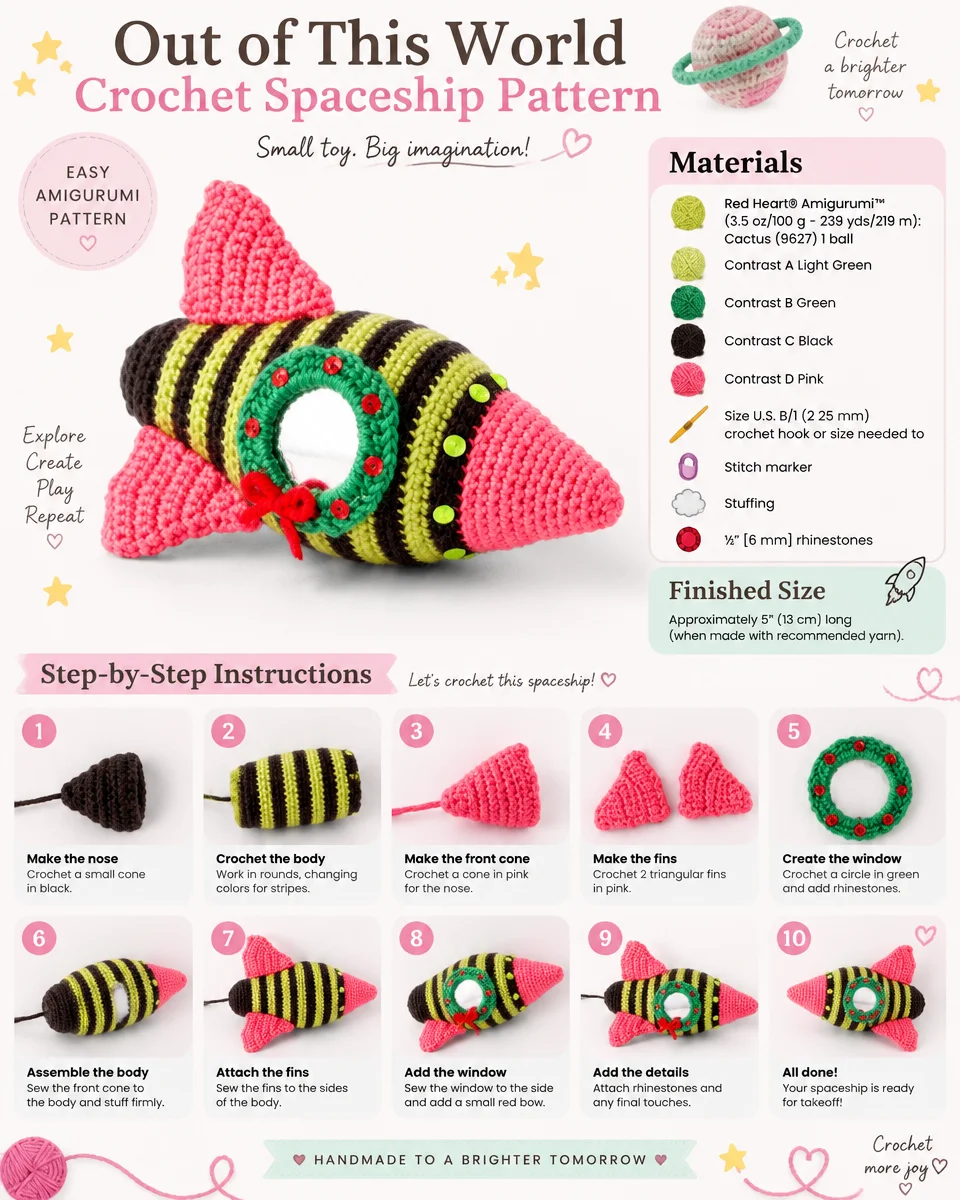
To get started on your crochet spaceship, gather the following materials:
-
Yarn:
- Red Heart® Amigurumi™ (3.5 oz/100 g; 239 yds/219 m): Cactus (9627) – 1 ball (for main body)
- Contrast A – Light Green
- Contrast B – Green
- Contrast C – Black
- Contrast D – Pink
-
Crochet Hook:
- Size U.S. B/1 (2.25 mm) crochet hook or size needed to obtain gauge
-
Notions:
- Stitch marker
- Stuffing
- ½” [6 mm] rhinestones, sequins, or beads
- Small red sequins (for wreath embellishment)
- Small length of red yarn (for wreath bow)
- Small piece of light cardboard (for use inside spaceship fins)
- Craft glue (for flying saucer lights)
- Glue sticks
- Optional: Foil cardstock (for porthole window)
Crochet Abbreviations
- ch – chain
- sc – single crochet
- sl st – slip stitch
- hdc – half double crochet
- PM – place marker
- sts – stitches
- rem – remaining
- Sc2tog – single crochet two together
Pattern Notes
- This pattern is worked in continuous rounds (spiral), meaning there will be no joining at the end of the round.
- Always keep track of your rounds using a stitch marker, moving it up with each completed round.
Spaceship Body
Instructions
Beg at nose cone, with D, ch 2.
1st rnd: 5 sc in 2nd ch from hook. Do not join. (5 sc)
2nd rnd: 2 sc in each of next 5 sts. (10 sc)
3rd rnd: 1 sc in each st around. (15 sc)
4th rnd: (1 sc in next st. 2 sc in next st) 5 times. (20 sc)
5th rnd: Sc in each st around. (24 sc)
6th rnd: (1 sc in each of next 4 sts. 2 sc in next st) 3 times. (30 sc)
7th rnd: Sc in each st around. (35 sc)
8th rnd: (1 sc in each of next 5 sts. 2 sc in next st) 3 times. (42 sc)
9th rnd: 1 sc in each st around. (49 sc)
10th rnd: (1 sc in each of next 2 sts. 2 sc in next st) 7 times. (56 sc)
11th rnd: (1 sc in each of next 3 sts. 2 sc in next st) 7 times. (63 sc)
12th – 14th rnds: Sc in each st around. Sl st in next st and fasten off D.
Striped Section
15th rnd: Join C with sl st in back loop of first st. ch 1. Working in back loops only, 1 sc in each st around. Join.
16th rnd: With C, ch 1. (1 sc in each of next 4 sts. 2 sc in next st) 7 times. Join. (42 sc)
17th rnd: With A, ch 1. 1 sc in each st around. Join.
18th rnd: With A, ch 1. (1 sc in each of next 5 sts. 2 sc in next st) 7 times. Join. (49 sc)
19th and 20th rnds: With C, 1 sc in each st around. Join with sl st in first sc and change to A at end of 20th rnd.
21st rnd: With A, ch 1. 1 sc in each st around. Join.
22nd rnd: With A, ch 1. (1 sc in each of next 6 sts. 2 sc in next st) 7 times. Join. (56 sc)
23rd rnd: With C, ch 1. 1 sc in each st around. Join.
24th rnd: With C, ch 1. (1 sc in each of next 7 sts. 2 sc in next st) 7 times. Join. (63 sc)
25th and 26th rnds: With A, 1 sc in each st around. Join with sl st in first sc and change to C at end of 26th rnd.
27th rnd: With C, ch 1. 1 sc in each st around. Join.
28th rnd: With C, ch 1. (1 sc in each of next 7 sts. Sc2tog) 7 times. Join. (56 sc)
29th rnd: With A, ch 1. 1 sc in each st around. Join.
30th rnd: With A, ch 1. (1 sc in each of next 6 sts. Sc2tog) 7 times. Join. (49 sc)
31st rnd: With C, ch 1. 1 sc in each st around. Join.
32nd rnd: With C, ch 1. (1 sc in each of next 5 sts. Sc2tog) 7 times. Join. (42 sc)
33rd rnd: With A, ch 1. 1 sc in each st around. Join.
34th rnd: With A, ch 1. (1 sc in each of next 4 sts. Sc2tog) 7 times. Join. (35 sc)
35th rnd: With C, ch 1. 1 sc in each st around. Join.
Stuff the spaceship body firmly and continue stuffing as work progresses.
36th rnd: With C, ch 1. (1 sc in each of next 3 sts. Sc2tog) 7 times. Join. (28 sc)
37th and 38th rnds: With A, 1 sc in each st around. Join with sl st in first sc and change to C at end of 38th rnd.
39th and 40th rnds: With C, 1 sc in each st around. Join with sl st in first sc and change to A at end of 40th rnd.
41st-44th rnds: Rep 37th-40th rnds. Do not change to A at the end of 44th rnd. Fasten off A. Work all remaining rnds with C only.
45th rnd: Ch 1. Working in back loops only, 1 sc in each st around. Join.
46th rnd: Ch 1. (1 sc in each of next 5 sts. Sc2tog) 4 times. Join. (24 sc)
47th rnd: Ch 1. (1 sc in each of next 2 sts. Sc2tog) 6 times. Join. (18 sc)
48th rnd: Ch 1. (1 sc in each st. Sc2tog) 6 times. Join. (12 sc)
Finish stuffing spaceship body. Fasten off C, leaving a long end. Thread end through remaining sts of last rnd and pull to close opening. Pull tightly. Fasten securely.
Fins (Make 3)
With D, ch 2.
1st row: 3 sc in 2nd ch from hook. Turn. (3 sc)
2nd row: Ch 1. 2 sc in first st. 1 sc in next st. 2 sc in next st. Turn. (5 sc)
3rd row: Ch 1. 1 sc in first st. 2 sc in next st. 1 sc in next st. PM in this st (center st). 2 sc in next st. 1 sc in last st. Turn. (7 sc)
4th row: Ch 1. 1 sc in each of first 2 sts. 2 sc in next st. 1 sc in marked st and move marker to st just made. 2 sc in next st. 1 sc in each of last 2 sts. Turn. (9 sc)
5th row: Ch 1. 1 sc in each st to 1 st before marked center st. 2 sc in next st. 1 sc in center st and move marker to st just made. 2 sc in next st. 1 sc in each st to end of row. Turn. (11 sc)
6th-9th rows: Rep 5th row 4 times more. Turn. (19 sc)
Remove center marker.
10th row: Ch 1. 1 sc in each of first 4 sts. 2 sc in next st. 1 sc in each of next 9 sts. 2 sc in next st. 1 sc in last 4 sts. Turn. (21 sc)
11th row: Ch 1. 1 sc in each of first 5 sts. 2 sc in next st. 1 sc in each of next 9 sts. 2 sc in next st. 1 sc in each of last 5 sts. 1 sc in each of first 4 sts. 2 sc in next st. 1 sc in each of next 9 sts. 2 sc in next st. 1 sc in each of last 4 sts. Turn. (23 sc)
12th row: Ch 1. 1 sc in each of first 6 sts. 2 sc in next st. 1 sc in each of next 9 sts. 2 sc in next st. 1 sc in last 6 sts. (25 sc)
Fasten off, leaving a long end. Fold piece in half bringing side edges together. Whipstitch side edges together.
Wreath
With B, ch 16. Join with sl st in first ch to form a ring.
1st rnd: Ch 1. 40 hdc in ring. Join with sl st in first hdc. Fasten off.
Finishing
Make Cardboard Fin Inserts
- Place one fin piece flat on a piece of light cardboard and trace around it.
- Break out the triangle, rounding the corners to prevent the shape from poking through. Repeat to make a total of three inserts.
Attach Fins
- Hold one RS of the fin and one WSe of the fin together with RS facing out. Sew fins together, inserting one cardboard piece before seam is complete. Finish sewing pieces together then secure. Repeat for all three fins.
Optional Porthole Window
- Place wreath on foil cardstock. Trace a circle that is smaller in diameter than the outside of the wreath but a little larger than the diameter of the inside circle.
- Break out circle and glue to back of wreath to form the reflective porthole glass.
Note: A picture of Santa or another creature could be substituted for the foil paper to give the appearance of someone looking out of the spaceship porthole.
Add Wreath Embellishments
- Glue red sequins approximately ¼” [6 mm] apart or as desired around the wreath.
- With a scrap of red yarn, tie a small bow and glue it to the bottom of the wreath over the seam line if desired.
Assemble Spaceship
- Referring to the picture as a guide to placement, sew the following pieces together.
- Pin the fins vertically with long cast-on edges against the lower portion of the spaceship body, making sure to space them evenly. Fins should be placed with the larger part of the triangle towards the bottom of the spaceship. Sew fins securely to the bottom portion of the spaceship.
- Sew wreath to the spaceship.
- With craft glue, glue rhinestones, sequins, or beads around the first C-colored stripe to represent running lights approximately ½” [1.5 cm] apart or as desired.
Optional: If desired, attach thread or fishing line to the spaceship for a hanging loop.
Frequently Asked Questions
What crochet hook is used for this pattern?
The pattern calls for a Size U.S. B/1 (2.25 mm) crochet hook or the size needed to obtain gauge.
Is this project worked in rows or rounds?
This project is worked in continuous rounds (spiral).
Does this crochet project require assembly?
Yes, the fins and wreath need to be sewn onto the spaceship body once all pieces are complete.
Conclusion
The Out of This World Crochet Spaceship Pattern is a fun and vibrant way to explore amigurumi crochet. You’ll find joy in creating each piece, and once finished, your spaceship will surely be a delightful addition to any space-themed collection or decor. Happy crocheting, and may your creativity take flight!