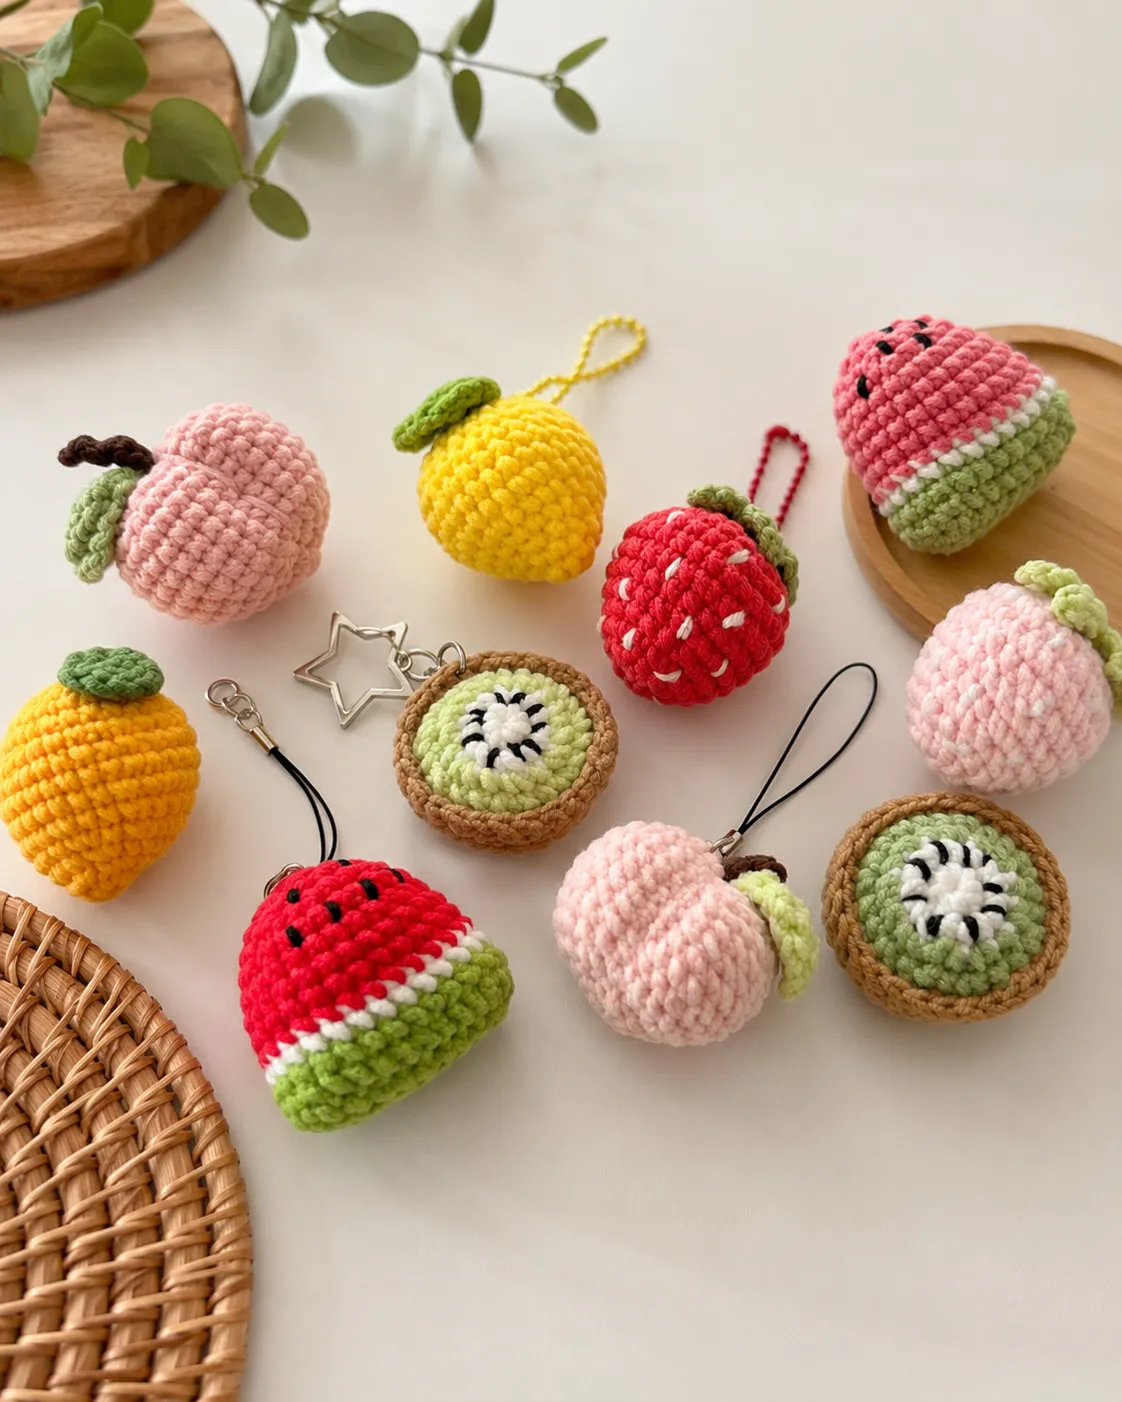
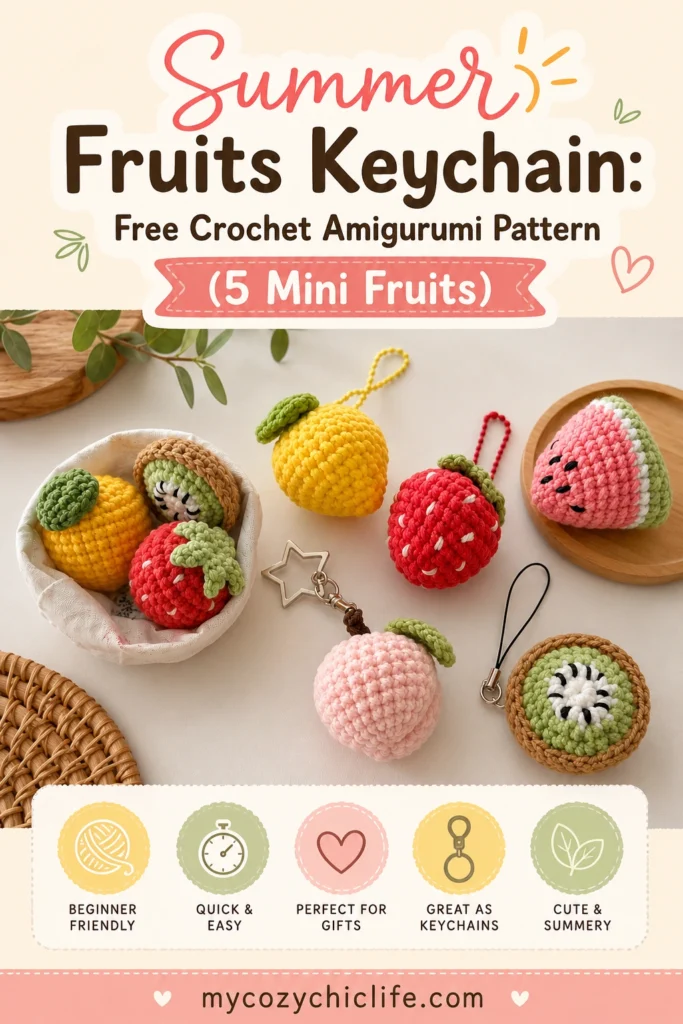
Nothing says summer quite like a basket of fresh, juicy fruit — and this free crochet pattern lets you carry that cheerful, sunny feeling everywhere you go. You’ll learn to make five adorable mini fruits: a mango, a strawberry, a watermelon, a kiwi, and a peach. Each one works up small, quick, and perfectly keychain-sized.
These little fruits make wonderful gifts, bag charms, or a bright pop of color clipped to your keys. And because they’re so small and use only basic stitches, they’re an ideal beginner amigurumi project — and a great way to use up small scraps of yarn.
Grab your hook and your favorite summery colors, and let’s get started.
What You’ll Be Making
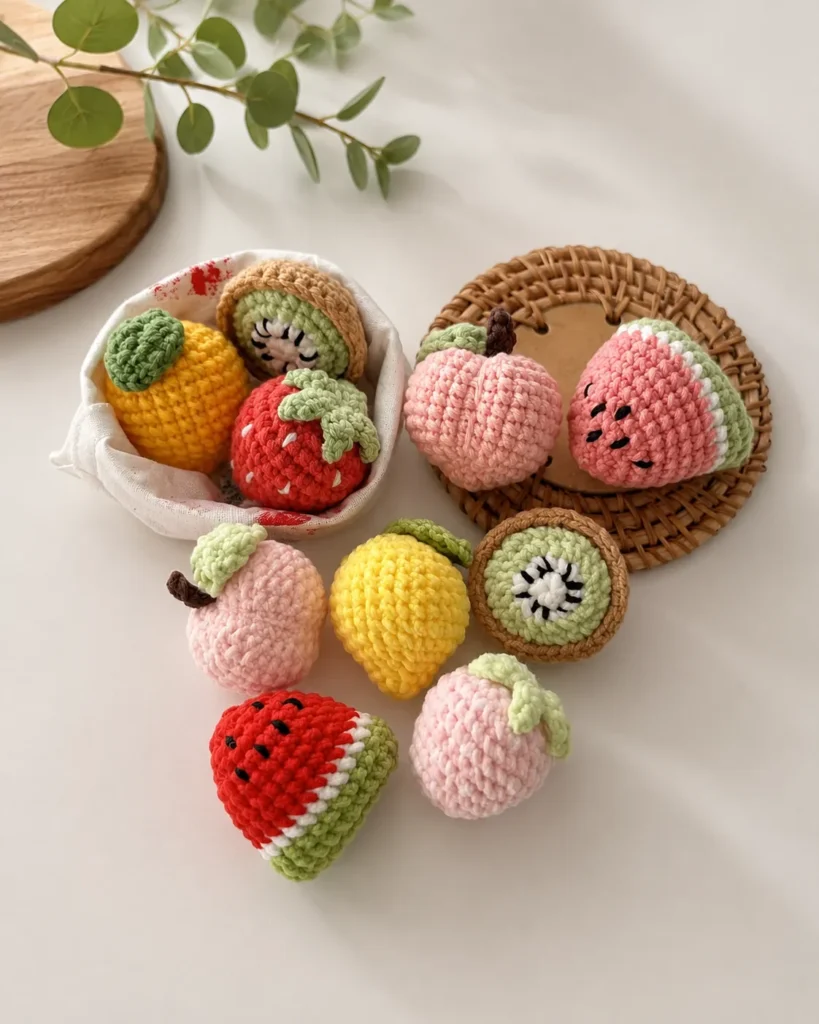
This pattern includes five separate mini fruit designs. Make one, make a few, or make the whole fruit basket:
- Mango — a smooth, rounded fruit with a tiny leaf
- Strawberry — complete with a crocheted leafy top and embroidered seeds
- Watermelon — striped in green, white, and red with little black seeds
- Kiwi — a two-part fruit with a fuzzy brown outside and a green-and-white center
- Peach — soft and round with a sweet little dip and a stalk
All five are made with the same simple stitches, so once you’ve made one, the rest will feel familiar.
Materials Needed
- Yarn: Chenille, cotton, or acrylic yarn in sport weight (5 ply). Suggested colors per fruit:
- Mango: yellow body, green leaf
- Strawberry: red or pink body, green leaf, white for seeds
- Watermelon: green, white, and red, plus black for seeds
- Kiwi: brown outer, green and white inner
- Peach: pink body, dark brown stalk, green leaf
- Crochet hook: 3 mm
- Polyester stuffing
- Stitch markers
- Darning needle
- Scissors
- Keychain rings or clasps (one per fruit)
Tip: Cotton yarn gives crisp stitch definition and holds the fruit shapes neatly. Chenille makes them softer and fuzzier — lovely for the kiwi’s “skin” especially. Use what suits the look you want.
Crochet Abbreviations
This pattern uses US crochet terminology.
| Abbreviation | Meaning |
|---|---|
| R | round / row |
| ch | chain |
| mr | magic ring |
| st | stitch |
| sc | single crochet |
| inc | increase |
| dec | decrease |
| hdc | half double crochet |
| dc | double crochet |
| slst | slip stitch |
| FLO | front loop only |
| BLO | back loop only |
| sk | skip |
| * | repeat |
| [ ] | total stitch count for that round/row |
Skill Level & Time
Skill level: Beginner. Every fruit uses only the magic ring, single crochet, increases, and decreases, with a few simple leaves.
Time to make: Roughly 30–45 minutes per fruit.
Mango
Start with a magic ring using yellow yarn.
- R1: 6 sc in the magic ring [6]
- R2: (1 sc, 1 inc) repeat 3 times [9]
- R3: 2 sc, 5 inc, 2 sc [14]
- R4: 2 sc, (1 sc, 1 inc) repeat 5 times, 2 sc [19]
- R5: 2 sc, (2 sc, 1 inc) repeat 5 times, 2 sc [24]
- R6: (5 sc, 1 inc) repeat 4 times [28]
- R7–R10: 28 sc — repeat for 4 rounds [28]
- R11: (5 sc, 1 dec) repeat 4 times [24]
- R12: (2 sc, 1 dec) repeat 6 times [18]
Start stuffing now, and continue adding stuffing after each round below.
- R13: (1 sc, 1 dec) repeat 6 times [12]
- R14: 6 dec [6]
Cut the yarn and close the body using the yarn tail.
Tiny Leaf (for the Mango)
Start with a slip knot in green yarn, then chain 6.
Starting from the 2nd ch from the hook: 1 sc, 1 hdc, 1 dc, 1 hdc. In the last ch, work (1 sc, ch 2, 1 sc). Then continue along the lower side of the chain: 1 hdc, 1 dc, 1 hdc, 1 sc, 1 slst. Ch 1 and cut the yarn.
Sew the tiny leaf onto the top of the mango.
Strawberry
Start with a magic ring using red or pink yarn.
- R1: 6 sc in the magic ring [6]
- R2: 6 inc [12]
- R3: (1 sc, 1 inc) repeat 6 times [18]
- R4: 18 sc [18]
- R5: (2 sc, 1 inc) repeat 6 times [24]
- R6: 24 sc [24]
- R7: (3 sc, 1 inc) repeat 6 times [30]
- R8: 30 sc [30]
- R9: (3 sc, 1 dec) repeat 6 times [24]
- R10: (2 sc, 1 dec) repeat 6 times [18]
Start stuffing now, and continue stuffing after each round below.
- R11: (1 sc, 1 dec) repeat 6 times [12]
- R12: 6 dec [6]
Cut the yarn and close the body.
Leaf (for the Strawberry)
In a magic ring, work (ch 4, 1 slst, 2 sc, 1 slst into the magic ring) repeat 5 times.
Cut the yarn and sew the leafy top onto the strawberry. Finally, using white yarn, embroider tiny seeds dotted around the body.
Watermelon
Start with a slip knot using green yarn, then chain 11.
- R1: Starting from the 2nd ch from the hook, 10 sc [10]
- R2–R3: Ch 1 & turn, 10 sc [10]
- R4: Crochet around all four sides of the piece — 1st side: 3 sc, 2nd side: 10 sc, 3rd side: 3 sc, 4th side: 10 sc [26]
- R5: 26 sc [26] — change to white yarn at the end of this round
- R6: In white, 26 sc [26] — change to red yarn at the end of this round and continue in red to the end
- R7–R10: 26 sc — repeat for 4 rounds [26]
- R11: 1 dec, 12 sc, 1 dec, 10 sc [24]
- R12: (4 sc, 1 dec) repeat 4 times [20]
Start stuffing now, and continue stuffing after each round below.
- R13: (3 sc, 1 dec) repeat 4 times [16]
- R14: 8 dec [8]
Cut the yarn and close the body. Using black yarn, embroider a scatter of tiny seeds across the red part.
Kiwi
The kiwi is made in two pieces — a pale green-and-white inner face and a brown outer shell — that are crocheted together at the end.
Inner Part
Start with a magic ring using white yarn. Join with a slst at the end of each round. The slst and ch 1 are not counted in your stitch totals.
- R1: 7 sc in the magic ring, 1 slst [7]
- R2: Ch 1, 7 inc, 1 slst [14]
- R3: Change to green yarn. Ch 1, (1 sc, 1 inc) repeat 7 times, 1 slst [21]
- R4: In green, ch 1, (1 sc, 1 inc, 1 sc) repeat 7 times, 1 slst [28]
Cut the yarn.
Outer Part
Start with a magic ring using brown yarn.
- R1: 7 sc in the magic ring [7]
- R2: 7 inc [14]
- R3: (1 sc, 1 inc) repeat 7 times [21]
- R4: (1 sc, 1 inc, 1 sc) repeat 7 times [28]
- R5–R6: 28 sc — repeat for 2 rounds [28]
Do not cut the yarn. Hold the inner part against the outer part and crochet the two pieces together all the way around with sc.
Tip: The kiwi can be stuffed lightly before fully closing for a slightly plumper look, or left flatter for a true kiwi-slice shape — your choice.
Peach
Start with a magic ring using pink yarn.
- R1: 6 sc in the magic ring [6]
- R2: (1 sc, 2 inc) repeat 3 times [15]
- R3: 9 inc, then sc to end [18]
- R4: (1 sc, 1 inc) repeat 9 times [27]
- R5: 27 sc [27]
- R6: (8 sc, 1 inc) repeat 3 times [30]
- R7–R10: 30 sc — repeat for 4 rounds [30]
- R11: (3 sc, 1 dec) repeat 6 times [24]
Start stuffing now, and continue stuffing after each round below.
- R12: (2 sc, 1 dec) repeat 6 times [18]
- R13: (1 sc, 1 dec) repeat 6 times [12]
- R14: 6 dec [6]
Cut the yarn, leaving a long tail, and close the body. Then use the remaining tail to pull a stitch through the middle, shaping the classic dimpled “peachy dip.”
Note: The original R2 increase brings the count up to a wider base — work the increases evenly and check your count before moving on, as the peach widens quickly in the first few rounds.
Stalk & Leaf (for the Peach)
Start with a slip knot using dark brown yarn, then chain 4. Starting from the 2nd ch from the hook: 1 slst, 2 sc.
Make a tiny leaf using the same leaf pattern as the Mango.
Sew the stalk and the tiny leaf onto the top of the peach.
Turning Your Fruit into Keychains
Once a fruit is finished and closed:
- Thread a short length of matching yarn through the top of the fruit (near the leaf or stalk).
- Loop it through a keychain ring or clasp.
- Tie it off securely and weave the ends back inside the fruit so nothing shows.
For extra durability, pass the yarn through the keyring twice before knotting — these little charms get plenty of handling.
Care & Finishing Tips
- Weave in all ends securely. Keychains take a lot of wear, so anchor your ends well.
- Stuff firmly but not over-tightly so the fruits keep their plump, rounded shapes without stitches splaying open.
- For embroidered seeds, keep your tension gentle so the surface doesn’t pucker.
- Spot clean only with a damp cloth — these are too small to machine wash safely.
- If gifting to a small child, make sure the keyring attachment is extra secure, or skip the keyring and give it as a tiny plush instead.
Make It Your Own
Five fruits is just the beginning — here are some easy ways to expand your fruit basket:
- Try lemons, oranges, cherries, or grapes using the same basic ball-shaping technique.
- Crochet them in pastel or unexpected colors for a playful, dreamy set.
- Make a mini version with thinner yarn and a smaller hook for even tinier charms.
- String several together for a fruit garland, or attach them to bags, zippers, or backpacks instead of keyrings.
You Did It!
Take a moment to admire your handful of mini fruits. From a few magic rings and some cheerful colors, you’ve made a whole little summer harvest. They don’t need to be flawless — handmade charms never are, and the tiny quirks are exactly what make them sweet and personal. Be proud of every stitch.
If you enjoyed this make, here are a few more small, beginner-friendly projects to try next:
- Crochet Green Alien Cat Keychain — another quick, cute keychain make
- Amigurumi Seahorse Keychain — a charming summery keychain to pair with your fruits
- No-Sew Mini Octopus Free Crochet Pattern — a tiny, satisfying project for using up scrap yarn
- Free Crochet Snoopy Keychain — a fun little amigurumi keychain
Happy crocheting! ❤️
Frequently Asked Questions
Are these keychains good for beginners? Yes — they’re a perfect beginner amigurumi project. Each fruit uses only the magic ring, single crochet, increases, and decreases. They’re small, quick, and very forgiving if you make a small mistake.
How much yarn do I need? Very little. Each fruit uses only small amounts, which makes this pattern ideal for using up leftover scraps from bigger projects.
Can I sell the keychains I make from this pattern? You’re welcome to sell finished keychains you make from this pattern. Please don’t resell or mass-distribute the pattern itself, and a credit link back to this blog is always appreciated if you share your work online.
What yarn works best — cotton or chenille? Cotton gives crisp, defined stitches and holds the fruit shapes neatly. Chenille makes softer, fuzzier fruits, which looks especially good for the kiwi’s outer skin. Both work well, so choose the texture you prefer.
My fruit looks lumpy. What went wrong? Lumpiness usually means uneven stuffing. Add stuffing in small pieces a little at a time rather than in one big clump, and stuff gradually as you close each round so the shape stays smooth and even.
How do I keep the watermelon stripes neat? Change colors at the very end of the round as the pattern indicates, and carry the new color cleanly. Working the first stitch of the new color snugly helps avoid a visible gap where the colors meet.