Peachy Plum Pillow Crochet Amigurumi Pattern
Crocheting can be a delightful and rewarding experience, and there are so many fun patterns to try out. The Peachy Plum Pillow is not just an exquisite home decor item but also an adorable amigurumi you can enjoy creating. This charming crochet pattern will guide you through every step, with detailed instructions to ensure your creation turns out perfect.
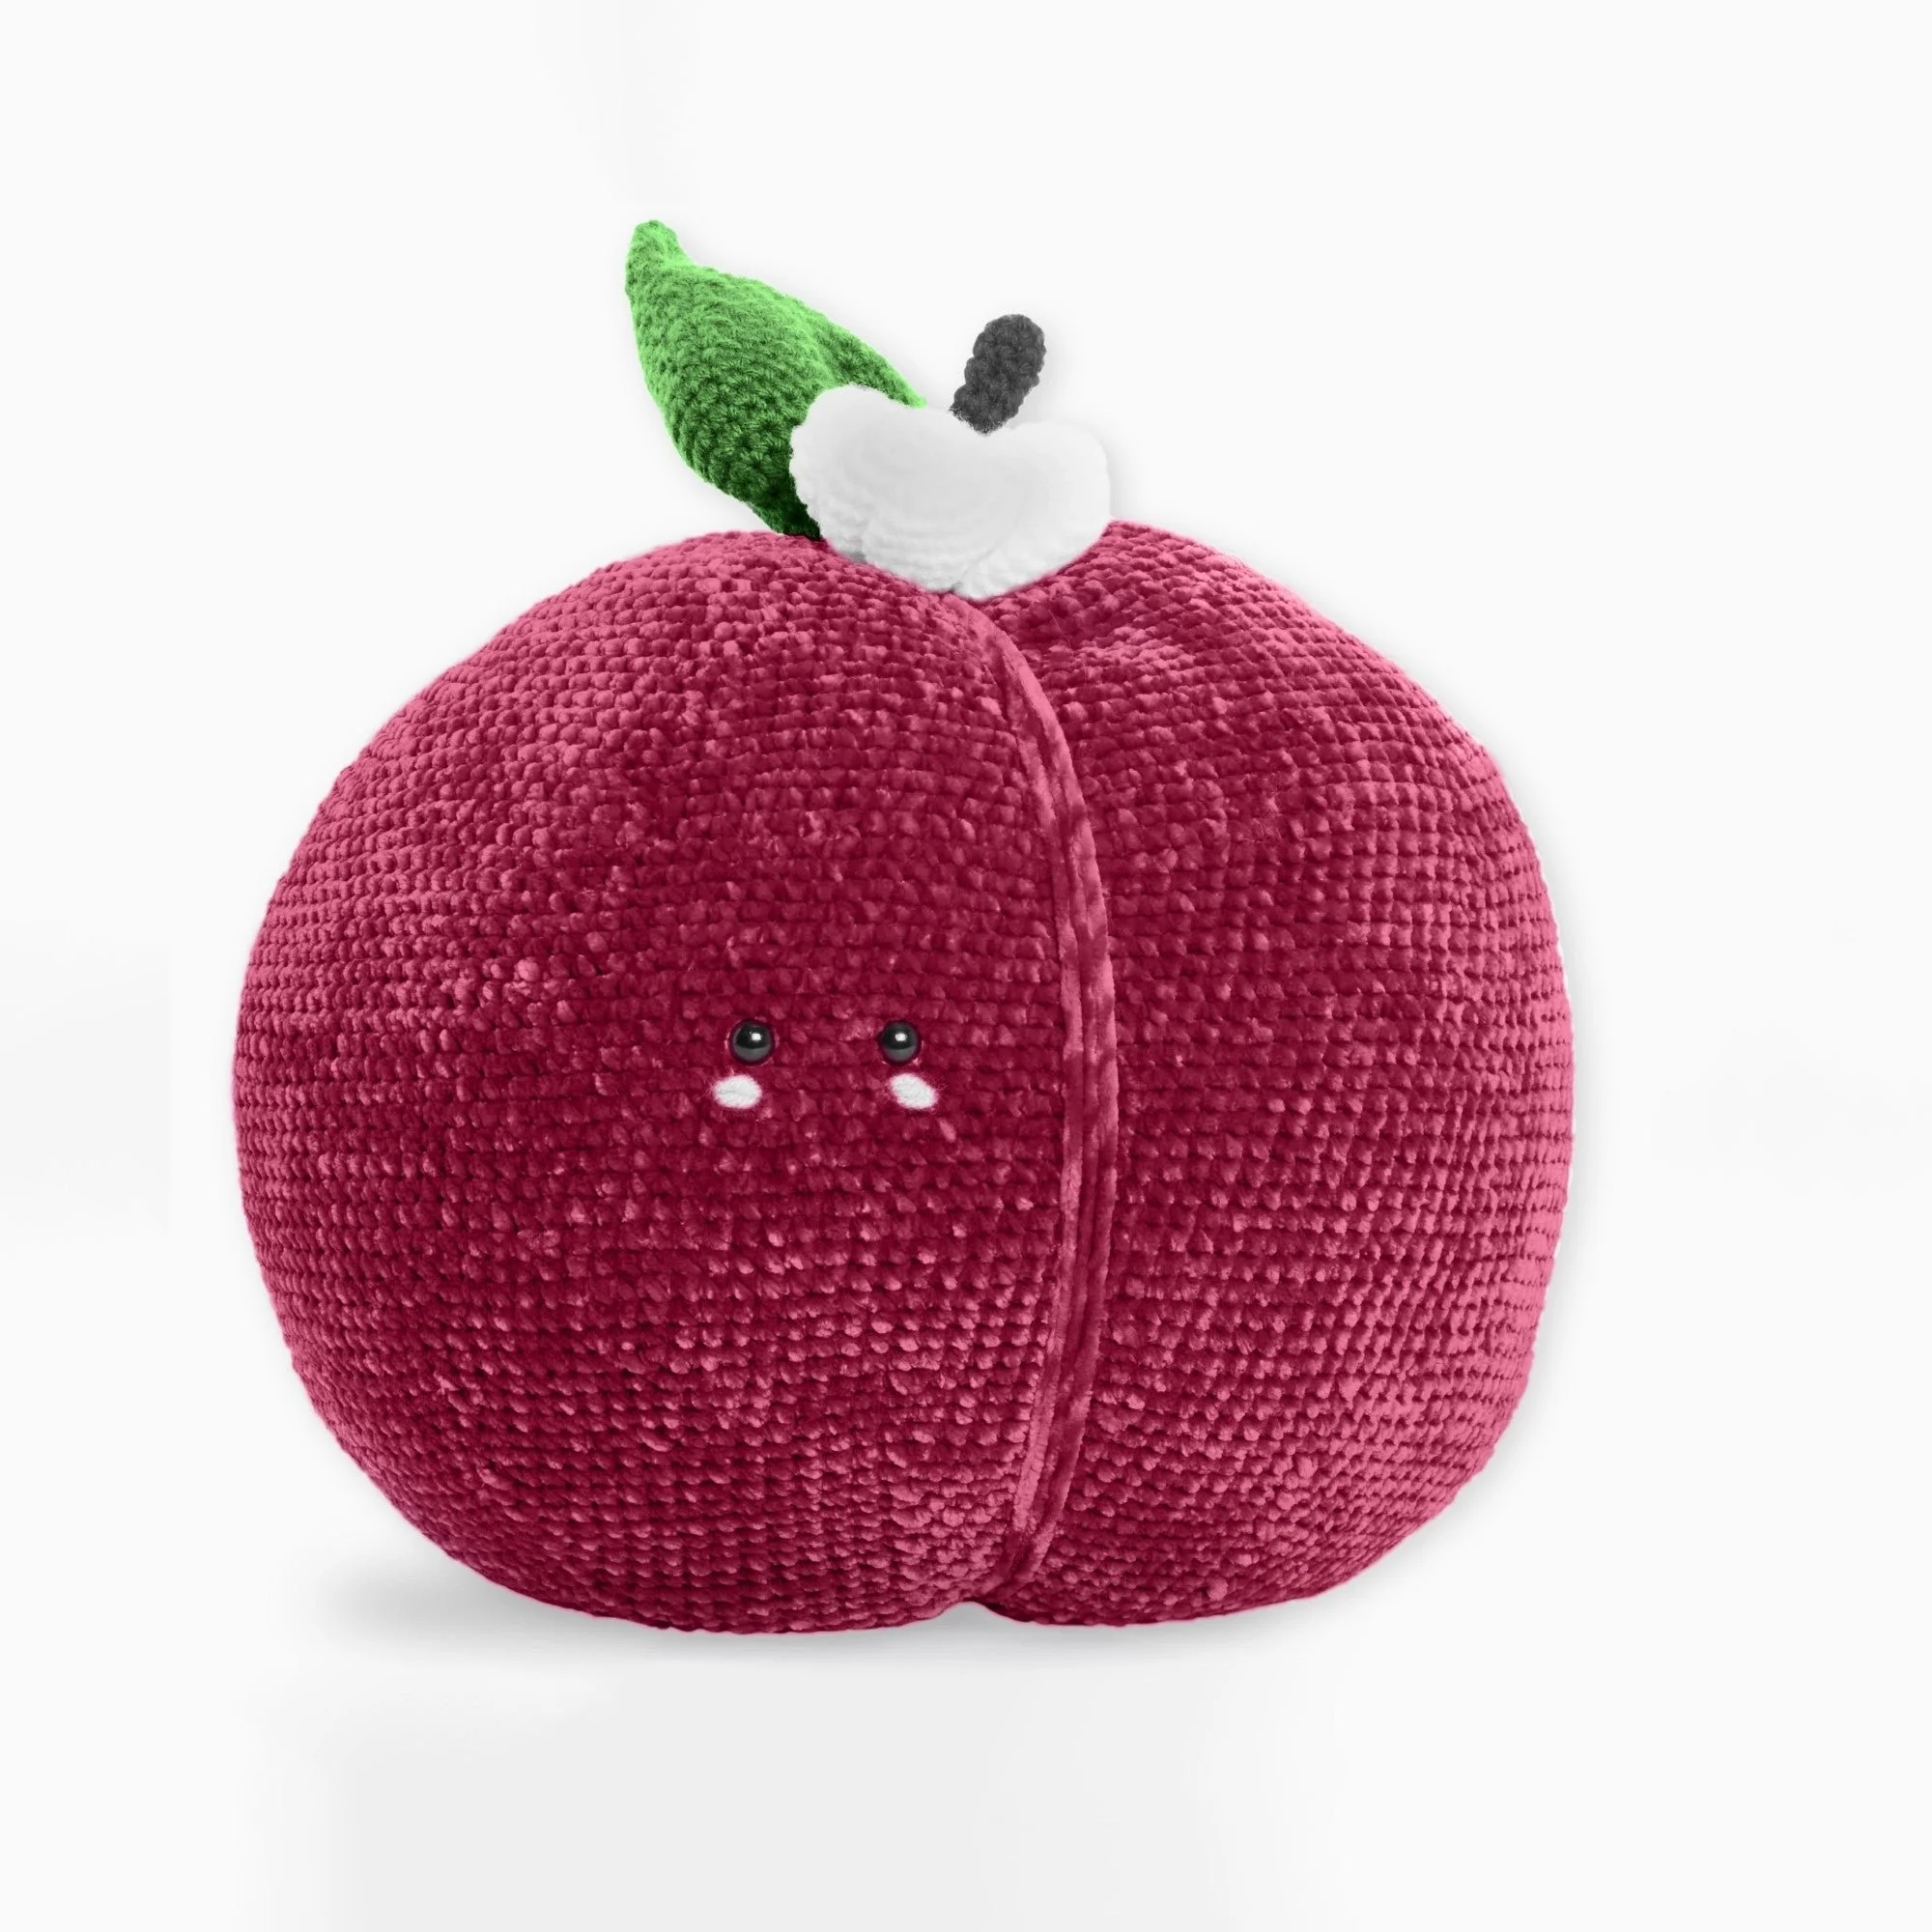
This plush pillow project features a delightful peach shape, complete with leaves and a flower, adding a touch of whimsy to any space. It’s an ideal piece for those who love playful designs and adds a soft, cozy touch to your home. Whether you decide to make it as a gift or to keep for yourself, this amigurumi peach is sure to be cherished!
About This Amigurumi Design
The Peachy Plum Pillow incorporates a blend of vibrant colors and textures using Bernat yarns. The design includes a body, leaves, and flower—all made from various yarn colors for an eye-catching aesthetic. The use of safety eyes provides a playful expression, reinforcing the amigurumi’s cute and cheerful charm.
This project will not only test your crochet skills but also provide an opportunity to use creative color combinations. We’ll make use of Bernat® Velvet™ yarn for the main peach body, with contrasting colors to define the leaves and flower. This crochet pattern is suitable for intermediate crocheters who have a basic understanding of single crochet and amigurumi construction.
Materials
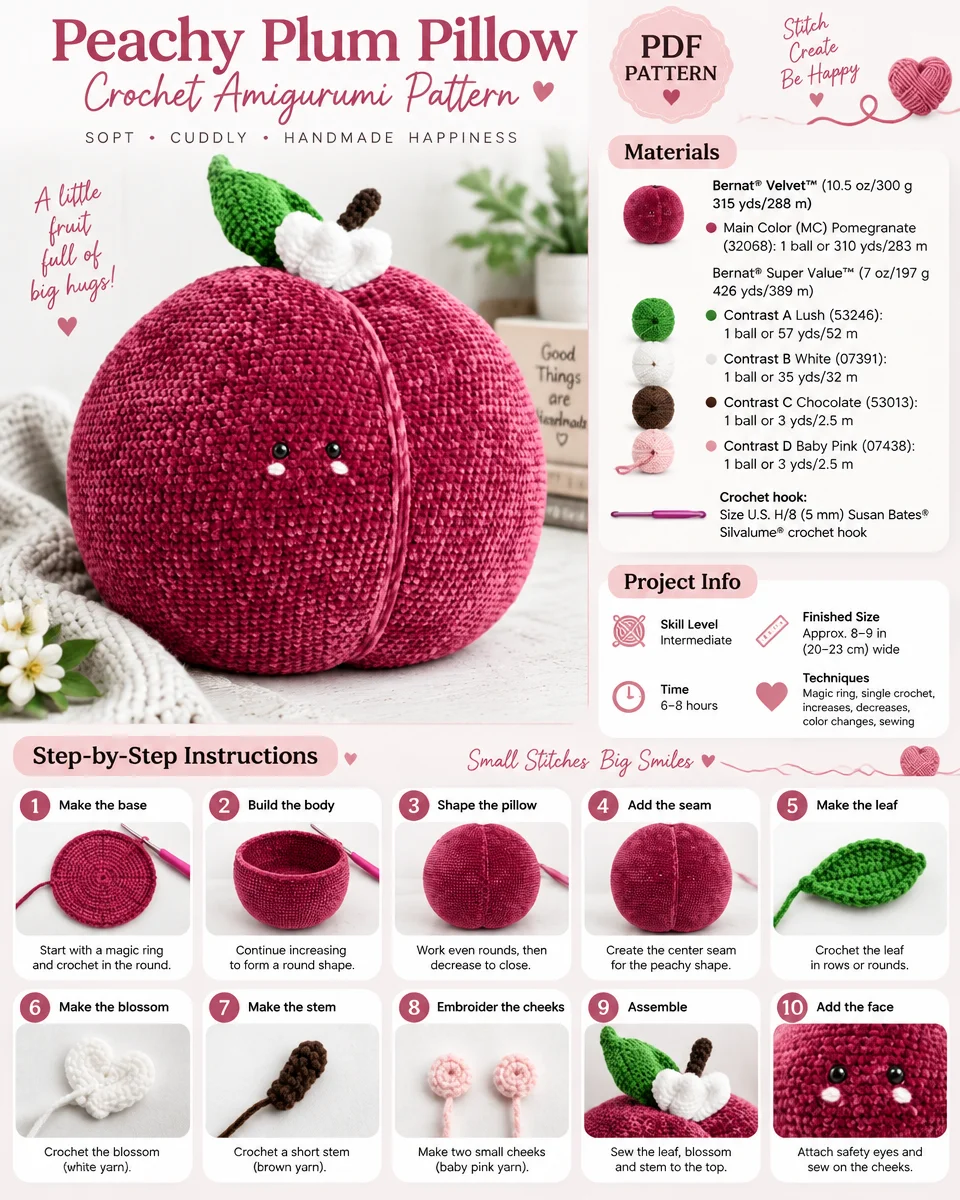
To complete your Peachy Plum Pillow, gather the following materials. This ensures you have everything you need at hand, making the process enjoyable.
Yarn
- Bernat® Velvet™ (10.5 oz/300 g; 315 yds/288 m)
- Main Color (MC) Pomegranate (32068): 1 ball or 310 yds/283 m
- Bernat® Super Value™ (7 oz/197 g; 426 yds/389 m)
- Contrast A Lush (53246): 1 ball or 57 yds/52 m
- Contrast B White (07391): 1 ball or 35 yds/32 m
- Contrast C Chocolate (53013): 1 ball or 3 yds/2.5 m
- Contrast D Baby Pink (07438): 1 ball or 3 yds/2.5 m
Crochet Hook
- Size U.S. H/8 (5 mm) – Susan Bates® Silvalume® crochet hook or size needed to obtain gauge.
Notions
- Susan Bates® yarn needle
- Susan Bates® Split-Lock Stitch Count Markers
- Polyester fiberfil for stuffing
- 1 set safety eyes (12 mm diameter)
Crochet Abbreviations
Understanding crochet abbreviations can streamline your stitching process. Here are the key ones used in this pattern:
- ch = chain
- sc = single crochet
- sc2tog = single crochet two together
- PM = place marker
- Rep = repeat
- rnd = round
Pattern Notes
- This pattern is worked in continuous rounds; do not join rounds unless instructed.
- Use stitch markers to keep track of round beginnings.
Instructions
Peach: Body (MC)
Begin at the bottom of the Body with MC, ch 2. See diagrams if available.
Rounds (spiral; do not join):
1st rnd: 8 sc in 2nd ch from hook.
Do not join, continuing to work in spiral as follows. PM (first marker) for beginning of the round. Move marker up on rounds as work progresses.
2nd rnd: 2 sc in each sc around. (16 sc)
3rd rnd: *2 sc in next sc. 1 sc in next sc. Rep from * around. (24 sc)
4th rnd: 1 sc in first sc. 2 sc in next sc. *1 sc in each of next 2 sc. 2 sc in next sc. Rep from * to last sc. 1 sc in last sc. (32 sc)
5th rnd: *2 sc in next sc. 1 sc in each of next 3 sc. Rep from * around. (40 sc)
6th rnd: 1 sc in each of first 2 sc. 2 sc in next sc. *1 sc in each of next 4 sc. 2 sc in next sc. Rep from * to last 2 sc. 1 sc in each of last 2 sc. (48 sc)
7th rnd: *2 sc in next sc. 1 sc in each of next 5 sc. Rep from * around. (56 sc)
Bottom Curve of Body:
1st and alt rnds: 1 sc in each sc around.
2nd rnd: 1 sc in each of first 3 sc. 2 sc in next sc.
*1 sc in each of next 6 sc. 2 sc in next sc. Rep from * to last 3 sc. 1 sc in each of last 3 sc. (64 sc)
4th rnd: *2 sc in next sc. 1 sc in each of next 7 sc. Rep from * around. (72 sc)
6th rnd: 1 sc in each of first 4 sc. 2 sc in next sc.
*1 sc in each of next 8 sc. 2 sc in next sc. Rep from * to last 4 sc. 1 sc in each of last 4 sc. (80 sc)
8th rnd: *2 sc in next sc. 1 sc in each of next 9 sc. Rep from * around. (88 sc)
9th rnd: As 1st rnd.
Continue in this manner, increasing 8 sc, as before, evenly around next and every following alt rnd, until there are 128 sc.
PM (second marker at end of last rnd).
Next rnd: 1 sc in each sc around.
Rep last rnd until work from marked rnd measures 5″ [12.5 cm].
Top Curve of Body
1st rnd: 1 sc in each of first 7 sts. Sc2tog.
*1 sc in each of next 14 sts. Sc2tog. Rep from * to last 7 sts. 1 sc in each of last 7 sts. (120 sts)
2nd and alt rnds: 1 sc in each st around.
3rd rnd: *Sc2tog. 1 sc in each of next 13 sts. Rep from * around. (112 sts)
5th rnd: 1 sc in each of first 6 sts. Sc2tog.
*1 sc in each of next 12 sts. Sc2tog. Rep from * to last 7 sts. 1 sc in each of last 7 sts. (104 sts)
7th rnd: *Sc2tog. 1 sc in each of next 11 sts. Rep from * around. (96 sts)
8th rnd: As 2nd rnd.
Continue in this manner, decreasing 8 sts, as before, evenly around next and every following alt rnd, until there are 56 sts.
Next rnd: 1 sc in each st around.
Top of Body (safety eyes and final shaping; MC)
Following manufacturer’s instructions, attach safety eyes to the side of the Body 1½” [4 cm] apart, approx midway down. Stuff Body firmly.
1st rnd: *Sc2tog. 1 sc in each of next 5 sts. Rep from * around. (48 sts)
2nd rnd: 1 sc in each of first 2 sts. Sc2tog.
*1 sc in each of next 4 sts. Sc2tog. Rep from * to last 2 sts. 1 sc in each of last 2 sts. (40 sts)
3rd rnd: *Sc2tog. 1 sc in each of next 3 sts. Rep from * around. (32 sts)
4th rnd: 1 sc in first st. Sc2tog.
*1 sc in each of next 2 sts. Sc2tog. Rep from * to last st. 1 sc in last st. (24 sts)
5th rnd: *Sc2tog. 1 sc in next st. Rep from * around. (16 sts)
6th rnd: (Sc2tog) 8 times. (8 sts)
Fasten off, leaving a long end. Draw end tightly through remaining sts and fasten off. Weave in end.
Leaf (Contrast A = A)
Make the Leaf as follows:
With A, ch 26.
Join with sl st to first ch to form a ring, being careful not to twist the chain.
Rounds (spiral):
1st rnd: Ch 1. 1 sc in same space as sl st. 1 sc in each ch around.
Do not join. (26 sc)
Continue working in a spiral as follows:
2nd rnd: 1 sc in each sc around.
3rd rnd: 2 sc in first sc. 1 sc in each of next 11 sc. 2 sc in each of next 2 sc. 1 sc in each of next 11 sc. 2 sc in last sc. (30 sc)
4th rnd: As 2nd rnd.
5th rnd: 2 sc in first sc. 1 sc in each of next 13 sc. 2 sc in each of next 2 sc. 1 sc in each of next 13 sc. 2 sc in last sc. (34 sc)
6th to 8th rnds: As 2nd rnd.
9th rnd: (Sc2tog. 1 sc in each of next 13 sts. Sc2tog) twice. (30 sts)
10th and alt rnds: 1 sc in each st around.
11th rnd: (Sc2tog. 1 sc in each of next 11 sts. Sc2tog) twice. (26 sts)
13th rnd: (Sc2tog. 1 sc in each of next 9 sts. Sc2tog) twice. (22 sts)
14th rnd: As 10th rnd.
Continue in this manner, decreasing 4 sts, as before, evenly around next and every following alt rnd, until there are 6 sts.
Next rnd: 1 sc in each st around.
Finishing Leaf Tip
Fasten off, leaving a long end. Draw end tightly through remaining 6 sts at tip and fasten off. Weave in end. Stuff Leaf very loosely. Fold foundation chain in half, having the beginning of row at the side edge of Leaf.
Final Joining of Folded Leaf
Next rnd: (RS). Join yarn with sl st to the first remaining loop of the foundation ch.
Ch 1. Working through both thicknesses of remaining loops of the foundation ch as follows:
[(Sc2tog) 3 times. Sc3tog. (Sc2tog) twice] (Total 6 sts).
Sl st in first sc. Fasten off.
Flower
Petal (Make 5) (Contrast B = B)
With B, ch 2.
1st rnd: 6 sc in 2nd ch from hook. Do not join. PM for beg rnd.
Move marker up on rnds as work progresses.
Continue working in a spiral as follows:
2nd rnd: (2 sc in next sc. 1 sc in next sc. 2 sc in next sc) twice. (10 sc)
3rd rnd: (2 sc in next sc. 1 sc in each of next 3 sc. 2 sc in next sc) twice. (14 sc)
4th to 7th rnds: 1 sc in each sc around.
8th rnd: (Sc2tog) 7 times. (7 sts)
Fasten off, leaving a long end. Draw end tightly through remaining 7 sts and fasten off. Weave in end.
Assemble Flower
With B, sew the base of all 5 petals together, through the centers of the first rnds to form the Flower.
Stem (Contrast C = C)
With C, ch 2.
1st rnd: 6 sc in 2nd ch from hook. Do not join. PM for beg rnd.
Move marker up on rnds as work progresses.
Continue working in a spiral as follows:
2nd rnd: 1 sc in each sc around.
Rep last rnd until work from beg measures 3″ [7.5 cm].
Join with a sl st to the first sc. Fasten off.
Assembly & Finishing
Crease (MC)
With a strand of MC 75″ [190.5 cm] long and a yarn needle,
weave yarn down through the center from top to bottom, and back up around the side of Body 3 times, tightening to create a cinched crease. Fasten off.
Attach Parts
Using yarn to match, sew Leaf, Stem, and Flower to the top of the Peach at the Crease.
Embroidery
With Contrast D, embroider blush lines below each eye using the Satin Stitch.
Frequently Asked Questions
What crochet hook is used for this pattern?
For this project, a Size U.S. H/8 (5 mm) crochet hook is recommended, but you can also use a size that allows you to obtain the correct gauge.
Does this project require assembly?
Yes, the project requires you to assemble multiple pieces including the body, leaves, stem, and flower.
Is this project worked in rows or rounds?
The Peachy Plum Pillow is worked entirely in rounds without joining, expanding into a lovely dimensional piece.
How many colors of yarn are used in this design?
The design utilizes five different colors: Pomegranate for the main body, Lush, White, Chocolate, and Baby Pink for contrasting features.
What is the finished size of the pillow?
While the pattern does not specify exact finished dimensions, the completed body measures approximately 5″ [12.5 cm] from the marked round.
Conclusion
The Peachy Plum Pillow Crochet Amigurumi Pattern is a delightful project that combines vibrant colors and intricate designs, making it a beautiful addition to any space. Happy crocheting! Enjoy creating your amigurumi peach, and let your creativity shine!