Crochet Katie Cat Amigurumi Pattern
Welcome to the adorable world of crochet! Today, we’ll be making a delightful kitty cat amigurumi. This project is perfect for cat lovers and those who appreciate the charm of handmade toys. Follow this detailed pattern to create your very own “Katie Cat.”
About This Amigurumi Design
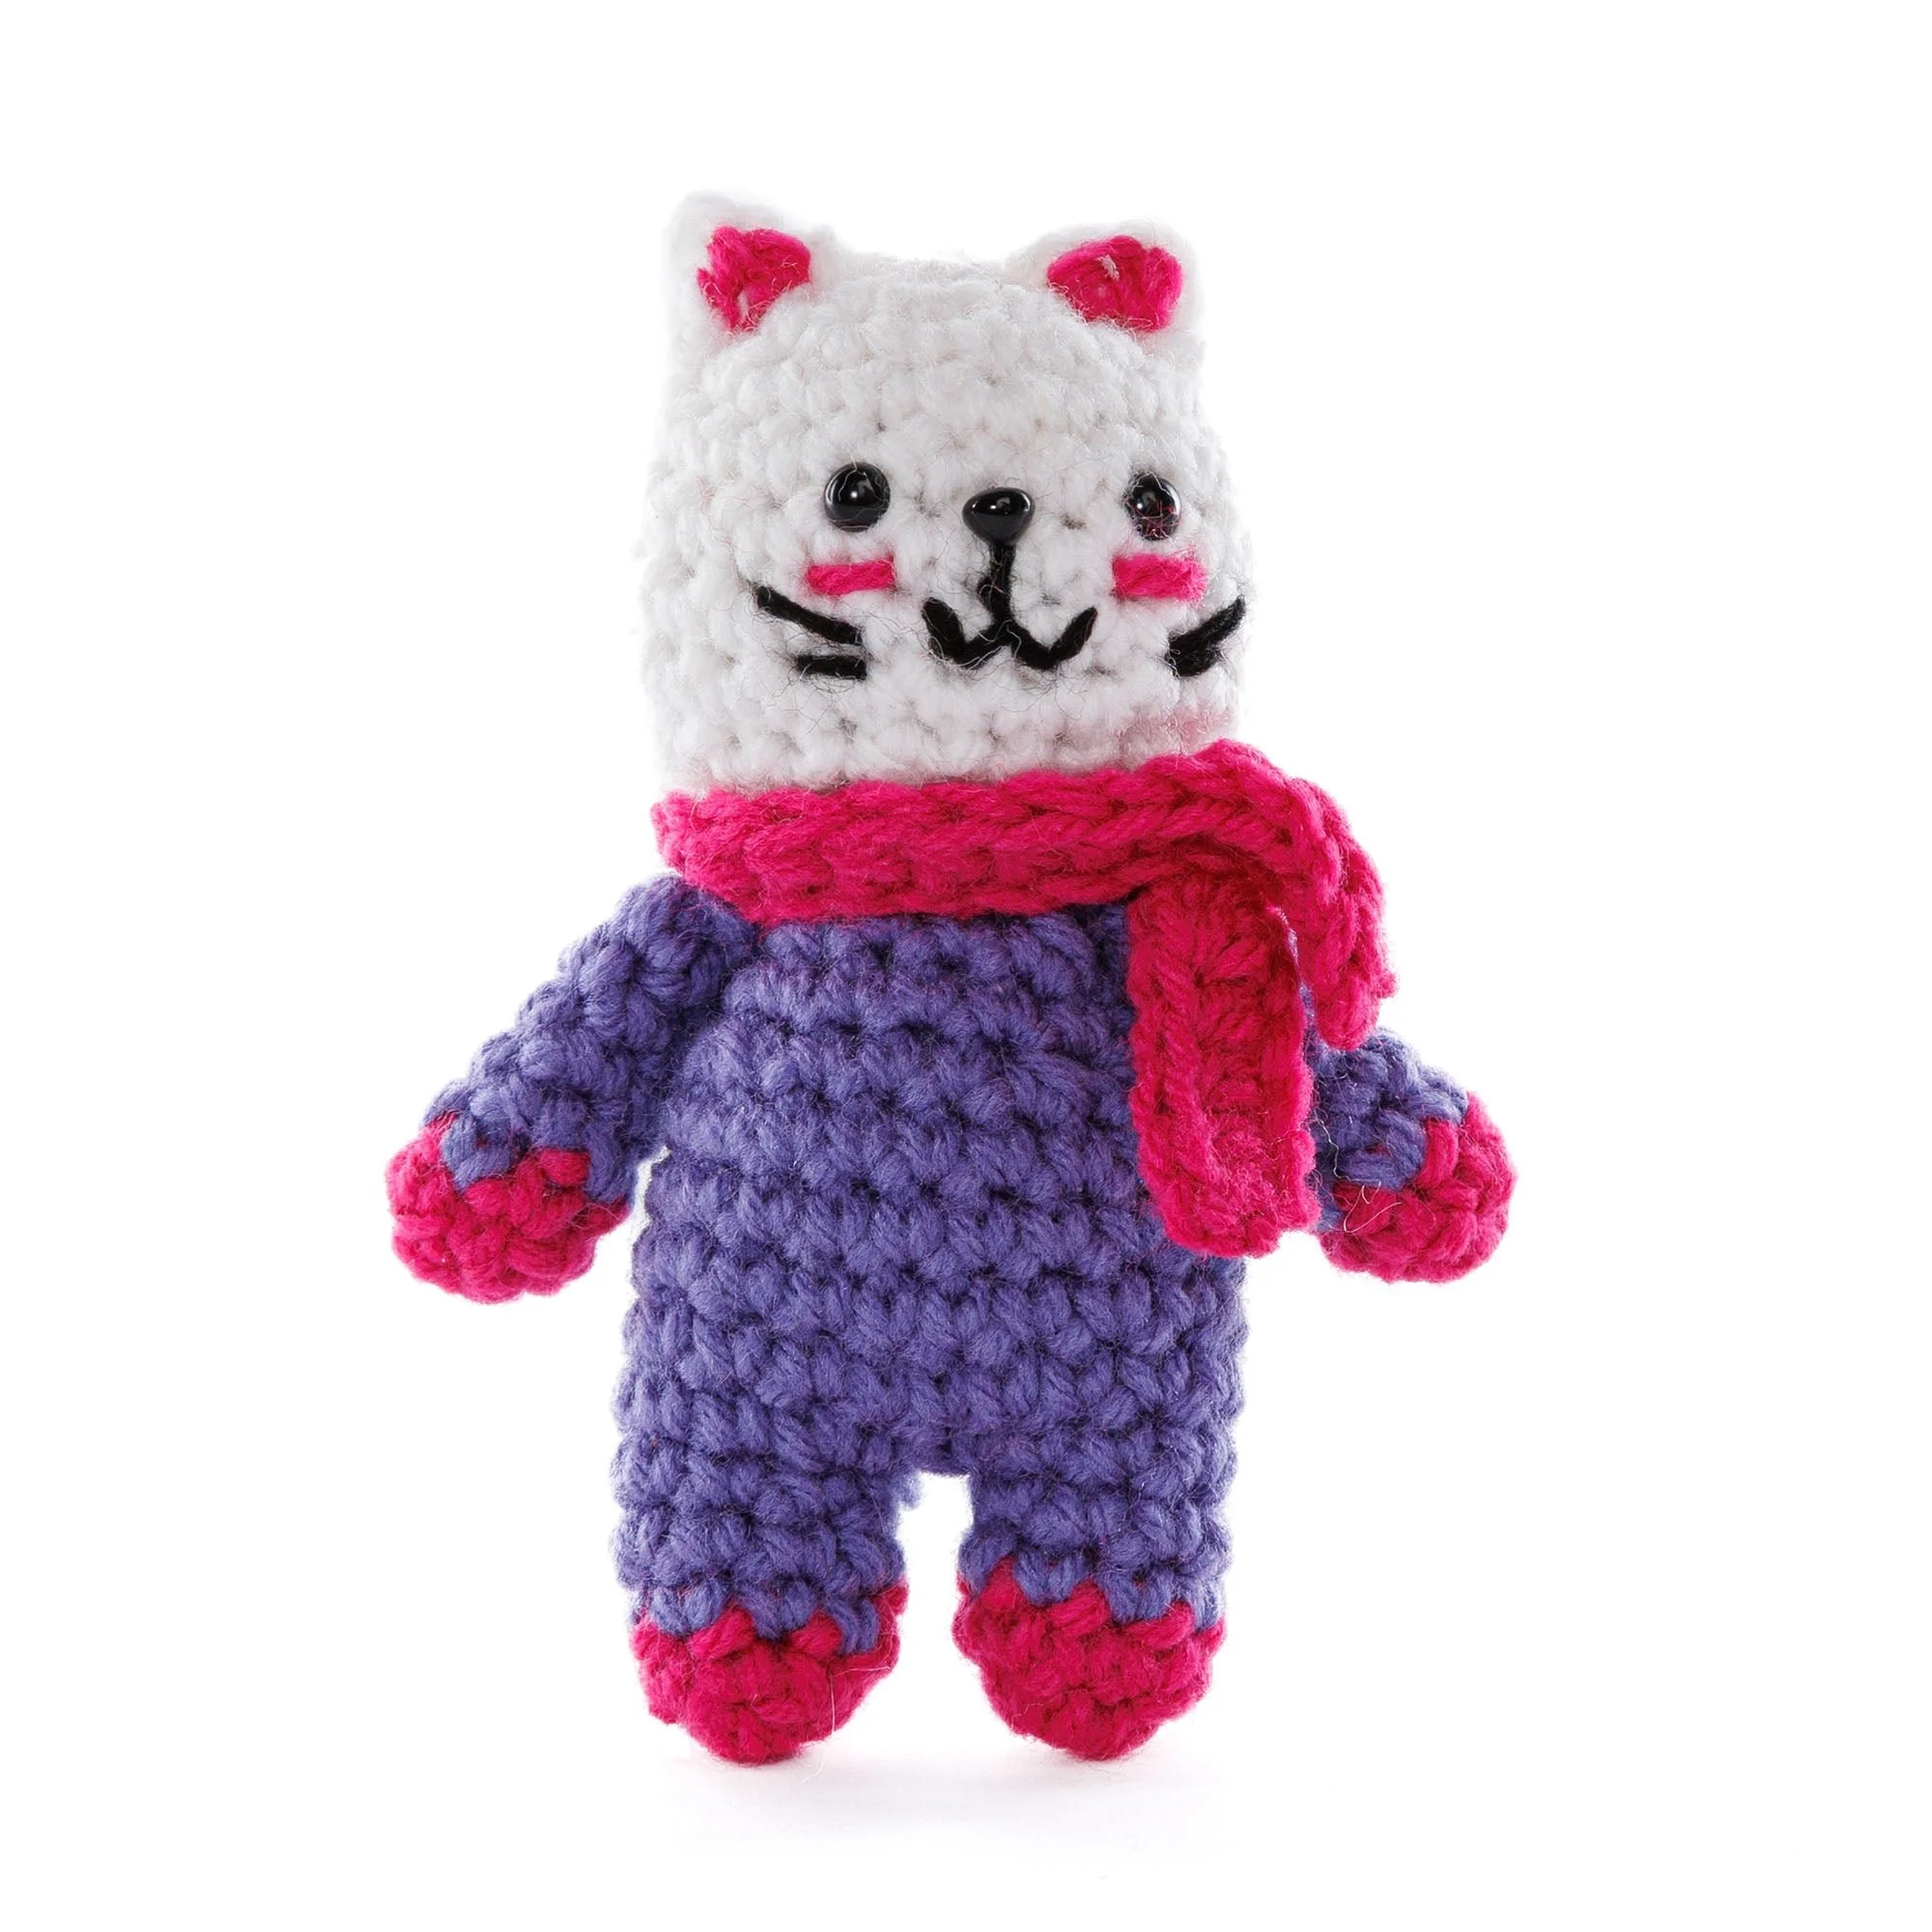
The Katie Cat amigurumi is a classic crocheted toy that features a cute, rounded head, delicate ears, and tiny paws. Each piece of the amigurumi is crafted using vibrant colors from the Red Heart® Super Saver® Super Craft Kit™, ensuring your finished product is as cute as it is cuddly. The finished Katie Cat can serve as a lovely gift or a charming addition to your own home décor.
Materials
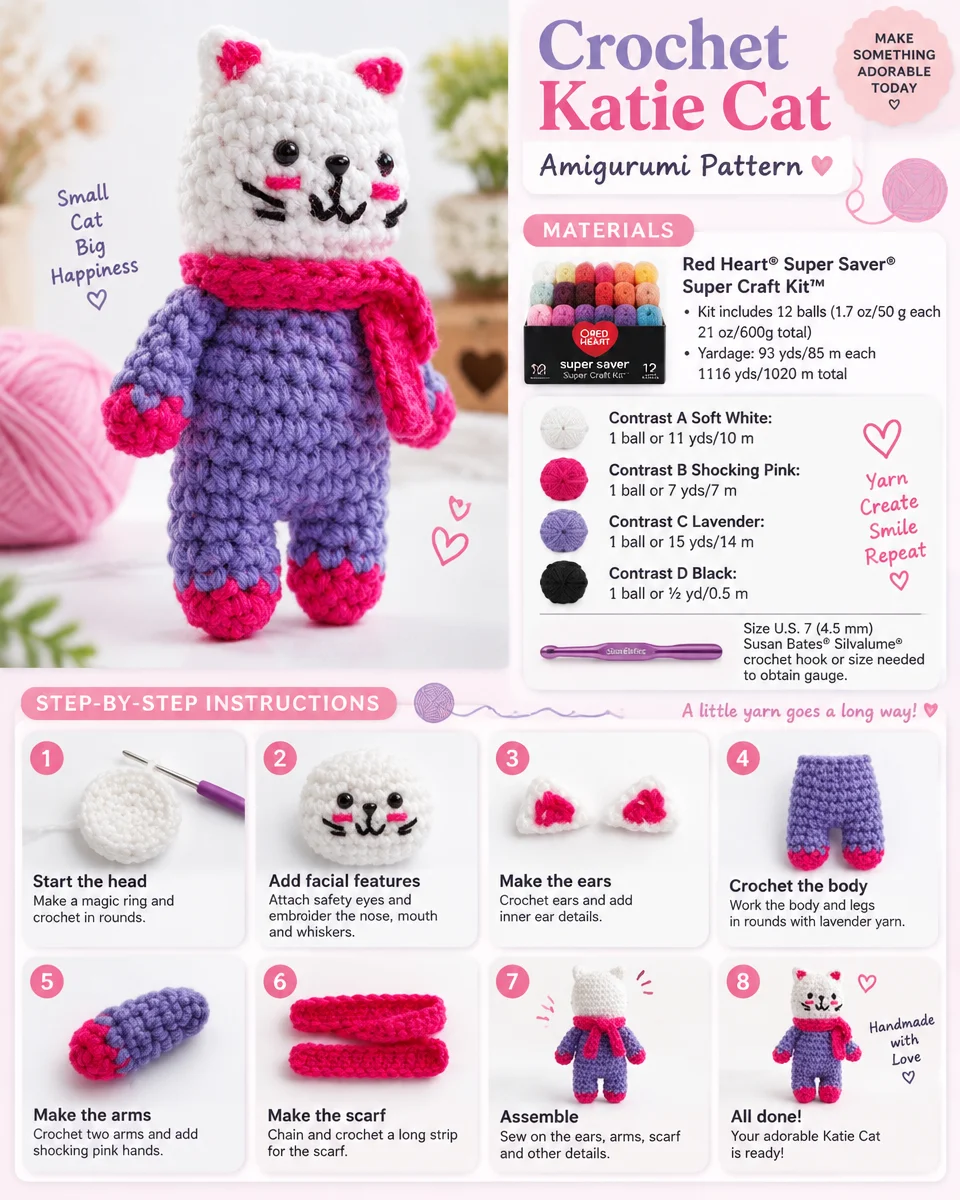
Here’s what you’ll need to create your Katie Cat:
Yarn
- Red Heart® Super Saver® Super Craft Kit™: 12 balls (1.7 oz/50 g each; 21 oz/600 g total)
- Contrast A Soft White: 1 ball or 11 yds/10 m
- Contrast B Shocking Pink: 1 ball or 7 yds/7 m
- Contrast C Lavender: 1 ball or 15 yds/14 m
- Contrast D Black: 1 ball or ½ yd/0.5 m
Crochet Hook
- Size U.S. 7 (4.5 mm) Susan Bates® Silvalume® crochet hook or size needed to obtain gauge
Notions
- Susan Bates® stitch marker
- Susan Bates® yarn needle
Safety Features
- Pair of 6 mm Safety Eyes
- 4 mm Safety Nose
Filling
- Polyester fiberfill
Crochet Abbreviations
- ch = chain
- sc = single crochet
- pm = place marker
- dc = double crochet
- sl st = slip stitch
- hdc = half double crochet
- sc2tog = single crochet two together
Pattern Notes
- Read through the entire pattern before beginning.
- Stuff your amigurumi lightly but securely as you go to maintain its shape.
- Use safety features carefully and follow all instructions for placement.
Head
Instructions:
- With Contrast A, make a Magic Ring.
- 1st rnd: Ch 1. 6 sc in ring. PM on first sc. Pull tail of Magic Ring up tightly to draw opening closed and secure with a knot or 2 on the WS (inside).
- 2nd rnd: 2 sc in each sc around. (12 sc)
- 3rd rnd: *2 sc in next sc. 1 sc in next sc. Rep from * around. (18 sc)
- 4th rnd: *2 sc in next sc. 1 sc in each of next 2 sc. Rep from * around. (24 sc)
- 5th to 8th rnds: 1 sc in each sc around.
- 9th rnd: *Sc2tog. 1 sc in each of next 2 sc. Rep from * to end of rnd. (18 sts)
Before beginning the next rnd, secure safety eyes, placing them at the top of the 6th rnd, with 3 sc between them. Insert Safety Nose on the same row, between the eyes. Stuff head with approximately 1/3 of the included stuffing.
- 10th rnd: *Sc2tog. 1 sc in next sc. Rep from * around. (12 sts)
- 11th rnd: (Sc2tog) 6 times. (6 sts)
- Fasten off, leaving a tail approximately 8″ [20.5 cm] long. Thread tail through remaining sts and pull tightly to draw the opening closed.
Ears (Make 2)
- With Contrast A, ch 3.
- 1st row: Sl st in 2nd ch from hook. 1 dc in last ch.
- Fasten off, leaving a tail for attaching to head.
Ear Embroidery Notes
- Cut a length of Contrast B approximately 6″ [15 cm] long. Split plies and use 2 plies to sew a couple of straight stitches on the RS of each ear in the middle, ensuring the needle only goes through the front legs of sts to keep it hidden on the back.
Sew ears to the top of the head, centering them with the eyes and nose. Using Contrast B, embroider cheeks beneath the eyes with a straight stitch. Split Contrast D into plies and, using 1 ply, embroider the mouth and whiskers with a straight stitch.
Legs (Make 2)
First Leg
- With Contrast B, make a Magic Ring.
- 1st rnd: Ch 1. 8 sc in ring. PM on first sc.
- 2nd rnd: 1 sc in each sc around. Join Contrast C at end of 2nd rnd. Break Contrast B, leaving a tail 2″ [5 cm].
- 3rd to 5th rnds: With Contrast C, 1 sc in each sc around.
- Fasten off, leaving a tail approximately 3″ [7.5 cm] long.
Second Leg
Work as given for First Leg but do not fasten off at the end of the 5th rnd.
Body (Join Legs + Body Shaping)
Join Legs
- 1st rnd: 2 sc in first sc of Second Leg (PM on first sc). 2 sc in first sc of First Leg to join. 1 sc in each of next 6 sc of First Leg. 2 sc in last sc. 2 sc in next sc of Second Leg. 1 sc in each of next 6 sc of Second Leg. (20 sc)
Tip: Before proceeding, sew the space between legs closed using the tail of the First Leg, ensuring the bottoms of both legs are drawn closed tightly and secured using the beginning tails. Don’t cut the ends; just use the tails as extra ‘stuffing’ in the legs!
- 2nd to 5th rnds: 1 sc in each sc around.
- 6th rnd: *Sc2tog. 1 sc in each of next 3 sc. Rep from * around. (16 sts)
- 7th rnd: 1 sc in each st around.
- 8th rnd: *Sc2tog. 1 sc in each of next 2 sc. Rep from * around. (12 sts)
Stuff Body
Stuff the body with the remaining stuffing and fasten off.
Arms (Make 2)
- With Contrast B, make a Magic Ring.
- 1st rnd: Ch 1. 6 sc in ring. PM on first sc.
- 2nd rnd: 1 sc in each sc around. Join Contrast C. Break B.
- 3rd to 7th rnds: With Contrast C, 1 sc in each sc around.
- Join with sl st in next sc at end of 7th rnd. Fasten off, leaving a tail to attach to the body.
‘Stuff’ the bottom of the arms with the tail ends of B and C. The end of your crochet hook is a handy tool for getting into these spots! With the top of the arm held flat, sew the arms to each side of the body, making sure they are centered evenly.
Finishing / Assembly
Attach Head to Body
Sew the head to the body, using 12 sts of the 10th rnd of the head and 12 sts of the neck.
Scarf
- With Contrast B, ch 30.
- 1st row (RS): 1 hdc in 3rd ch from hook. 1 hdc in each ch to end of chain. (28 hdc)
- Fasten off.
Wrap the scarf around the neck and secure it at the side.
Hanging Loop
Cut a length of Contrast A 8″ [20.5 cm] long. Thread through the top of the head and tie to secure.
Frequently Asked Questions
What crochet hook is used for this pattern?
You will need a size U.S. 7 (4.5 mm) Susan Bates® Silvalume® crochet hook or the size needed to obtain gauge.
Is this project worked in rows or rounds?
The crochet pattern is primarily worked in rounds, especially for the head, body, and limbs of Katie Cat.
Does this crochet project require assembly?
Yes, the various parts such as the head, body, arms, and legs need to be assembled to create the finished amigurumi.
How much stuffing will I need for this project?
One package of polyester fiberfill is enough for this project; however, you can always add more as you see fit while crafting.
Can I customize the colors used in this amigurumi?
Absolutely! Feel free to substitute different yarn colors from the same weight category for a unique look or to suit your preferences.
Conclusion
The Crochet Katie Cat Amigurumi Pattern is a fantastic way to invest your time in crafting, whether for cuddles, décor, or gifting. Following this step-by-step guide, you’ll create a charming cat that will surely bring smiles to everyone who sees it. Enjoy your crocheting adventure with Katie Cat!