Crochet Dolly Donut Amigurumi Pattern
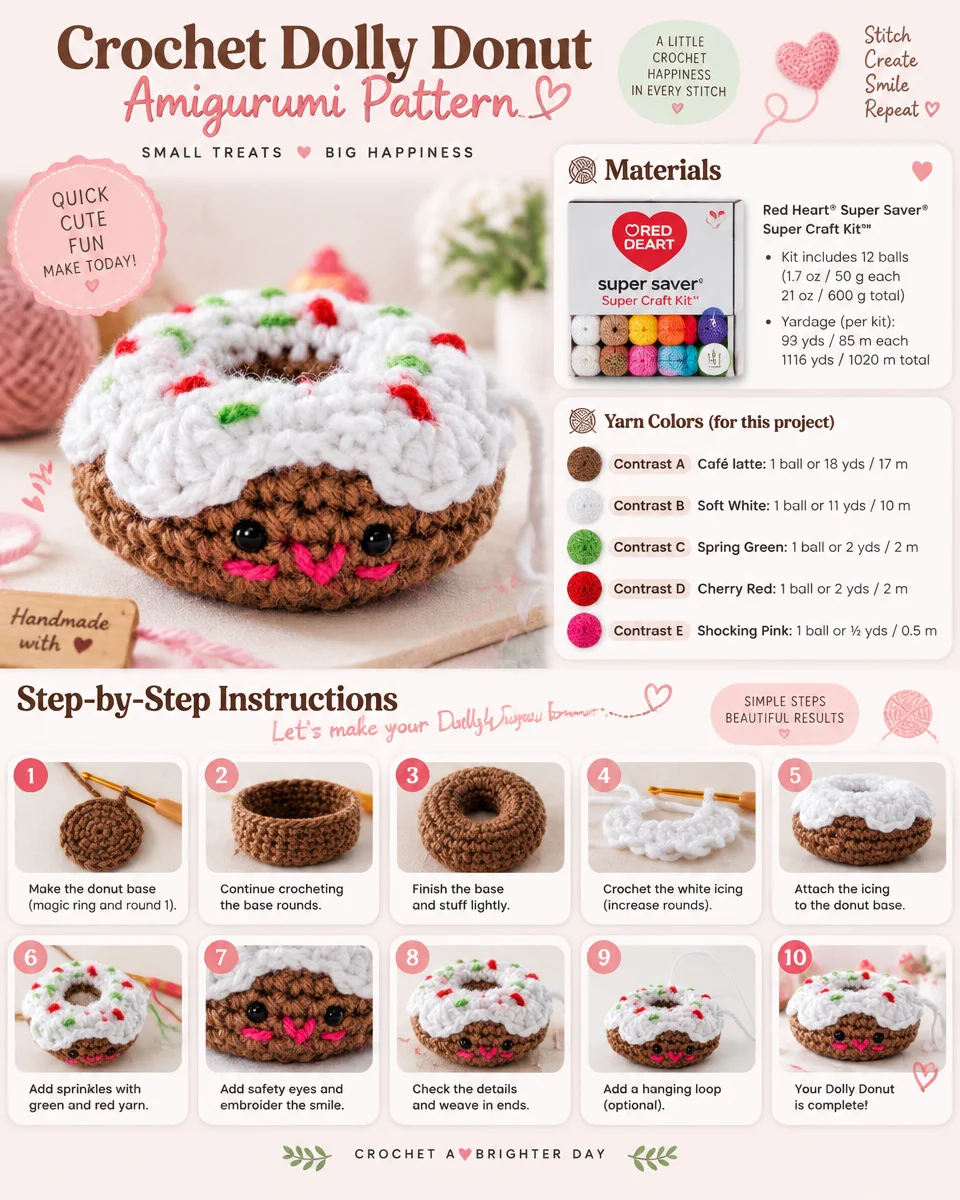
Welcome to the delightful world of crochet with the Crochet Dolly Donut Amigurumi Pattern! This whimsical project is perfect for adding a touch of sweetness to your crafting collection or as an adorable gift for a loved one. In this article, we’ll guide you through the materials needed, the stitches involved, and detailed instructions to create your own colorful dolly donut.
About the Crochet Project
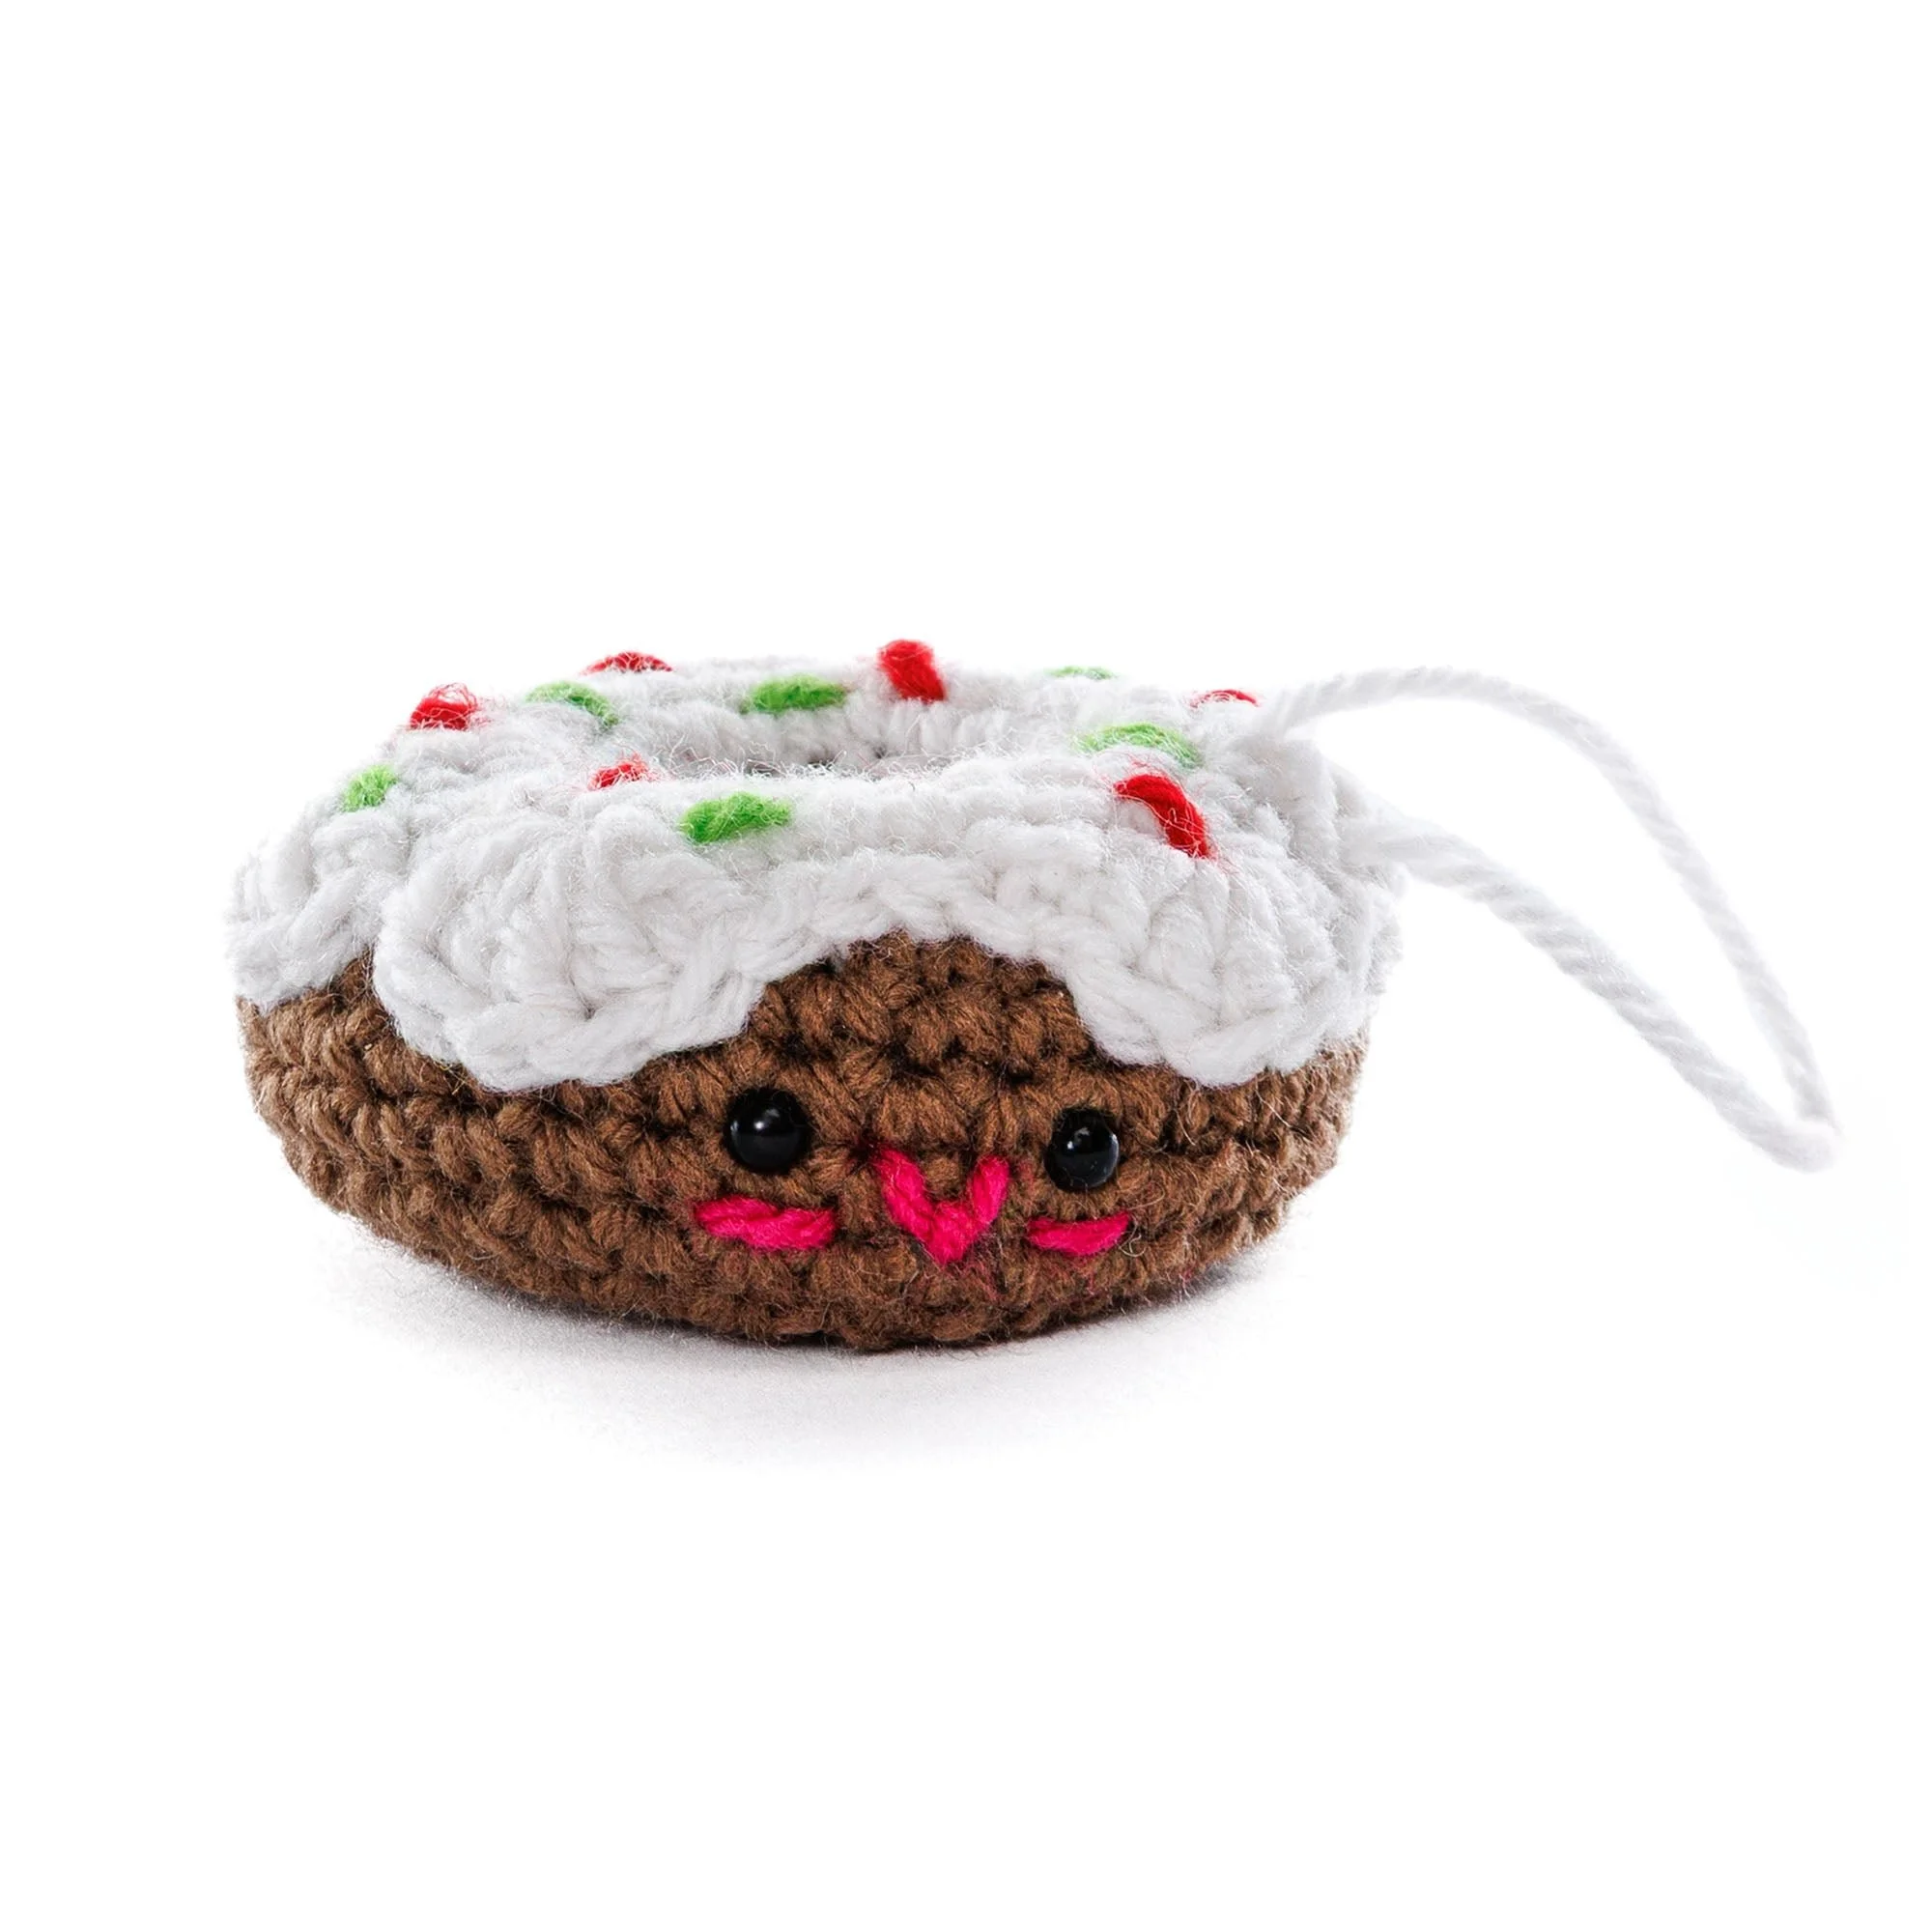
The Crochet Dolly Donut is an amigurumi project that combines creative stitching with playful design. Constructed in the round, this donut features added elements of character, like safety eyes and an embroidered face, making it an engaging and fun project for crafters. The project also includes elements of assembly, ensuring your finished donut is not only charming but also three-dimensional and huggable!
Materials
Here’s a list of materials you will need to create your Crochet Dolly Donut:
Yarn
- Red Heart® Super Saver® Super Craft Kit™
- Kit includes 12 balls (1.7 oz / 50 g each; 21 oz / 600 g total)
- Yardage (per kit): 93 yds / 85 m each; 1116 yds / 1020 m total
- Contrast A: Café Latte – 1 ball (18 yds / 17 m)
- Contrast B: Soft White – 1 ball (11 yds / 10 m)
- Contrast C: Spring Green – 1 ball (2 yds / 2 m)
- Contrast D: Cherry Red – 1 ball (2 yds / 2 m)
- Contrast E: Shocking Pink – 1 ball (½ yd / 0.5 m)
Crochet Hook
- Size U.S. G / 6 (4.5 mm) Susan Bates® Silvalume® crochet hook or size needed to obtain gauge.
Notions
- Susan Bates® stitch marker
- Susan Bates® yarn needle
- Pair of 6 mm Safety eyes
- Polyester fiberfill
Crochet Abbreviations
Understanding crochet abbreviations will help you follow the pattern efficiently:
- = sc2tog: single crochet 2 together
- = ch: chain
- = sc: single crochet
- = sl st: slip stitch
- = dc: double crochet
Straight Stitch Symbol Noted: STRAIGHT ST = single crochet 2 together (sc2tog)
Pattern Notes
This pattern is worked in continuous spiral rounds. Be sure not to join the rounds unless specified. Place a stitch marker on the first stitch of each round to keep track of your progress.
Pattern Instructions
Donut
To create the body of the donut, follow these instructions closely:
-
With A, ch 14. Join with sl st to first ch, being careful not to twist the chain.
1st rnd: Ch 1. 1 sc in each ch around. PM on first sc.
2nd rnd: 1 sc in each sc around.
3rd rnd: 2 sc in each sc around. (28 sc)
4th rnd: *2 sc in next sc. 1 sc in each of next 6 sc. Rep from * around. (32 sc)
5th to 8th rnds: 1 sc in each sc around.
9th rnd: *Sc2tog. 1 sc in each of next 6 sc. Rep from * to end of rnd. (28 sts)
10th rnd: *Sc2tog. Rep from * around. (14 sts)
11th rnd: 1 sc in each st around. Sl st in first st.
Fasten off, leaving a tail approx 10″ [25.5 cm] long.
Face / Safety Eyes and Embroidery
- Insert Safety eyes at the top of the 7th rnd, ensuring there are 2 sts between them.
- Using Contrast E, embroider cheeks one row below the eyes, spanning across one st directly below each eye.
- Embroider the mouth between the eyes in the center with a Straight Stitch. Bring the needle up just below this straight stitch and ‘catch’ it to create a slight smile.
Assemble Donut (Whipstitch Seam)
- Align the sts of the foundation ch and the last rnd with wrong sides (WS) together.
- Using the long tail, whipstitch inside the seam, stuffing gently as you work to give your donut a plush appearance.
Icing
Next, we’re going to create the donut’s icing.
-
With B, ch 18. Join with sl st being careful not to twist the chain.
1st rnd: Ch 1. 1 sc in each ch around. (18 sc) PM on first sc.
2nd rnd: *2 sc in next sc. 1 sc in each of next 2 sc. Rep from * around. (24 sc)
3rd rnd: *2 sc in next sc. 1 sc in each of next 3 sc. Rep from * around. (30 sc)
4th rnd: *Skip next sc. 5 dc in next sc. Skip next sc. Sl st in next sc. Rep from * 6 times more. Sl st in each of the last 2 sc.
Fasten off, leaving a tail approx 10″ [25.5 cm] long.
Embroider Sprinkles
Use Contrast C and D to embroider sprinkles on the icing using a Straight Stitch.
Attach Icing to Donut
- Position the icing on top of the donut, ensuring that the last section of slip stitches is placed above the face.
- Using the tail, sew the icing to the donut securely.
Hanging Loop
- Cut a length of B, about 8″ [20.5 cm] long.
- Thread it through the icing on the top side and tie to secure.
Finishing
Complete all stated embroidery (cheeks and mouth with E; sprinkles with C and D). Whipstitch inside the seam and stuff gently while sewing. Sew icing in the specified position and add the hanging loop.
Frequently Asked Questions
What crochet hook is used for this pattern?
You will need a Size U.S. G / 6 (4.5 mm) crochet hook, or a size needed to obtain gauge.
Is this project worked in rows or rounds?
This project is exclusively worked in continuous spiral rounds.
Does this crochet project require assembly?
Yes, assembly is involved, particularly in the stitching together of the donut and the attaching of the icing.
Conclusion
The Crochet Dolly Donut Amigurumi Pattern is a delightful project that combines creativity and enjoyment. With vibrant yarn colors, playful features, and the soothing rhythm of crochet stitches, it promises hours of fun and relaxation. Whether you are looking to make a unique gift or simply brighten up your space, this adorable dolly donut is sure to bring a smile. Happy crocheting!