Feeling Crabby Crochet Amigurumi Pattern
Welcome to the delightful world of amigurumi! In this article, we’ll guide you through creating your very own Feeling Crabby crochet amigurumi project. With its charming design and whimsical popping colors, this adorable crab makes a perfect gift for children or a fun addition to your home décor. This pattern is sure to bring smiles and joy to anyone who spots it!
About the Crochet Project
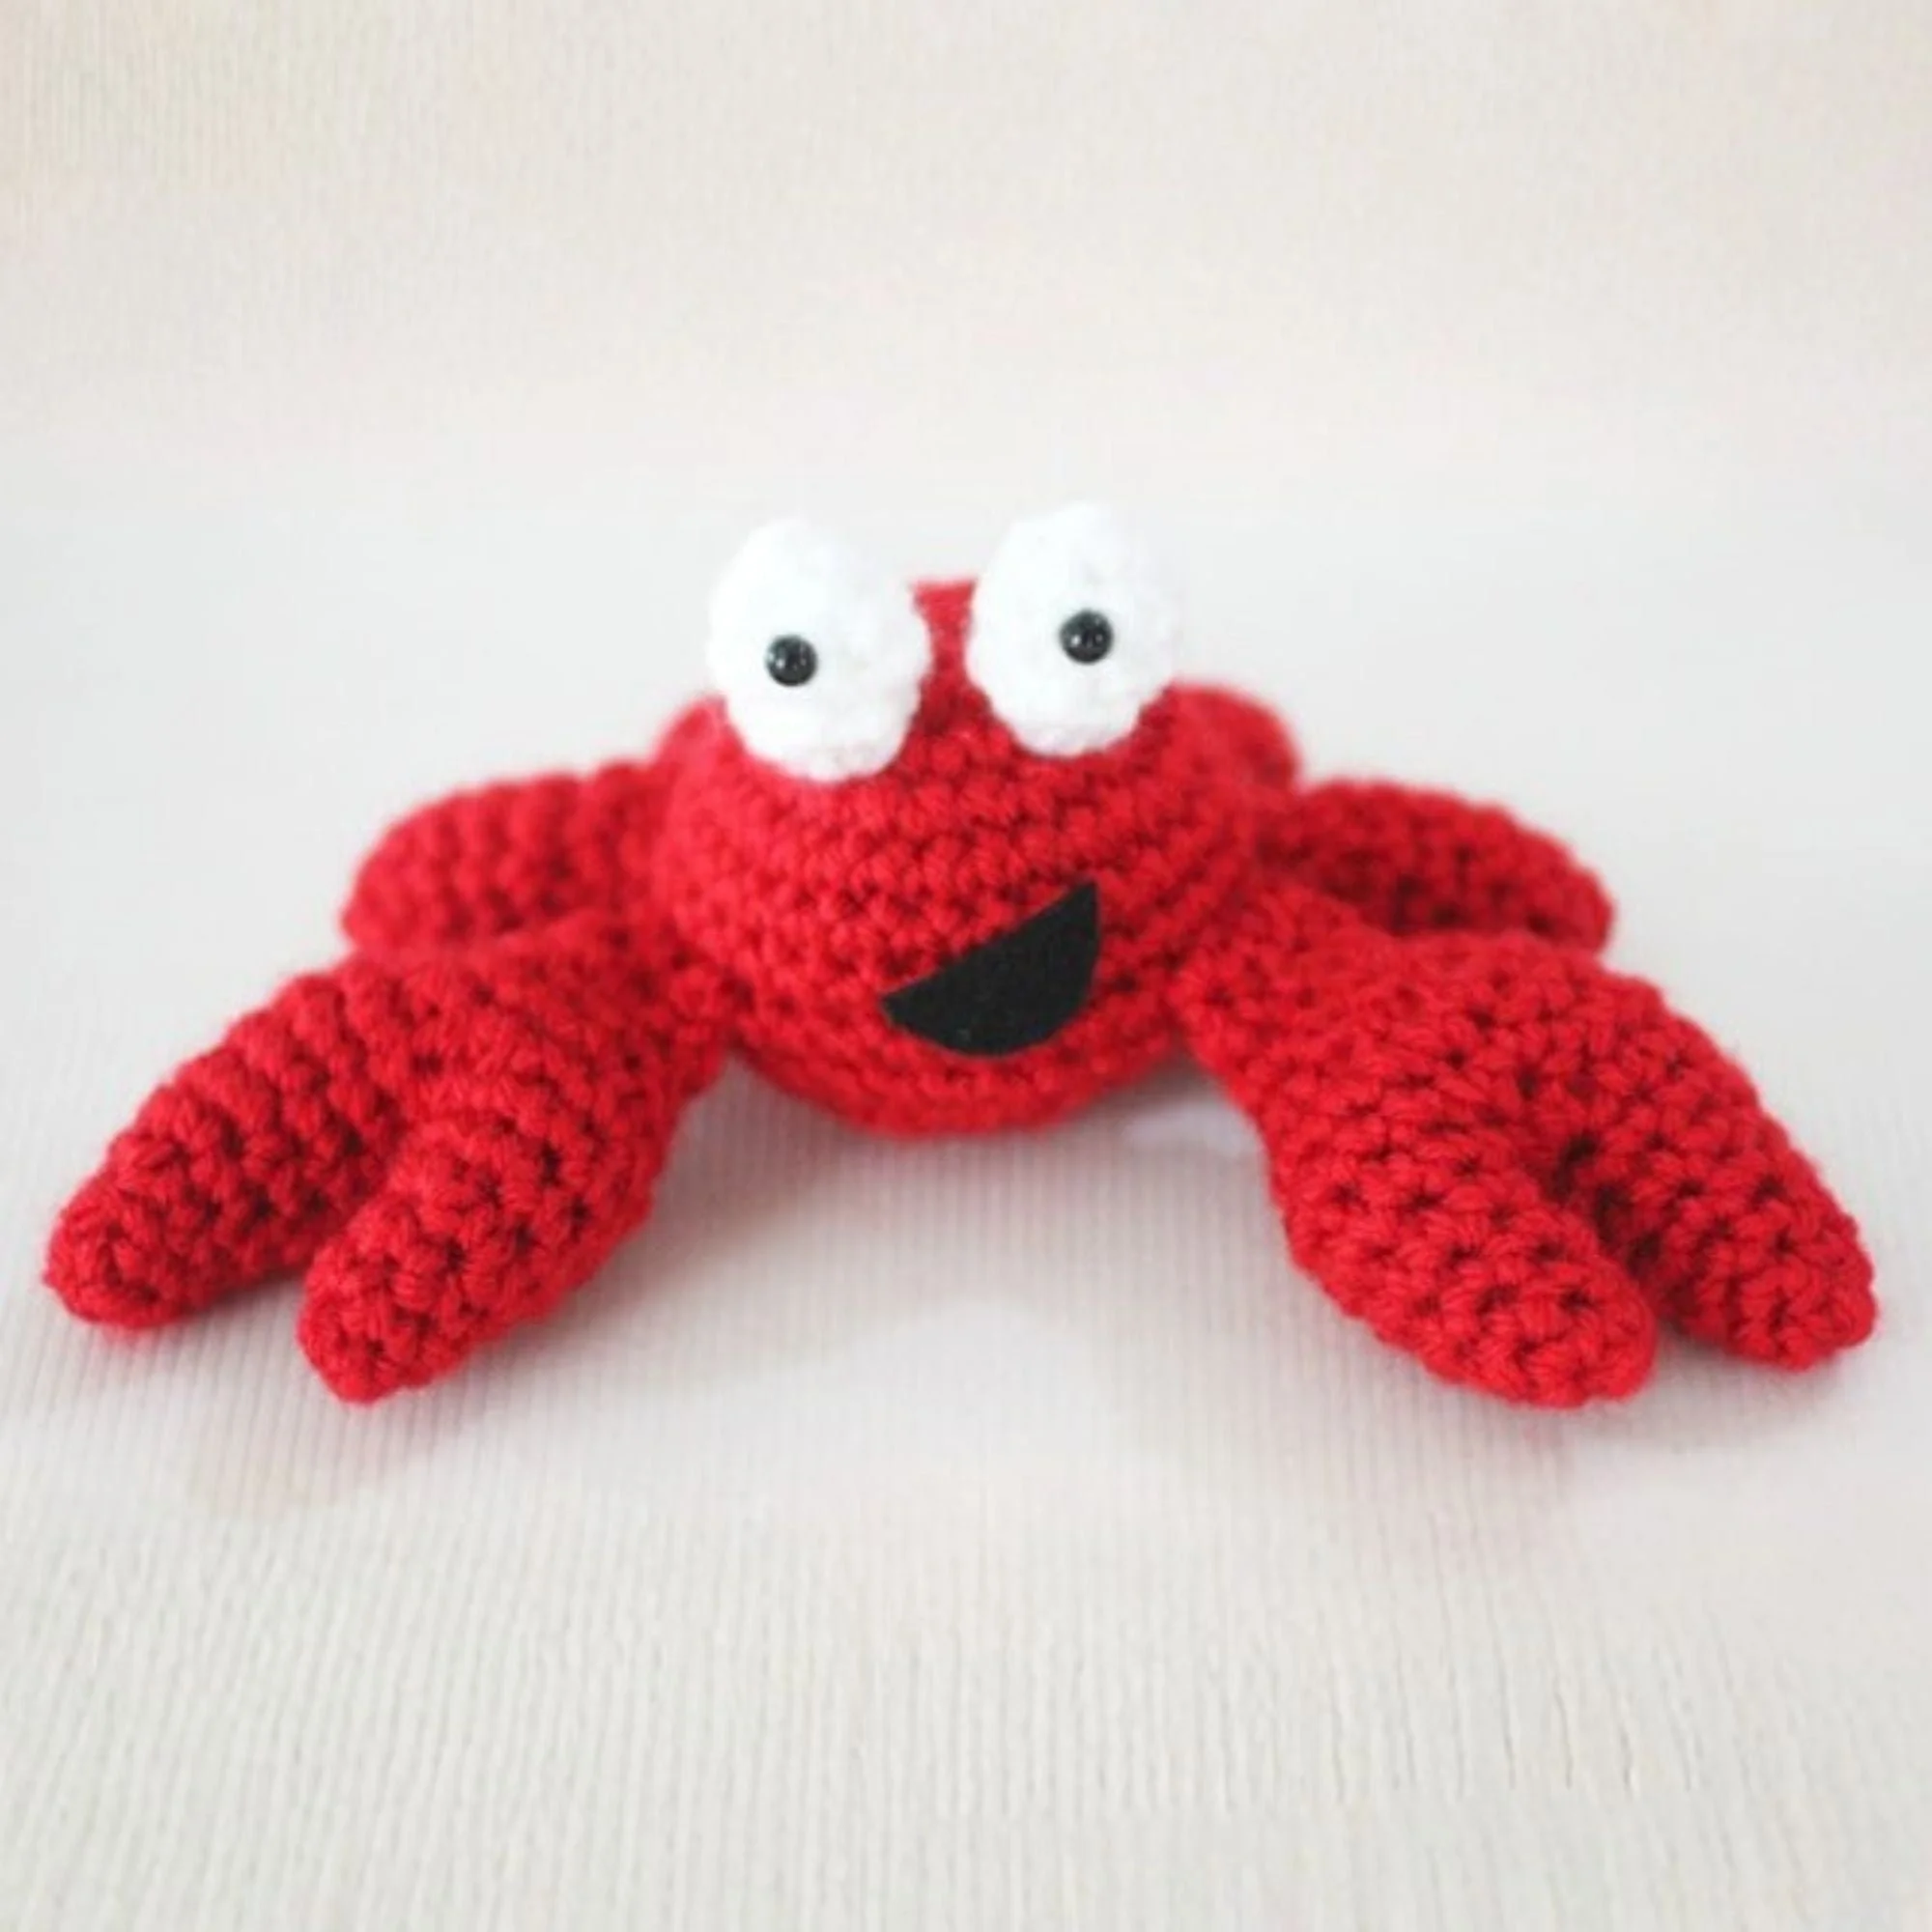
This amigurumi pattern features a cute crab with big claws, small legs, and expressive eyes that are sure to brighten your day. The use of soft, vibrant yarn adds to the friendly appearance of the crab, making it a delightful toy or decorative piece.
Materials
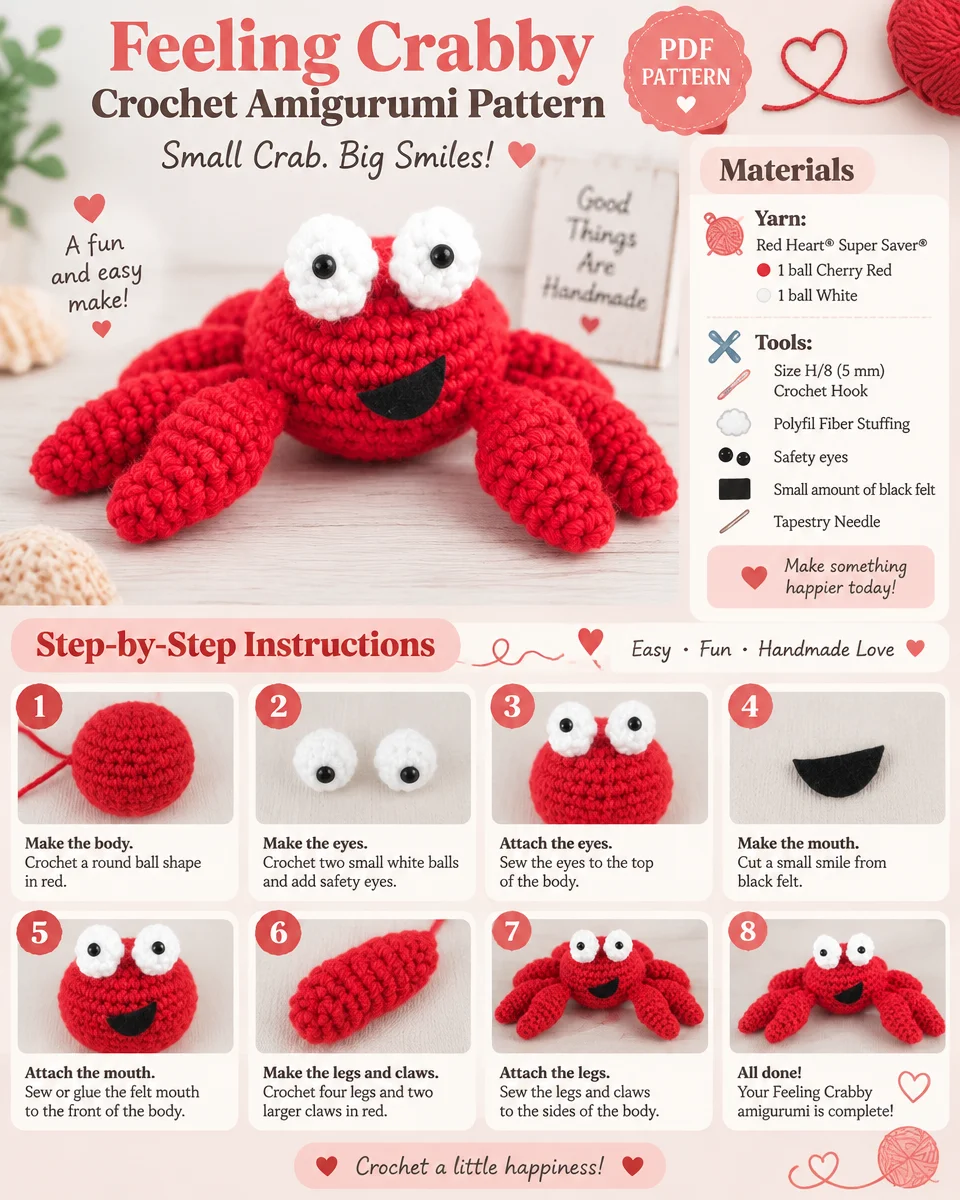
To create your Feeling Crabby amigurumi, you will need the following materials:
Yarn
- Red Heart® Super Saver® Yarn:
- 1 ball of Cherry Red
- 1 ball of White
Tools
- Size H/8 (5 mm) crochet hook
- Polyfil Fiber Stuffing
- Safety eyes
- Small amount of black felt
- Tapestry needle
Crochet Abbreviations
Here’s a quick reference for the abbreviations used in this pattern:
- SC: Single Crochet
- Rd: Round
- Ch: Chain
- St: Stitch
Pattern Notes
- It is recommended to use a stitch marker to mark the beginning of each round to help keep track of your progress.
- Make sure to stuff your pieces lightly to maintain a pleasant shape without overstuffing.
- Work in continuous rounds for all parts, as indicated.
Body Pattern
Body
-
Start with a magic ring, chain 1 in the ring, and make 10 SC in the ring, continuing to crochet in rounds.
-
Rd 2: 2 SC in each stitch around (20 SC)
-
Rd 3: 2 SC in the first stitch, SC in the next stitch, repeat around (30 SC)
-
Rd 4-8: SC in each stitch around (30 SC)
-
Rd 9: SC decrease in the first stitch, SC in the next, repeat around
-
Rd 10: SC in each stitch around
-
Rd 11: SC decrease in each stitch around until closed. Stuff before completely closing.
Big Claw
-
Begin with a magic ring, chain 1 in the ring, make 4 SC in the ring, continuing to crochet in rounds.
-
Rd 2: 2 SC in first stitch, SC in next, repeat around (6 SC)
-
Rd 3: SC in each stitch around (6 SC)
-
Rd 4: 2 SC in first stitch, SC in the next 2 stitches, repeat around (8 SC)
-
Rd 5: SC in each stitch around (8 SC)
-
Rd 6: 2 SC in first stitch, SC in next 3 stitches, repeat around (10 SC)
-
Rd 7: SC in each stitch around (10 SC)
Fasten off and set aside.
Small Claw
-
Start with a magic ring, chain 1 in the ring, make 4 SC in the ring, continuing to crochet in rounds.
-
Rd 2: 2 SC in first stitch, SC in next, repeat around (6 SC)
-
Rd 3: SC in each stitch around (6 SC)
-
Rd 4: 2 SC in first stitch, SC in the next 2 stitches, repeat around (8 SC)
-
Rd 5: SC in each stitch around (8 SC)
Do not fasten off.
Connect the Two Claws
Now you are going to connect the two claws.
-
Begin to SC where you left off in the big claw to begin attaching them.
-
SC all the way around both claws. You should have 18 single crochets, but don’t worry if your stitch count is off.
-
Rd 2: SC around (18 SC)
-
Rd 3: SC decrease in each stitch around.
-
Start stuffing the claw.
-
Rd 4-6: SC in each stitch around (9 SC)
-
Fasten off, leaving a long tail to sew onto the body. Be sure to stuff with poly-fil and weave in loose ends as well.
Eyes (Make 2)
-
Start with a magic ring, chain 1, and make 4 SC in the ring, continuing to work in rounds.
-
Rd 2: 2 SC in each stitch around (8 SC)
-
Rd 3: SC in each stitch around (8 SC)
-
Rd 4: SC decrease, followed by SC in the next 2 stitches, repeat around. Add safety eyes, stuff with yarn scraps (or poly-fil), SC decrease, and sew shut.
Legs (Make 2)
-
Begin with a magic ring, chain 1 in the ring, make 4 SC in the ring, continuing to work in rounds.
-
Rd 2: 2 SC in each stitch around (8 SC)
-
Rd 3-6: SC in each stitch around (8 SC)
-
Rd 7: SC decrease, SC in the next 2 stitches, repeat around.
-
Fasten off, leaving a tail to sew onto the body. Stuff lightly with poly-fil.
Small Legs (Make 2)
-
Start with a magic ring, chain 1 in the ring, make 4 SC in the ring, continuing to work in rounds.
-
Rd 2: 2 SC in first stitch, SC in next stitch (6 SC)
-
Rd 3-5: SC in each stitch around (6 SC)
-
Fasten off, leaving a tail to sew onto the body. Stuff lightly with poly-fil.
Assembly
To bring your Feeling Crabby to life, it’s time to assemble the parts!
-
Begin by securely sewing the eyes onto the body where they will be most expressive.
-
Next, attach the big claw on one side and the small claw on the other side of the crab’s body, ensuring they are securely fastened.
-
The two legs can be attached beneath the body for balance, around the center.
-
For a finishing touch, securely stitch the small legs in a symmetric manner, adding character and playful stance to your crab.
-
When all parts are sewn on and secure, take a look at your wonderful creation!
Frequently Asked Questions
What yarn is used for this pattern?
The pattern specifies Red Heart® Super Saver® in Cherry Red and White.
What crochet hook size is used for this pattern?
Use a Size H/8 (5 mm) crochet hook as indicated in the materials section.
Does this project require assembly?
Yes, assembly is required to connect the various parts including the claws, eyes, and legs to the body.
Is this project worked in rows or rounds?
The entire pattern is worked in rounds.
How many components does the Feeling Crabby pattern include?
This pattern includes several components: the body, two claws, two regular legs, and two small legs, alongside two eyes.
Conclusion
Congratulations on completing your Feeling Crabby crochet amigurumi! This charming project not only enhances your crochet skills but also provides a delightful toy or decoration that is sure to brighten spaces and hearts alike. Remember to have fun while crafting and feel free to experiment with different colors or sizes to create your unique crab! Happy crocheting!