Ellie and Eugene Crochet Elephants Pattern
Create your very own adorable crochet elephants with the Ellie and Eugene Crochet Elephants Pattern! This charming pattern is perfect for bringing joy to children and adults alike. Let’s dive into the details of this delightful project.
About the Crochet Project
The Ellie and Eugene crochet elephants pattern is an amigurumi project designed for crafters who love creating whimsical stuffed toys. This pattern leads you through making two cute elephants with various components, such as heads, bodies, ears, arms, legs, and a charming little hat.
Materials
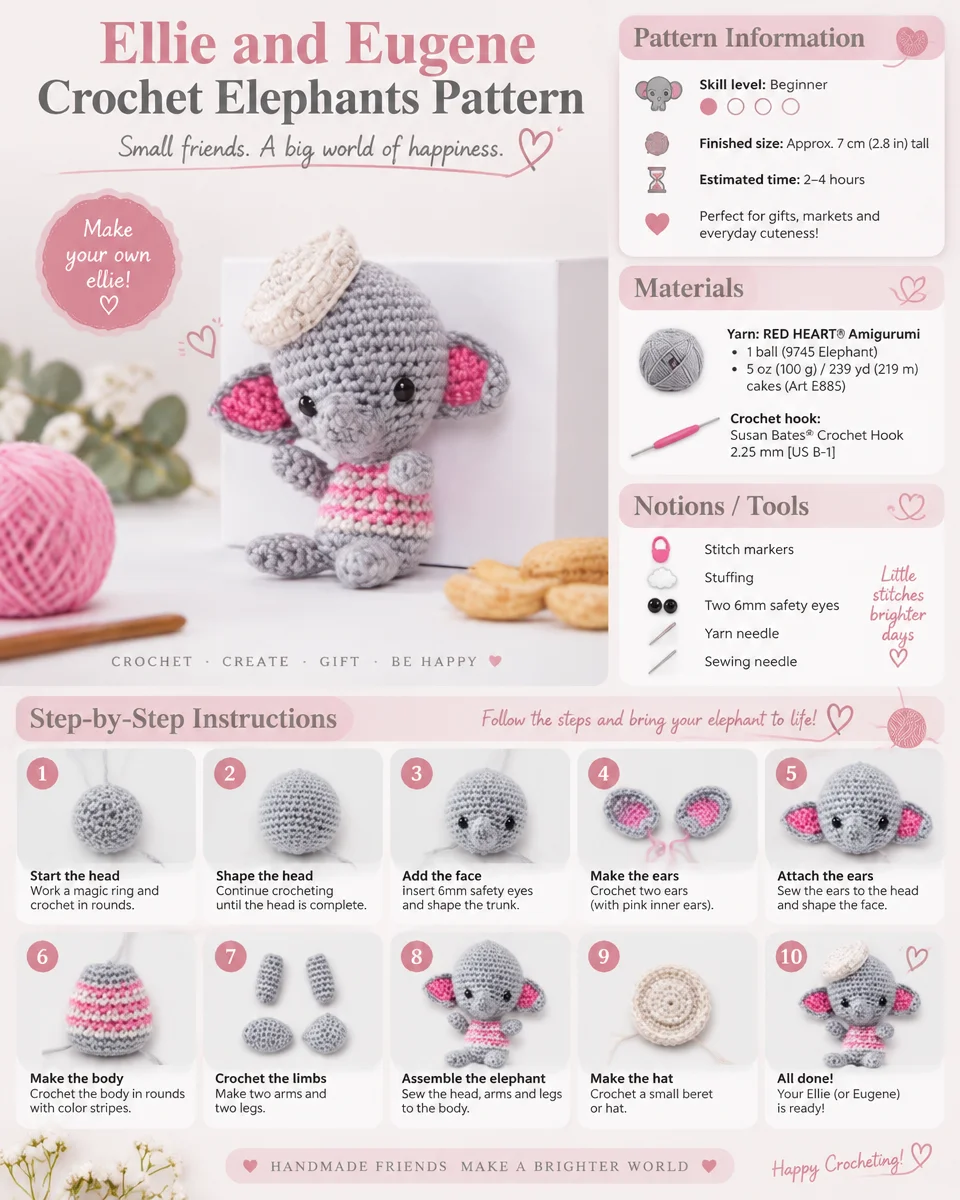
To create your Ellie and Eugene elephants, you will need the following materials:
Yarn
- Yarn: RED HEART® Amigurumi, 1 ball (9745 Elephant), 3.5 oz (100 g) / 239 yd (219 m) cakes (Art E885)
Crochet Hook
- Crochet Hook: Susan Bates® Crochet Hook 2.25 mm [US B-1]
Notions
- Stitch markers
- Stuffing
- Two 6mm safety eyes
- Yarn needle
- Sewing needle
- White sewing thread (for sewing hat to head)
Optional Materials
- Knee high stocking and plastic pellets for weighted stuffing
- Chenille stem for trunk armature
Additional
- Optional photo guide for eye placement
Crochet Abbreviations
- sc: single crochet
- sc2tog: single crochet two together
- ch: chain
- sl st: slip stitch
- hdc: half double crochet
Special Technique
Adjustable Ring
Wrap yarn into a ring, ensuring that the tail falls behind the working yarn. Grip ring and tail between middle finger and thumb. Insert hook through center of ring, yarn over (with working yarn) and draw up a loop. Work stitches of the first round in the ring. After the first round of stitches is worked, pull gently on tail to tighten the ring.
Head
Beginning from the top of the head with A, make an adjustable ring.
Round 1 (right side): Work 6 sc in ring; do not join, work in continuous rounds (spiral)—6 sc.
Place a marker in the last sc worked to indicate the end of the round. Move the marker up as each round is completed.
Round 2: 2 sc in each of the next 6 sts—12 sc.
Round 3: [Sc in next st, 2 sc in next st] 6 times—18 sc.
Round 4: [Sc in next 2 sts, 2 sc in next st] 6 times—24 sc.
Round 5: [Sc in next 3 sts, 2 sc in next st] 6 times—30 sc.
Round 6: [Sc in next 4 sts, 2 sc in next st] 6 times—36 sc.
Round 7: [Sc in next 5 sts, 2 sc in next st] 6 times—42 sc.
Rounds 8–10: Sc in each st around.
Round 11: [Sc in next 5 sts, sc2tog] 6 times—36 sc.
Rounds 12–14: Sc in each st around.
Round 15: [Sc in next 4 sts, sc2tog] 6 times—30 sc.
Begin stuffing head and continue as work progresses.
Make Opening for Trunk
Round 16: Ch 3, skip next 3 sts (for trunk opening), sc in next 2 sts, [sc2tog, sc in next 2 sts] 6 times, sc in last st—21 sc and 1 ch-3 space (trunk opening).
Eyes: Using the photograph as a guide, attach safety eyes between Rounds 14 and 15, about 3 or 4 stitches from edges of trunk opening and about 6–8 stitches apart. Take care that the washer on the back of each safety eye does not overlap into the trunk opening, so that they do not interfere with trunk stitches to be worked later.
Round 17: Working in each ch of the ch-3 and each sc around, [sc in next 2 sts, sc2tog] 6 times—18 sc.
Note: Now you will pause working the head so that the trunk can be made while it is easier to access the trunk from the inside of the head, rather than having to stuff the trunk through the tiny opening at the tip of the trunk. The head will be completed after the trunk is made.
Remove loop from hook and place it on a stitch marker or elongate it, so that it does not unravel. Cut yarn, leaving about 1yd/1m tail for completing head.
Trunk
Trunk Round 1 (right side): With the right side facing, join A with sc in the first skipped sc of trunk opening, sc in next 2 sc, sc in side of trunk opening, sc in base of each of next 3 ch of trunk opening, sc in side of trunk opening; do not join, work in continuous rounds (spiral)—8 sc.
Place a marker in the last sc worked to indicate the end of the round. Move the marker up as each round is completed.
Rounds 2–7: Sc in each st around.
Round 8: [Sc2tog, sc in next 2 sts] twice—6 sc.
Fasten off, leaving a long tail. Weave tail through stitches of last round and pull to close the opening. Secure tail and weave to inside of trunk.
Complete Head
Return the dropped loop to the hook and pull until the loop sits snuggly on the hook.
Round 18: Sc in each st around.
Working from inside of head, complete stuffing head and stuff trunk inserting chenille stem for armature (if desired).
Round 19: [Sc2tog] 9 times—9 sc.
Fasten off. Weave in ends.
Body
Beginning at the bottom of the body with A, make an adjustable ring.
Round 1 (right side): Work 7 sc in ring; do not join, work in continuous rounds (spiral)—7 sc.
Place a marker in the last sc worked to indicate the end of the round. Move the marker up as each round is completed.
Round 2: 2 sc in each of the next 7 sts—14 sc.
Round 3: [Sc in next st, 2 sc in next st] 7 times—21 sc.
Round 4: [Sc in next 2 sts, 2 sc in next st] 7 times—28 sc.
Round 5: Sc in each st around and change to B in last st.
Begin Striped Shirt
Round 6: With B, [sc2tog, sc in next 2 sts] 7 times and change to C in last st—21 sc. Do not cut B. Carry B inside piece.
Round 7: With C, sc in each st around and change to B in last st. Do not cut C. Carry C inside piece.
Round 8: With B, sc in each st around and change to C in last st. Do not cut B. Carry B inside piece.
Round 9: With C, [sc2tog, sc in next 5 sts] 3 times and change to B in last st—18 sts. Do not cut C. Carry C inside piece.
Round 10: Repeat Round 8.
Round 11: Repeat Round 7. Cut C.
Stuff the body with stuffing or with the optional knee-high filled with plastic pellets.
Round 12 (neck): With B, [sc in next st, sc2tog] 6 times—12 sts.
Fasten off, leaving a long tail for sewing head to body.
Ears (Make 2)
Inner Ears (Make 2)
With C, ch 7.
Row 1: Working in back bumps only, sc in 2nd ch from hook and remaining each ch across—6 sc.
Row 2: Ch 1, turn, skip first st, sc in next 5 sts—5 sc.
Row 3: Ch 1, turn, sc in first 3 sts, sc2tog—4 sc.
Row 4: Ch 1, turn, sc2tog, skip next st, sc in last st—2 sc.
Fasten off. Weave in and trim ends.
Outer Ears (Make 2)
With A, make same as inner ear through Row 4—2 sc.
Do not fasten off.
Joining Round:
Place an inner ear on top of the outer ear with stitches matching; working through both thicknesses, work sc evenly spaced all the way around the outer edge of the ear working 2 sc in each corner; join with slip st in the first sc.
Fasten off leaving a long tail for sewing ear to head.
Arms (Make 2)
With A, leaving a long beginning tail, make an adjustable ring.
Round 1 (right side): Work 5 sc in ring; do not join, work in continuous rounds (spiral)—5 sc.
Place a marker in the last sc worked to indicate the end of the round. Move the marker up as each round is completed.
Rounds 2–5: Sc in each st around.
Stuff arm lightly. Fasten off leaving a long tail. Weave the tail through stitches of the last round and pull to close the opening. Weave in and trim the ending tail. Do not cut the beginning tail. It can be used later for sewing leg to body.
Legs (Make 2)
With A, leaving a long beginning tail, make an adjustable ring.
Round 1 (right side): Work 5 sc in ring; do not join, work in continuous rounds (spiral)—5 sc.
Place a marker in the last sc worked to indicate the end of the round. Move the marker up as each round is completed.
Round 2: [Sc in next st, 2 sc in next st] twice, sc in last st—7 sc.
Round 3: 2 sc in next st, sc in next 6 sts—8 sc.
Rounds 4–6: Sc in each st around.
Stuff leg lightly. Fasten off leaving a long tail. Weave the tail through the stitches of the last round and pull to close the opening. Weave in and trim the ending tail. Do not cut the beginning tail. It can be used later for sewing leg to body.
Tail
With A, ch 4. Fasten off leaving a long tail for sewing tail to body. Trim the beginning yarn tail to about ¼” [6mm] and fray yarn to form a tiny tassel.
Hat
With B, make an adjustable ring.
Crown (Top of Hat)
Round 1 (right side): Work 6 sc in ring; do not join, work in continuous rounds (spiral)—6 sc.
Place a marker in the last sc worked to indicate the end of the round. Move the marker up as each round is completed.
Round 2: 2 sc in each of the next 6 sts—12 sc.
Round 3: [Sc in next st, 2 sc in next st] 6 times—18 sc.
Round 4: [Sc in next 2 sts, 2 sc in next st] 6 times—24 sc.
Round 5: [Sc in next 3 sts, 2 sc in next st] 6 times—30 sc.
Rounds 6 and 7: Sc in each st around.
Brim
Round 8 (wrong side): Ch 1, TURN, working in back loops only, sc in each st around; join with slip st in the first sc of this round—30 sc.
Round 9: Ch 1, hdc in same st as joining slip st and in next 3 sts, 2 hdc in next st, [hdc in next 4 sts, 2 hdc in next st] 5 times; join with slip st in the first hdc—36 hdc.
Round 10: Ch 1, slip st in each st around; join with slip st in the first st.
Fasten off. Weave in and trim ends.
Finishing (Assembly)
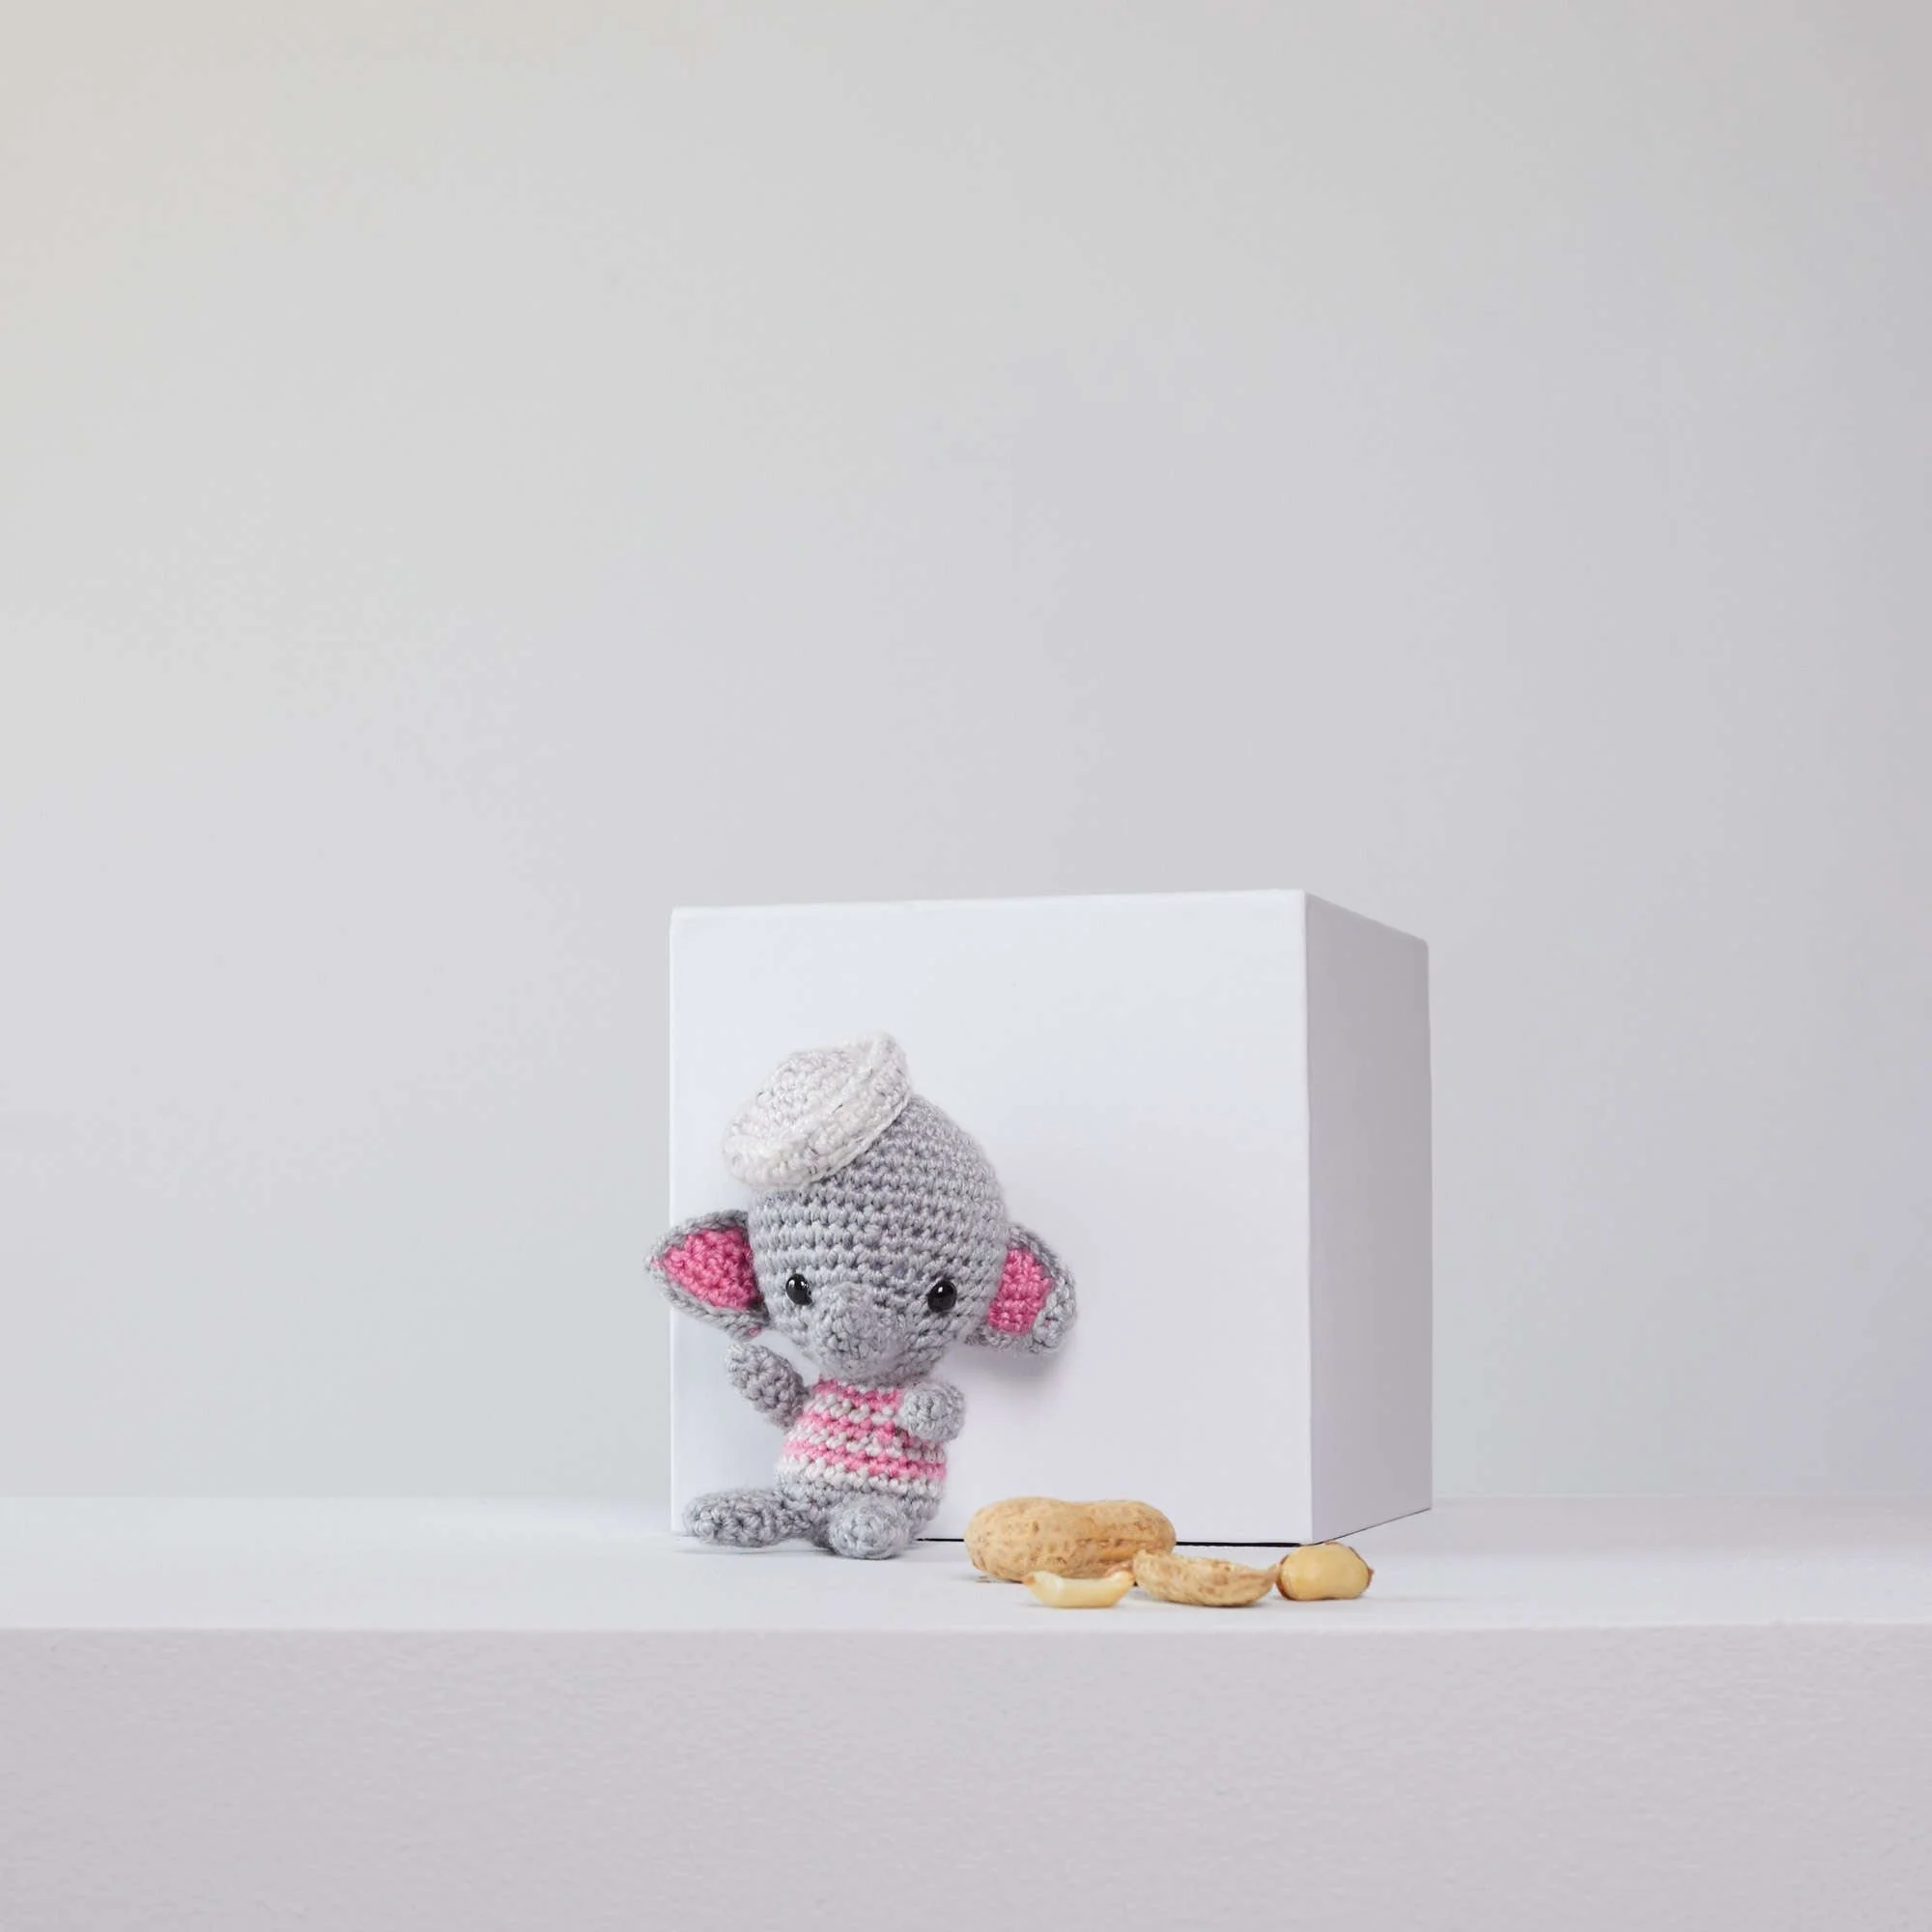
Referring to the photograph as a guide to placement, use yarn tails or yarn scraps to sew the following pieces together:
- Sew ears to the lower portion of each side of the head.
- Sew head to neck opening of body.
- Sew arms along about 3rd row from the top of the body and about 8 stitches apart.
- Sew legs to A-colored lower portion of the body, placing them towards the front so that the elephant is in a sitting position or place them directly at the bottom of the body for a standing position.
- Sew the tail to the back of the body in the middle of the A-colored lower portion.
Tilt the hat to one side of the top of the head. With a sewing needle and white sewing thread, sew the hat to the head, placing a small amount of stuffing in the crown before completing the sewing.
Weave in and trim any remaining ends. If a chenille stem was used in the trunk, bend the trumpet upwards or into your desired position.
Frequently Asked Questions
What crochet hook is used for this pattern?
The recommended crochet hook is a Susan Bates® Crochet Hook 2.25 mm [US B-1].
Is this project worked in rows or rounds?
This crochet project is primarily worked in rounds.
Does this crochet project require assembly?
Yes, assembly is involved as the various pieces (head, body, arms, legs, ears, and hat) must be sewn together.
Conclusion
Now that you have the Ellie and Eugene Crochet Elephants Pattern, you’re ready to start crafting these lovable amigurumi elephants. Not only will they serve as delightful toys, but they’ll also make heartwarming gifts for both kids and adults alike. Happy crocheting!