Crochet Amigurumi Snowman Ornaments Pattern
Crocheting seasonal decorations brings a warm touch to your home, and what could be more charming than handmade snowman ornaments? This crochet pattern for amigurumi snowman ornaments will add joy and a personal flair to your holiday décor. Whether to hang on your tree or gift to friends, these little snowmen are sure to spread smiles.
About This Amigurumi Design
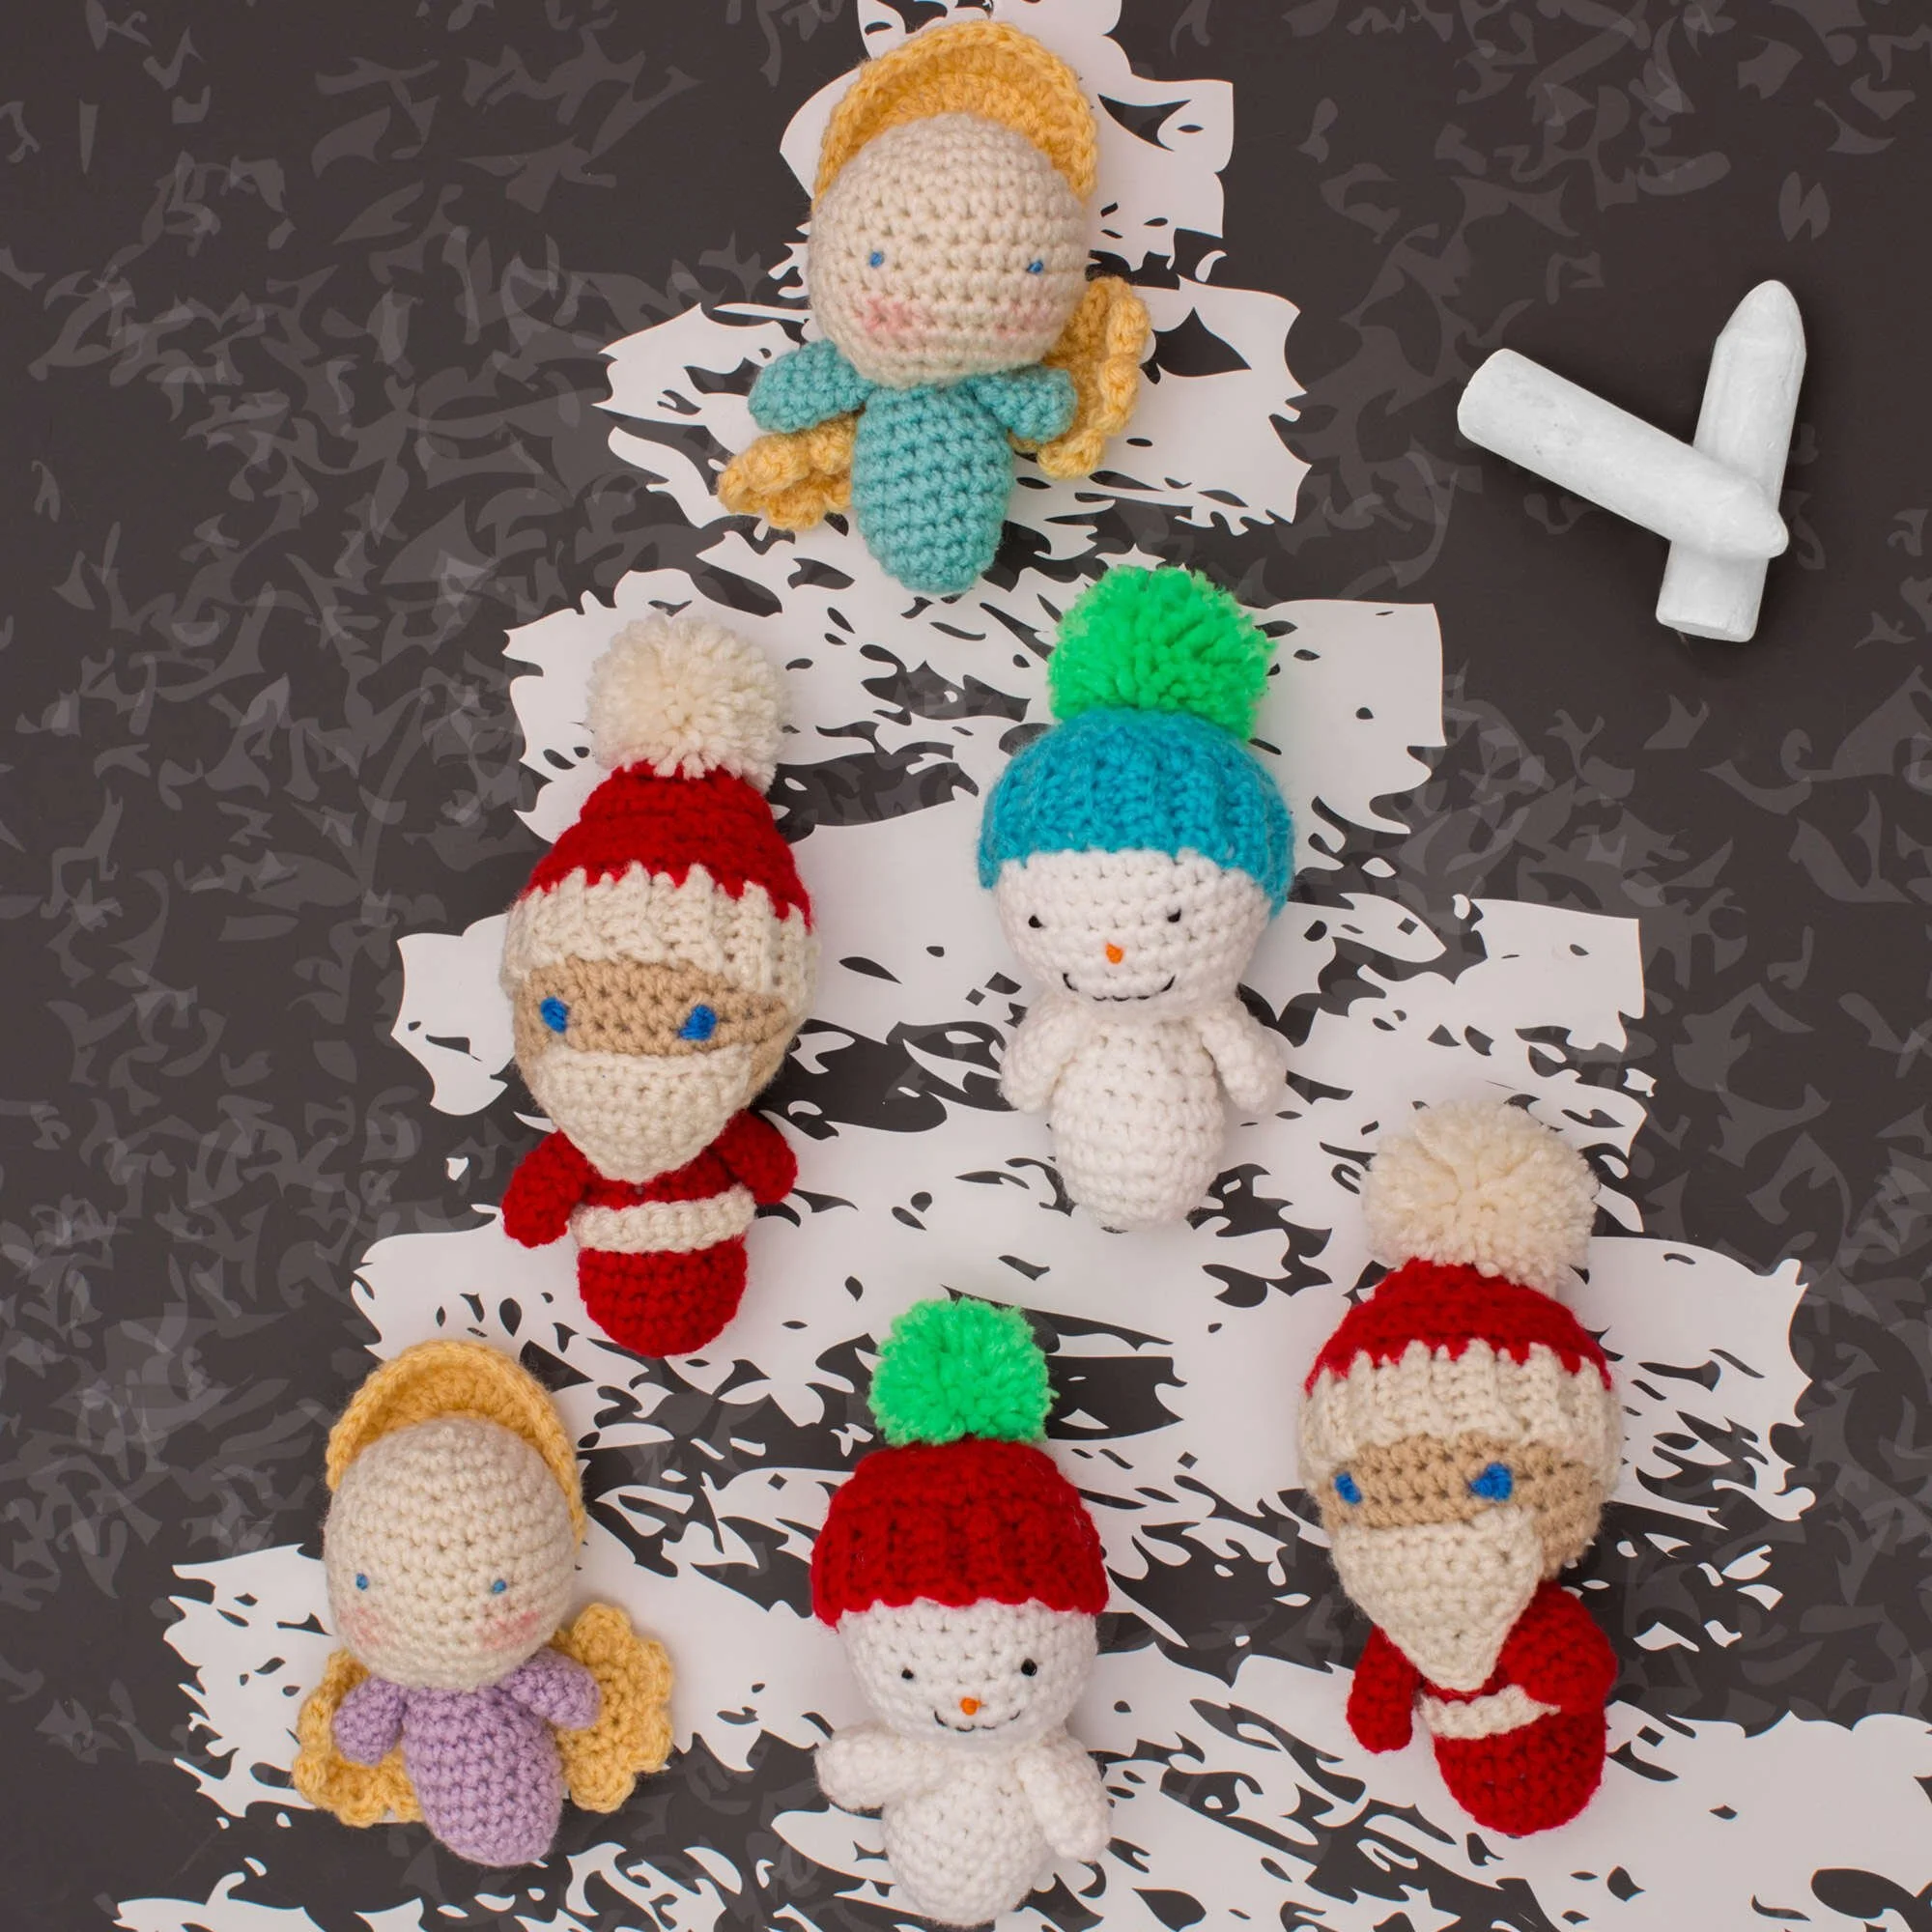
This pattern is designed to create adorable amigurumi snowman ornaments. Each snowman features a classic shape with cute facial features and a cozy hat. You’ll be using a blend of colors that mimic the chilly winter season. The snowman is small enough to hang from a tree or use as a festive decoration around your home.
Materials
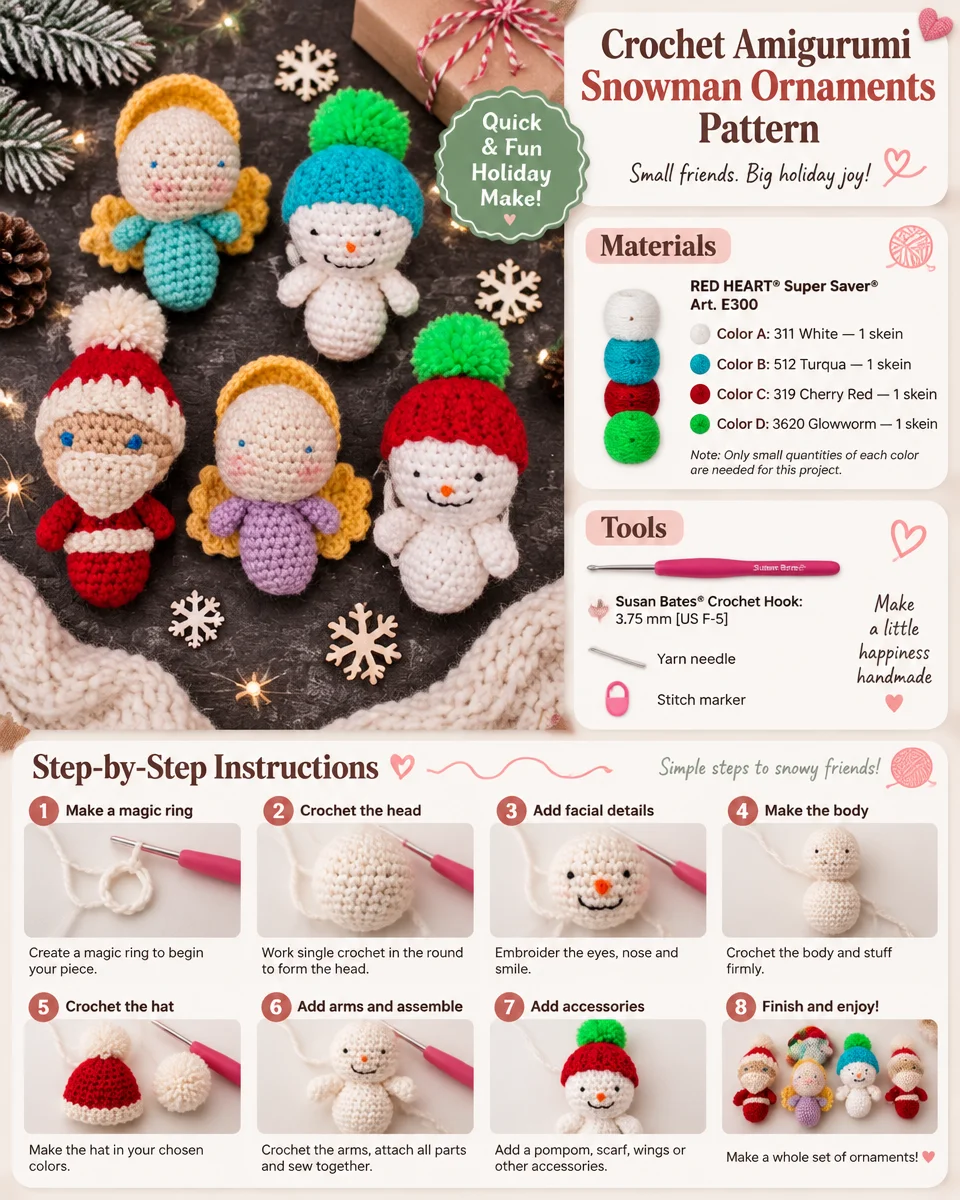
To complete this crochet project, gather the following materials:
Yarn
- RED HEART® Super Saver®
- Color A: 311 White — 1 skein (solid)
- Color B: 512 Turqua — 1 skein
- Color C: 319 Cherry Red — 1 skein
- Color D: 3620 Glowworm — 1 skein
Note: Only small quantities of each color are needed for this project.
Crochet Hook
- Susan Bates® Crochet Hook: 3.75 mm [US F-5]
Notions
- Yarn needle
- Stitch marker
- Polyester fiberfill
- Embroidery floss: black, orange, and white
Crochet Abbreviations
To help you follow along with the instructions, here are a few abbreviations you’ll encounter in this pattern:
- ch = chain
- sc = single crochet
- sl st = slip stitch
- st = stitch
- sc2tog = single crochet two together
Pattern Notes
This pattern is worked in unjoined rounds for the head, body, and arms, while the hat is made in turned rows. It is important to use a stitch marker to indicate the beginning of each round.
Head
(Worked in unjoined rounds)
Beginning at top, with Color A, ch 2.
-
Round 1: Work 6 sc in 2nd ch from hook—6 sc.
Place marker for beginning of round and move marker up as each round is completed. -
Round 2: Work 2 sc in each sc around—12 sc.
-
Round 3: *Sc in next sc, 2 sc in next sc; repeat from * around—18 sc.
-
Round 4: *Sc in next 2 sc, 2 sc in next sc; repeat from * around—24 sc.
-
Round 5: Sc in each sc around.
-
Round 6: *Sc in next 3 sc, 2 sc in next sc; repeat from * around—30 sc.
-
Rounds 7–11: Repeat Round 5.
-
Round 12: *Sc2tog; repeat from * around—15 sc.
-
Round 13: Repeat Round 5; join with sl st in first sc.
Fasten off, leaving a long tail.
Facial Features (Embroidery placement/stitching)
Refer to a photograph as a guide for placement:
- With 6 strands of black embroidery floss, embroider French knot eyes on Round 10 and back stitches in a curve for the mouth.
- With 12 strands of orange embroidery floss, make a French knot for the carrot nose between the eyes and mouth, wrapping the floss around the needle three times for prominence.
Body
(Worked in unjoined rounds)
Beginning at the bottom, with Color A, ch 2.
-
Rounds 1 and 2: Work same as Rounds 1 and 2 of head—12 sc total.
-
Round 3: *Sc in next 3 sc, 2 sc in next sc; repeat from * around—15 sc.
-
Rounds 4–8: Work same as Round 5 of head.
-
Round 9: *Sc in next 3 sc, sc2tog; repeat from * around—12 sc.
-
Round 10: Work same as Round 5 of head. Stuff body with fiberfill.
-
Round 11: Work same as Round 12 of head; join with sl st in first sc—6 sc.
Fasten off, leaving a long tail. Weave the tail through the last round and pull closed.
Arm (make 2)
(Worked in unjoined rounds; do not stuff)
With Color A, ch 2.
-
Round 1: Work same as Round 1 of head—6 sc.
-
Round 2: Repeat Round 3 of head—9 sc.
-
Rounds 3–6: Repeat Round 5 of head; join with sl st in first sc.
Fasten off, leaving a long tail. Do not stuff.
Hat
(Worked in turned rows; use Color B and Color C for hat)
Ribbing
- Ch 5.
- Row 1 (right side): Sc in 2nd ch from hook and in each ch across, turn—4 sc.
- Rows 2–30: Ch 1, sc in back loop of each sc across, turn.
Crown
- Row 1 (right side): Ch 1, working in ends of rows, sc in each row across, turn—30 sc.
- Row 2: Ch 1, *sc in next 3 sc, sc2tog; repeat from * across, turn—24 sc.
- Row 3: Ch 1, sc in each sc across, turn.
- Row 4: Ch 1, *sc in next 2 sc, sc2tog; repeat from * across, turn—18 sc.
- Row 5: Ch 1, *sc in next sc, sc2tog; repeat from * across, turn—12 sc.
- Row 6: Ch 1, *sc2tog; repeat from across.
Fasten off, leaving a long tail.
Assembly
- Arms: Weave tail through the last round and pull stitches closed, then sew in place at the top of the body.
- Head & Body: Stuff head with fiberfill. Push Round 13 of the head onto the top of the body. With the end tail, sew securely around to join the head to the body.
- Hat: Weave tail through the last row and pull closed. Working through the ends of the rows, sew the back seam. Working in the ends of the rows of ribbing, sew the hat onto the head.
Finishing
Pompom (make 2) using Color D
- Cut a 15″ (38 cm) strand of Color D and set aside.
- Wrap Color D around your four fingers 50 times.
- Carefully slide loops off your fingers and tie a single strand very tightly around the center of the loops. Do not cut or trim the center tie.
- Cut the loops open at both ends.
- Shake and trim evenly to your desired length.
- Thread the ends of the center tie through the top of the hat and secure the pompom.
Hanging Loop
- Cut a strand of white embroidery floss to your desired length for the hanging loop, thread through the top of the ornament, and tie the ends in a knot.
- Weave in all ends for a clean finish.
Frequently Asked Questions
What crochet hook is used for this pattern?
You will need a Susan Bates® Crochet Hook in size 3.75 mm [US F-5] for this project.
Is this project worked in rows or rounds?
The snowman ornament consists of multiple components worked in both unjoined rounds (for the head, body, and arms) and turned rows (for the hat).
Does this crochet project require assembly?
Yes, the head, body, arms, and hat all need to be assembled together to complete the snowman ornament.
Conclusion
Creating these crocheted amigurumi snowman ornaments is a delightful way to celebrate the winter season. With their charming features and handmade quality, they make perfect decorations for your home or thoughtful gifts for loved ones. Embrace your creativity and enjoy the process of bringing these snowmen to life, one stitch at a time! Happy crocheting!