Crochet Christmas Tree Pattern
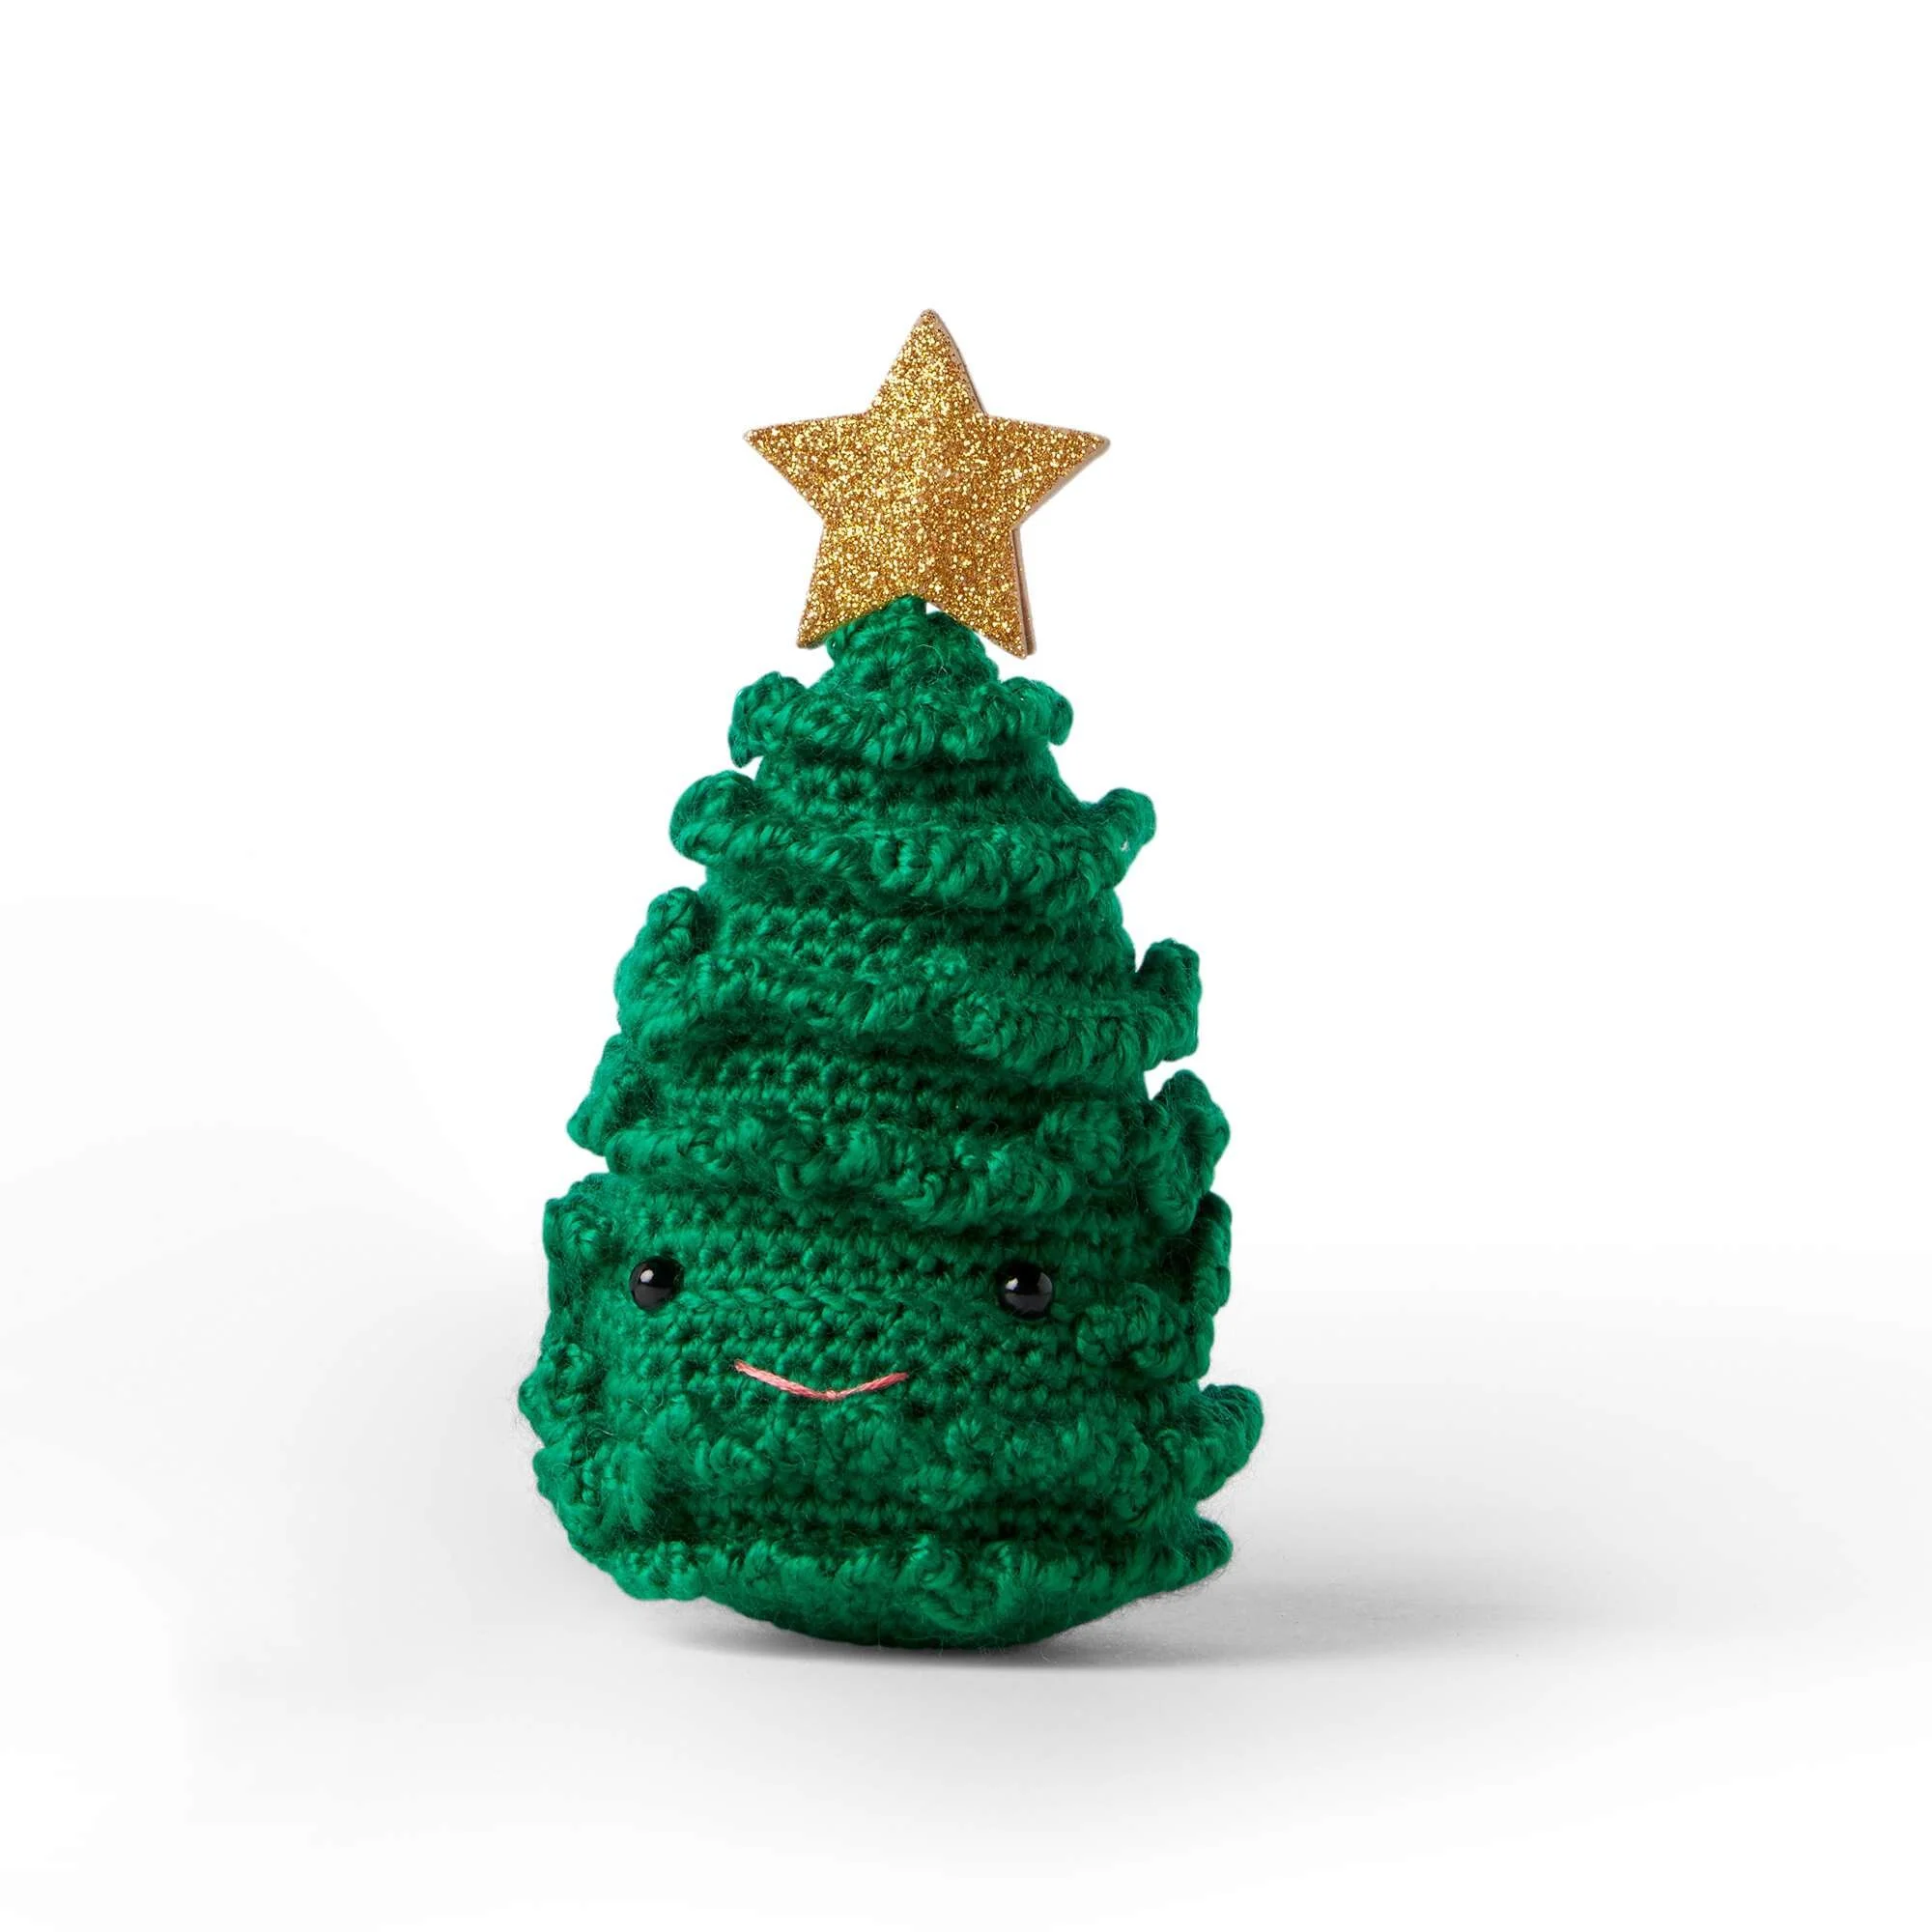
The holiday season is here, and what better way to spread joy than by creating your very own adorable crochet Christmas tree? This delightful pattern will guide you step-by-step to crochet a festive tree that adds charm to your decorations. Made using the popular Red Heart® Amigurumi™ yarn, this tree makes for a wonderful gift or holiday decoration. Let’s dive into this fun crochet project!
About the Crochet Project
This Crochet Christmas Tree pattern is a delightful amigurumi project that involves working in rounds to create a festive holiday decoration. The tree is not only cute but can also be customized with different embellishments, making it a personal craft project that can become a cherished part of your holiday decor. Plus, the use of safety eyes and weighted stuffing gives this little tree a personality of its own!
Materials
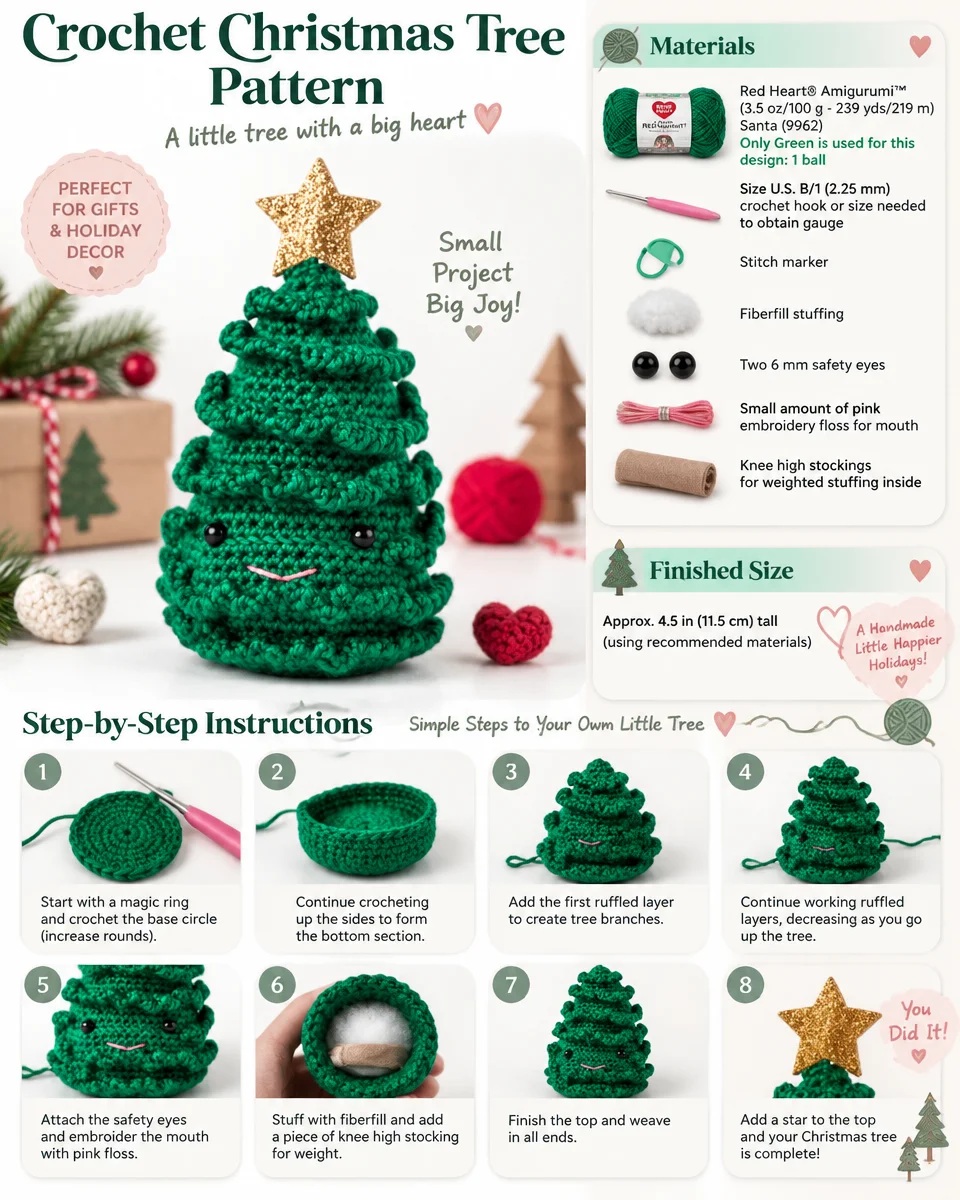
To crochet this adorable Christmas tree, gather the following materials:
Yarn
- Red Heart® Amigurumi™ (3.5 oz/100 g; 239 yds/219m)
- Color: Santa (9962) – Only Green is used for this design: 1 ball
Crochet Hook
- Size U.S. B/1 (2.25 mm) or size needed to obtain gauge
Stuffing
- Fiberfill stuffing
- Weighted stuffing (like aquarium gravel, plastic pellets, or rice)
- Knee-high stockings for weighted stuffing
Notions
- Stitch marker
- Two 6 mm safety eyes
- Small amount of pink embroidery floss for mouth
- Two 1½” [4 cm] self-stick glitter foam stars
- Toothpick for star topper
Crochet Abbreviations
For this pattern, the following abbreviations are used:
- ch = chain
- sc = single crochet
- PM = place marker
- sc2tog = single crochet two together
- st = stitch
Pattern Notes
- This pattern is worked entirely in rounds.
- Each round begins without joining; a stitch marker (PM) is essential to keep track of the beginning of each round.
- The weighted stuffing will help your tree stand upright, which is especially important for small amigurumi like this one.
Instructions
TREE
Begin at the base of the tree with a chain of 2.
- 1st rnd: 6 sc in 2nd ch from hook. Do not join. PM for beg of rnd. (6 sc)
- 2nd rnd: 2 sc in each of next 6 sc. (12 sc)
- 3rd rnd: (1 sc next sc, 2 sc in each of next sc) 6 times. (18 sc)
- 4th rnd: (1 sc in each of next 2 sc, 2 sc in next sc) 6 times. (24 sc)
- 5th rnd: (1 sc in each of next 3 sc, 2 sc in next sc) 6 times. (30 sc)
- 6th rnd: (1 sc in each of next 4 sc, 2 sc in next sc) 6 times. (36 sc)
- 7th rnd: (1 sc in each of next 5 sc, 2 sc in next sc) 6 times. (42 sc)
- 8th rnd: (1 sc in each of next 8 sc, 2 sc in next sc) 6 times. (48 sc)
- 9th rnd (Bottom ridge): Working in back loops only, 1 sc in each sc around.
Sides
- 10th to 12th rnds: Working in both loops, 1 sc in each sc around.
- 13th rnd: Working in back loops only, 1 sc in each sc around.
- 14th rnd: As 10th rnd.
- 15th rnd: (sc2tog, 1 sc in each of next 14 sts) 3 times. (45 sts)
- 16th rnd: As 10th rnd.
- 17th rnd: As 13th rnd.
- 18th rnd: (sc2tog, 1 sc in each of next 13 sts) 3 times. (42 sts)
- 19th rnd: As 10th rnd.
- 20th rnd: (sc2tog, 1 sc in each of next 12 sts) 3 times. (39 sts)
- 21st rnd: As 13th rnd.
- 22nd rnd: As 10th rnd.
Attach Safety Eyes
- Attach safety eyes between 21st and 22nd rnds approx 9 sts apart.
- Stuff with weighted stuffing placed in the toe of a knee-high stocking.
- Start stuffing piece firmly and continue stuffing as work progresses.
Continuing to Shape the Tree
- 23rd rnd: (sc2tog, 1 sc in each of next 11 sts) 3 times. (36 sts)
- 24th rnd: As 10th rnd.
- 25th rnd: As 13th rnd.
- 26th rnd: (sc2tog, 1 sc in each of next 4 sts) 6 times. (30 sts)
- 27th rnd: As 10th rnd.
- 28th rnd: (sc2tog, 1 sc in each of next 3 sts) 6 times. (24 sts)
- 29th rnd: As 13th rnd.
- 30th rnd: (sc2tog, 1 sc in each of next 2 sts) 6 times. (18 sts)
- 31st rnd: As 10th rnd.
- 32nd rnd: (sc2tog, 1 sc in next st) 6 times. (12 sts)
- 33rd rnd: As 13th rnd.
- 34th rnd: (sc2tog, 1 sc in next st) 4 times. (8 sts)
Finish the Piece
- Finish stuffing the piece.
- 35th rnd: 1 sc in each st around.
- Fasten off, leaving a long end. Thread through remaining sts, pull tightly and fasten securely.
TREE NEEDLES
Note: The needles are worked into the front loops only of 13th, 17th, 21st, 25th, 29th and 33rd rnds.
- 1st rnd: With tree tip facing down, join yarn with sl st to any front loop of 13th rnd. Ch 3, sl st in front loop of next st. Repeat from * around, working the last sl st in the same space as the first sl st. Fasten off.
- 2nd rnd: With tree tip facing down, join yarn with sl st to any front loop of 17th rnd. Rep as given for 1st rnd.
- 3rd rnd: Join yarn with sl st in front loop of the second st from the outside edge of one eye of 21st rnd. Working around side and back of tree towards the other eye, ch 3, sl st in front loop of next st. Rep from * to 1 front loop before the second eye. Fasten off.
- 4th, 5th and 6th rnds: With tree tip facing down, join yarn with sl st to any front loop of corresponding 25th, 29th and 33rd rnds. Rep as given for 1st rnd.
Finishing Touches
Smile
- Separate 4 of the 6 strands from the pink embroidery floss.
- Embroider a small upturned arc that spans 5 sts for the mouth.
Star Topper
- With the glue side up, place one end of a toothpick in the middle of one star.
- Place the second star glue-side down on the glue-side of the first star. Press firmly to ensure a bond.
- Stick the toothpick of the star topper down into the top of the tree.
Frequently Asked Questions
What crochet hook is used for this pattern?
You will need a size U.S. B/1 (2.25 mm) crochet hook, or a size needed to obtain gauge.
Is this project worked in rows or rounds?
This crochet Christmas tree project is worked entirely in rounds.
Does this crochet project require assembly?
No assembly is required. The tree is crocheted in one piece with embellishments added during the finishing phase.
Conclusion
This Crochet Christmas Tree pattern provides a joyful and festive way to celebrate the holiday season with handcrafted decor. The pattern is straightforward, making it accessible for crocheters who enjoy working in rounds. With a bit of creativity, you can personalize your tree with different colors and accessories. Embrace the spirit of Christmas and spread happiness with your very own crochet Christmas tree! Happy crocheting!