Crochet Hedgehogs Pattern
Crochet your own adorable hedgehogs with this charming pattern! These delightful amigurumi toys are perfect for adding a whimsical touch to any room or making a delightful gift for a child. Let’s jump right into the materials you’ll need and the step-by-step instructions to make your very own crochet hedgehogs!
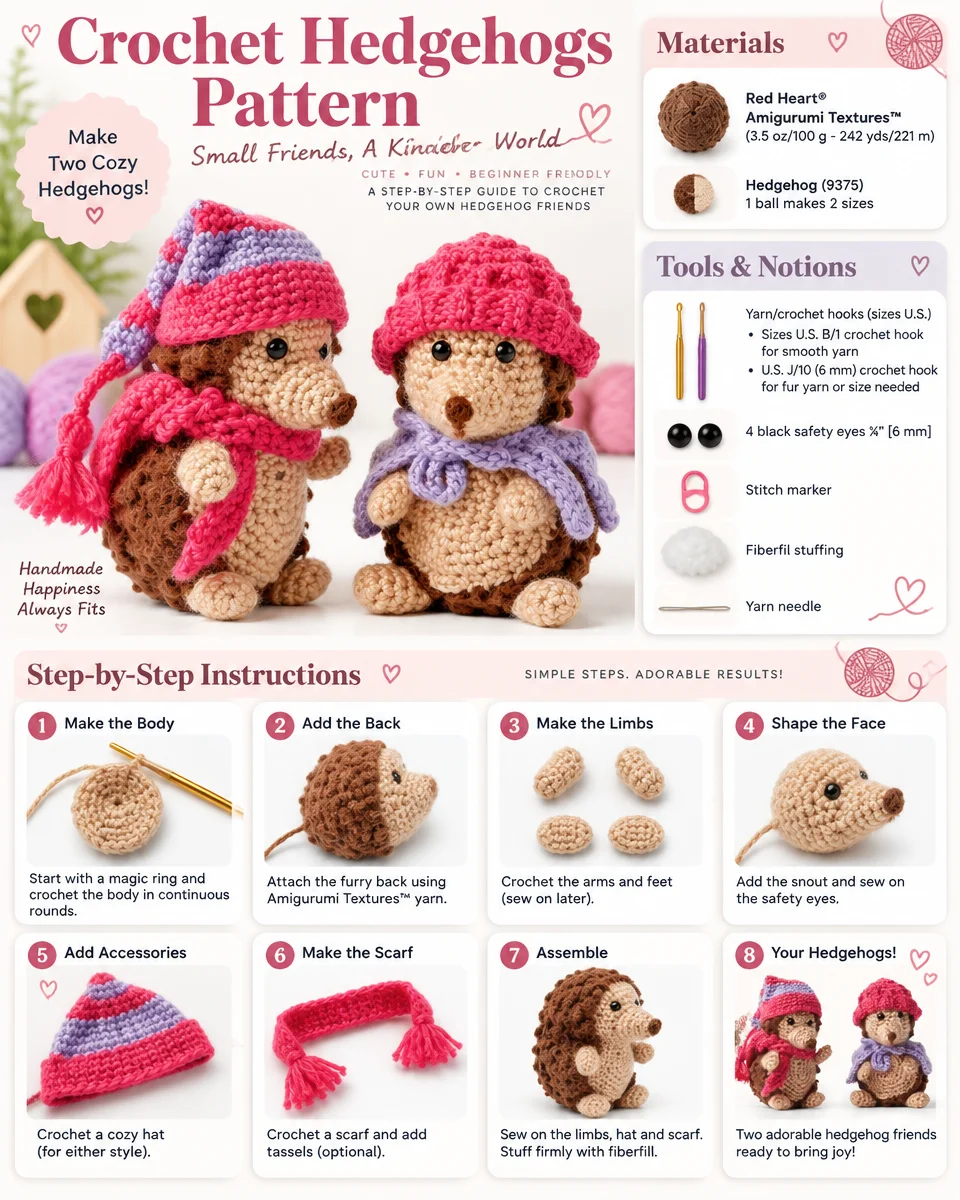
Materials
Yarn
- Red Heart® Amigurumi Textures™ (3.5 oz/100 g; 242 yds/221 m)
- Hedgehog (9375): 1 ball makes 2 sizes
Crochet Hook
- Sizes U.S. B/1 crochet hook for smooth yarn
- U.S. J/10 (6 mm) crochet hook for fur yarn or size needed to obtain gauge
Notions
- 4 black safety eyes (¼” [6 mm])
- Stitch marker
- Fiberfil stuffing
- Yarn needle
Skills
CROCHET SKILL LEVEL: INTERMEDIATE
About This Crochet Project
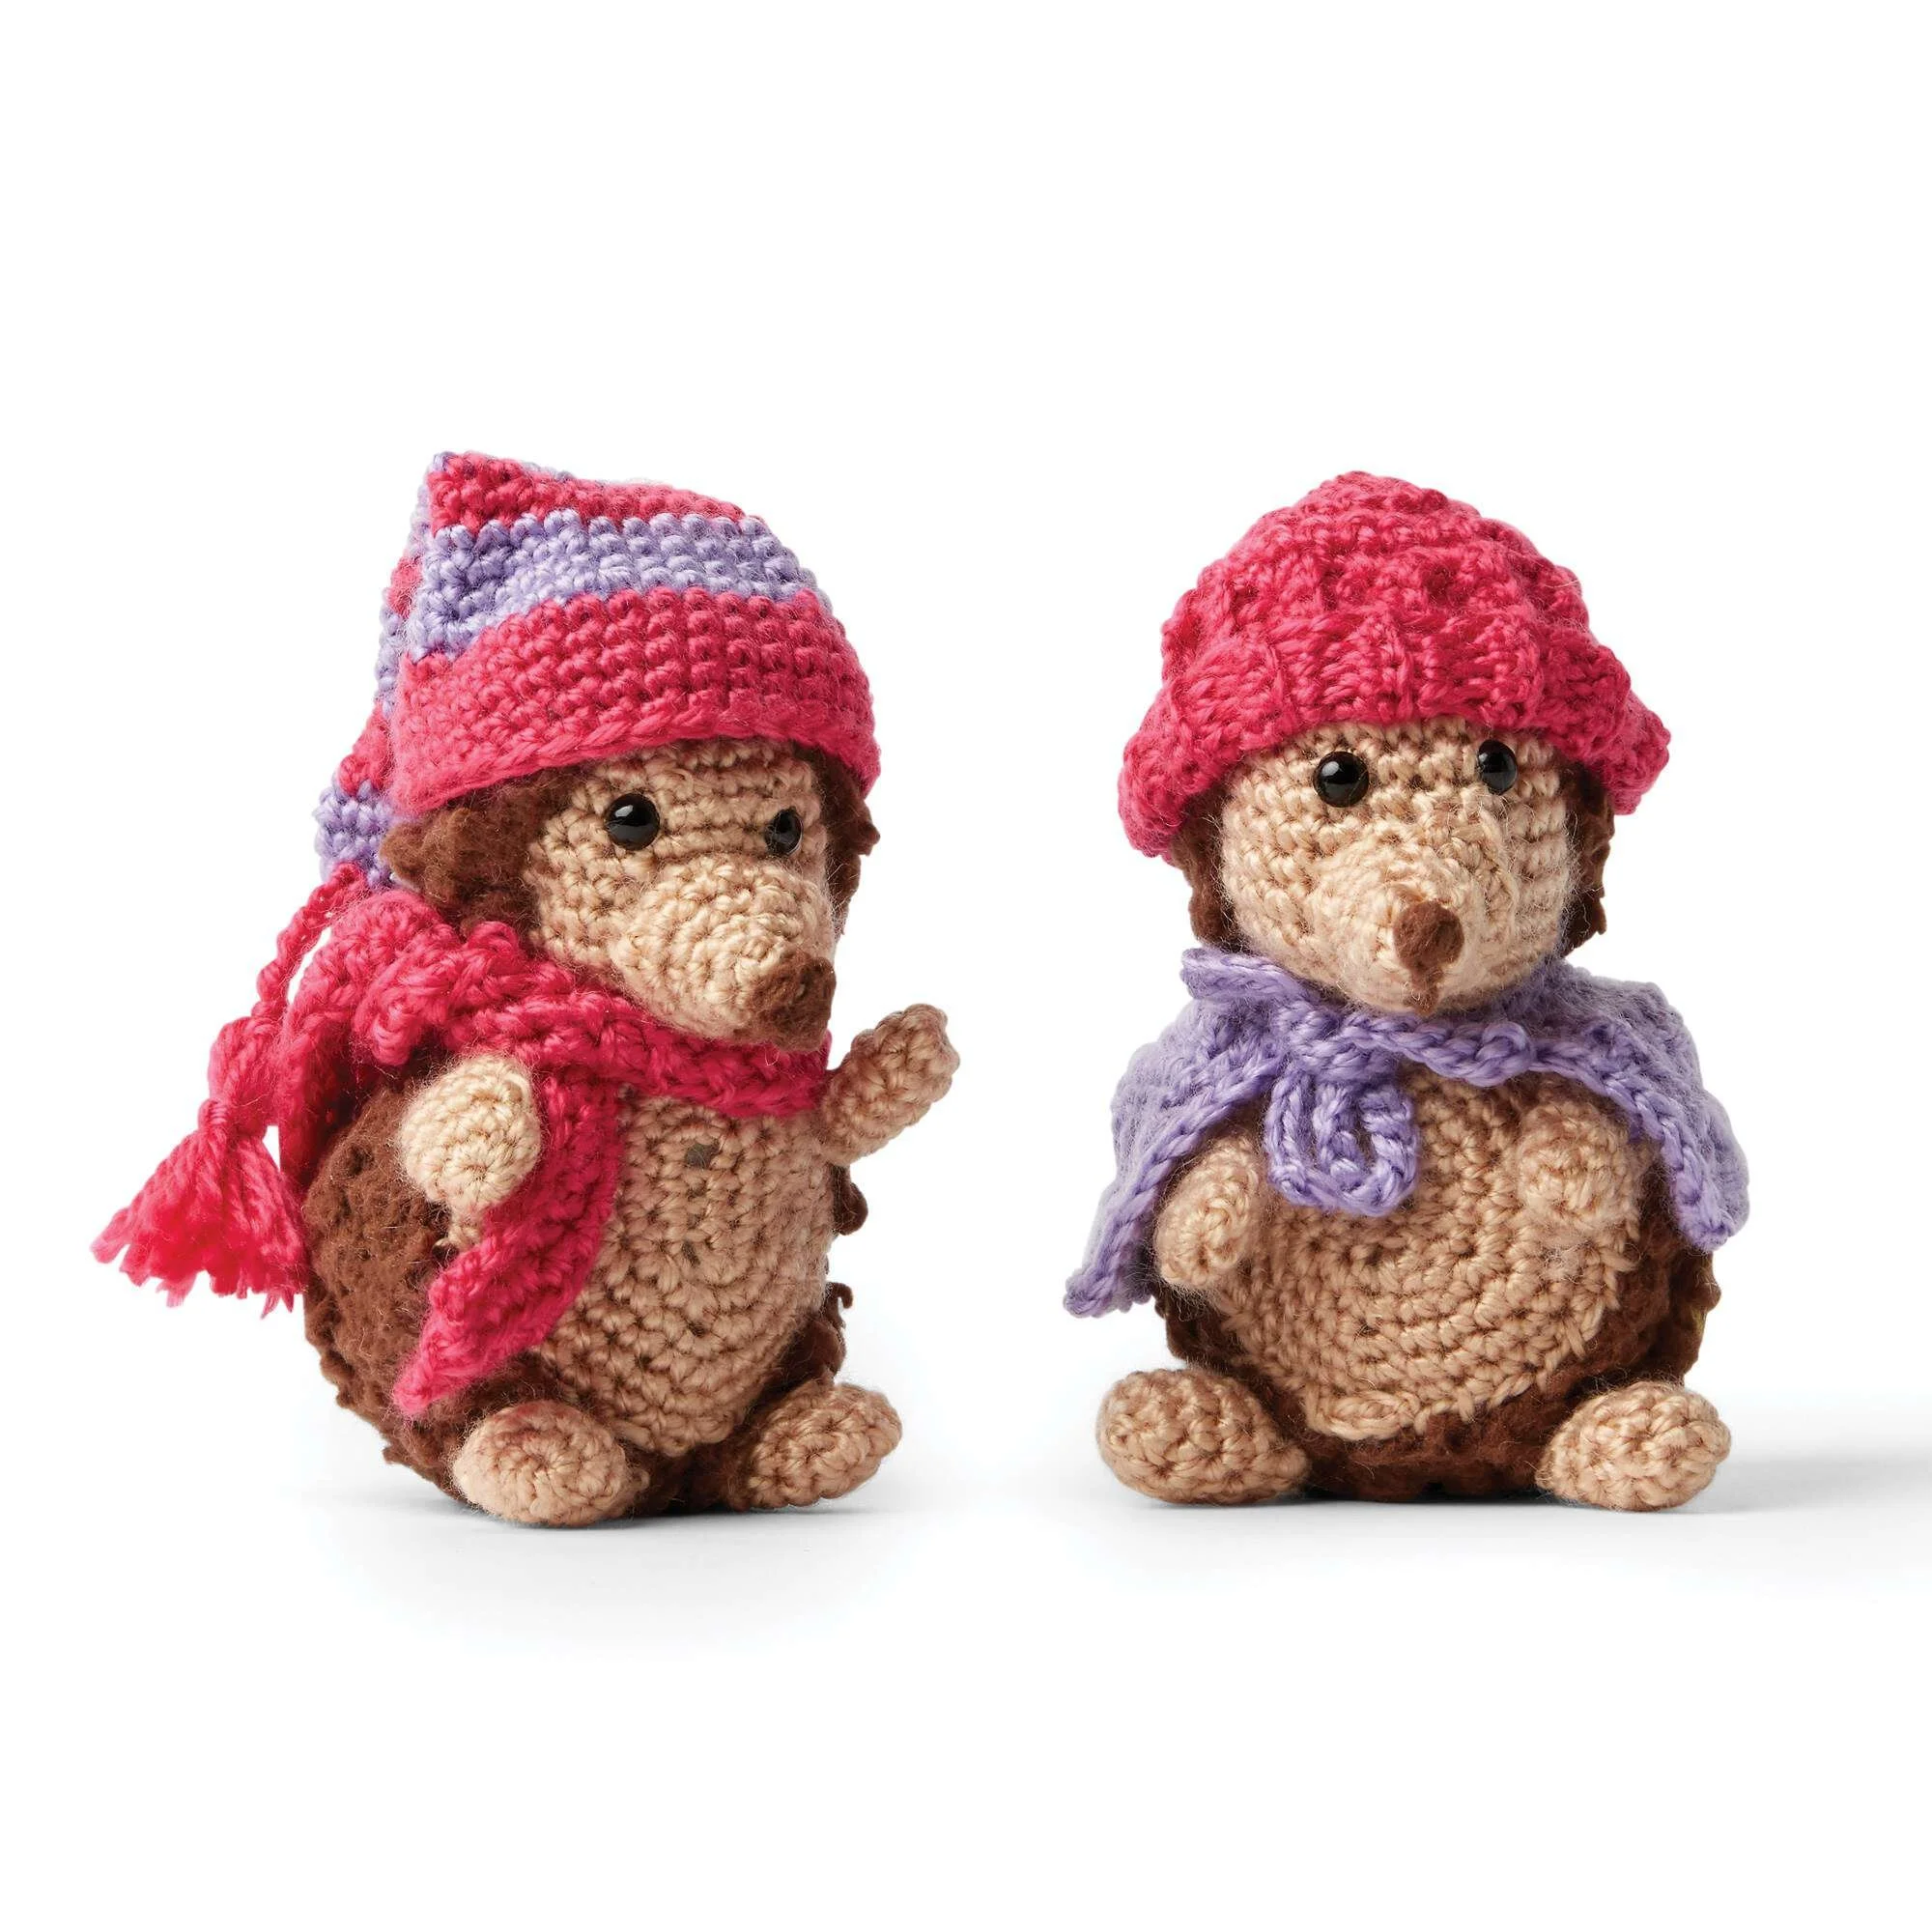
This crochet project features a pair of adorable hedgehogs that are made in two sizes. One will be slightly larger than the other, giving you the option to choose which you prefer or even make both for fun.
Head
(make 2 alike)
With the smaller hook and Color 2, ch 2.
1st rnd: 6 sc in 2nd ch from hook. Do not join at end of rnd. PM for beg of rnd.
2nd rnd: 2 sc in each sc around. (12 sc)
3rd rnd: *1 sc in next sc. 2 sc in next sc. Rep from * around. (18 sc)
4th rnd: 1 sc in each sc around.
5th rnd: *1 sc in next 2 sc. 2 sc in next sc. Rep from * around. (24 sc)
6th to 12th rnds: 1 sc in each sc around.
Inset eyes between rnds 6 and 7, with 3 sc between eyes.
13th rnd: *Sc2tog. Rep from * around. (12 sts)
14th rnd: 1 sc in each sc around.
Fasten off, leaving a long end for sewing. Stuff head.
Snout
With smaller hook and Color 2, ch 2.
1st rnd: 6 sc in 2nd ch from hook. Do not join at end of rnd. PM for beg of rnd.
2nd rnd: 1 sc in each sc around.
3rd rnd: *1 sc in next sc. 2 sc in next sc. Rep from * around. (9 sc)
4th rnd: *1 sc in each of next 2 sc. 2 sc in next sc. Rep from * around. (12 sc)
5th rnd: *1 sc in each of next 3 sc. 2 sc in next sc. Rep from * around. (15 sc)
Fasten off, leaving a long end for sewing. Stuff snout and sew in place.
With Color 1, using French Knot, embroider the nose. Using a straight stitch, embroider the mouth as shown in the picture. (Refer to diagrams on page 3.)
Front of Body
With smaller hook and Color 2, ch 6.
1st rnd: 1 sc in 2nd ch from hook and each of next 3 ch. 3 sc in last sc. Do not turn. Work in rem loops of foundation ch, 1 sc in each of next 3 sc. 2 sc in last ch. Do not join at end of rnd. PM for beg of rnd. (12 sc)
2nd rnd: 2 sc in first sc. 1 sc in each of next 3 sc. 2 sc in each of next 3 sc. 1 sc in each of next 3 sc. 2 sc in each of last 2 sc. (18 sc)
3rd rnd: *1 sc in each of next 2 sc. 2 sc in next sc. Rep from * around. (24 sc)
4th rnd: *1 sc in each of next 3 sc. 2 sc in next sc. Rep from * around. (30 sc)
5th rnd: 1 sc in each sc around.
6th rnd: *1 sc in each of next 4 sc. 2 sc in next sc. Rep from * around. (36 sc)
Fasten off.
Back of Body
With larger hook and Color 1, ch 6.
1st to 4th rnds: As 1st to 4th rnds of Front of Body. (30 sc)
5th to 7th rnds: 1 sc in each sc around. Fasten off, leaving a long end for sewing. Sew front of body to back of body, easing to fit and stuff before closing.
Back of Head
With larger hook and Color 1, ch 2.
1st to 3rd rnds: As 1st to 3rd rnds of Head. (18 sc)
4th to 6th rnds: 1 sc in each sc around.
Sew over back of head and sew head to top of body.
Ears (make 2)
With smaller hook and Color 2, ch 2.
1st row: 6 hdc in 2nd ch from hook. Fasten off and sew in place.
Legs (make 4)
With smaller hook and Color 2, ch 2.
1st rnd: 7 sc in 2nd ch from hook. Do not join at end of rnd. PM for beg of rnd.
2nd to 6th rnds: 1 sc in each sc around. Fasten off, leaving a long end for sewing. Stuff legs lightly and sew in place.
Clothes
Cape
(Note: Ch 3 at beg of row counts as dc.)
With smaller hook and Color 4, ch 19.
1st row: 1 sc in 2nd ch from hook and each ch to end of chain. Turn. (18 sc)
2nd row: Ch 3. 1 dc in first sc. 2 dc in each sc to end of row. Turn. (36 dc)
3rd to 6th rows: Ch 3. 1 dc in each dc to end of row. Turn.
Edging: Ch 1. Work in sc around cape, having 3 sc in corners.
Ties
With smaller hook and Color 4, ch 28.
1st row: Sl st in 2nd ch from hook and each ch to end of chain. 1 sc in each of next 18 sc across neck edge of cape. Ch 28. Sl st in 2nd ch from hook and each ch to end of chain. Fasten off.
Stocking Cap
(Note: Do not break color not in use. Carry color not in use up side of work.)
With smaller hook and Color 4, ch 2.
1st rnd: 6 sc in 2nd ch from hook. Do not join at end of rnd. PM for beg of rnd.
2nd to 4th rnds: 1 sc in each sc around. Change to Color 3 at end of 4th rnd. Do not break Color 4.
5th to 6th rnds: With Color 3, 1 sc in each sc around. Change to Color 4 at end of 6th rnd.
7th rnd: With Color 4, 1 sc in each sc around.
8th rnd: *1 sc in each of next 2 sc. 2 sc in next sc. Rep from * around. (8 sc)
9th rnd: 1 sc in each sc around.
10th rnd: *1 sc in each of next 3 sc. 2 sc in next sc. Rep from * around. (10 sc) Change to Color 3.
11th rnd: With Color 3, 1 sc in each sc around.
12th rnd: *1 sc in each of next 4 sc. 2 sc in next sc. Rep from * around. (12 sc) Change to color 4.
13th rnd: With Color 4, 1 sc in each sc around.
14th rnd: *1 sc in each of next 3 sc. 2 sc in next sc. Rep from * around. (15 sc)
15th rnd: 1 sc in each sc around.
16th rnd: *1 sc in each of next 4 sc. 2 sc in next sc. Rep from * around. (18 sc) Change to Color 3.
17th rnd: With Color 3, 1 sc in each sc around.
18th rnd: *1 sc in each of next 5 sc. 2 sc in next sc. Rep from * around. (21 sc) Change to Color 4.
19th rnd: With Color 4, 1 sc in each sc around.
20th rnd: *1 sc in each of next 6 sc. 2 sc in next sc. Rep from * around. (24 sc)
21st rnd: 1 sc in each sc around.
22nd rnd: *1 sc in each of next 7 sc. 2 sc in next sc. Rep from * around. (24 sc) Change to Color 3.
23rd rnd: *With Color 3, 1 sc in each of next 3 sc. 2 sc in next sc. Rep from * around. (30 sc)
24th to 27th rnds: 1 sc in each sc around. Fasten off, leaving a long end for sewing. Sew cap in place.
Tassel
Hanger: With smaller hook and Color 3, ch 6.
1st row: Sl st in 2nd ch from hook and each ch to end of chain. Attach to tip of hat.
Tassels: Wrap Color 3 around a 7” [18 cm] piece of cardboard 10 times. Tie securely at one end. Cut across other end. Wrap yarn 6 times around tassel ½” [1 cm] from tied end, and fasten securely. Trim tassel to desired length. Attach to hanger.
Scarf
With smaller hook and Color 3, ch 50.
1st row: 1 hdc in 3rd ch from hook and each ch to end of chain. Turn. (49 hdc)
2nd and 3rd rows: Ch 2 (counts as hdc). 1 hdc in each hdc to end of row. Fasten off.
Finishing / Assembly
- Inset eyes between rnds 6 and 7, with 3 sc between eyes.
- Snout: Stuff snout and sew in place.
- Head: Fasten off, leaving long end for sewing. Stuff head.
- Front/Back body: Sew front of body to back of body, easing to fit and stuff before closing.
- Back of head: Sew over back of head and sew head to top of body.
- Ears: Fasten off and sew in place.
- Legs: Stuff legs lightly and sew in place.
- Cap: Fasten off, leaving a long end for sewing. Sew cap in place.
- Tassel hanger + tassel: Attach to tip of hat; attach tassel to hanger.
- Scarf: Crochet to completion; fasten off after 3rd row.
- Nose/Mouth embroidery: With Color 1, using French Knot, embroider nose. Using straight stitch, embroider mouth as shown in the picture.
Frequently Asked Questions
What crochet hook is used for this pattern?
- You will need a U.S. B/1 crochet hook for smooth yarn and a U.S. J/10 (6 mm) crochet hook for fur yarn or the size needed to obtain gauge.
Is this project worked in rows or rounds?
- The crochet hedgehogs are mainly worked in rounds.
Does this crochet project require assembly?
- Yes, assembly is required. You will need to sew various parts together, including the head, body, and ears.
Conclusion
This Crochet Hedgehogs Pattern is a delightful way to enhance your crochet skills while creating two charming, cuddly hedgehogs. Whether you’re gifting them or keeping them for yourself, these cute critters are sure to bring a smile to anyone’s face. Happy crocheting!