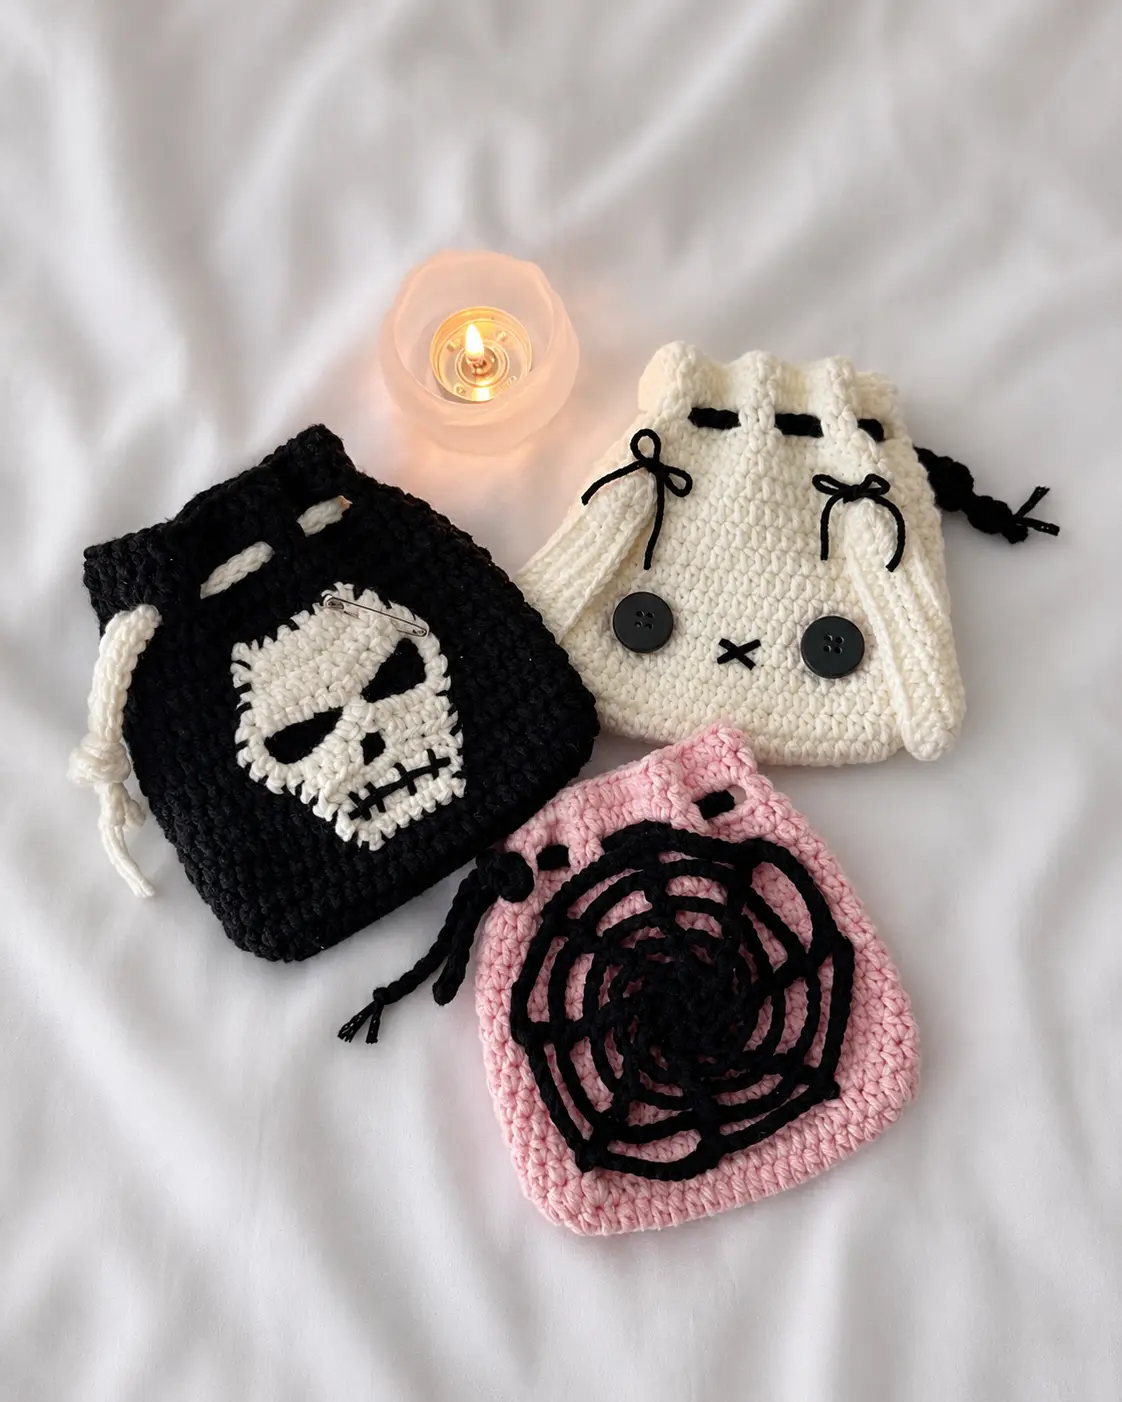
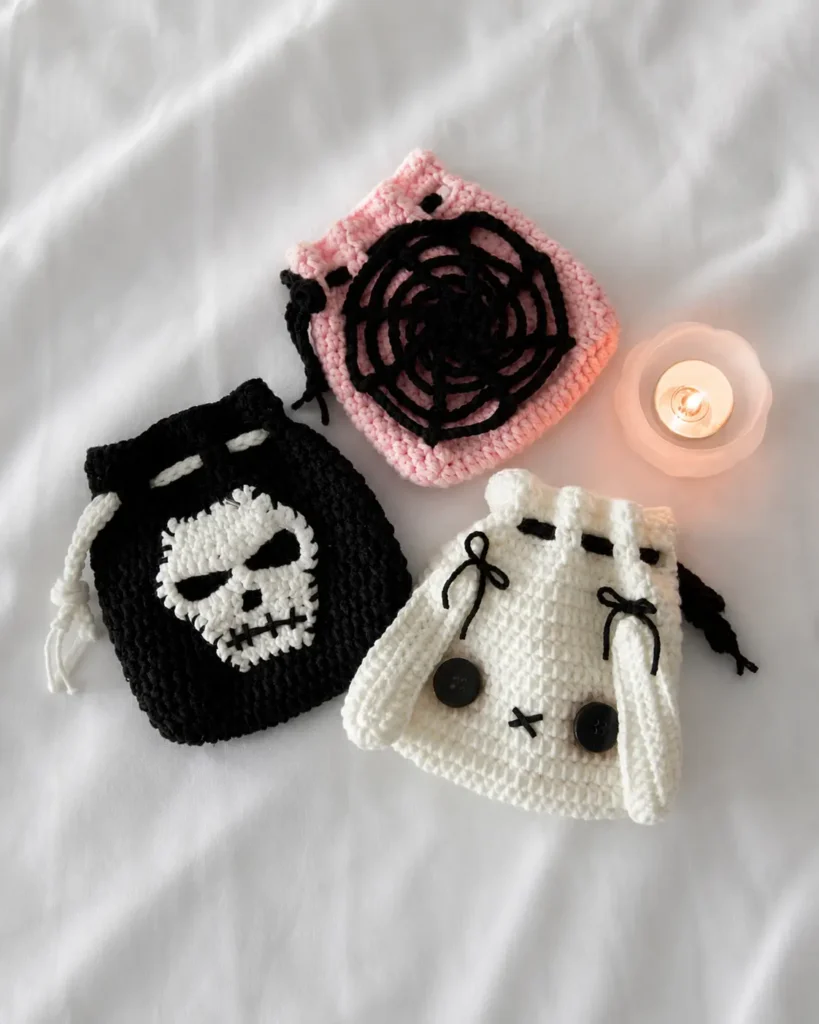
Halloween has a way of arriving faster than expected, so why not get a head start on something handmade this year? This free crochet pattern walks you through three different Halloween-themed pouches, each built on the same simple base but finished with its own playful character: a spider web, a friendly skeleton, and a bunny in costume.
These little pouches are endlessly useful. Fill them with candy for trick-or-treaters, tuck a small gift inside for a friend, or simply set them out as seasonal decor on a shelf or mantel. Because all three share one base pattern, once you’ve made the first you’ll breeze through the rest.
This pattern is beginner-friendly with a few small finishing touches, and it works up quickly in an evening or two.
What You’ll Be Making
All three pouches start from the same base and drawstring. The difference is purely in the decorative applique you add on top:
- Spider Web Pouch – a delicate web crocheted directly onto the pouch
- Skeleton Pouch – a cute skeleton applique with an embroidered grin
- Bunny Pouch – button eyes, a felt mouth, and a pair of soft ears
Pick one, or make the whole trio for a coordinated set.

Materials Needed
- Yarn: Cotton or acrylic yarn in sport weight (5 ply), in any colors you like. Orange, black, white, and grey are all great Halloween choices.
- Crochet hook: 3 mm
- 20 mm black buttons (for the bunny’s eyes)
- Black felt cloth (for the bunny’s mouth)
- Craft glue
- Dark eyeshadow or crayon (to shade around the eyes for a dramatic look)
- Stitch markers
- Darning needle
- Scissors
Tip: Cotton yarn gives these pouches a crisp, structured shape that holds up well, while acrylic makes them softer and lighter. Either works beautifully, so use what you have on hand.
Crochet Abbreviations
This pattern uses US crochet terminology.
| Abbreviation | Meaning |
|---|---|
| R | round / row |
| ch | chain |
| mr | magic ring |
| st | stitch |
| sc | single crochet |
| inc | increase |
| dec | decrease |
| dc | double crochet |
| hdc | half double crochet |
| slst | slip stitch |
| FLO | front loop only |
| BLO | back loop only |
| sk | skip |
| * | repeat |
| [ ] | total stitch count for that round/row |
Skill Level & Time
Skill level: Advanced beginner. If you’re comfortable with single crochet, half double crochet, and working in rounds, you’ll be fine. The skeleton applique is the trickiest part, so take it slowly.
Time to make: Roughly 1–2 hours per pouch, depending on your pace and which design you choose.
Part 1: The Base Pouch
Every pouch begins here. The base is worked as a flat oval that builds up into walls, with a row of eyelets near the top for the drawstrings.
Start with a slip knot and chain 22.
- R1: Starting from the 3rd ch from the hook, 1 hdc inc, 18 hdc, 4 hdc in one ch, 18 hdc, 1 hdc inc, 1 slst [44]
- R2: Ch 1, 2 hdc inc, 18 hdc, 4 hdc inc, 18 hdc, 2 hdc inc, 1 slst [52]
- R3–R14: Ch 1, 52 hdc, 1 slst — repeat for 12 rounds total [52]
- R15 (eyelet round): Ch 1, (2 hdc, sk 2, ch 2) repeat 13 times, 1 slst [26 hdc]
- R16–R17: Ch 1, 52 hdc, 1 slst — repeat for 2 rounds [52]
Cut the yarn and weave in the ends.
Helpful note: R15 creates the holes your drawstring threads through. As you work R16, make sure you’re placing 2 hdc into the top of each pair of stitches and 2 hdc into each ch-2 space — this keeps your stitch count back at 52 and closes the gap above the eyelets neatly.
Part 2: The Drawstring
- Start with a slip knot and chain 70 or 75 (a longer chain gives more room to open and close the pouch).
- Work 1 slst into the back bump of each chain, then cut the yarn.
- Make two of these.
Thread one drawstring through the eyelets in R15 going one direction, and the second drawstring going the opposite direction. When you pull both, the pouch cinches closed from both sides — this is what gives it that classic gathered pouch look.
Part 3: Decorative Appliques
Now choose your design (or make all three). Here’s how to finish each one.
Spider Web
The web is crocheted as a flat motif and then attached directly to the front of the pouch.
- R1: In a magic ring, ch 4, (1 dc, ch 1) repeat 7 times, 1 slst into 3rd ch
- R2: Ch 6, (1 dc, ch 3) repeat 7 times, 1 slst into 3rd ch
- R3: Ch 8, (1 dc, ch 5) repeat 7 times, 1 slst into 3rd ch
- R4: Ch 10, (1 dc, ch 7) repeat 7 times, 1 slst into 3rd ch
- R5: Ch 12, (1 dc, ch 9) repeat 7 times, 1 slst into 3rd ch
Do not cut the yarn. To attach the web to the pouch:
- At each corner point of the web (where the dc spokes land), crochet it onto the pouch with a sc, going through both the web and the pouch fabric.
- For the chains between corners, do not join them to the pouch — simply work 1 slst into each chain to travel to the next corner.
- Continue around until the entire outer edge of the web is secured.
This method leaves the inner web “floating” slightly off the pouch surface, which gives it a lovely dimensional, lacy effect.
Skeleton Applique
This applique is built from two crocheted loops — one becomes the skull, the other the ribcage area — joined into a single shape. It reads as confusing in text alone, so work slowly and count carefully.
Make the joined loops:
- Start with a slip knot and chain 14, then 1 slst into the 1st ch to form a loop.
- Chain 14 again, then 1 slst into the first loop — you now have two connected loops.
- Work 15 sc into each loop, then 1 slst into the very first sc. [30 sc total]
- Cut the yarn.
Upper section (the rib cage):
Mark 6 sc on each upper side of the shape (12 sc marked in total). Rejoin your yarn and work only across those marked stitches.
- R1: Ch 1 & turn, 1 dec, 8 sc, 1 dec [10]
- R2: Ch 1 & turn, 10 sc [10]
- R3: Ch 1 & turn, 1 dec, 6 sc, 1 dec [8]
- R4: Ch 1 & turn, 8 sc [8]
Cut the yarn.
Lower section (the jaw/hips):
Mark 5 sc from each loop along the bottom side (10 sc marked in total). Rejoin your yarn.
- R1: Ch 2, 4 hdc, sk 2 in the middle, ch 3, 4 hdc [8 hdc]
- R2: Ch 1 & turn, 1 dec, 2 sc, 2 sc into the ch space, 2 sc, 1 dec [8]
- R3–R4: Ch 1 & turn, 8 sc — repeat for 2 rows [8]
- R5: Ch 1 & turn, 1 dec, 4 sc, 1 dec [6]
Cut the yarn, leaving a long tail.
Finishing the skeleton: Embroider a row of small vertical stitches in black yarn across the face area for teeth. Then sew or glue the finished skeleton onto the front of the pouch.
Bunny Ears & Face
Ears (make 2):
Start with a slip knot and chain 17.
- R1: Starting from the 2nd ch from the hook, 15 sc, 5 sc into the last ch, 15 sc, 1 slst [35]
- R2: Ch 1, 1 inc, 9 sc, 5 hdc, 1 dc, 3 dc inc, 1 dc, 5 hdc, 9 sc, 1 inc, 1 slst [40]
Cut the yarn, leaving a long tail for sewing, and make a second ear to match.
Assembling the bunny face:
- Glue the two 20 mm black buttons onto R5–R6 of the pouch for eyes.
- Brush a little dark eyeshadow or crayon around each button for a soft, dramatic shadow.
- Cut a small X shape from black felt and glue it between the eyes for the mouth.
- Sew one ear onto each side of the pouch at R11.
Finishing & Care Tips
- Weave in all ends thoroughly so nothing pokes through or unravels with use.
- If your pouch leans a little, gently block it by misting with water and shaping it as it dries — cotton yarn responds especially well to this.
- For pouches that will actually hold candy or small gifts, sew the appliques on rather than gluing them, since stitched-on pieces hold up far better to handling.
- Keep glued embellishments (buttons, felt) away from small children, or stitch those on too for safety.
Make It Your Own
The base pouch is a blank canvas, so don’t stop at three designs. A few easy variations:
- Crochet a tiny pumpkin or ghost motif instead of the spider web.
- Swap the bunny ears for black cat ears and add a stitched nose for a Halloween cat.
- Use glow-in-the-dark yarn for the appliques so they shine at night.
- Make a set in graduated sizes for a cute display.
You Did It!
Take a moment to look at what you’ve made. Whether this is your first crochet pouch or your fiftieth, every stitch you placed is a small piece of effort and creativity. It doesn’t have to be flawless — handmade things rarely are, and that’s exactly what makes them special. Be proud of it.
If you enjoyed this project, you might also like these other quick, beginner-friendly makes:
- No-Sew Mochi Bunny Crochet Pattern — another adorable, gift-ready little project
- Miffy Pillow Crochet Pattern — a no-sew, beginner-friendly cozy make
- Crochet Green Alien Cat Keychain — a small, fun amigurumi if you’re in a spooky-cute mood
- Free Crochet Dragon Ornament — ready for a more advanced seasonal project
Happy crocheting, and have a wonderfully spooky season! 🎃🕸️
Frequently Asked Questions
Can I sell pouches made from this pattern? Yes — you’re welcome to sell finished items you make from this pattern. Please don’t resell or mass-distribute the pattern itself, and a credit link back to this blog is always appreciated if you share your work online.
What size hook and yarn should beginners use? Stick with the recommended 3 mm hook and sport-weight (5 ply) yarn. If you only have worsted-weight yarn, size up your hook accordingly — your pouch will simply come out a bit larger.
My pouch base is curling. What went wrong? A little curl is normal before the walls build up. If it persists, your tension may be too tight, or you may have missed an increase in R1 or R2. Double-check your stitch counts against the brackets.
How do I keep the spider web from looking flat? The trick is attaching only the corner points of the web to the pouch and slip-stitching loosely across the chains in between. That leaves the inner sections raised slightly off the surface for a dimensional look.
Can these be machine washed? Hand washing in cool water and laying flat to dry is safest, especially for pouches with glued-on felt or buttons. If you stitched everything on and used acrylic yarn, a gentle cycle in a mesh bag is usually fine.