Crochet Amigurumi Ponies Pattern
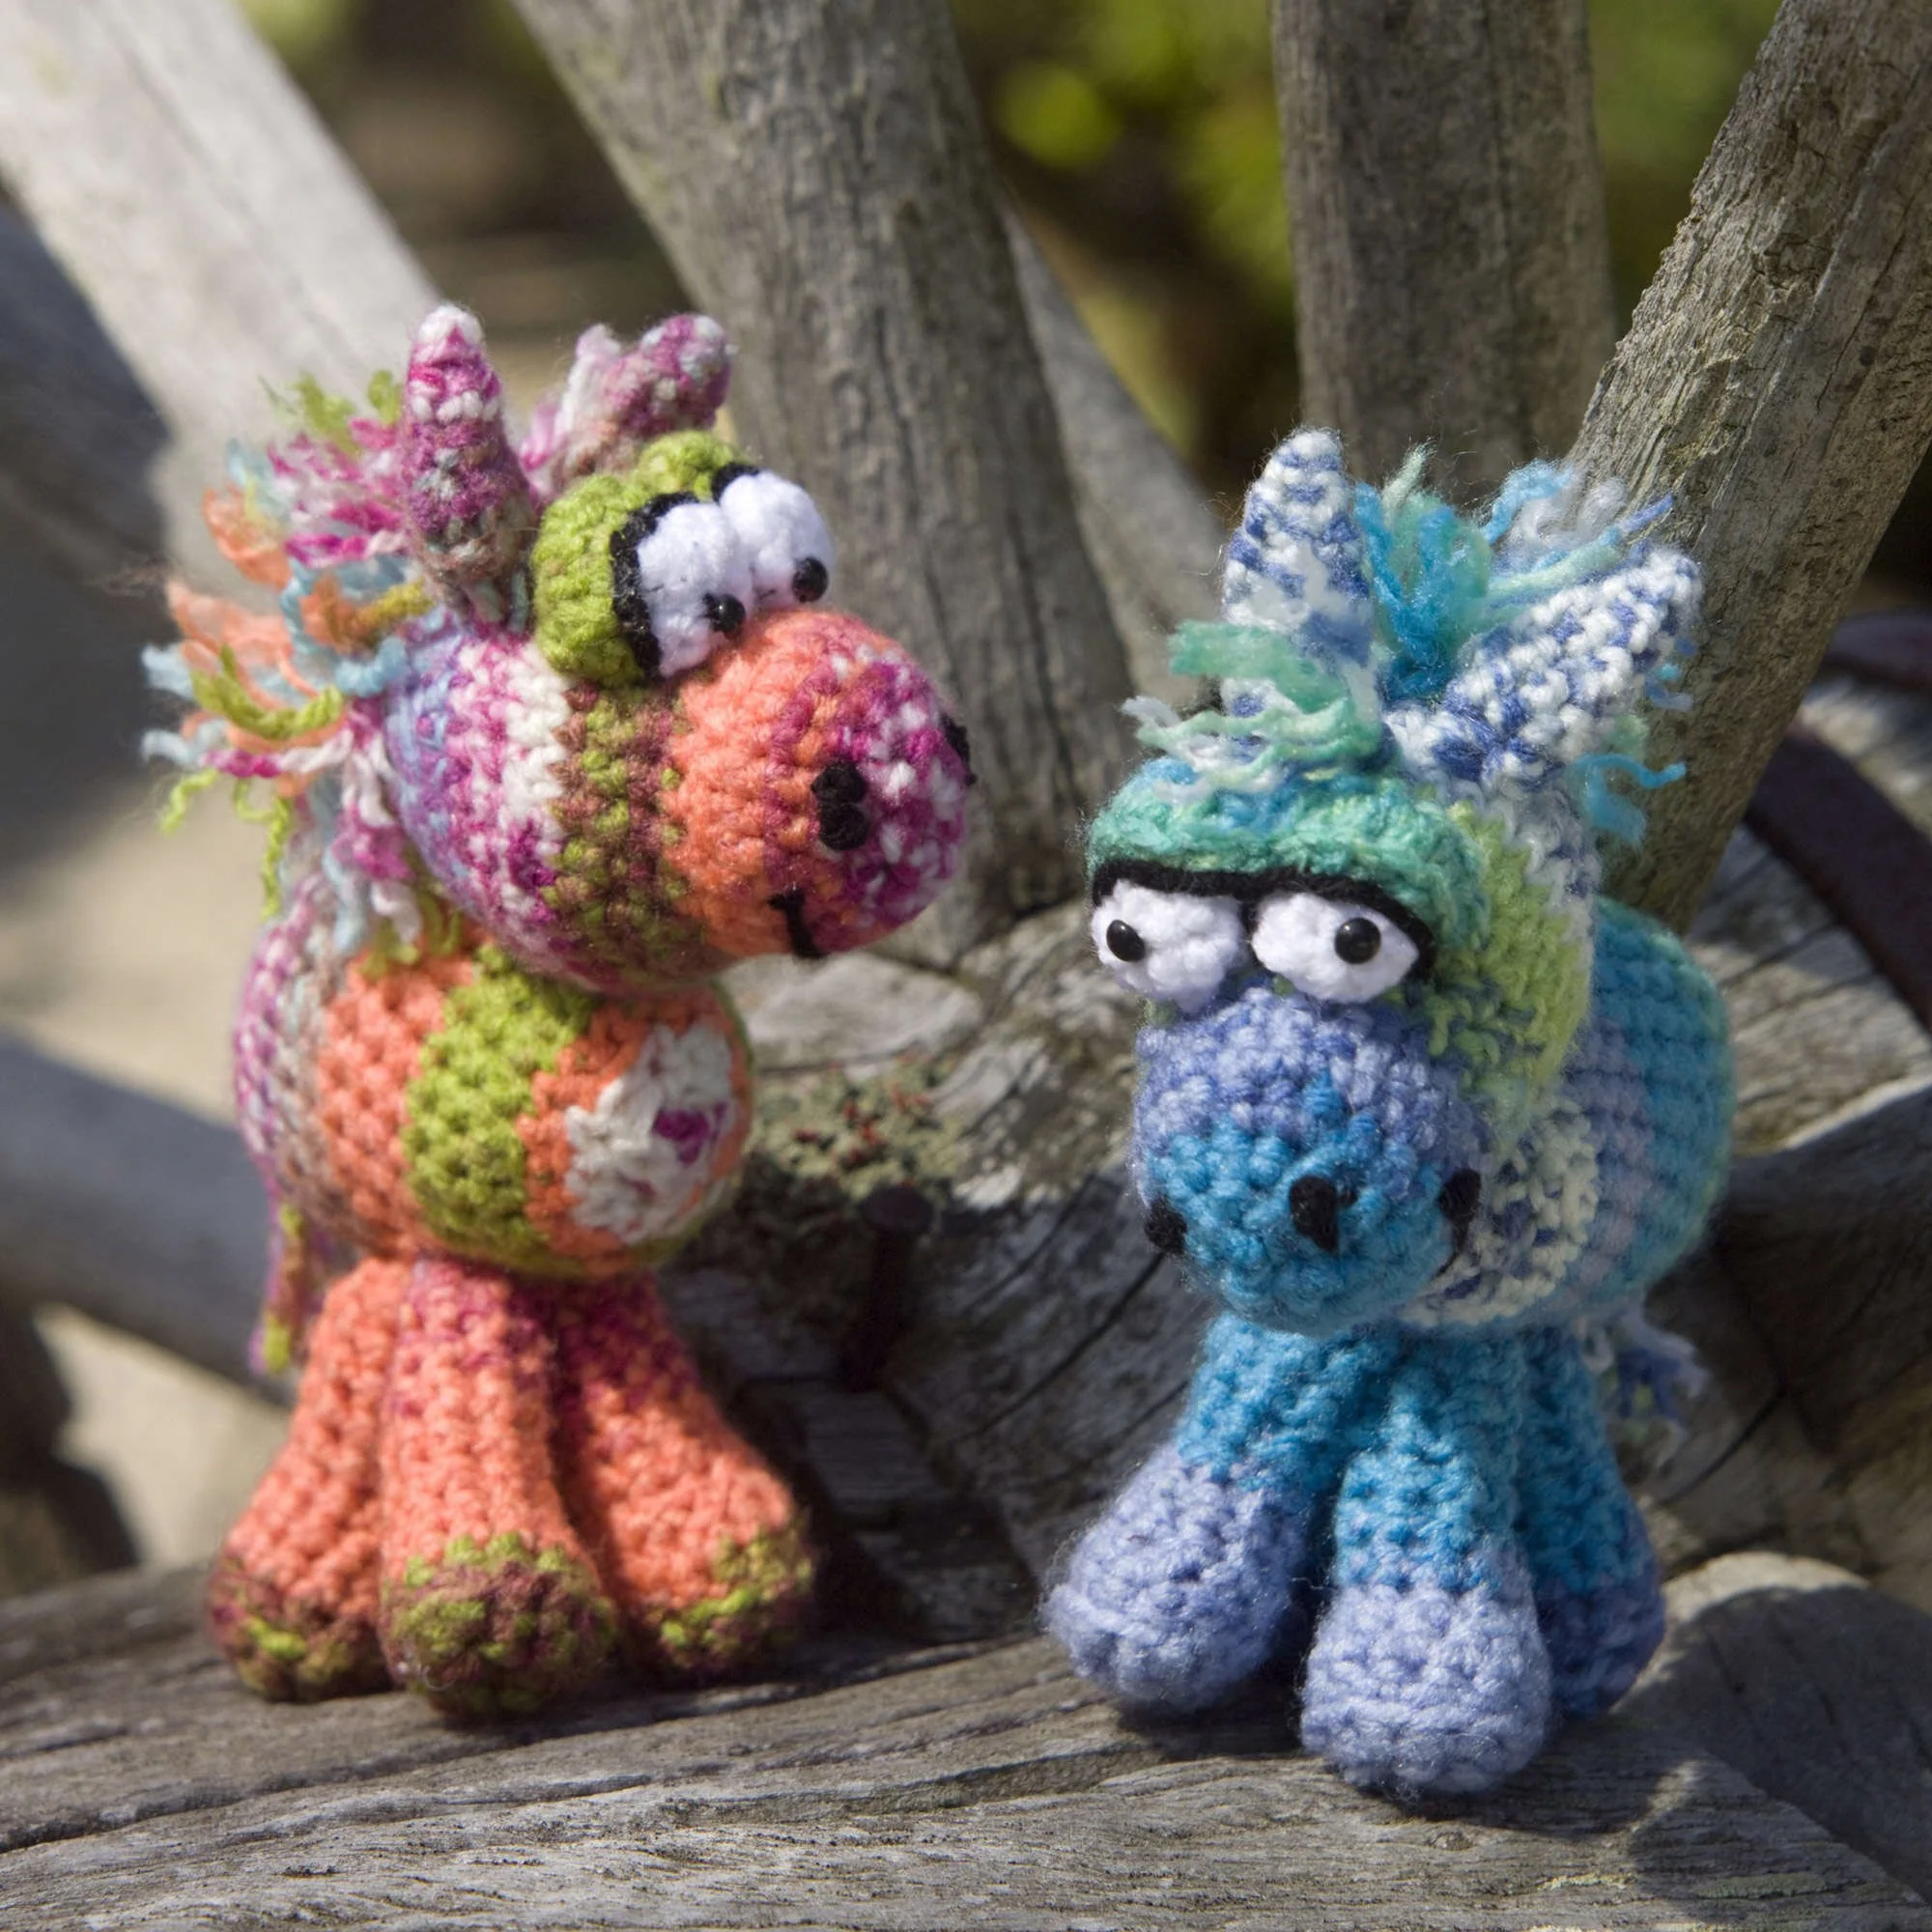
Creating delightful amigurumi ponies brings joy and a sense of accomplishment to crocheters, whether you’re a seasoned pro or just starting out. This crochet pattern guides you through crafting your very own beautiful ponies, featuring vivid color contrasts and charming details that are sure to capture anyone’s heart.
About the Crochet Project
This amigurumi pony isn’t just a fun project but a great way to practice important crochet techniques such as working in rounds, shaping with increases and decreases, and assembling multiple pieces. Whether intended as a gift or a personal keepsake, this pony is bound to bring a smile.
Materials
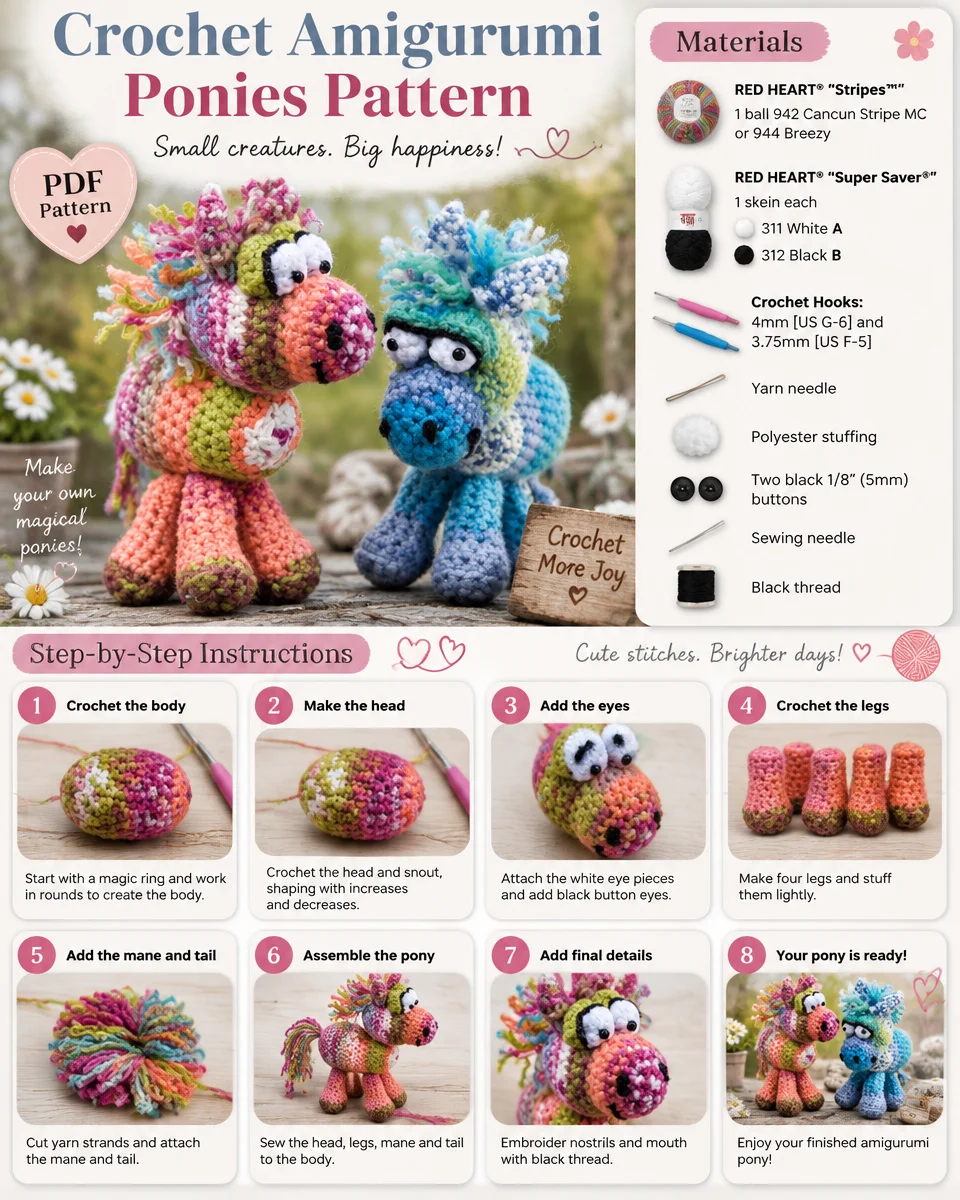
To ensure your project goes smoothly, gather the following materials before starting:
-
Yarn:
- RED HEART® “Stripes™”: 1 ball 942 Cancun Stripe MC or 944 Breezy Stripe MC
- RED HEART® “Super Saver®”: 1 skein each
- 311 White A
- 312 Black B
-
Crochet Hooks:
- 4mm [US G-6]
- 3.75mm [US F-5]
-
Notions:
- Yarn needle
- Polyester stuffing
- Two black 1/8” (5mm) buttons
- Sewing needle
- Black thread
- Plastic pellets (optional)
When choosing yarn, be aware of the color runs to create distinct hooves that differ from the legs. Plastic pellets can be used to give your pony added weight, making it more stable and durable.
Gauge
While the gauge may vary based on your crochet technique, it’s recommended that you use any hook size that achieves the specified gauge to ensure your pony turns out the correct size.
Crochet Abbreviations
Familiarize yourself with the following abbreviations used throughout the pattern:
- sc: single crochet
- ch: chain
- rnd: round
- sc2tog: [draw up a loop in next st] twice, yo and draw through all 3 loops on hook.
- yo: yarn over
- hdc: half double crochet
- st: stitch
Technical Notes
- The body is worked from the tail end to the neck.
- Hooves are constructed by matching the color patterns of yarn for each hoof.
- If you choose to use plastic pellets to weight the body, place about 3–4 tablespoons inside the toe of a knee-high stocking and tie it securely before stuffing it into the tail-end.
- Throughout the pattern, work in continuous rounds without joining unless otherwise specified.
- Mark the first stitch of each round and move the marker up each round as you go.
Pattern Instructions
Pony
Body
- Use the larger hook and main color (MC).
- Rnd 1: With larger hook and MC, ch 2; 6 sc in 2nd ch from hook.
- Rnd 2: 2 sc in each sc around – 12 sc.
- Rnd 3: [2 sc in next sc, sc in next sc] 6 times – 18 sc.
- Rnd 4: [2 sc in next sc, sc in next 2 sc] 6 times – 24 sc.
- Rnd 5: [2 sc in next sc, sc in next 3 sc] 6 times – 30 sc.
- Rnds 6 and 7: Sc in each sc around.
- Rnd 8: [sc2tog, sc in next 3 sc] 6 times – 24 sc.
- Rnds 9-14: Repeat Rnd 6.
- Rnd 15: [sc2tog, sc in next 2 sc] 6 times – 18 sc.
- Rnd 16: [sc2tog, sc in next sc] 6 times – 12 sc.
- Stuff firmly with polyester filling (and pellets, if using).
- Rnd 17: [sc2tog] 6 times – 6 sc.
- Fasten off and weave yarn tail through last 6 sc, draw up firmly. Secure the end by weaving in.
Head
- Head Rnds 1-4: Work the same way as Body Rnds 1-4.
- Rnd 5: Sc in each sc around.
- Rnd 6: [sc2tog, sc in next 2 sc] 6 times – 18 sc.
- Rnd 7: Repeat Rnd 5.
- Rnd 8: [2 sc in next sc, sc in next 2 sc] 6 times – 24 sc.
- Rnd 9: [2 sc in next sc, sc in next 3 sc] 6 times – 30 sc.
- Rnd 10: [2 sc in next sc, sc in next 4 sc] 6 times – 36 sc.
- Rnd 11: Repeat Rnd 5.
- Rnd 12: [sc2tog, sc in next 4 sc] 6 times – 30 sc.
- Rnd 13: Repeat Rnd 5.
- Rnd 14: [sc2tog, sc in next 3 sc] 6 times – 24 sc.
- Rnd 15: Repeat Rnd 5.
- Rnd 16: [sc2tog, sc in next 2 sc] 6 times – 18 sc.
- Rnd 17: [sc2tog, sc in next sc] 6 times – 12 sc.
- Stuff head firmly with polyester.
- Rnd 18: [sc2tog] 6 times – 6 sc.
- Fasten off and weave yarn tail through last 6 sc, draw up firmly. Secure the end by weaving in.
Legs (Make 4)
- Use the larger hook and MC.
- Rnd 1: With the larger hook and MC, ch 2; 6 sc in 2nd ch from hook. Join with a slip st in the first sc.
- Rnd 2: Ch 1, 2 sc in each sc around; join – 12 sc.
- Rnd 3: Ch 1, working in back loops only, sc in each sc around; join.
- Rnds 4 and 5: Ch 1, sc in each sc around; join.
- Rnd 6: Ch 1, [sc2tog, sc in next 3 sc] twice, sc2tog; join – 9 sc.
- Rnds 7-11: Repeat Rnd 4.
- Fasten off and leave a long tail for sewing. Stuff legs.
Eyes (Make 2)
- Use smaller hook and A.
- Rnd 1: With smaller hook and A, ch 2; 6 sc in 2nd ch from hook.
- Rnd 2: 2 sc in each sc around – 12 sc.
- Rnd 3: [sc2tog, sc in next 3 sc] twice, sc2tog – 9 sc.
- Fasten off, leaving a long tail for sewing. Stuff lightly.
- Weave yarn tail through last 9 sc, draw up firmly; secure the end by weaving in.
Eyelids (Make 2)
- Worked as rows. Use smaller hook and MC.
- Row 1: With smaller hook and MC, ch 13; sc in 2nd ch from hook and in each ch across; turn – 12 sc.
- Row 2: Ch 1, sc in first 2 sc, hdc in next 3 sc, slip st in next 2 sc, hdc in next 3 sc, sc in last 2 sc.
- Fasten off, leaving a long tail for sewing.
Ears (Make 2)
- Use smaller hook and MC.
- Rnd 1: With smaller hook and MC, ch 2; 4 sc in 2nd ch from hook.
- Rnd 2: Sc in each sc around.
- Rnd 3: 2 sc in each sc around – 8 sc.
- Rnd 4: Repeat Rnd 2.
- Rnd 5: [sc2tog, sc in next 2 sc] twice – 6 sc.
- Rnd 6: [Skip first sc, sc in next sc] 3 times – 3 sc.
- Fasten off, leaving a long tail for sewing.
Tail
- Use smaller hook and MC.
- Tail: ch 5. Fasten off, leaving a long tail for sewing.
- Cut three 4” strands of yarn.
- Fold strands in half forming a loop; insert crochet hook into the end of the chain and draw the loop through, then draw the yarn ends through the loop and tighten.
- Pull plies apart to fluff and trim to about 1”.
Finishing (Assembly & Embroidery)
- Sew all 4 legs together at the top of the legs using the untrimmed yarn ends. Tack the legs as needed to keep them from flailing out.
- Attach the 4 joined legs securely to the bottom of the body, positioning them towards the back to offset the weight of the head.
- Attach the tail at the very back of the body.
- Pin the head to the body as pictured, then sew in place with the yarn tail.
- Sew on the eyes, then attach buttons to the eyeball with a needle and black thread.
- Pin the eyelid on with the curved edge over the top of the eyes, sewing in place with tacking down in several places in the middle of the two eyes.
- Using B and a sharp yarn needle, embroider the mouth using an outline or running stitch. Create the nostrils using a French knot stitch.
- Outline eyelids with B using a running or outline stitch.
- Weave in all ends.
Mane
- Cut ten 4” strands of yarn.
- Fold 2 strands in half to form a loop; insert the crochet hook into a loop on the back of the head and draw the loop through, then draw the yarn ends through the loop and tighten.
- Repeat with the remaining cut strands.
- Pull plies apart to fluff and trim to about 1”.
Frequently Asked Questions
What crochet hook should I use for this project?
You will need two hooks: a 4mm [US G-6] for the body and head, and a 3.75mm [US F-5] for the facial features and other details.
Is this project worked in rows or rounds?
The entire project is worked in rounds, specifically in continuous rounds without joining unless specified otherwise.
How many legs does this pony have?
The pattern requires you to make four legs for the pony, contributing to its charming amigurumi design.
Can I add weight to the pony?
Yes, you can add plastic pellets for weight. Instructions for doing so are outlined in the technical notes section of the pattern.
Are there any buttons required for this project?
Yes, you will need two black buttons measuring 1/8” (5mm) for the eyes of the pony, enhancing its adorable charm.
Conclusion
With this detailed crochet pattern, you’re equipped to create a delightful amigurumi pony that’s sure to bring joy. By following each step carefully, you can achieve a beautiful and fun project that showcases your crochet skills while allowing for personal touches along the way. Happy crocheting!