Spiky T Succulent Crochet Amigurumi Pattern
Crochet enthusiasts will delight in crafting the Spiky T Succulent, a charming addition to any collection. This amigurumi pattern combines the appeal of succulent plants with the fun of crochet, resulting in a delightful and unique plush creation. This project is perfect for home decor or as a gift for friends and family who appreciate handmade crochet items. Get ready to bring some greenery into your space with this engaging crochet pattern.
About the Crochet Project
The Spiky T Succulent is constructed using a series of spirals for the body and a multitude of leaves that create texture and dimension. The amigurumi design allows for personalization in color and embellishment, making it a versatile project for crocheters of all skill levels. The detailed assembly instructions will guide you through bringing this adorable succulent to life.
Materials
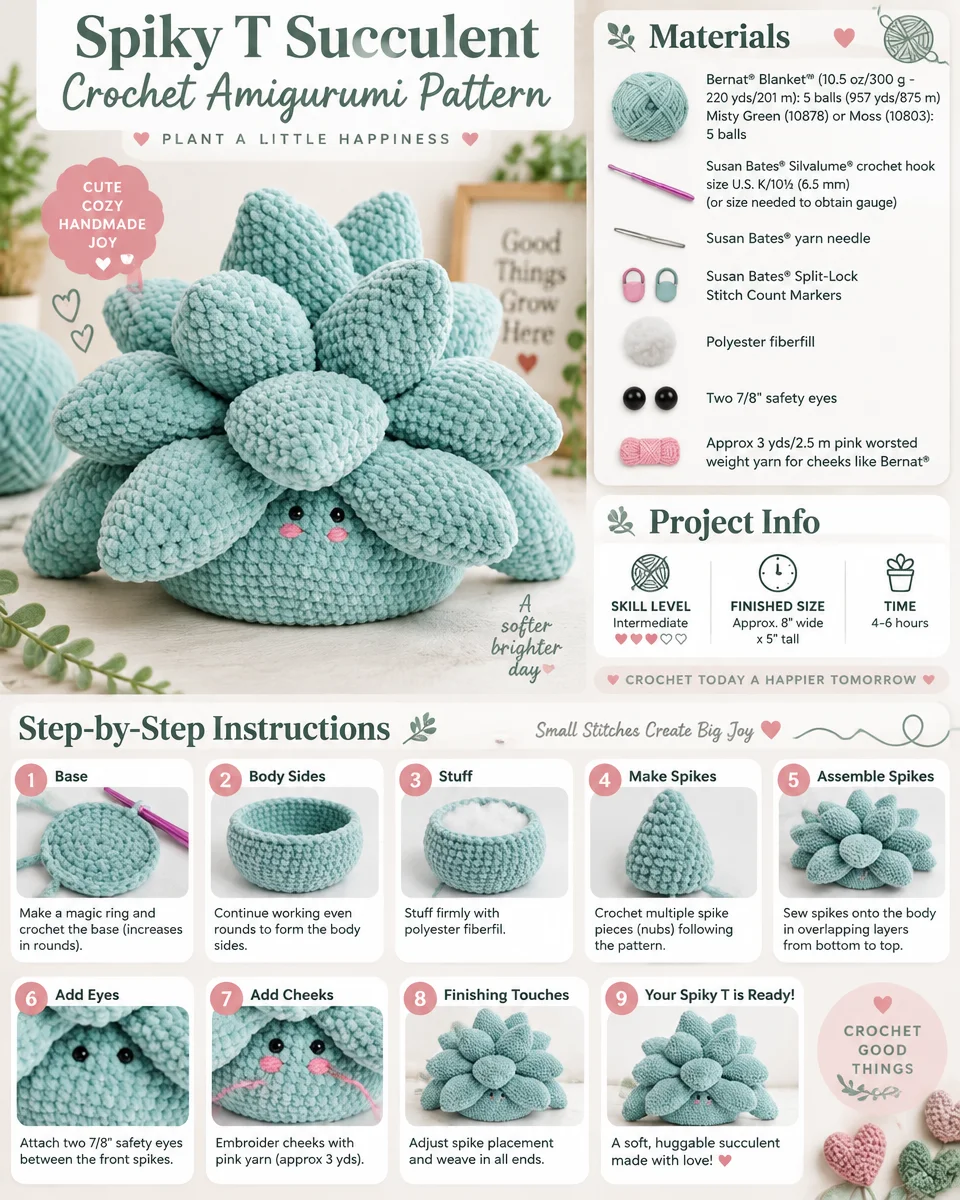
To successfully complete the Spiky T Succulent pattern, gather the following materials:
Yarn
- Bernat® Blanket™ (10.5 oz/300 g; 220 yds/201 m): 5 balls (957 yds/875 m)
- Misty Green (10878) or Moss (10803): 5 balls
- Approx 3 yds/2.5 m pink worsted weight yarn for cheeks like Bernat® Super Value™ Baby Pink (07438)
Crochet Hook
- Susan Bates® Silvalume® hook, size U.S. K/10½ (6.5 mm) (or size needed to obtain gauge)
Notions
- Susan Bates® yarn needle
- Susan Bates® Split-Lock Stitch Count Markers
- Polyester fiberfill
- Two 7/8″ safety eyes
Crochet Abbreviations
- ch: chain
- sc: single crochet
- sc2tog: single crochet two together
- PM: place marker
- tbl: through back loop
- bl: through front loop
- st(s): stitch(es)
- rep: repeat
Pattern Notes
- The body of the succulent is worked in a spiral; do not join rounds unless otherwise stated.
- Place a stitch marker at the beginning of each round and move it up as you progress.
- The pattern features a special shaping technique that creates the natural look of leaves.
Pattern Instructions
Body
(Worked in spiral; do not join unless stated)
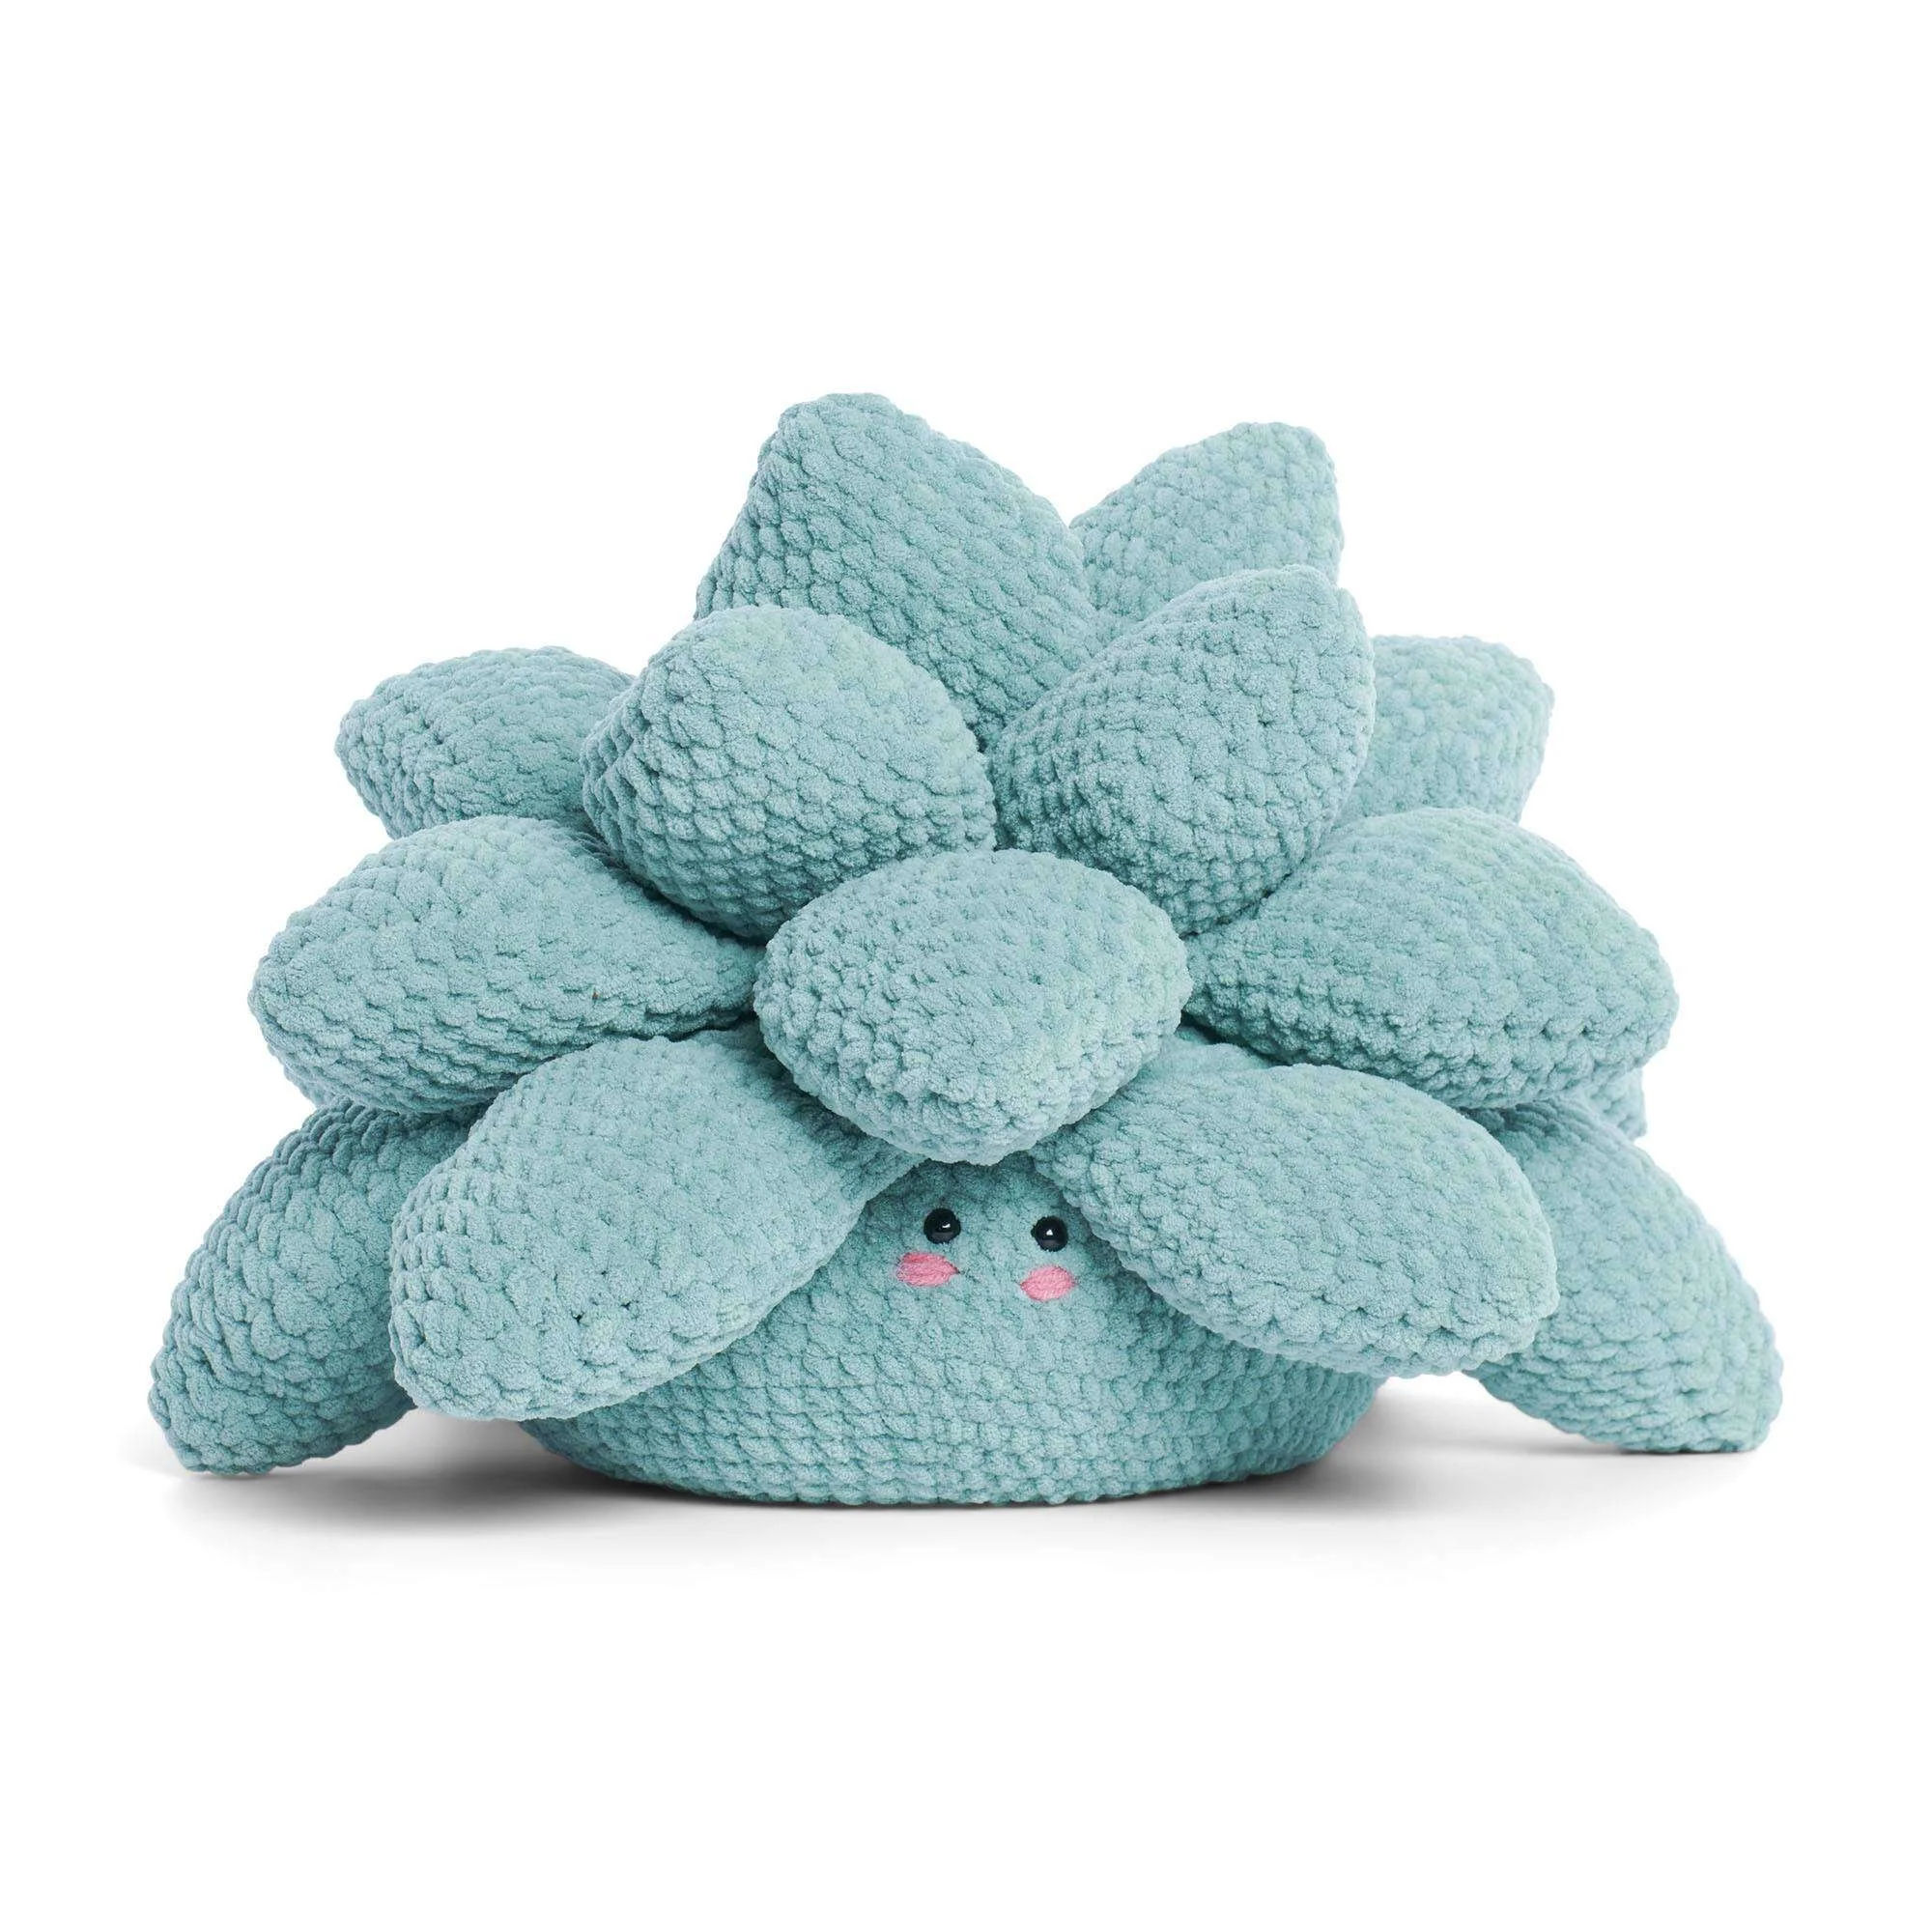
Begin at the bottom of the body: ch 2.
1st rnd:
6 sc in 2nd ch from hook.
Do not join; continue working in a spiral as follows. PM (first marker) for the beginning of the round. Move marker up on each round as work progresses.
2nd rnd:
2 sc in each sc around.
12 sc.
3rd rnd:
*2 sc in next sc. 1 sc in next sc. Rep from * around.
18 sc.
4th rnd:
1 sc in first sc. 2 sc in next sc.
*1 sc in each of the next 2 sc. 2 sc in next sc. Rep from * to last sc. 1 sc in last sc.
24 sc.
5th rnd:
*2 sc in next sc. 1 sc in each of the next 3 sc. Rep from * around.
30 sc.
6th rnd:
1 sc in each of the first 2 sc. 2 sc in next sc.
*1 sc in each of the next 4 sc. 2 sc in next sc. Rep from * to last 2 sc.
1 sc in each of last 2 sc.
36 sc.
7th rnd:
*2 sc in next sc. 1 sc in each of the next 5 sc. Rep from * around.
42 sc.
8th rnd:
1 sc in each of the first 3 sc. 2 sc in next sc.
*1 sc in each of the next 6 sc. 2 sc in next sc. Rep from * to last 3 sc.
1 sc in each of last 3 sc.
48 sc.
9th to 13th rnds:
Continue in this manner, increasing 6 sc evenly around next 5 rnds (as established).
78 sc. PM (2nd marker) at end of last rnd.
14th rnd:
1 sc in each sc around.
Repeat last rnd until work from 2nd marker measures 4″ [10 cm].
Top of Body
1st rnd:
*Sc2togtbl. 1 scbl in each of next 11 sc. Rep from * around.
72 sts.
2nd rnd:
Working in both loops, 1 sc in each of the first 5 sc. Sc2tog.
*1 sc in each of the next 10 sts. Sc2tog. Rep from * to last 5 sc. 1 sc in each of last 5 sc.
66 sts.
3rd rnd:
*Sc2tog. 1 sc in each of the next 9 sts. Rep from * around.
60 sts.
4th rnd:
1 sc in each of first 4 sc. Sc2tog.
*1 sc in each of next 8 sts. Sc2tog. Rep from * to last 4 sc.
1 sc in each of last 4 sc.
54 sts.
5th rnd:
*Sc2togtbl. 1 scbl in each of the next 7 sts. Rep from * around.
48 sts.
6th rnd:
Working in both loops, 1 sc in each of first 3 sc. Sc2tog.
*1 sc in each of next 6 sts. Sc2tog. Rep from * to last 3 sc.
1 sc in each of last 3 sc.
42 sts.
7th rnd:
*Sc2tog. 1 sc in each of next 5 sts. Rep from * around.
36 sts.
8th rnd:
1 sc in each of first 2 sc. Sc2tog.
*1 sc in each of next 4 sts. Sc2tog. Rep from * to last 2 sc.
1 sc in each of last 2 sc.
30 sts.
9th rnd:
*Sc2togtbl. 1 scbl in each of next 3 sc. Rep from * around.
24 sc.
10th rnd:
Working in both loops, 1 sc in first sc. Sc2tog.
*1 sc in each of the next 2 sc. Sc2tog. Rep from * to last sc.
1 sc in last sc.
18 sts.
11th rnd:
*Sc2tog. 1 sc in next sc. Rep from * around.
12 sts.
Following manufacturer’s instructions, attach safety eyes to the side of the body 1½” [4 cm] apart, 5 rounds down from first rnd at the top of the body (as shown). Stuff the body firmly.
12th rnd:
*Sc2tog. Rep from * around.
6 sts.
Fasten off, leaving a long end. Draw end tightly through remaining sts and fasten off. Weave in end.
Leaf (make 20)
Ch 26. Join with sl st to first ch to form a ring, being careful not to twist chain. PM for beginning of rnd. Move marker up on rnds as work progresses.
1st rnd:
Ch 1. 1 sc in same space as sl st. 1 sc in each ch around. Do not join.
26 sc.
Continue working in a spiral as follows:
2nd rnd:
1 sc in each sc around.
3rd rnd:
2 sc in first sc.
1 sc in each of next 11 sc.
2 sc in each of next 2 sc.
1 sc in each of next 11 sc.
2 sc in last sc.
30 sc.
4th to 8th rnds:
1 sc in each sc around.
9th rnd:
(Sc2tog. 1 sc in each of next 11 sc. Sc2tog) twice.
26 sc.
10th rnd:
(Sc2tog. 1 sc in each of next 9 sc. Sc2tog) twice.
22 sc.
11th rnd:
(Sc2tog. 1 sc in each of next 7 sc. Sc2tog) twice.
18 sc.
12th to 14th rnds:
Continue in this manner, decreasing 4 sc each rnd for the next 3 rnds (as established).
6 sc.
Fasten off, leaving long end. Draw end tightly through remaining 6 sts at tip and fasten off. Weave in end.
Assembly
Outer 6-Leaf Ring
Stuff 6 leaves loosely.
Fold foundation chains of 6 leaves in half, having the beginning of the row at the join of the foundation chain of each leaf.
Joining 6 Leaves in rnd: (RS)
Join yarn with sl st to remaining loop foundation chain at the join of the first leaf.
Ch 1.
Working through both thicknesses, work 13 sc in remaining loops of foundation chain across the bottom edge to “seam” leaf closed. Rep from * across bottom edge of remaining 5 leaves.
Join in rnd with sl st to first sc, being careful not to twist leaves.
2nd rnd:
Join Outer 6-Leaf ring to body:
Align Outer 6-Leaf Ring sts and remaining front loops of 1st rnd of top of last round of body, aligning space between leaves over eyes (as shown in photo).
Ch 1.
Working through both thicknesses, 1 sc in each sc around.
Join with sl st to first sc. Fasten off.
Inner 6-Leaf Ring
Stuff 6 leaves loosely.
Fold foundation chains of 6 leaves in half, having the beginning of the row at the join of the foundation chain of each leaf.
Joining 6 Leaves in rnd: (RS)
Join yarn with sl st to remaining loop foundation chain at the join of the first leaf.
Ch 1.
Work through both thicknesses of remaining loops of foundation chain as follows:
Sc2tog. 1 sc in each of next 2 sts. Sc2tog. 1 sc in next st. Sc2tog. 1 sc in each of next 2 sts. Sc2tog (Total 9 sts).
Rep from * across bottom edge of remaining 5 leaves.
Join in rnd with sl st to first st, being careful not to twist leaves.
2nd rnd:
Join Inner 6-Leaf Ring to Body:
Align Inner 6-Leaf Ring sts and remaining front loops of 4th rnd of Top of Body so that leaves are offset between leaves of Outer Ring.
Ch 1.
Working through both thicknesses, 1 sc in each st around.
Join with sl st to first sc. Fasten off.
5-Leaf Ring
Stuff 5 leaves loosely.
Fold foundation chains of 5 leaves in half, having the beginning of the row at the join of the foundation chain of each leaf.
Joining 5 Leaves in rnd: (RS)
Join yarn with sl st to remaining loop foundation chain at the join of the first leaf.
Ch 1.
Working through both thicknesses of remaining loops of foundation chain as follows:
[(Sc2tog) 3 times. Sc3tog. (Sc2tog) twice] (Total 6 sts).
Rep from * across bottom edge of remaining 4 leaves.
Join in rnd with sl st to first sc, being careful not to twist leaves.
Join 5-Leaf Ring to Body:
Align 5-Leaf Ring sts and remaining front loops of 8th rnd of Top of Body so that leaves are offset between leaves of Inner Ring.
Ch 1.
Working through both thicknesses, 1 sc in each st around.
Join with sl st to first sc. Fasten off.
Top 3-Leaves
Joining 3 Leaves in rnd:
Work from the 1st rnd of 5-Leaf Ring, noting, there are 3 leaves only.
Fasten off.
Sew Top 3-Leaves ring to Top of Body:
Sew Top 3-Leaves ring to the Top of Body in the center of the 5-Leaf Ring, adjusting and shaping as necessary to fit, as shown in the photo.
Embroidery
With pink yarn, embroider blush lines below each eye using Satin Stitch as shown.
Frequently Asked Questions
What crochet hook is used for this pattern?
The pattern uses a Susan Bates® Silvalume® crochet hook, size U.S. K/10½ (6.5 mm) or another size needed to obtain gauge.
Is this project worked in rows or rounds?
This pattern is primarily worked in rounds, specifically for the body and leaves of the succulent.
Does this crochet project require assembly?
Yes, assembly is required as the leaves need to be joined to the body and arranged to create the final succulent design.
What materials do I need for the eyes?
You will need two 7/8″ safety eyes for this project.
How many leaves need to be made?
You will need to crochet a total of 20 leaves for the Spiky T Succulent.
Conclusion
Creating the Spiky T Succulent Crochet Amigurumi Pattern is a rewarding project that combines creativity with craftsmanship. This charming succulent adds a touch of whimsy to any space and serves as a wonderful gift for friends or loved ones who appreciate unique handmade items. Follow the detailed instructions, enjoy the process, and let your creativity flourish with this delightful crochet project!