Crochet Tiger Amigurumi Pattern
Creating a cute and playful tiger amigurumi is a delightful crochet project that is sure to bring joy. This pattern combines various crochet techniques to create a charming, stuffed tiger that can serve as a toy, a decorative piece, or a thoughtful gift. In this article, we’ll provide detailed instructions on how to make your own tiger amigurumi along with helpful tips and clarifications.
About the Crochet Project
This crochet tiger is made using the amigurumi technique, which involves working in continuous rounds to form 3D shapes. The pattern covers all parts of the tiger, including the body, head, arms, legs, ears, and a tail. With vibrant colors and plush stuffing, this tiger is both fun to create and to squeeze!
Materials
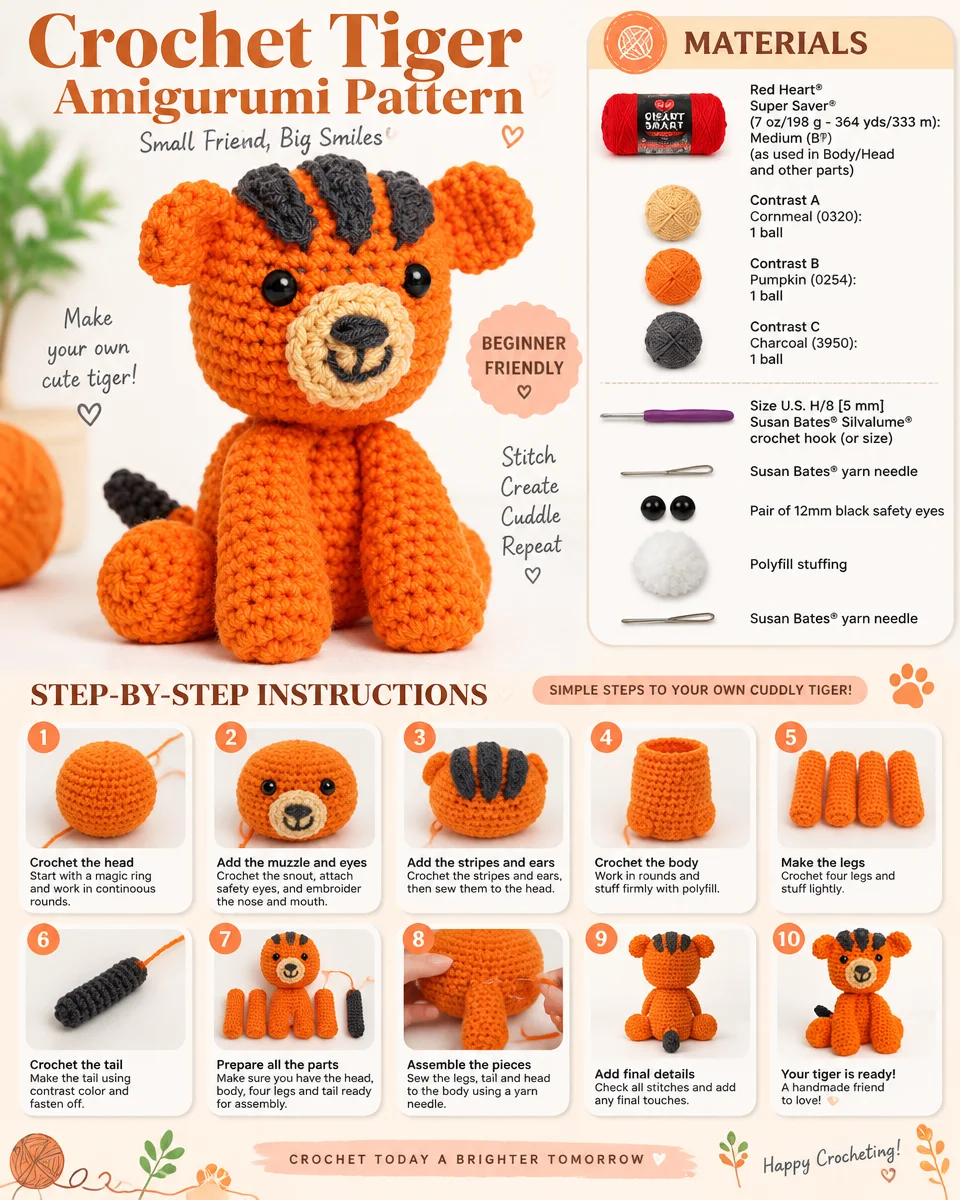
To get started on your tiger amigurumi, you’ll need the following materials:
Yarn
- Red Heart® Super Saver® (7 oz/198 g; 364 yds/333 m) in:
- Medium (B?) for the Body/Head and other parts labeled “With B”: 1 ball
- Contrast A Cornmeal (0320): 1 ball
- Contrast B Pumpkin (0254): 1 ball
- Contrast C Charcoal (3950): 1 ball
Crochet Hook
- Size U.S. H/8 [5 mm] Susan Bates® Silvalume® crochet hook (or size needed to obtain gauge)
Notions
- Susan Bates® yarn needle
- Pair of 12mm black safety eyes
- Polyfill stuffing
- Susan Bates® yarn needle (listed twice; use as needed)
Crochet Abbreviations
Familiarize yourself with these crochet abbreviations that will be used throughout the pattern:
- Ch: Chain
- Sc: Single crochet
- Sc2tog: Single crochet two together (decrease)
- St: Stitch
- Rnd: Round
- Hdc: Half double crochet
- Dc: Double crochet
Pattern Notes
- This pattern is primarily worked in continuous rounds, with the body and head made as a single piece.
- Always use a magic loop to start your amigurumi for a tight closure.
- Make sure to stuff your pieces firmly yet evenly to maintain shape but also ensure they are soft and cuddly.
Pattern Instructions
Snout (Color A)
With Color A, begin using the magic loop method.
- 1st rnd: Ch 1. 10 sc in ring. Join.
- 2nd rnd: Ch 1. 2 sc in each sc around. Join. (20 sc)
Fasten off, leaving a long tail.
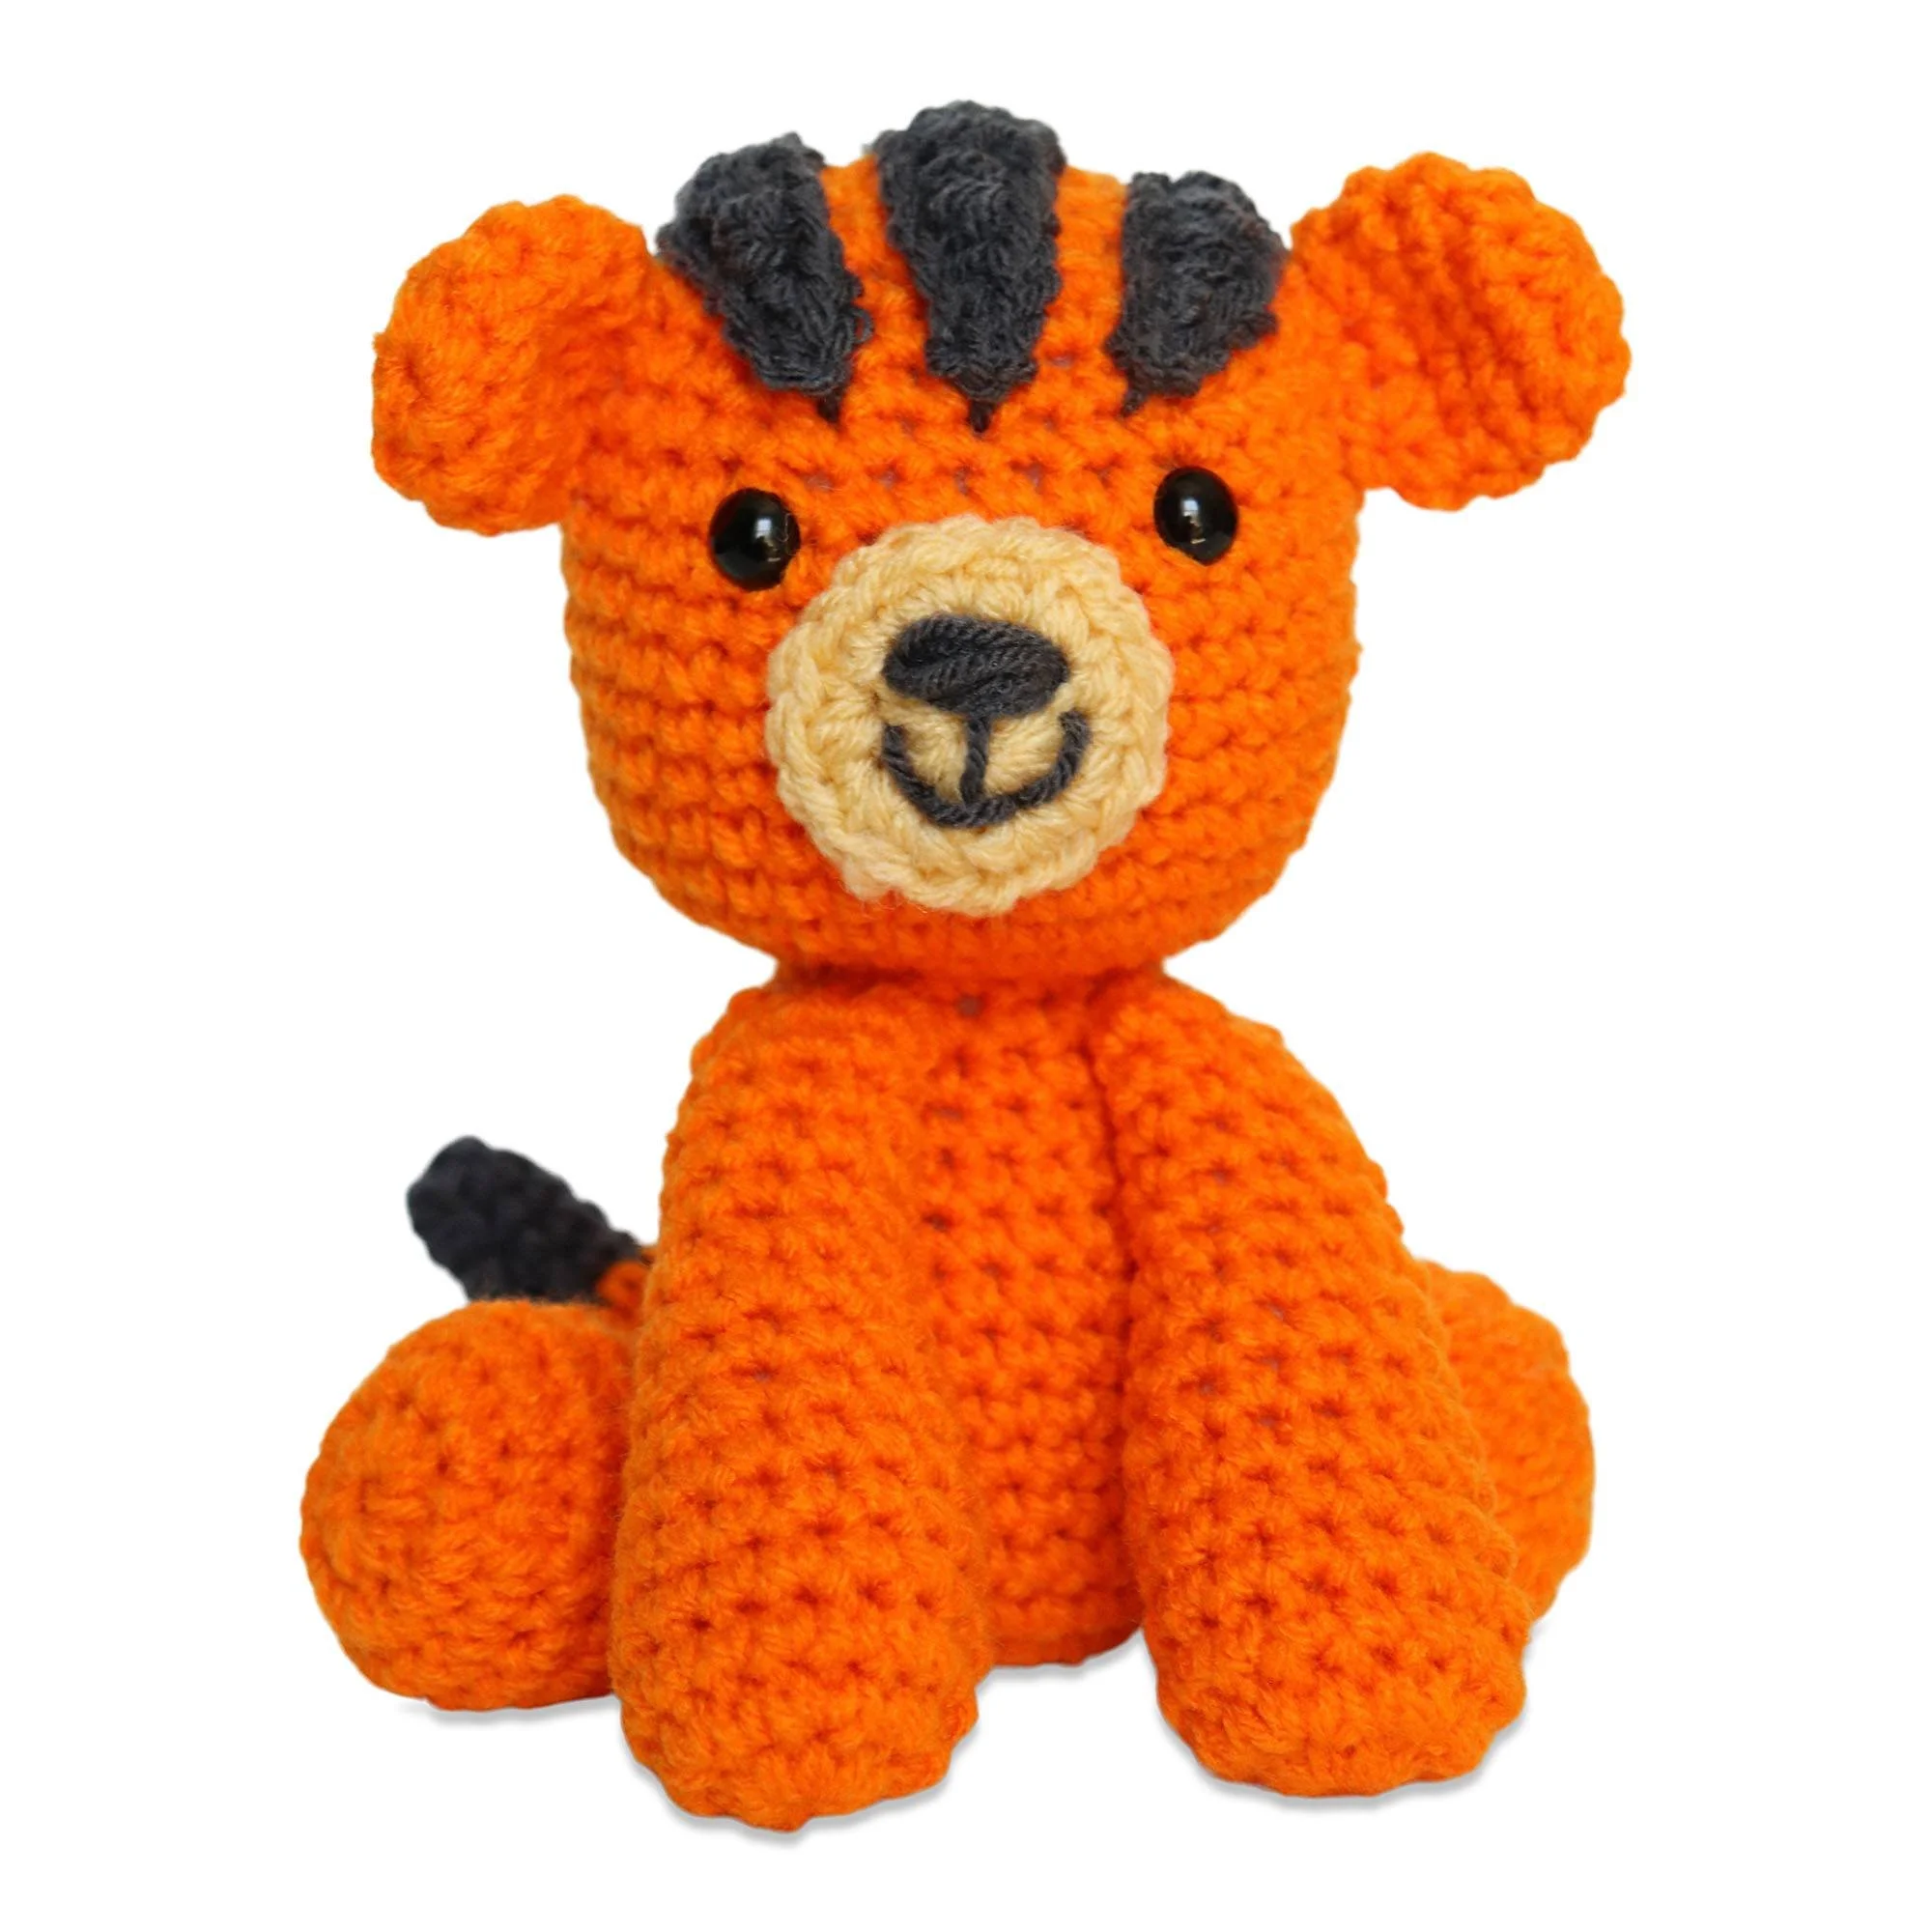
With Color C, stitch on Mouth as shown in the photo.
Loop yarn between 2 sts approx 10 times to make the Nose.
Body/Head (Color B)
The Body and Head are worked in one piece from the bottom up.
With Color B, begin using the magic loop method.
- 1st rnd: Ch 1. 10 sc in ring. Join.
- 2nd rnd: Ch 1. 2 sc in each sc around. Join. (20 sc)
- 3rd rnd: Ch 1. 2 sc in first sc. 1 sc in next sc. *2 sc in next sc. 1 sc in next sc. Rep from * around. Join. (30 sc)
- 4th to 10th rnds: Ch 1. 1 sc in each sc around. Join.
- 11th rnd: Ch 1. *Sc2tog. 1 sc in each of the next 3 sc. Rep from * around. Join. (24 sts)
- 12th rnd: As 4th rnd.
- 13th rnd: Ch 1. *Sc2tog. 1 sc in each of the next 2 sc. Rep from * around. Join. (18 sts)
- 14th rnd: As 4th rnd.
- 15th rnd: Ch 1. *Sc2tog. 1 sc in next sc. Rep from * around. (12 sts)
- 16th rnd: As 4th rnd.
- 17th rnd: Ch 1. 2 sc in each sc around. Join. (24 sc)
- 18th rnd: Ch 1. 2 sc in first sc. 1 sc in next sc. *2 sc in next sc. 1 sc in next sc. Rep from * around. Join. (36 sc)
- 19th to 26th rnds: As 4th rnd.
- 27th rnd: Ch 1. *Sc2tog. 1 sc in each of the next 4 sc. Rep from * around. Join. (30 sts)
- 28th rnd: As 4th rnd.
- 29th rnd: Ch 1. *Sc2tog. 1 sc in each of the next 3 sc. Rep from * around. Join. (24 sts)
Before proceeding to complete the Head:
- Stitch Snout to Face between the 20th and 24th rnds.
- Add safety eyes between the 24th and 25th rnds, approx 6 sts apart and centered over the Snout.
- Begin stuffing with polyfill, continuing to stuff as you work on the rest of the Head.
- 30th rnd: As 4th rnd.
- 31st rnd: As 13th rnd. (18 sts)
- 32nd rnd: As 15th rnd. (12 sts)
- 33rd rnd: Ch 1. *Sc2tog. Rep from * around. (6 sts)
Fasten off, leaving a long tail.
Ears (make 2) (Color C)
With Color C, begin using the magic loop method.
- 1st rnd: Ch 1. 8 sc in ring. Join.
- 2nd rnd: Ch 1. 2 sc in first st. 1 sc in next st. *2 sc in next st. 1 sc in next st. Rep from * around. Join. (12 sc)
- 3rd and 4th rnds: Ch 1. 1 sc in each st around. Join.
- 5th rnd: Ch 1. *Sc2tog. 1 sc in next st. Rep from * around. Join. (8 sts)
Do not stuff.
Stitch Ears to Head as shown in the photo, approx 4 rnds down from the top.
Tiger Head Stripes (make 3) (Color C)
With Color C, ch 12.
- 1st row: 1 sc in 3rd chain from the hook. 1 sc in the next ch. 1 hdc in each of the next 3 ch. 1 dc in each of the last 5 ch.
Fasten off, leaving a long tail.
Stitch Stripes to the top of the Head as shown in the photo, ensuring the point of Stripes faces towards Snout.
Feet (make 2) (Color B)
With Color B, begin using the magic loop method.
- 1st rnd: Ch 1. 10 sc in ring. Join.
- 2nd rnd: Ch 1. 2 sc in each sc around. Join. (20 sc)
- 3rd and 4th rnds: Ch 1. 1 sc in each sc around. Join.
- 5th rnd: Ch 1. *Sc2tog. 1 sc in each of the next 3 sc. Rep from * around. Join. (16 sts)
- 6th rnd: As 3rd rnd.
- 7th rnd: Ch 1. *Sc2tog. 1 sc in each of the next 2 sc. Rep from * around. Join. (12 sts)
- 8th rnd: Ch 1. *Sc2tog. 1 sc in next sc. Rep from * around. Join. (8 sts)
Fasten off, leaving a long tail.
Stuff Feet with polyfill.
Attach Feet to each side at the bottom of the Body. Note that Feet should stick out sideways to give Tiger support to sit up.
Arms (make 2) (Color B)
With Color B, begin using the magic loop method.
- 1st rnd: Ch 1. 10 sc in ring. Join.
- 2nd rnd: Ch 1. *2 sc in next sc. 1 sc in the next sc. Rep from * around. Join. (15 sc)
- 3rd to 6th rnds: Ch 1. 1 sc in each sc around. Join.
- 7th rnd: Ch 1. *Sc2tog. 1 sc in each of the next 3 sc. Rep from * around. Join. (12 sc)
- 8th to 9th rnds: As 3rd rnd.
- 10th rnd: Ch 1. *Sc2tog. 1 sc in each of the next 2 sc. Rep from * around. Join. (9 sc)
- 11th to 15th rnds: As 3rd rnd.
Fasten off, leaving a long tail.
Stuff Arms with polyfill.
Stitch to Tiger at Neck so Arms hang down in front of Feet as shown in the photo.
Tail (Color C then B)
With Color C, begin using the magic loop method.
- 1st rnd: Ch 1. 4 sc in ring. Join.
- 2nd rnd: Ch 1. 2 sc in first sc. 1 sc in next sc. 2 sc in next sc. 1 sc in next sc. Join. (6 sc)
- 3rd to 5th rnds: Ch 1. 1 sc in each sc around. Join.
Break Color C and join Color B. - 6th to 12th rnds: With Color B, ch 1. 1 sc in each sc around. Join.
Fasten off, leaving a long tail.
Do not stuff the Tail.
Stitch the Tail to the bottom of the Body at the back.
Assembly / Finishing
- Stitch Snout to Face between the 20th and 24th rnds.
- Add safety eyes between the 24th and 25th rnds, approx 6 sts apart, centered over Snout.
- Stitch Ears to Head as shown in the photo, approx 4 rnds down from the top.
- Stitch Tiger Head Stripes (3) to the top of the Head as shown in the photo, ensuring the point of Stripes faces towards Snout.
- Attach Feet to each side at the bottom of the Body. Feet should stick out sideways to give Tiger support to sit up.
- Stitch Arms to Tiger at Neck so Arms hang down in Front of Feet as shown in the photo.
- Stitch Tail to the bottom of the Body at the back.
Frequently Asked Questions
What crochet hook is used for this pattern?
This pattern uses Size U.S. H/8 [5 mm] Susan Bates® Silvalume® crochet hook (or size needed to obtain gauge).
Does this project require assembly?
Yes, assembly is required as the pieces (snout, ears, limbs, and tail) need to be sewn together to form the finished tiger.
How many yarn balls are needed for this pattern?
You will need a total of four balls of yarn. One ball of each color: Body/Head (Color B), Cornmeal (Contrast A), Pumpkin (Contrast B), and Charcoal (Contrast C).
Can I use other yarn instead of Red Heart® Super Saver®?
While Red Heart® Super Saver® is recommended for this pattern, you can use any medium-weight yarn that is suitable for amigurumi, ensuring the finished piece maintains the desired texture and firmness.
What stuffing is recommended for this amigurumi?
Polyfill stuffing is recommended to achieve that plush and soft effect needed for the amigurumi. Be sure to stuff the pieces firmly while maintaining their shapes.
Conclusion
The Crochet Tiger Amigurumi pattern offers a wonderful opportunity for crochet enthusiasts to showcase their skills and creativity. This project not only produces a delightful toy but also serves as a chance to improve and practice various crochet techniques, leading to a satisfying finished product. So grab your materials and enjoy the process of bringing this adorable tiger to life!