Sparkle and Shimmer Crochet Unicorn Pattern
Bring a touch of magic to your home with this delightful Sparkle and Shimmer Crochet Unicorn Pattern. This charming amigurumi project is sure to spark joy and creativity, whether you’re making it for a friend, a little one, or simply for yourself.
About This Amigurumi Design
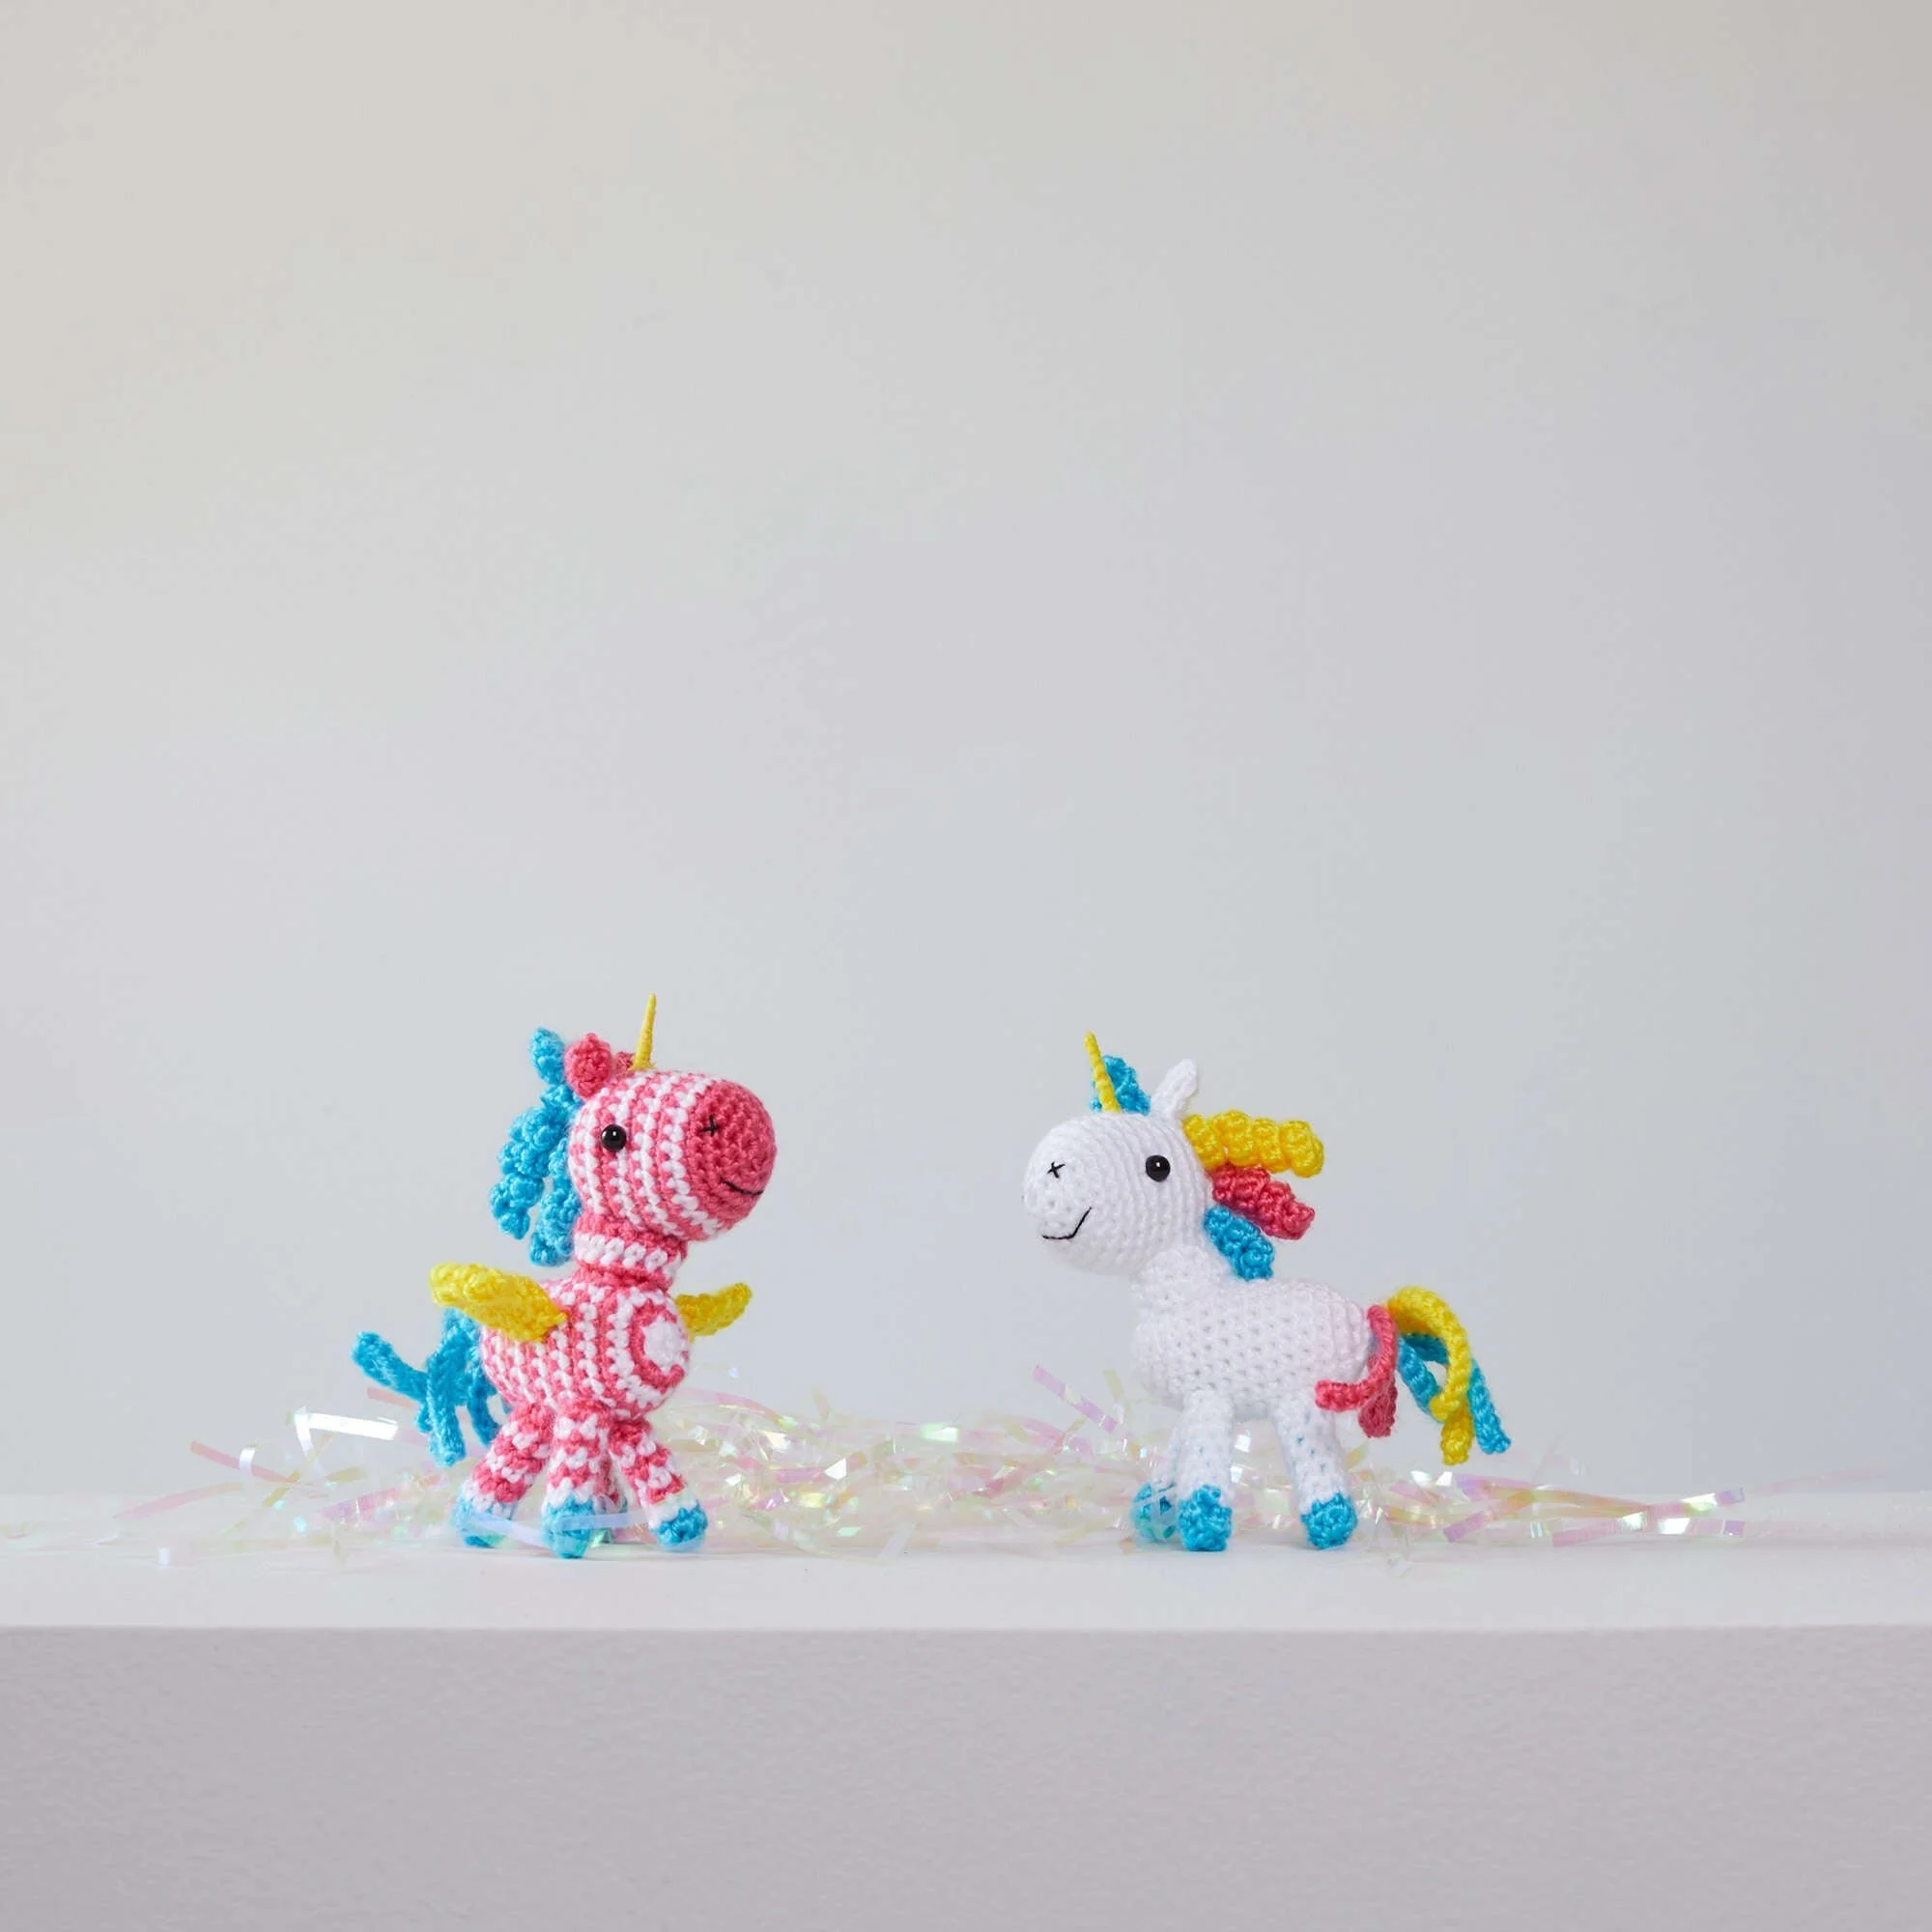
The Sparkle and Shimmer Crochet Unicorn combines whimsy and charm to create an endearing stuffed toy. Perfect as a gift or a decorative piece, this crochet unicorn is made with vibrant colors and embellishments that bring its personality to life. With clear instructions and helpful details, this pattern allows you to customize your unicorn’s design with optional stripes and varying colors, making each creation unique.
What You’ll Need
Materials
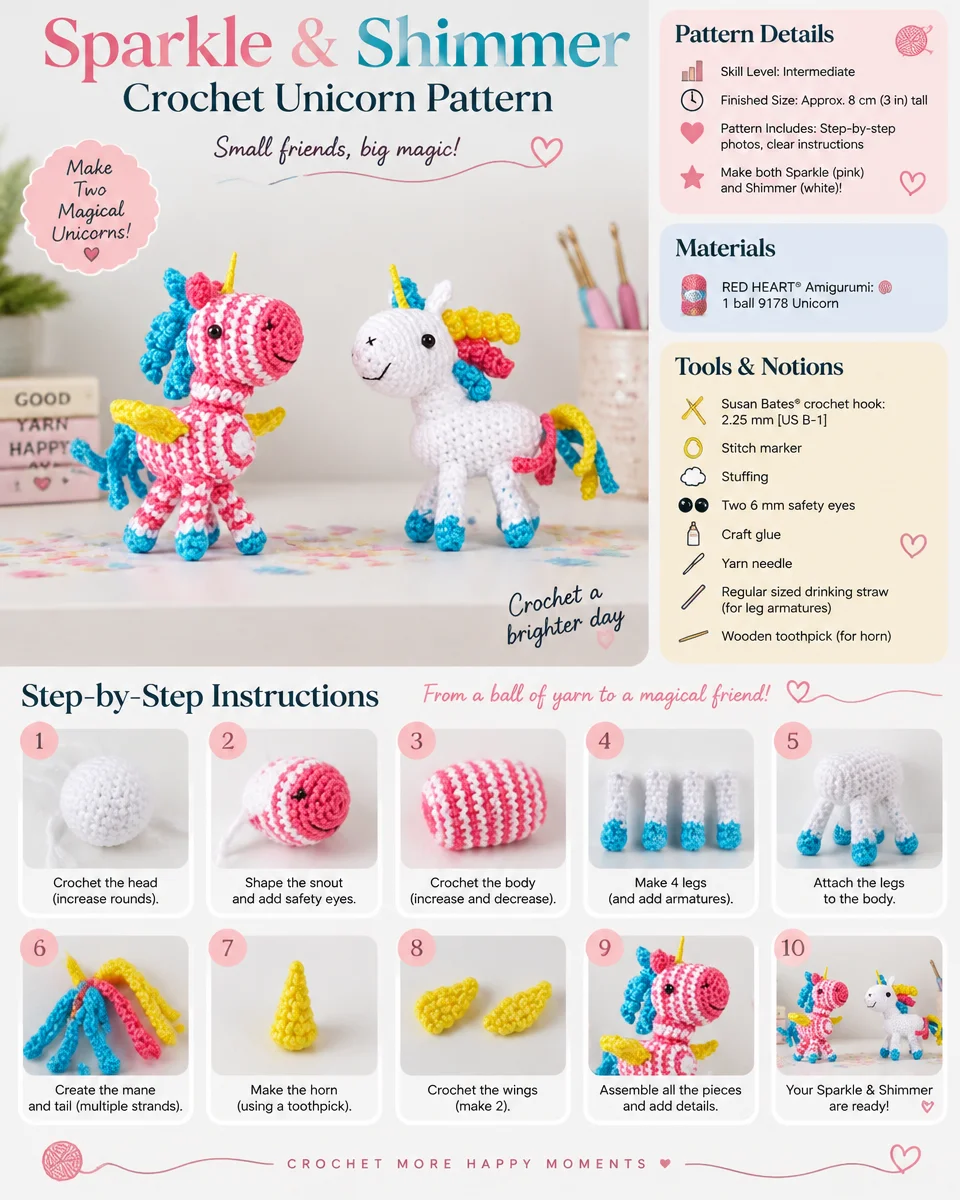
- Yarn:
- RED HEART® Amigurumi: 1 ball 9178 Unicorn
- Crochet Hook:
- Susan Bates® crochet hook: 2.25 mm [US B-1]
Notions/Tools
- Stitch marker
- Stuffing
- Two 6 mm safety eyes
- Craft glue
- Yarn needle
- Regular sized drinking straw (for leg armatures)
- Wooden toothpick (for horn)
- Black embroidery floss and embroidery needle (for embroidering facial features)
- Optional (weighted stuffing): Pins, knee-high stocking, plastic pellets
Crochet Abbreviations
- sc: Single crochet
- sc2tog: Single crochet two stitches together
- ch: Chain
- hdc: Half double crochet
- st: Stitch
- sl st: Slip stitch
Special Techniques
Special Stitch
sc2tog (single crochet 2 stitches together):
- Insert hook in next stitch, yarn over and pull up a loop.
- Insert hook in the next stitch, yarn over and pull up a loop.
- Yarn over and draw through all 3 loops on hook.
Special Technique
Adjustable ring:
- Wrap yarn into a ring, ensuring that the tail falls behind the working yarn.
- Grip the ring and tail between your middle finger and thumb.
- Insert hook through the center of the ring, yarn over (with working yarn) and draw up a loop.
- Work stitches of the first round in the ring. After the first round is worked, pull gently on the tail to tighten the ring.
Pattern Instructions
Solid Unicorn Body
- With A, make an adjustable ring.
- Round 1 (right side): Work 6 sc in ring; do not join, work in continuous rounds (spiral)—6 sc. Place a marker in the last sc worked to indicate the end of the round. Move the marker up as each round is completed.
- Round 2: Work 2 sc in each of the next 6 sts—12 sc.
- Round 3: [Sc in next st, 2 sc in next st] 6 times—18 sc.
- Round 4: [Sc in next 8 sts, 2 sc in next st] twice—20 sc.
- Rounds 5–13: Sc in each st around. Begin stuffing piece with fiberfill or place optional knee-high, filled with plastic pellets, into the piece. Continue stuffing piece as work progresses.
- Round 14: [Sc in next 8 sts, sc2tog] twice—18 sc.
- Round 15: [Sc in next st, sc2tog] 6 times—12 sc.
- Round 16: [Sc in next st, sc2tog] 4 times—8 sc.
Fasten off, leaving a long tail for sewing the body to the tail. If needed, thread the beginning yarn tail through stitches at the opening and pull to close. Weave in and trim the beginning tail only.
Striped Unicorn Body (For Reference)
- With A, make an adjustable ring.
- Round 1 (right side): Work 6 sc in ring and change to B in the last sc made; do not join, work in continuous rounds (spiral)—6 sc. Place a marker in the last sc worked to indicate the end of the round. Move the marker up as each round is completed.
- Round 2: With B, work 2 sc in each of the next 6 sts and change to A in the last sc made—12 sc.
- Round 3: With A, [sc in next st, 2 sc in next st] 6 times and change to B in the last sc made—18 sc.
- Round 4: With B, [sc in next 8 sts, 2 sc in next st] twice and change to A in the last sc made—20 sc.
- Rounds 5–13: Sc in each st around and continue to change yarn color at the end of every round, alternating A and B. Begin stuffing piece with fiberfill or place optional knee-high, filled with plastic pellets, into the piece. Continue stuffing piece as work progresses.
- Round 14: With B, [sc in next 8 sts, sc2tog] twice and change to A in the last sc made—18 sc.
- Round 15: With A, [sc in next st, sc2tog] 6 times and change to B in the last sc made—12 sc.
- Fasten off A.
- Round 16: With B, [sc in next st, sc2tog] 4 times—8 sc.
Fasten off, leaving a long tail for sewing the tail to the body. If needed, thread the beginning yarn tail through stitches at the opening and pull to close. Weave in and trim the beginning tail only.
Solid Unicorn Head
- Beginning at the muzzle with A, make an adjustable ring.
- Round 1 (right side): Work 6 sc in ring; do not join, work in continuous rounds (spiral)—6 sc. Place a marker in the last sc worked to indicate the end of the round. Move the marker up as each round is completed.
- Round 2: Work 2 sc in each of the next 6 sts—12 sc.
- Round 3: [Sc in next st, 2 sc in next st] 6 times—18 sc.
- Round 4: [Sc in next 2 sts, 2 sc in next st] 6 times—24 sc.
- Rounds 5–12: Sc in each st around.
- Round 13: [Sc in next 2 sts, sc2tog] 6 times—18 sc.
- Attach safety eyes between Rounds 9 and 10, about 10 or 11 stitches apart. Begin stuffing head and continue stuffing as work progresses. Do not use weighted stuffing in the head.
- Round 14: [Sc in next st, sc2tog] 6 times—12 sc.
- Round 15: [Sc in next st, sc2tog] 4 times—8 sc.
Fasten off, leaving a long yarn tail. Thread the tail through stitches of the last round and pull to close. If needed, thread the beginning yarn tail through stitches at the opening and pull to close. Weave in and trim both ends.
Striped Unicorn Head (For Reference)
- Beginning at the muzzle with B, make an adjustable ring.
- Round 1 (right side): Work 6 sc in ring; do not join, work in continuous rounds (spiral)—6 sc. Place a marker in the last sc worked to indicate the end of the round. Move the marker up as each round is completed.
- Round 2: Work 2 sc in each of the next 6 sts—12 sc.
- Round 3: [Sc in next st, 2 sc in next st] 6 times—18 sc.
- Round 4: [Sc in next 2 sts, 2 sc in next st] 6 times—24 sc.
- Round 5: Sc in each st around and change to A in the last sc made.
Begin Stripes
7. Round 6: With A, sc in each st around and change to B in the last sc made.
8. Round 7: With B, sc in each st around and change to A in the last sc made.
9. Rounds 8–11: Repeat Rounds 6 and 7 twice.
10. Round 12: Repeat Round 6.
- Round 13: With B, [sc in next 2 sts, sc2tog] 6 times and change to A in the last sc made—18 sc. Attach safety eyes between Rounds 9 and 10, about 10 or 11 stitches apart. Begin stuffing head and continue stuffing as work progresses. Do not use weighted stuffing in head.
- Round 14: With A, [sc in next st, sc2tog] 6 times and change to B in the last sc made—12 sc.
- Fasten off A.
- Round 15: With B, [sc in next st, sc2tog] 4 times—8 sc.
- Fasten off, leaving a long yarn tail. Thread the tail through stitches of the last round and pull to close. If needed, thread the beginning yarn tail through stitches at the opening and pull to close. Weave in and trim both ends.
Solid Unicorn Neck
- With A, leaving a long beginning tail for sewing neck to head, ch 14; taking care not to twist ch, join with slip st in the first ch to form a ring.
- Round 1: Ch 1, sc in same ch as joining slip st and in each remaining ch around; join with slip st in the first sc—14 sc.
- Rounds 2 and 3: Ch 1, sc in each st around; join with slip st in the first sc.
Fasten off, leaving a long tail for sewing the neck to the body.
Striped Unicorn Neck (For Reference)
Make the same as the neck for the solid unicorn, working the beginning chain and Round 1 with B, Round 2 with A, and Round 3 with B.
Solid Unicorn Legs (Make 4)
- Beginning at hoof with C, make an adjustable ring.
- Round 1 (right side): Ch 1, work 6 sc in ring; join with slip st in the first sc—6 sc.
- Round 2: Ch 1, sc in each st around; join with slip st in the first sc.
Fasten off C.
- Round 3: Draw up a loop of A in any st, sc in each st around; do not join, work in continuous rounds (spiral).
- Place a marker in the last sc worked to indicate the end of the round. Move the marker up as each round is completed.
- Rounds 4–8: Sc in each st around.
- Fasten off, leaving a long tail for sewing the leg to the body. If needed, thread the beginning yarn tail through stitches at the opening and pull to close. Weave in and trim the beginning tail only.
Insert the drinking straw into the leg and cut to size.
Striped Unicorn Legs (Make 4) (For Reference)
Make the same as the legs for the solid unicorn, working the beginning chain, Rounds 1 and 2 with C, Round 3 with A, Round 4 with B, and continue to alternate one round with A and one round with B until the leg is complete.
Ears (Make 2 for Each Unicorn)
Note: If making the solid unicorn, work with A. If making a striped unicorn, work with B.
- Ch 7.
- Row 1: Working in back bumps only, sc in 2nd ch from hook and in the next ch, hdc in the next 2 ch, sc in the last 2 ch.
- Fasten off, leaving a long tail for sewing.
Fold each ear in half widthwise, with the tops of the stitches facing forwards. Sew the backs of the ears together using the yarn tail.
Forelock
- With C, ch 6.
- Row 1: Work 3 sc in 2nd ch from hook and in each remaining ch across—15 sc.
- Fasten off, leaving a long tail for sewing the forelock to the head.
Mane (Make 3 for Each Unicorn)
Notes:
-
Each piece of mane is a different length. Begin the first piece with ch 14, the second piece with ch 12, and the last piece with ch 10.
-
If making a striped unicorn, make all three pieces with C. If making a solid unicorn, make one piece each with B, C, and D. Use D for the longest piece, B for the middle piece, and C for the shortest piece.
-
Row 1: Work 3 sc in 2nd ch from hook and in each remaining ch.
- Note: The longest piece will have 39 sc, the middle piece will have 33 sc, and the shortest piece will have 27 sc.
Fasten off, leaving a long tail for sewing the forelock to the head.
Tail (Make 3 for Each Unicorn)
Note: If making a striped unicorn, make all three pieces with C. If making a solid unicorn, make one piece each with B, C, and D.
- Ch 27.
- Row 1: Working in back bumps only, slip st in 2nd ch from hook and in each remaining ch across.
- Fasten off. Weave in and trim ends.
Striped Unicorn Wings (Requires 2)
- With D, leaving a long beginning tail for sewing the wing to the body, make an adjustable ring.
- Round 1 (right side): Work 6 sc in ring; do not join, work in continuous rounds (spiral)—6 sc.
- Place a marker in the last sc worked to indicate the end of the round. Move the marker up as each round is completed.
- Round 2: Work 2 sc in each of the next 6 sts—12 sc.
- Rounds 3 and 4: Sc in each st around.
Flatten piece, matching the front and back stitches of the last round to form a double layer of 6 stitches in each layer. Work now proceeds back and forth in rows.
6. Row 5: Ch 1, working through both layers, skip the first st, sc in the next 5 sts.
7. Row 6: Ch 1, turn, sc in each st across.
8. Row 7: Ch 1, turn, (slip st, hdc, slip st) in each st across.
Fasten off, weave in and trim the ending tail.
Finishing & Assembly
Referring to the photograph as a guide for placement, use yarn tails or yarn scraps to sew the following pieces together:
- Sew ears to the top of the head at Round 14, about 2 or 3 stitches apart.
- Sew the neck to the underside of the head, beginning at Round 9 of the head and covering through Round 14.
- Sew head and neck to the top front of the body, beginning at Round 4 of the body and positioning the face slightly to the side. Sew with the yarn tail attached to the neck, stuffing the neck firmly before completing the seam.
- Sew legs to the bottom portion of the body. Sew back legs beginning at Round 10 of the body and front legs beginning at Round 6, each leg covering about 3 rounds and leaving 1 round between the front and back legs. Place back legs very close together (so they touch) and place the front legs very close together. To check for balance, pin or baste legs in place first, then sew securely in place.
- Sew forelock to forehead, between ears.
- Sew mane pieces to the back of the head, positioning the shortest piece at the top and the longest piece at the end.
- Hold all three tail pieces together and fold in half. With the yarn tail from the end of the body, insert the needle through the tail pieces at the fold and sew to the rear of the body.
- Sew wings to the back of the striped unicorn, positioning wings in the shoulder area of the body (about Round 8). Sew the wings angled upwards and backwards with tips facing back and up.
With an embroidery needle and 2 strands of black embroidery floss, embroider an “X” for each nostril, about 4 or 5 rounds from the beginning round at the muzzle and about 5 stitches apart. Embroider a curved smile, following Round 3 or 4 at the muzzle, about 4 or 5 stitches long. Weave the floss ends back through the head and knot securely, then bury yarn in the head, trimming excess as needed.
Horn
Generously coat about one-third of a wooden toothpick with strong craft glue. Wrap D-colored yarn around the toothpick, wrapping from the beginning of the glue up to the point. Hold the wraps until the yarn adheres. Trim the yarn evenly when the glue is dry.
After the horn is dry, place a small amount of glue on the unwrapped end of the toothpick and insert it at the center of the unicorn’s forehead, about 2 rounds down from the ears. Allow glue to dry. Weave in and trim any remaining ends.
Frequently Asked Questions
What crochet hook is used for this pattern?
You will need a Susan Bates® crochet hook: 2.25 mm [US B-1].
Does this project require assembly?
Yes, you will need to assemble various parts including the head, neck, legs, and tail.
Is this project worked in rounds or rows?
The majority of this pattern is worked in continuous rounds.
Can I use weighted stuffing for this unicorn?
Yes, you can use optional weighted stuffing such as pins, knee-high stockings, or plastic pellets for added stability if desired.
What type of stuffing is recommended for the unicorn?
You can use fiberfill for stuffing, or opt for weighted stuffing if you prefer additional weight for your unicorn.
Conclusion
Creating your very own Sparkle and Shimmer Crochet Unicorn is not only a fun and rewarding project; it also results in an enchanting stuffed toy that will surely be cherished. With its delightful design and customizable options, this crochet pattern allows you to express your creativity while crafting something beautiful and magical. Happy crocheting!