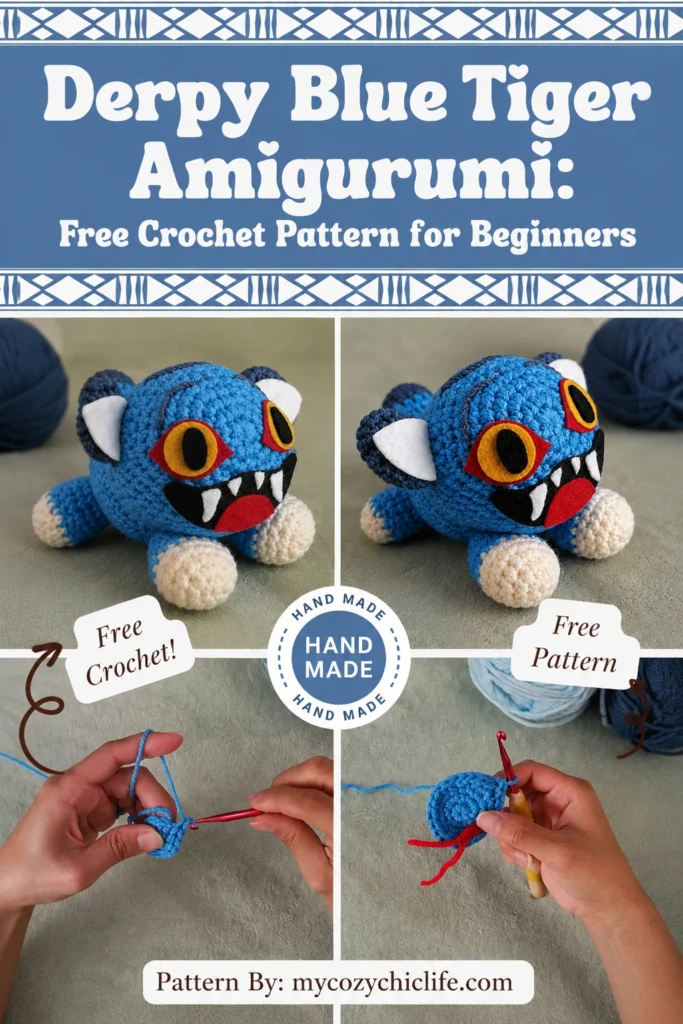
If you’ve been scrolling through crochet feeds lately, you’ve probably spotted them — those silly little blue tigers with goofy grins, droopy eyes, and a face that’s somehow chaotic and adorable at the same time. They’ve gone viral for a reason: they’re impossibly cute, full of personality, and surprisingly beginner-friendly to make.
This free crochet pattern walks you through making your very own derpy blue tiger amigurumi, with a chunky huggable size, soft body, and all those wonderfully expressive face details. The construction is mostly seamless — you’ll crochet the head and body in one continuous piece, so there’s far less assembly than a traditional amigurumi.
Whether you’re brand new to amigurumi or coming back for a fun weekend project, this pattern is designed to be relaxing, satisfying, and full of charm. Let’s get hooked.
What You’ll Be Making
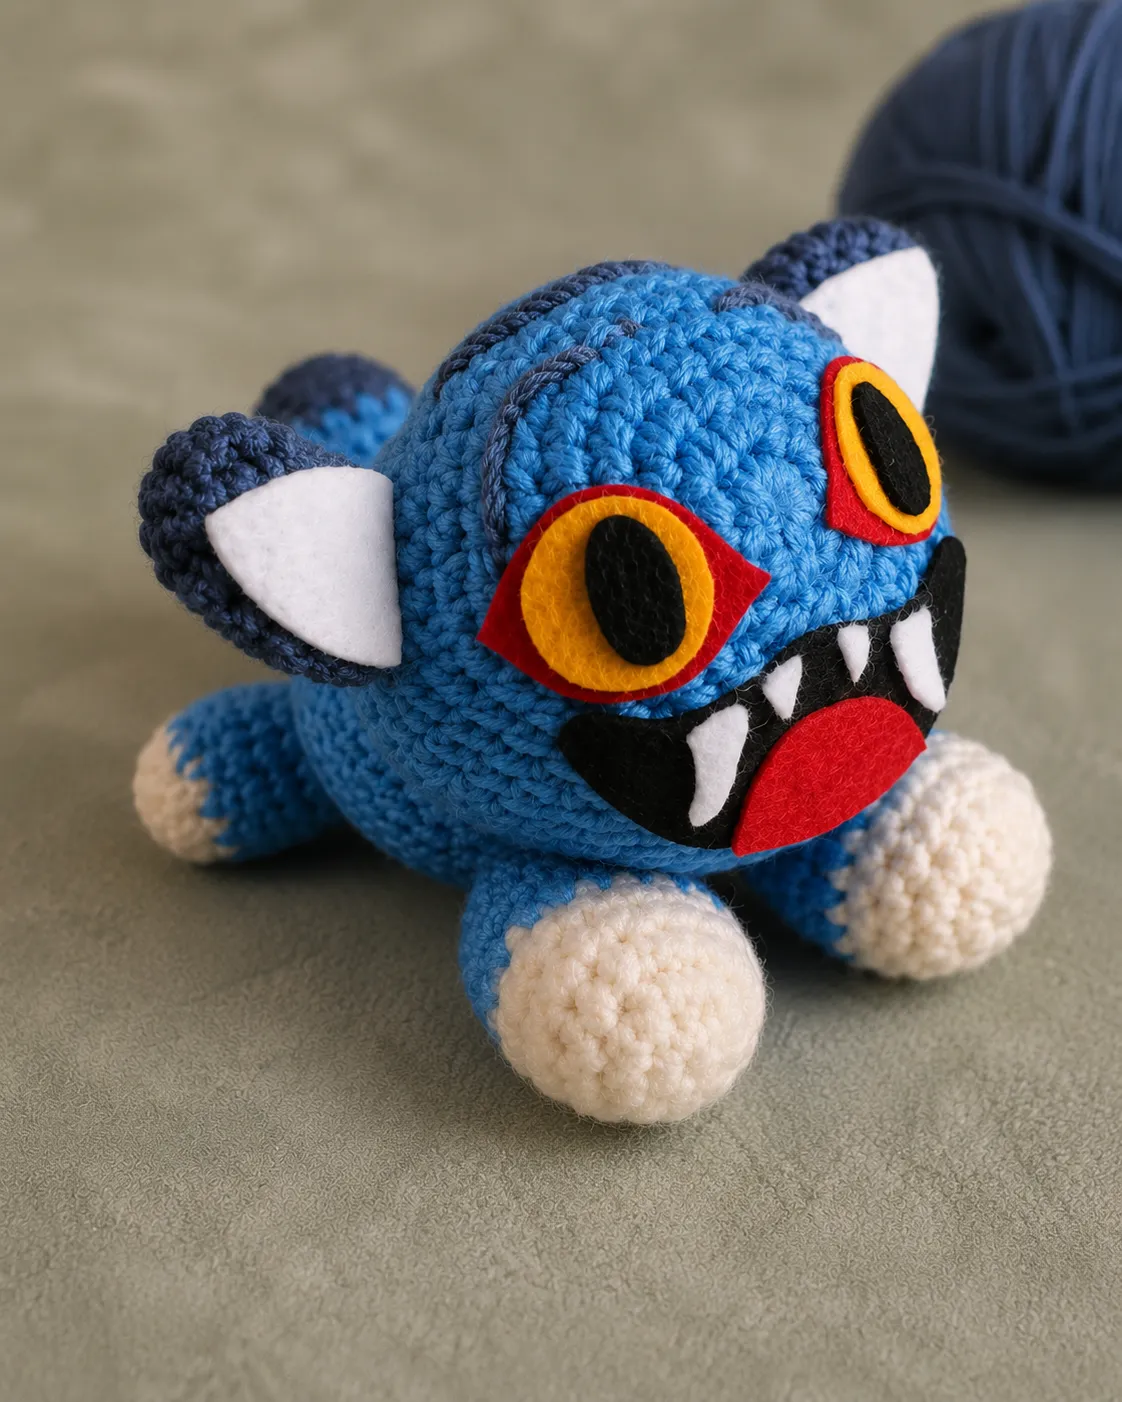
You’ll create a chunky, sitting blue tiger plushie around 8–10 inches tall, with:
- A round head and body worked as one continuous piece (no head-to-body sewing)
- Soft little off-white paws for the arms and legs
- Cute rounded ears with darker accents
- A small striped tail with a curl
- A signature derpy face — big yellow felt eyes, an open-mouth smile, a peeking tongue, and black stripes
The result is a plushie that genuinely makes you smile every time you look at it.
Materials Needed
- Yarn: Worsted weight (4-weight) acrylic in:
- Bright blue (main body color) — about 100 g
- Pale blue or dusty blue (for shading and stripes) — small amount
- Off-white (for paws, inner ears, and muzzle) — small amount
- Red (for mouth and tongue details) — small amount
- Black (for stripes and face details) — small amount
- Yellow (for eye details) — small amount
- Crochet hook: 5.0 mm (US H) — gives that perfect chunky, huggable size
- Stitch marker
- Darning needle
- Scissors
- Polyester fiberfill stuffing
- Felt sheets in yellow, red, black, and white
- Fabric glue or hot glue for attaching felt facial features
Tip: A 5 mm hook with worsted yarn gives a slightly snug fabric that’s perfect for amigurumi — dense enough to hide stuffing but soft enough to feel huggable. If you can see stuffing through your stitches, drop down to a 4.5 mm hook.
Crochet Abbreviations
This pattern uses US crochet terminology.
| Abbreviation | Meaning |
|---|---|
| MR | magic ring |
| SC | single crochet |
| Inc | increase (2 sc in one stitch) |
| Dec | decrease — invisible decrease is recommended for a smoother finish |
| SL ST | slip stitch |
| ch | chain |
| Rnd | round |
| FLO | front loop only |
| BLO | back loop only |
| FO | fasten off |
| ( ) * | repeat the sequence in parentheses |
| [ ] | total stitch count for that round |
Skill Level & Time
Skill level: Beginner to advanced beginner. If you’ve made even one or two simple amigurumi shapes before, you can absolutely make this.
Time to make: Around 4–8 hours — a great cozy weekend project.
Before You Begin — Please Read
A few quick notes that’ll make the pattern flow smoothly:
- The tiger is worked in continuous rounds (a spiral). Use a stitch marker at the start of each round and move it up as you go.
- The head and body are one continuous piece — you’ll never sew them together. This is the magic of this pattern’s construction.
- An invisible decrease (working through the front loops only of two stitches before completing the sc) gives a much cleaner finish than a regular decrease. Use it whenever the pattern calls for “Dec.”
Part 1: The Head
Start with bright blue yarn.
- Rnd 1: 6 SC in MR [6]
- Rnd 2: Inc in each st around [12]
- Rnd 3: (1 SC, 1 Inc) around [18]
- Rnd 4: (2 SC, 1 Inc) around [24]
- Rnd 5: (3 SC, 1 Inc) around [30]
- Rnd 6: (4 SC, 1 Inc) around [36]
- Rnd 7: (5 SC, 1 Inc) around [42]
- Rnd 8–13: 42 SC around — work 6 plain rounds [42]
This builds the big round head shape. Then start decreasing:
- Rnd 14: (5 SC, 1 Dec) around [36]
- Rnd 15: (4 SC, 1 Dec) around [30]
- Rnd 16: (3 SC, 1 Dec) around [24]
- Rnd 17: (2 SC, 1 Dec) around [18]
Stuff the head firmly now, while the opening is still big enough to comfortably reach into. You want it plump and well-shaped — but not so overstuffed that the stitches stretch open.
Part 2: Transitioning Into the Body (No Sewing!)
This is the clever bit — instead of closing the head and sewing it to a separate body, you’ll work directly down into the body from where the head ends.
- Rnd 18: Working in the front loops only of those 18 stitches, work 1 Inc in each st [36]
Why FLO? Working into the front loops only leaves the back loops free, which creates a small ridge that beautifully separates the head from the body — giving the illusion of a “neck” line without any actual neck.
Now continue with the body in regular both-loop stitches:
- Rnd 19–22: 36 SC around — work 4 plain rounds [36]
- Rnd 23: (4 SC, 1 Dec) around [30]
- Rnd 24: 30 SC around [30]
- Rnd 25: (3 SC, 1 Dec) around [24]
- Rnd 26–27: 24 SC around — 2 plain rounds [24]
- Rnd 28: (2 SC, 1 Dec) around [18]
- Rnd 29: (1 SC, 1 Dec) around [12]
- Rnd 30: 6 Dec [6]
Stuff the body firmly as you go from Rnd 25 onwards. Once the opening drops below 12 stitches, it gets hard to add more stuffing, so don’t wait.
Cut the yarn, leaving a short tail. Thread it through the front loops of the last 6 stitches with a darning needle, pull tight to close the hole, and weave the end inside the body.
Part 3: Ears (Make 2)
Each ear has a blue outer and an off-white inner, giving that cute two-tone look.
With bright blue yarn:
- Rnd 1: 6 SC in MR [6]
- Rnd 2: 6 Inc [12]
- Rnd 3: (1 SC, 1 Inc) around [18]
- Rnd 4: 18 SC [18]
Fold the ear flat and slip-stitch across the open base to close. Cut the yarn, leaving a long tail for sewing.
For the inner-ear accent, cut a small teardrop of off-white felt and glue it onto the front of each ear.
Sew the ears to the top of the head, about 4–5 stitches apart.
Part 4: Arms (Make 2)
Start with off-white yarn for the paw, then change to blue partway up.
- Rnd 1: 6 SC in MR [6]
- Rnd 2: 6 Inc [12]
- Rnd 3–4: 12 SC around — 2 plain rounds [12]
- Change to bright blue yarn
- Rnd 5–10: 12 SC around — 6 plain rounds [12]
Stuff lightly — arms should be soft, not firm. Flatten the opening and slip-stitch across to close. Cut the yarn, leaving a long tail.
Sew one arm to each side of the body, around Rnd 22–23.
Part 5: Legs (Make 2)
Legs are slightly larger than arms for that signature seated stance.
Start with off-white yarn for the paw:
- Rnd 1: 6 SC in MR [6]
- Rnd 2: 6 Inc [12]
- Rnd 3: (1 SC, 1 Inc) around [18]
- Rnd 4–5: 18 SC around — 2 plain rounds [18]
- Change to bright blue yarn
- Rnd 6–9: 18 SC around — 4 plain rounds [18]
Stuff lightly. Flatten and slip-stitch across the opening to close, leaving a long tail.
Sew the legs to the bottom front of the body so the tiger sits up nicely. Pose them slightly outward for the seated look.
Part 6: Tail
With bright blue yarn:
- Rnd 1: 6 SC in MR [6]
- Rnd 2–8: 6 SC around — 7 plain rounds [6]
Leave unstuffed (or stuff very lightly). Flatten and slip-stitch the opening closed. Cut the yarn, leaving a long tail.
Sew the tail to the back of the body, curving it slightly upward or to one side. Add small black yarn stripes across the tail using surface embroidery for that classic tiger look.
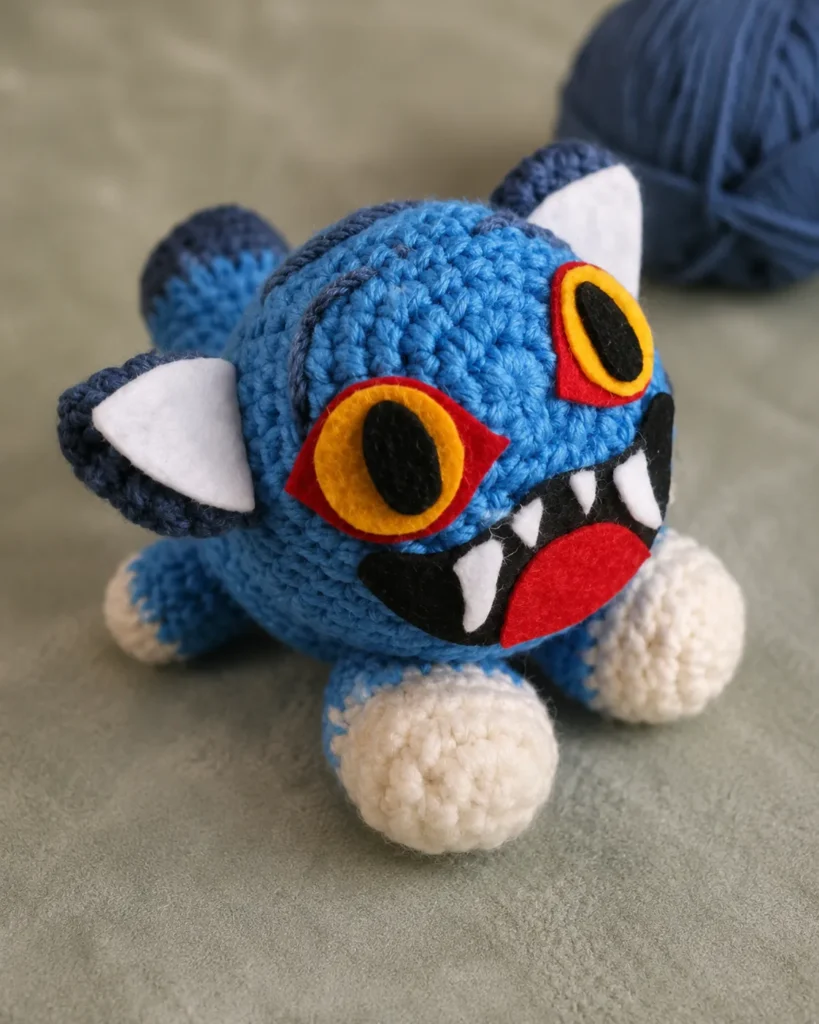
Part 7: The Derpy Face (The Best Part!)
This is where your tiger gets its personality — and where you can get genuinely playful. The “derpy” charm comes from making the eyes slightly mismatched in size or position. Don’t aim for perfectly symmetrical — wonky is the whole vibe.
The eyes:
- Cut two large yellow felt circles for the eye whites — make them on the bigger side, slightly oversized for that wide-eyed look.
- Cut two smaller black felt circles for the pupils and glue them onto the yellow.
- Optional: add a tiny white felt highlight on each pupil for sparkle, and a red felt outline or arc around each eye for that signature dramatic look.
- Glue the finished eyes onto the front of the head, intentionally a tiny bit off-center or at slightly different angles — that’s where the derpy magic happens.
The mouth:
- Cut a red felt shape for the open mouth — a wide, slightly off oval works perfectly.
- Glue it onto the face below and between the eyes.
- Cut a few small white felt teeth and glue them peeking out from the top of the mouth.
- Cut a small red felt tongue and glue it sticking out from the bottom of the mouth.
Stripes & details:
- Cut thin black felt strips (or embroider directly with black yarn) for stripes across the forehead, cheeks, and body.
- Add a small contrasting muzzle patch in off-white felt around the mouth if you’d like.
Take your time with this part — the felt details genuinely transform the plushie.
Tips for Success
- Use a stitch marker every round. Continuous spirals are easy to lose track of, and a marker saves so much frustration.
- Stuff firmly but not over-tightly. Too much stuffing stretches stitches open and stuffing peeks through.
- Invisible decreases look much cleaner than regular decreases on amigurumi — it’s worth learning the technique if you haven’t.
- Pin the face details before gluing. Once felt is glued, it’s hard to reposition, so test the placement first.
- The mismatched look is intentional. Don’t stress about perfect symmetry — the wonkier, the cuter.
Common Mistakes & How to Fix Them
Stuffing showing through stitches. Either your stitches are too loose or you’ve overstuffed. Drop down to a 4.5 mm hook next time and stuff more conservatively.
Lopsided head or body. Almost always means a missed increase or decrease — count your stitches at the end of every round.
Tiger won’t sit up. Position the legs lower on the body and angle them slightly forward. A small flat bottom (gently shaped with your hands once stuffed) helps too.
Face looks off. If the face doesn’t feel right, it’s usually the eye placement — try moving them slightly closer together or further apart before gluing.
Felt pieces lifting at the edges. Use fabric glue (not just craft glue) and press firmly for at least a minute. Hot glue also works well but be careful around acrylic yarn — keep the temperature low.
Make It Your Own
The pattern is just a starting point — go wild with variations:
- Try a pink tiger, mint green tiger, or lavender tiger for a pastel set.
- Use thinner yarn and a smaller hook for a mini keychain version.
- Add a tiny scarf, bow, or hat for extra personality.
- Make a whole derpy zoo — same construction, different colors and felt faces.
- For a baby-safe version, embroider all the face details with yarn instead of using glued felt.
You Did It!
Step back and look at your finished tiger. He doesn’t need to be flawless — the whole point of “derpy” is that the small imperfections are the charm. Every uneven stitch, every slightly wonky eye, every felt piece that’s a tiny bit off-center is part of his personality. Be proud of every bit of him.
If you loved making this, here are a few more cute amigurumi projects you might enjoy:
- Crochet Green Alien Cat Keychain — another quirky, colorful little character
- Crochet No-Sew Axolotl Free Amigurumi Pattern — a beginner-friendly cuddly creature with similar construction
- Free Triceratops Amigurumi Crochet Pattern — another animal friend for the collection
- Free Crochet Snoopy Keychain — a small, fun amigurumi to make next
Happy crocheting! ❤️
Frequently Asked Questions
Is this a no-sew pattern? Mostly! The head and body are crocheted as one continuous piece, so there’s no joining there. You will still need to sew on the ears, arms, legs, and tail — but that’s much less assembly than a traditional amigurumi.
Can a complete beginner make this? Yes, especially if you’ve done a basic amigurumi shape before. The stitches are simple (mostly single crochet, increase, and decrease), and the construction is forgiving.
How long does it take? Around 4–8 hours, depending on your pace and how detailed you get with the felt face. The face details usually take longer than people expect — give yourself extra time there.
How big will the finished tiger be? With worsted yarn and a 5 mm hook, expect roughly 8–10 inches tall when sitting. Using bulkier yarn and a larger hook will give you a bigger version; thinner yarn and a smaller hook will give you a mini.
Can I make this baby-safe? Yes — skip all glued felt pieces and embroider every face detail directly with yarn. Make sure all ends are woven in securely, and stitch (don’t glue) anything that could come loose.
My tiger looks too symmetrical and not derpy enough! That’s an easy fix — make one eye slightly bigger than the other, place them at uneven heights, or tilt one a different way. A tiny bit of asymmetry is the whole secret to the “derpy” charm.
Can I sell the tigers I make from this pattern? You’re welcome to sell finished plushies you make from this pattern. Please don’t redistribute the pattern itself, and a credit link back to this blog is always appreciated if you share your work online.