Crochet Two Happy Giraffes Pattern
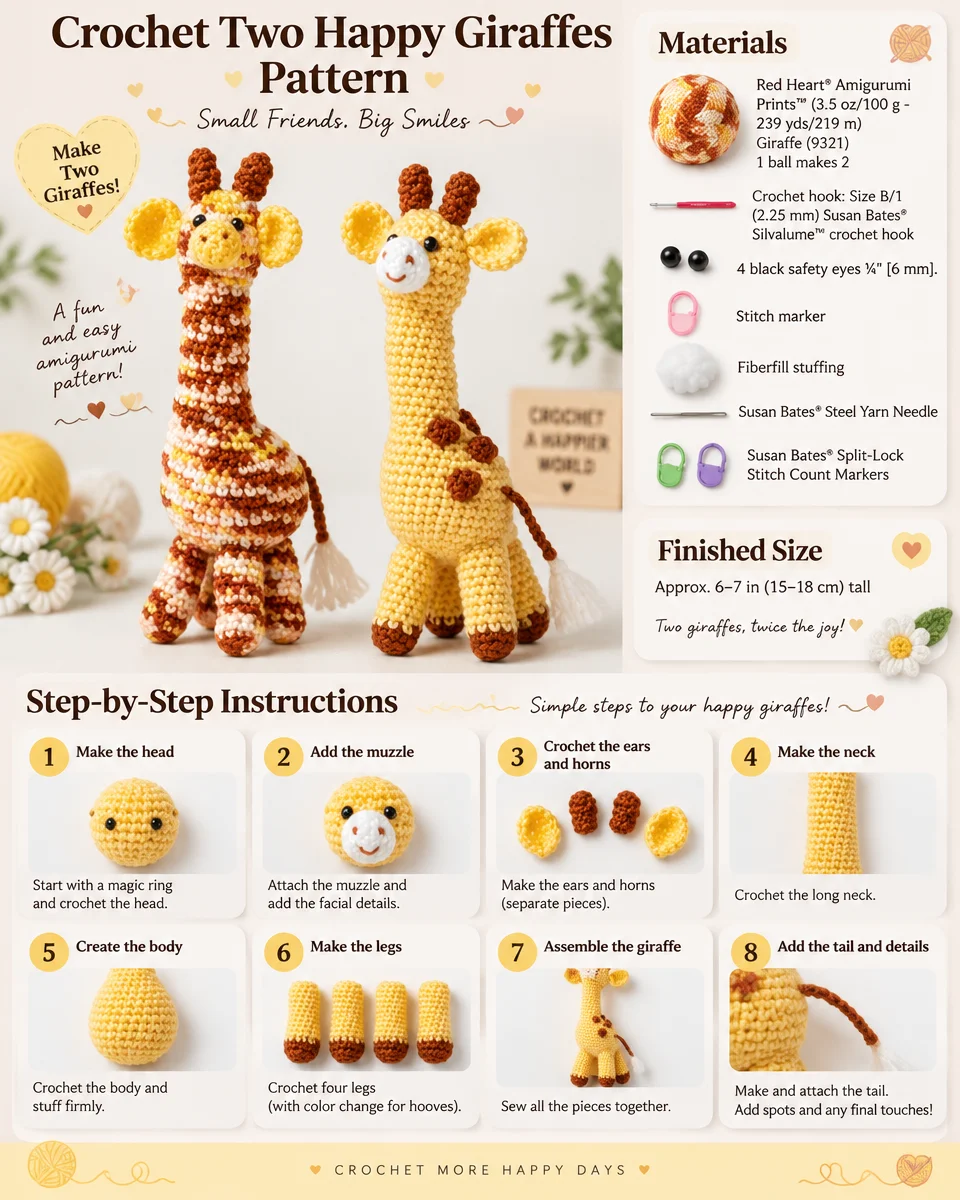
Amigurumi lovers, rejoice! Today, we’re diving into a delightful crochet project that combines creativity and a touch of whimsy. The Crochet Two Happy Giraffes Pattern offers you the chance to bring these adorable creatures to life using just a few materials and your crochet skills. Perfect as gifts or treasures for your home decor, these little giraffes are sure to bring smiles to all who encounter them.
About the Crochet Project
This pattern is designed for amigurumi-style giraffes, which are characterized by their stuffed, three-dimensional shapes. You will use continuous rounds to create the body, legs, ears, horn, and snout of each giraffe. With possibilities for colorful variations, these giraffes can align perfectly with your personal style.
Features of the Finished Project
- Size: Each giraffe will be approximately a charming size perfect for cuddling or display.
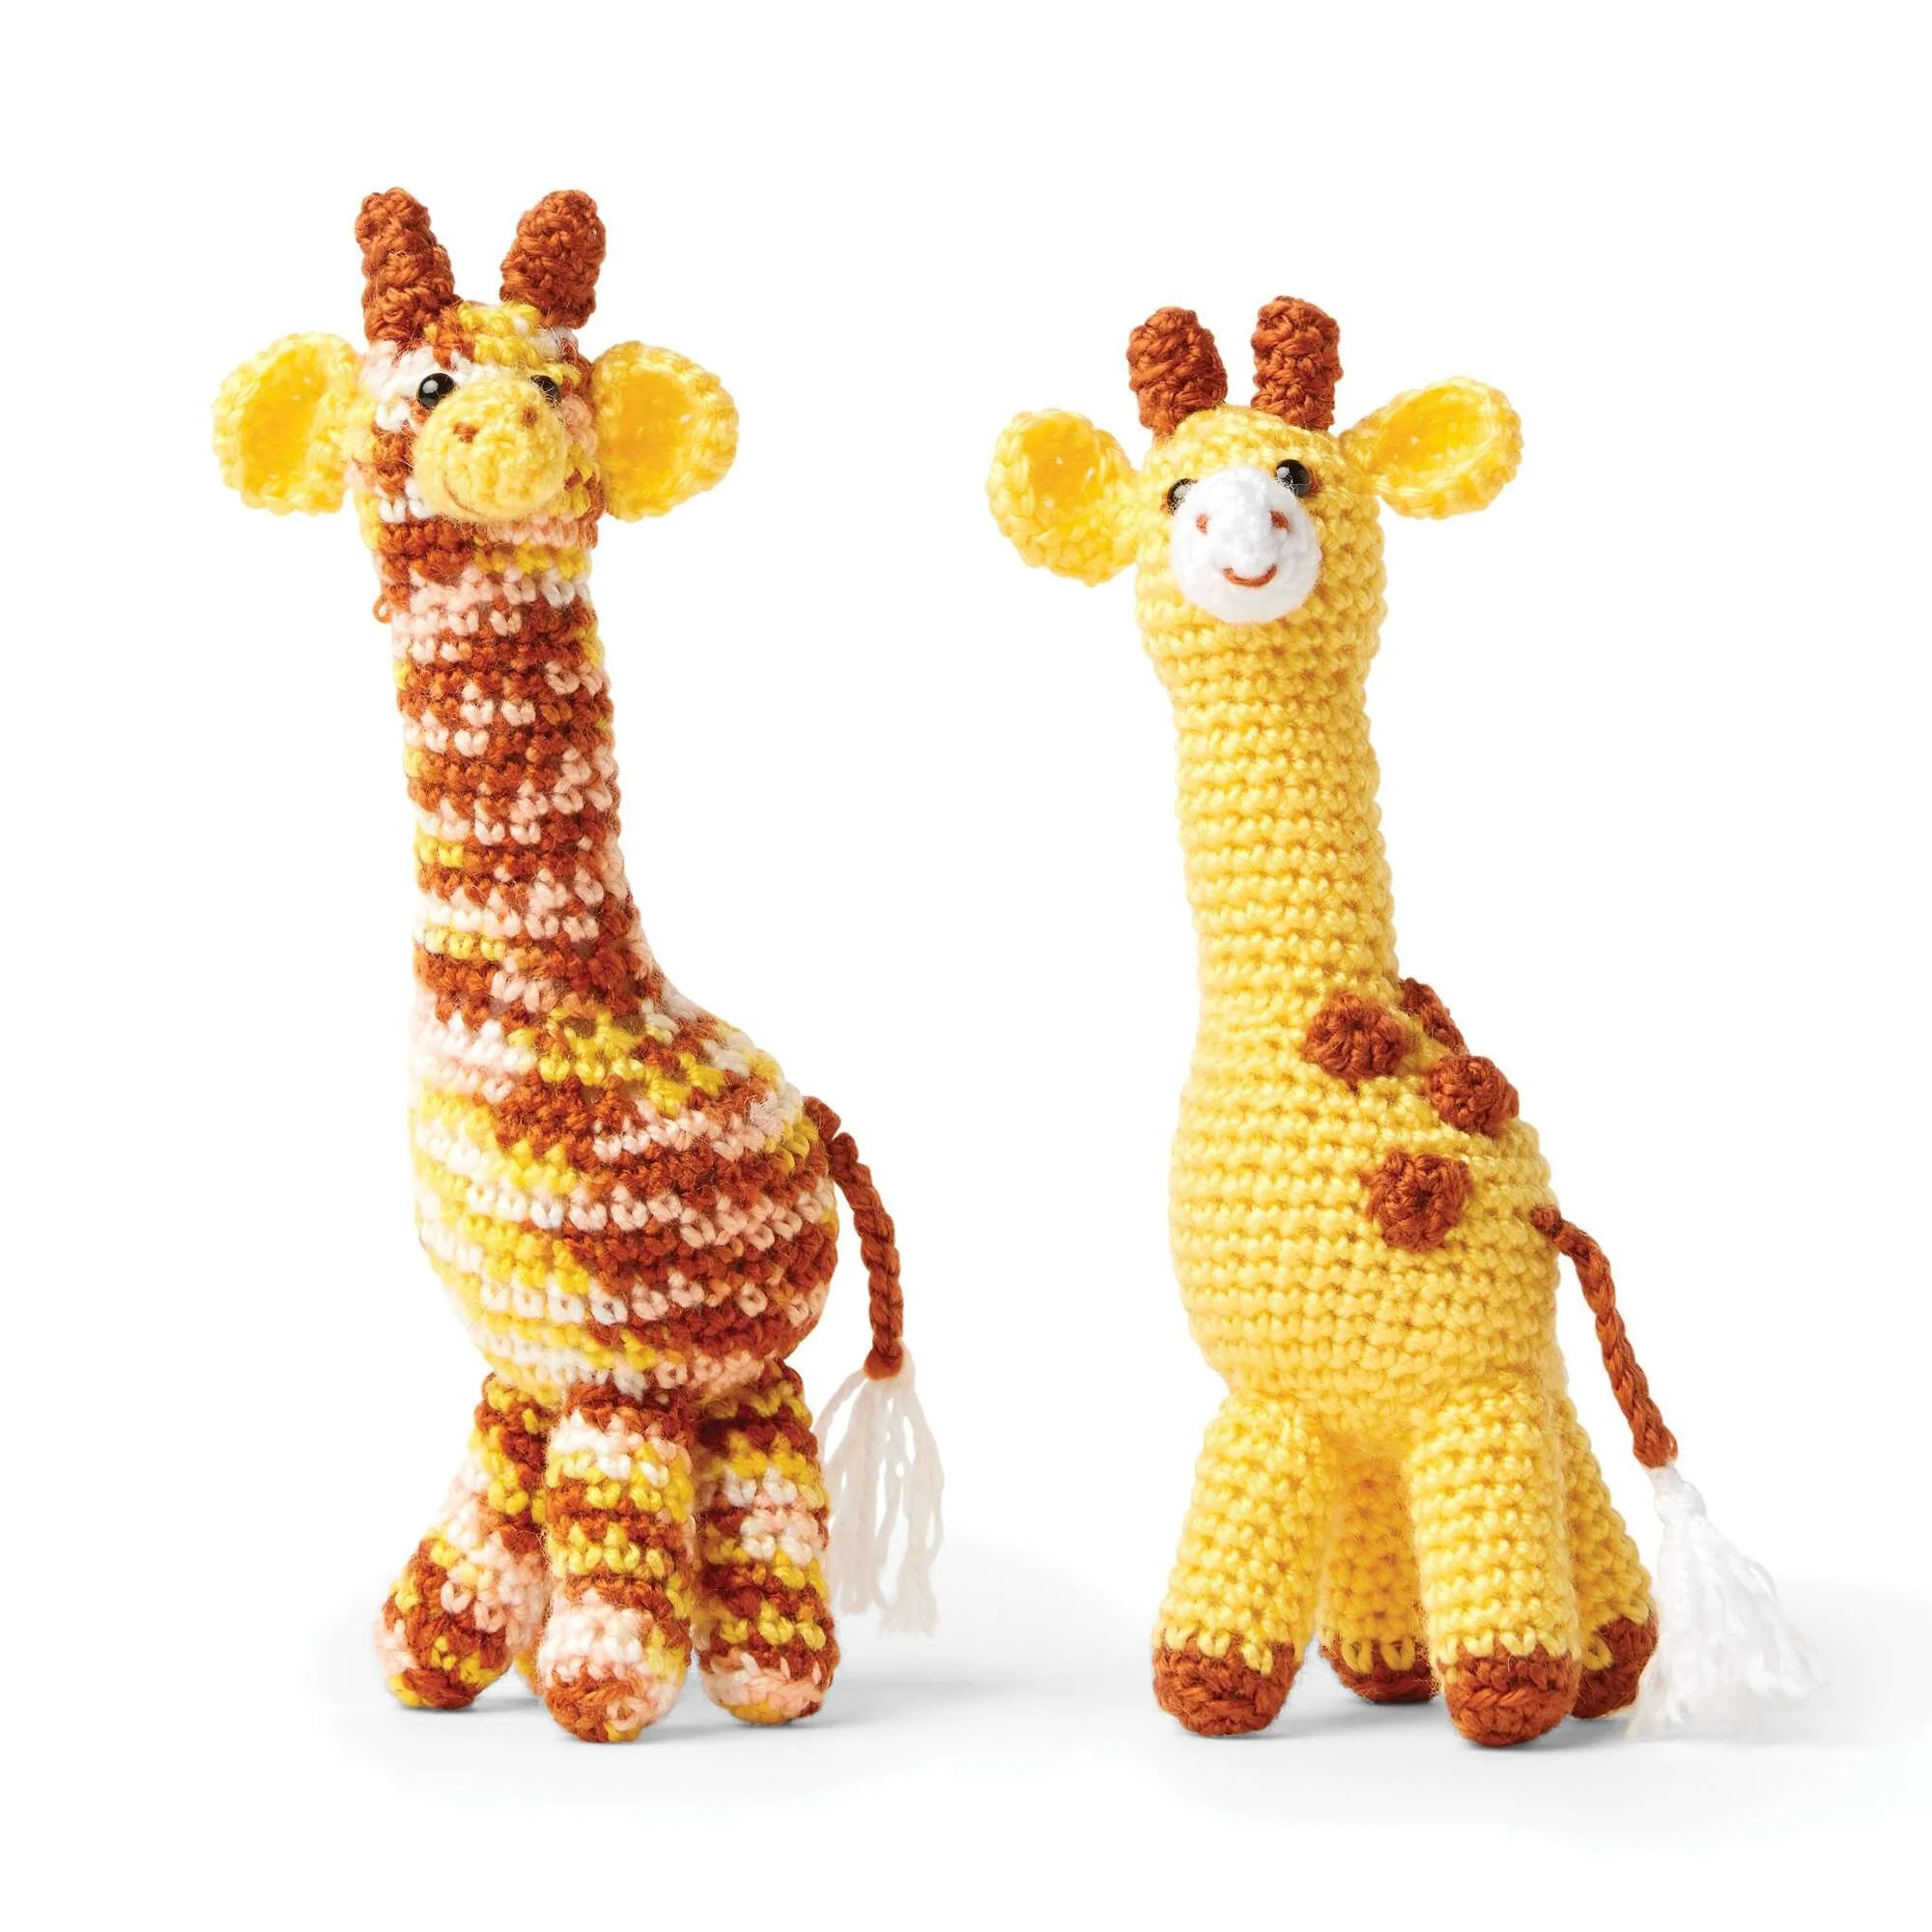
- Two Versions: You have the choice between a classic yellow giraffe or a multi-colored version.
- Stuffing: These giraffes will be filled with fluffy fiberfill to create a plush texture.
Materials
To get started on your crochet adventure, gather the following materials:
Yarn
- Red Heart® Amigurumi Prints™ (3.5 oz/100 g; 239 yds/219 m)
- Color for Version 1: Giraffe (9321) – Yellow as Color 1, Brown as Color 2, White as Color 3
- Color for Version 2: Multi as Color 1, Brown as Color 2, White as Color 3
- Note: One ball makes 2 giraffes.
Crochet Hook
- Size: B/1 (2.25 mm) Susan Bates® Silvalume™ crochet hook or size needed to obtain gauge.
Safety Eyes
- 4 black safety eyes, ¼” [6 mm].
Notions
- Stitch marker
- Fiberfill stuffing
- Susan Bates® Steel Yarn Needle
- Susan Bates® Split-Lock Stitch Count Markers (for marking the beginning of rounds)
Crochet Abbreviations
For convenience, here are the abbreviations used in this pattern:
- ch – chain
- sc – single crochet
- dc – double crochet
- st – stitch
- PM – place marker
- Sc2tog – single crochet two together
Color Versions
This pattern includes two vibrant versions:
Version 1
- Color 1: Yellow
- Color 2: Brown
- Color 3: White
Version 2
- Color 1: Multi
- Color 2: Brown
- Color 3: White
Pattern Instructions
The following instructions will guide you through creating your giraffes, starting with the body and then moving through each essential component.
Body
Begin at the bottom of the body with Color 1, and follow these steps:
- 1st rnd: 6 sc in 2nd ch from hook. Do not join. PM for beg of rnd.
- 2nd rnd: 2 sc in each sc around. (12 sc)
- 3rd rnd: *1 sc in next sc. 2 sc in next sc. Rep from * around. (18 sc)
- 4th rnd: *1 sc in each of next 2 sc. 2 sc in next sc. Rep from * around. (24 sc)
- 5th rnd: *1 sc in each of next 3 sc. 2 sc in next sc. Rep from * around. (30 sc)
- 6th to 14th rnds: 1 sc in each sc around.
- 15th rnd: 1 sc in each of next 9 sc. (sc2tog) 6 times. 1 sc in each of last 9 sc. (24 sts)
- 16th rnd: 1 sc in each sc around.
- 17th rnd: 1 sc in each of next 6 sc. (sc2tog) 6 times. 1 sc in each of last 6 sc. (18 sts)
- 18th rnd: 1 sc in each sc around.
- 19th rnd: (1 sc in each of next 4 sc. Sc2tog) 3 times. (15 sts)
- Stuff body.
- 20th to 30th rnds: 1 sc in each sc around.
- 31st rnd: *1 sc in each of next 2 sc. 2 sc in next sc. Rep from * around. (20 sc)
- 32nd to 37th rnds: 1 sc in each sc around. Stuff as you go.
- 38th rnd: *1 sc in each of next 2 sc. sc2tog. Rep from * around. (15 sts)
- 39th rnd: (sc2tog) 7 times. 1 sc in last sc. (8 sts)
- Fasten off, leaving a long end for sewing. Thread yarn through remaining stitches. Pull tightly. Fasten securely, leaving a long end.
Ear (make 2)
With Color 1:
- Ch 5.
- 1st rnd: 1 sc in 2nd ch from hook. 1 dc in each of the next 2 ch. 5 dc in last ch. Do not turn.
- Working in remaining loops of foundation ch, 1 dc in each of next 2 ch. 1 sc in last ch. Turn. (11 sts)
- 2nd rnd: Ch 1. 1 sc in each of next 4 sts. 2 sc in each of next 3 sts. 1 sc in each of last 4 sts. Fasten off, leaving a long end.
- Sew ears in place.
Horn (make 2)
With Color 2:
- Ch 2.
- 1st rnd: 6 sc in 2nd ch from hook.
- 2nd and 3rd rnds: Working in back loops only, 1 sc in each sc around.
- Join with sl st to first sc. Fasten off, leaving a long end.
- Sew horn in place.
Snout
With Color 3:
- Ch 2.
- 1st rnd: 6 sc in 2nd ch from hook. Do not join. PM for beg of rnd.
- 2nd rnd: *1 sc in next sc. 2 sc in next sc. Rep from * around. (9 sc)
- 3rd to 5th rnds: 1 sc in each sc around.
- Join with sl st to first sc. Fasten off, leaving a long end.
- Sew Snout in place, stuffing as you sew.
- After sewing the snout, embroider mouth and nostrils with Color 2, using little straight stitches.
- With Color 2, embroider satin stitch eyes above the snout.
Leg (make 4)
With Color 2:
- Ch 2.
- 1st rnd: 5 sc in 2nd ch from hook. Do not join. PM for beg of rnd.
- 2nd rnd: 2 sc in each sc around. (10 sc)
- 3rd rnd: Working in back loops only, 1 sc in each sc around.
- Join Color 1.
- 4th to 12th rnds: With Color 1, 1 sc in each sc around.
- Fasten off, leaving a long end. Stuff leg and sew in place.
Spot (make 5)
With Color 2:
- Ch 2.
- 1st rnd: 6 sc in 2nd ch from hook. Join with sl st to first sc.
- Fasten off, leaving a long end for sewing. Sew spots in place.
Tail
With Color 2:
-
Ch 8.
-
1st row: Sl st in 2nd ch from hook and each ch to end of chain.
-
Fasten off, leaving a long end. Sew tail in place.
-
Cut 3 lengths of Color 3, 7″ [18 cm] long. Draw through end of tail. Fold in half. Tie 6 ends tightly together. Trim and brush.
Assembly and Finishing
Now that you’ve completed each component, it’s time for the assembly. Follow these guidelines for neat and secure assembly:
- Sew Ears in place.
- Sew Horn in place.
- Sew Snout in place (stuffing as you sew; embroider mouth and nostrils; embroider satin stitch eyes).
- Sew leg pieces in place (legs are stuffed as instructed).
- Sew tail in place.
- For the tail fringe, cut Color 3 lengths 7″ [18 cm], draw through the tail end, fold, tie 6 ends tightly, trim, and brush.
Finally, handle the thread ends as follows:
- At the end of the body, fasten off leaving a long end and thread yarn through remaining sts, pull tightly, and fasten securely, leaving a long end.
- For each piece (ear, horn, snout, leg, spot), fasten off leaving a long end for sewing.
Frequently Asked Questions
What crochet hook is used for this pattern?
You will need a Size B/1 (2.25 mm) Susan Bates® Silvalume™ crochet hook or a size needed to obtain gauge.
How many giraffes can I make with one ball of yarn?
One ball of Red Heart® Amigurumi Prints™ makes two giraffes.
Is this project worked in rows or rounds?
This project is primarily worked in continuous rounds with no joining at the end of each round.
Can I customize the colors of the giraffes?
Absolutely! Both versions of the pattern allow for customization. You can use your favorite colors to create unique designs.
Does this crochet project require assembly?
Yes, you will need to assemble various parts, including the ears, horn, snout, legs, and tail.
Conclusion
The Crochet Two Happy Giraffes Pattern is a charming project that showcases the joy of creating something beautiful with your hands. With simple materials and clear instructions, you’ll enjoy every moment spent crafting these delightful giraffes. Whether you opt for the bright yellow or colorful multi-version, your finished pieces are sure to bring joy to all who see them. Happy crocheting!