Crochet Gingerfella Amigurumi Pattern
Welcome to the delightful world of amigurumi! In this tutorial, we will create an adorable crochet gingerbread man, lovingly referred to as the Gingerfella. This whimsical project is perfect for holiday decor, gifts, or as a fun toy for children. Using cozy yarn and simple stitches, you’ll bring this charming character to life. Let’s dive into the materials list and get started on this creative adventure!
About the Crochet Project
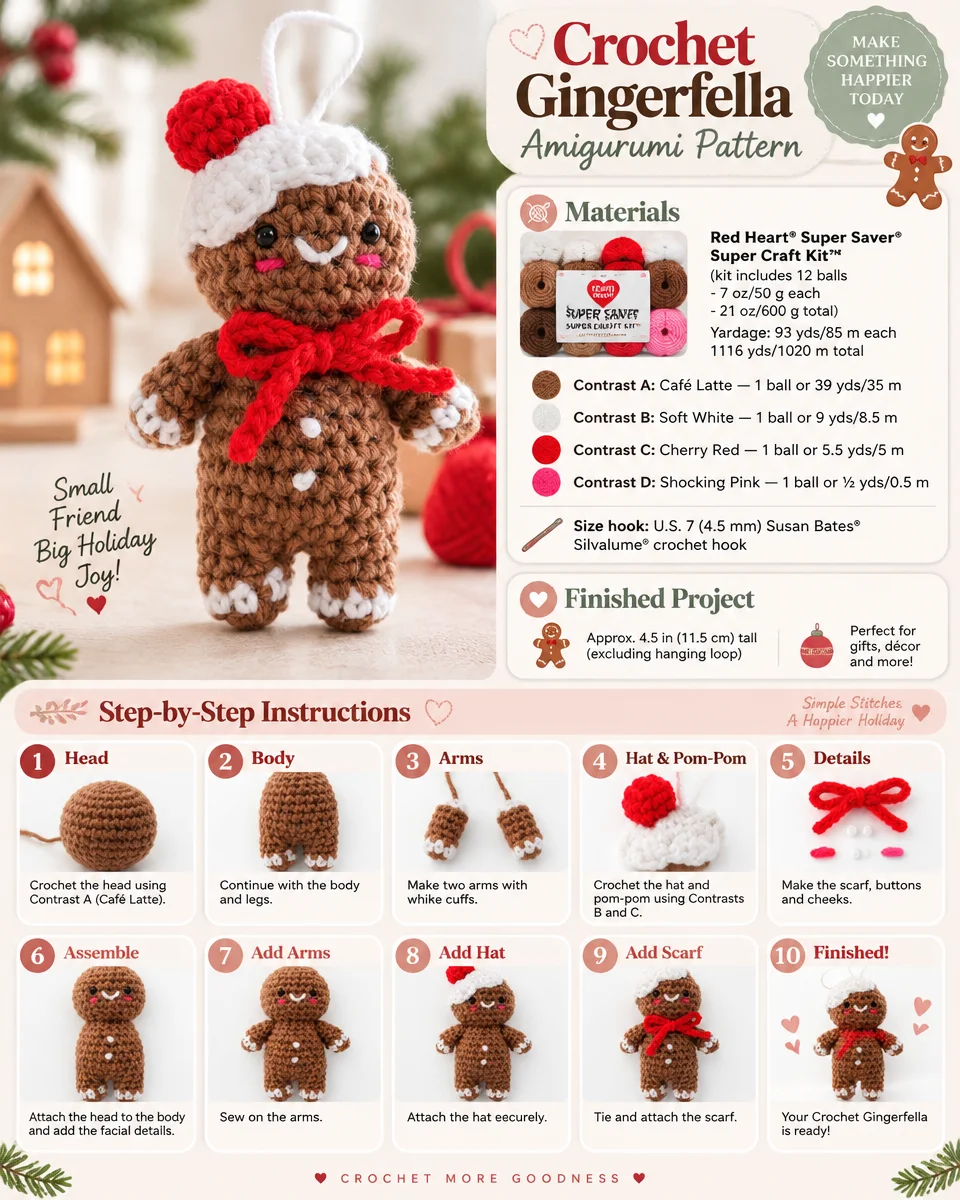
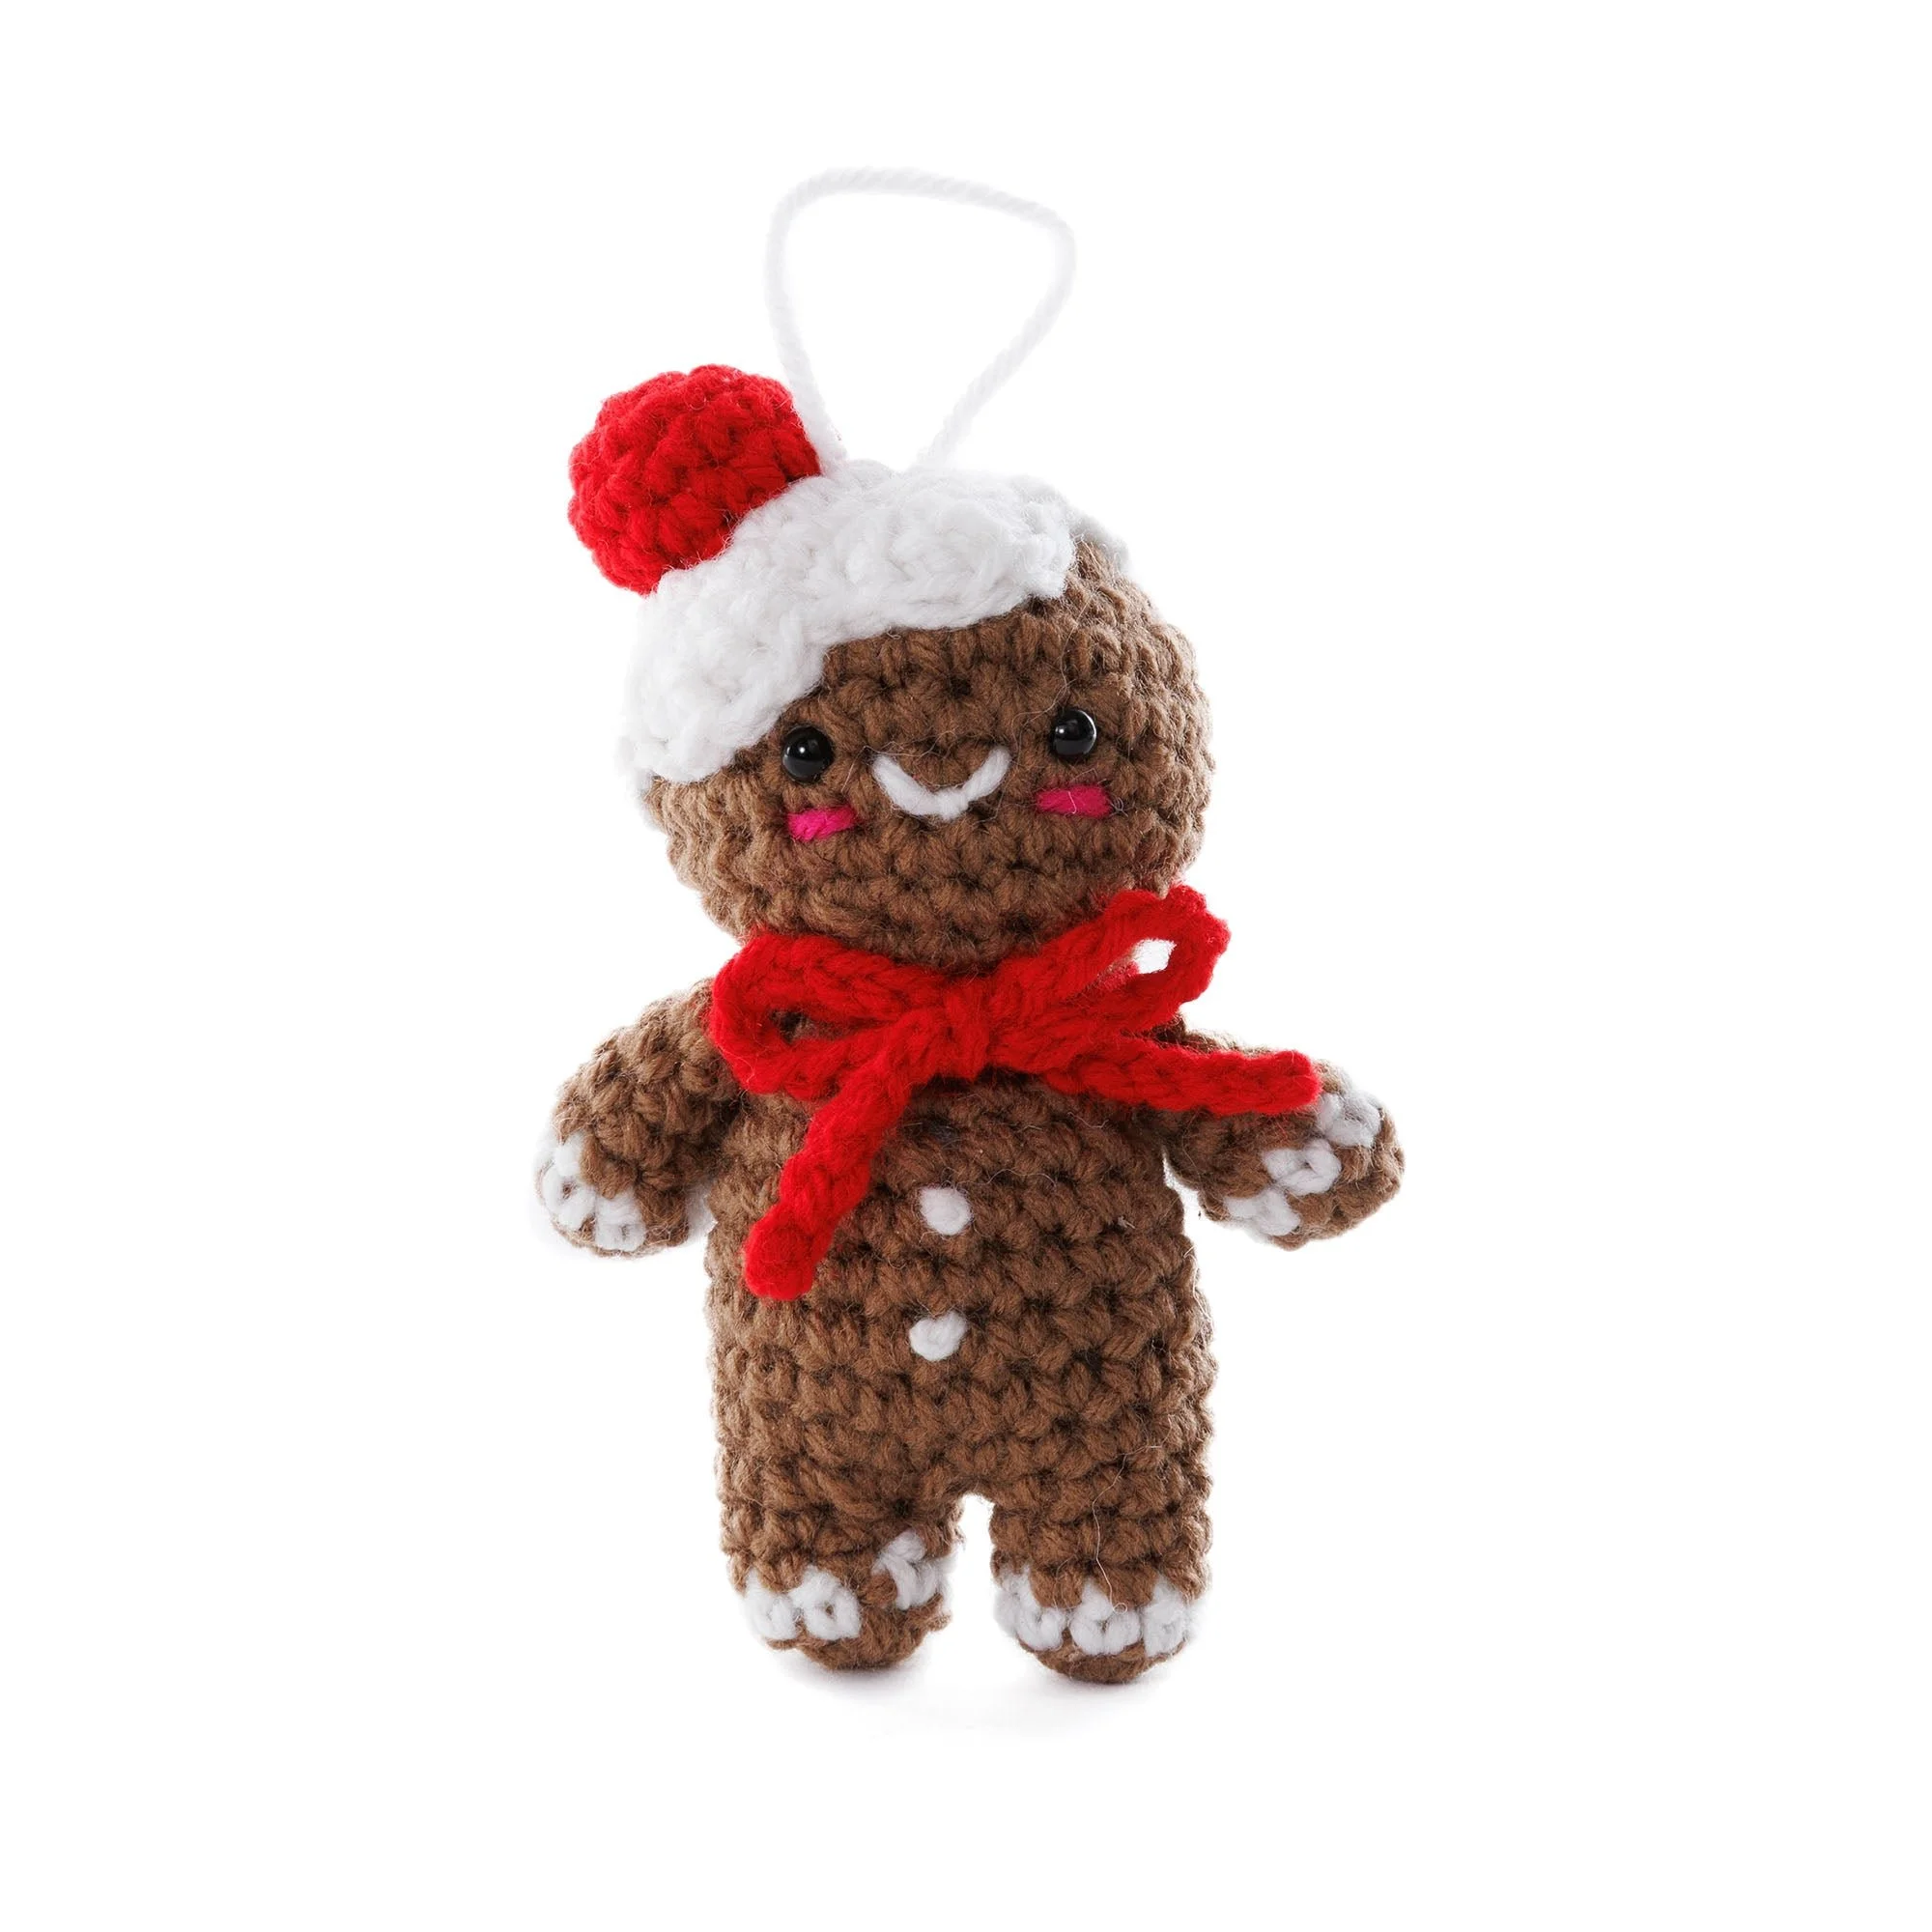
The Crochet Gingerfella pattern is designed to produce a cuddly gingerbread man complete with icing and a cherry on top. This amigurumi pattern features several individual components: a head, body, legs, arms, and decorative elements like buttons and a necktie. Skills required include basic crochet techniques, making magic rings, and sewing pieces together.
Materials
To complete your Crochet Gingerfella, you’ll need the following materials:
Yarn
- Red Heart® Super Saver® Super Craft Kit™ (includes 12 balls, 1.7 oz/50 g each; total 21 oz/600 g)
- Contrast A (Café Latte): 1 ball or 39 yds/35 m
- Contrast B (Soft White): 1 ball or 9 yds/8.5 m
- Contrast C (Cherry Red): 1 ball or 5.5 yds/5 m
- Contrast D (Shocking Pink): 1 ball or ½ yds/0.5 m
- Total yardage: 1116 yds/1020 m
Crochet Hook
- Size U.S. 7 (4.5 mm) Susan Bates® Silvalume® crochet hook or size needed to obtain gauge.
Tools
- Susan Bates® stitch marker
- Susan Bates® yarn needle
- Pair of 6 mm safety eyes
- Polyester fiberfill
Crochet Abbreviations
Here are the abbreviations used in this pattern:
- ch: chain
- sc: single crochet
- pm: place marker
- sc2tog: single crochet two together
- dc: double crochet
- sl st: slip stitch
Pattern Notes
This pattern consists of various parts that are later sewn or joined to create the final amigurumi. The head is created first, followed by the body, arms, and legs. Each component is stuffed with polyester fiberfill to give the gingerbread man a plush look and feel.
Head
Instructions
- With A, make a Magic Ring (see Note).
- 1st rnd: Ch 1. 6 sc in ring. PM on first sc.
- 2nd rnd: 2 sc in each sc around. 12 sc.
- 3rd rnd: *2 sc in next sc. 1 sc in next sc. Rep from * around. 18 sc.
- 4th rnd: *2 sc in next sc. 1 sc in each of next 2 sc. Rep from * around. 24 sc.
- 5th to 8th rnds: 1 sc in each sc around.
- 9th rnd: *Sc2tog. 1 sc in each of next 2 sc. Rep from * to end of rnd. 18 sts.
- Before beginning the next rnd, secure safety eyes, placing them at the top of the 6th rnd, with 3 sc between them.
- 10th rnd: *Sc2tog. 1 sc in next sc. Rep from * around. 12 sts.
- 11th rnd: (Sc2tog) 6 times.
- Fasten off, leaving a tail approx 8″ [20.5 cm] long. Thread tail through remaining sts and pull tightly to draw opening closed.
- Face embroidery instructions:
- With B, embroider mouth between eyes in center with a Straight Stitch. Bring needle up just below this straight stitch and ‘catch’ it to create a slight smile.
- With D, embroider cheeks one row below eyes, spanning across one stitch directly below each eye, using the Straight Stitch.
Icing
Instructions
- With B, make a Magic Ring.
- 1st rnd: Ch 1. 8 sc in ring. PM on first sc.
- 2nd rnd: 2 sc in each sc around. 16 sc.
- 3rd rnd: *2 sc in next sc. 1 sc in each of the next 3 sc. Rep from * around. 20 sc.
- 4th rnd: *Skip next sc. 5 dc in next sc. Skip next sc. Sl st in next sc. Rep from * around.
- Fasten off leaving a long tail for sewing to head. Using tail, sew to the top of the head, just slightly off center at a jaunty little angle.
Cherry
Instructions
- With C, make a Magic Ring.
- 1st rnd: Ch 1. 5 sc in ring. PM on first sc.
- 2nd rnd: 2 sc in each sc around. 10 sc.
- 3rd to 4th rnds: 1 sc in each sc around.
- Join with sl st in first sc at the end of the 4th rnd.
- Fasten off, leaving a tail for sewing to icing.
- Stuff cherry with a tiny bit of stuffing (or use the yarn ends). Using tail, sew to icing, just slightly off center.
Legs
First Leg
- With A, make a Magic Ring.
- 1st rnd: Ch 1. 8 sc in ring. Do not break A. Join B. PM on first sc.
- 2nd rnd: With B, 1 sc in each sc around. Break B, join A.
- 3rd to 5th rnds: With A, 1 sc in each sc around.
- Fasten off, leaving a tail approx 3″ [7.5 cm] long.
Second Leg
- Work from 1st to the 5th rnd as given for the first leg.
- Do not fasten off at the end of the 5th rnd.
Join Legs
- 1st rnd: 2 sc in first sc of Second Leg (PM on first sc). 2 sc in the first sc of First Leg to join. 1 sc in each of the next 6 sc of First Leg. 2 sc in last sc. 2 sc in next sc of Second Leg. 1 sc in each of the next 6 sc of Second Leg. 20 sc.
- Tip: Before proceeding, sew the space between legs closed using the tail of the First Leg, and ensure bottoms of both legs are drawn closed tightly and secured using beginning tails. Don’t cut the ends, just use the tails as extra ‘stuffing’ in the legs!
- 2nd to 5th rnds: 1 sc in each sc around.
- 6th rnd: *Sc2tog. 1 sc in each of the next 3 sc. Rep from * around. 16 sts.
Body
- 7th rnd: 1 sc in each st around.
- 8th rnd: *Sc2tog. 1 sc in each of next 2 sc. Rep from * around. 12 sts.
- Stuff body.
- Fasten off.
Arms (Make 2)
- Work from 1st to the 5th rnd as given for First Leg.
- 6th rnd: 1 sc in each sc around.
- Fasten off, leaving a long tail to sew to body. Stuff Arms lightly. Using tails, sew Arms to either side of Body, making sure they are centered evenly.
Finishing
Buttons
- With B, embroider 2 buttons on the front of the body using French knots, as shown in the picture.
Necktie
- With C, ch 55. Fasten off. Tie into a bow around the neck.
Hanging Loop
- Cut a length of B 8″ [20.5 cm] long. Thread through the top of the head and tie to secure.
Frequently Asked Questions
What crochet hook is used for this pattern?
For this pattern, a U.S. 7 (4.5 mm) Susan Bates® Silvalume® crochet hook, or a size needed to obtain gauge, is recommended.
Is this project worked in rows or rounds?
This amigurumi project is worked in rounds, with various components constructed separately and joined together later.
Does this crochet project require assembly?
Yes, assembly is required. The various components (head, body, arms, and legs) are worked separately and then sewn together.
Conclusion
The Crochet Gingerfella Amigurumi Pattern is a delightful project that combines creativity and skill. By following the step-by-step instructions, you’ll create a cheerful gingerbread character that adds charm to any space during the holiday season or serves as a thoughtful handmade gift. Enjoy the process and the joy that comes with crafting your very own Gingerfella!