Crochet Cat Pattern
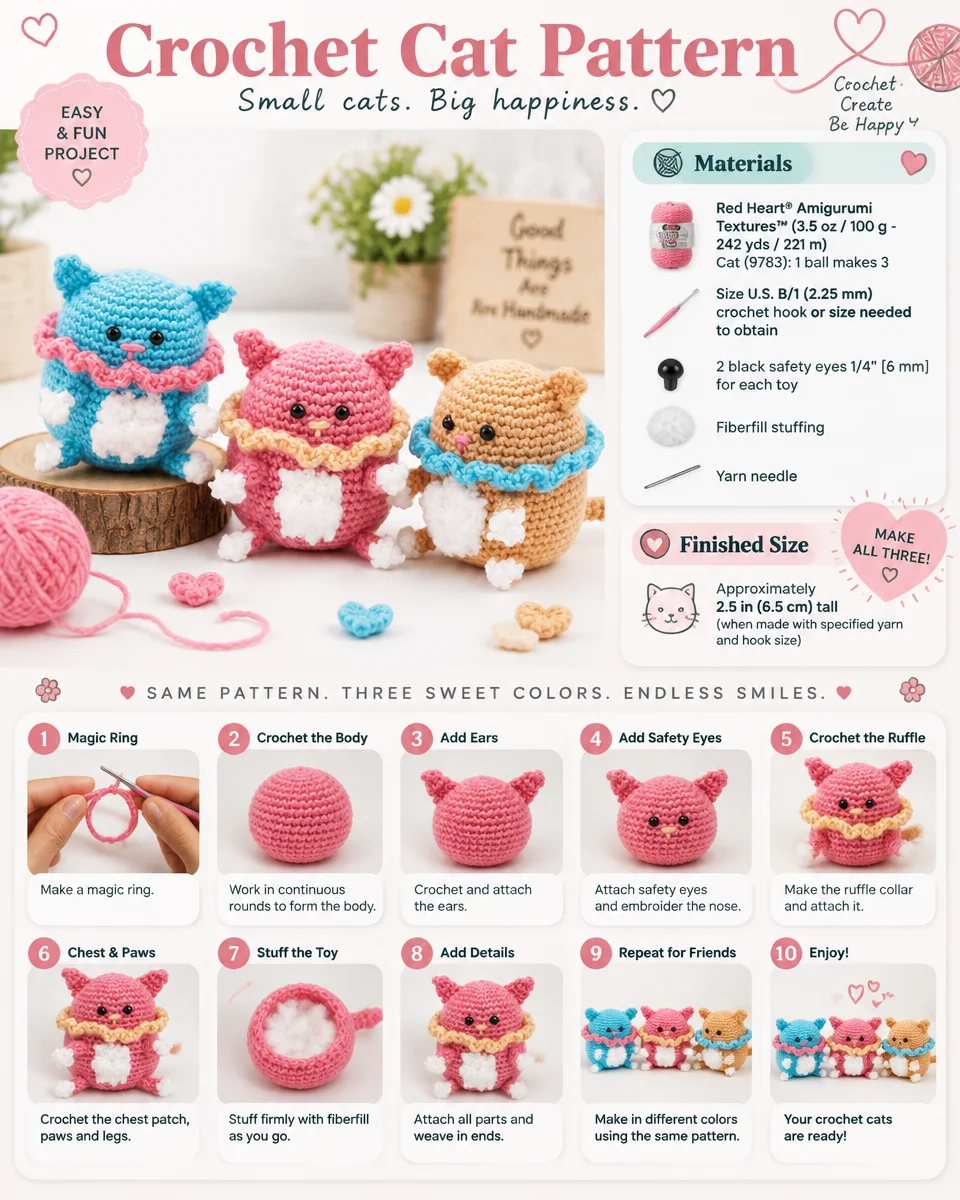
Creating a charming crochet cat is a delightful project that adds a whimsical touch to any space or makes for an adorable gift. This detailed guide will help you bring your amigurumi cat to life using the recommended materials and step-by-step crochet instructions. Whether you’re an experienced crocheter or a dedicated enthusiast, this pattern provides a fun challenge and a rewarding result.
About the Crochet Project
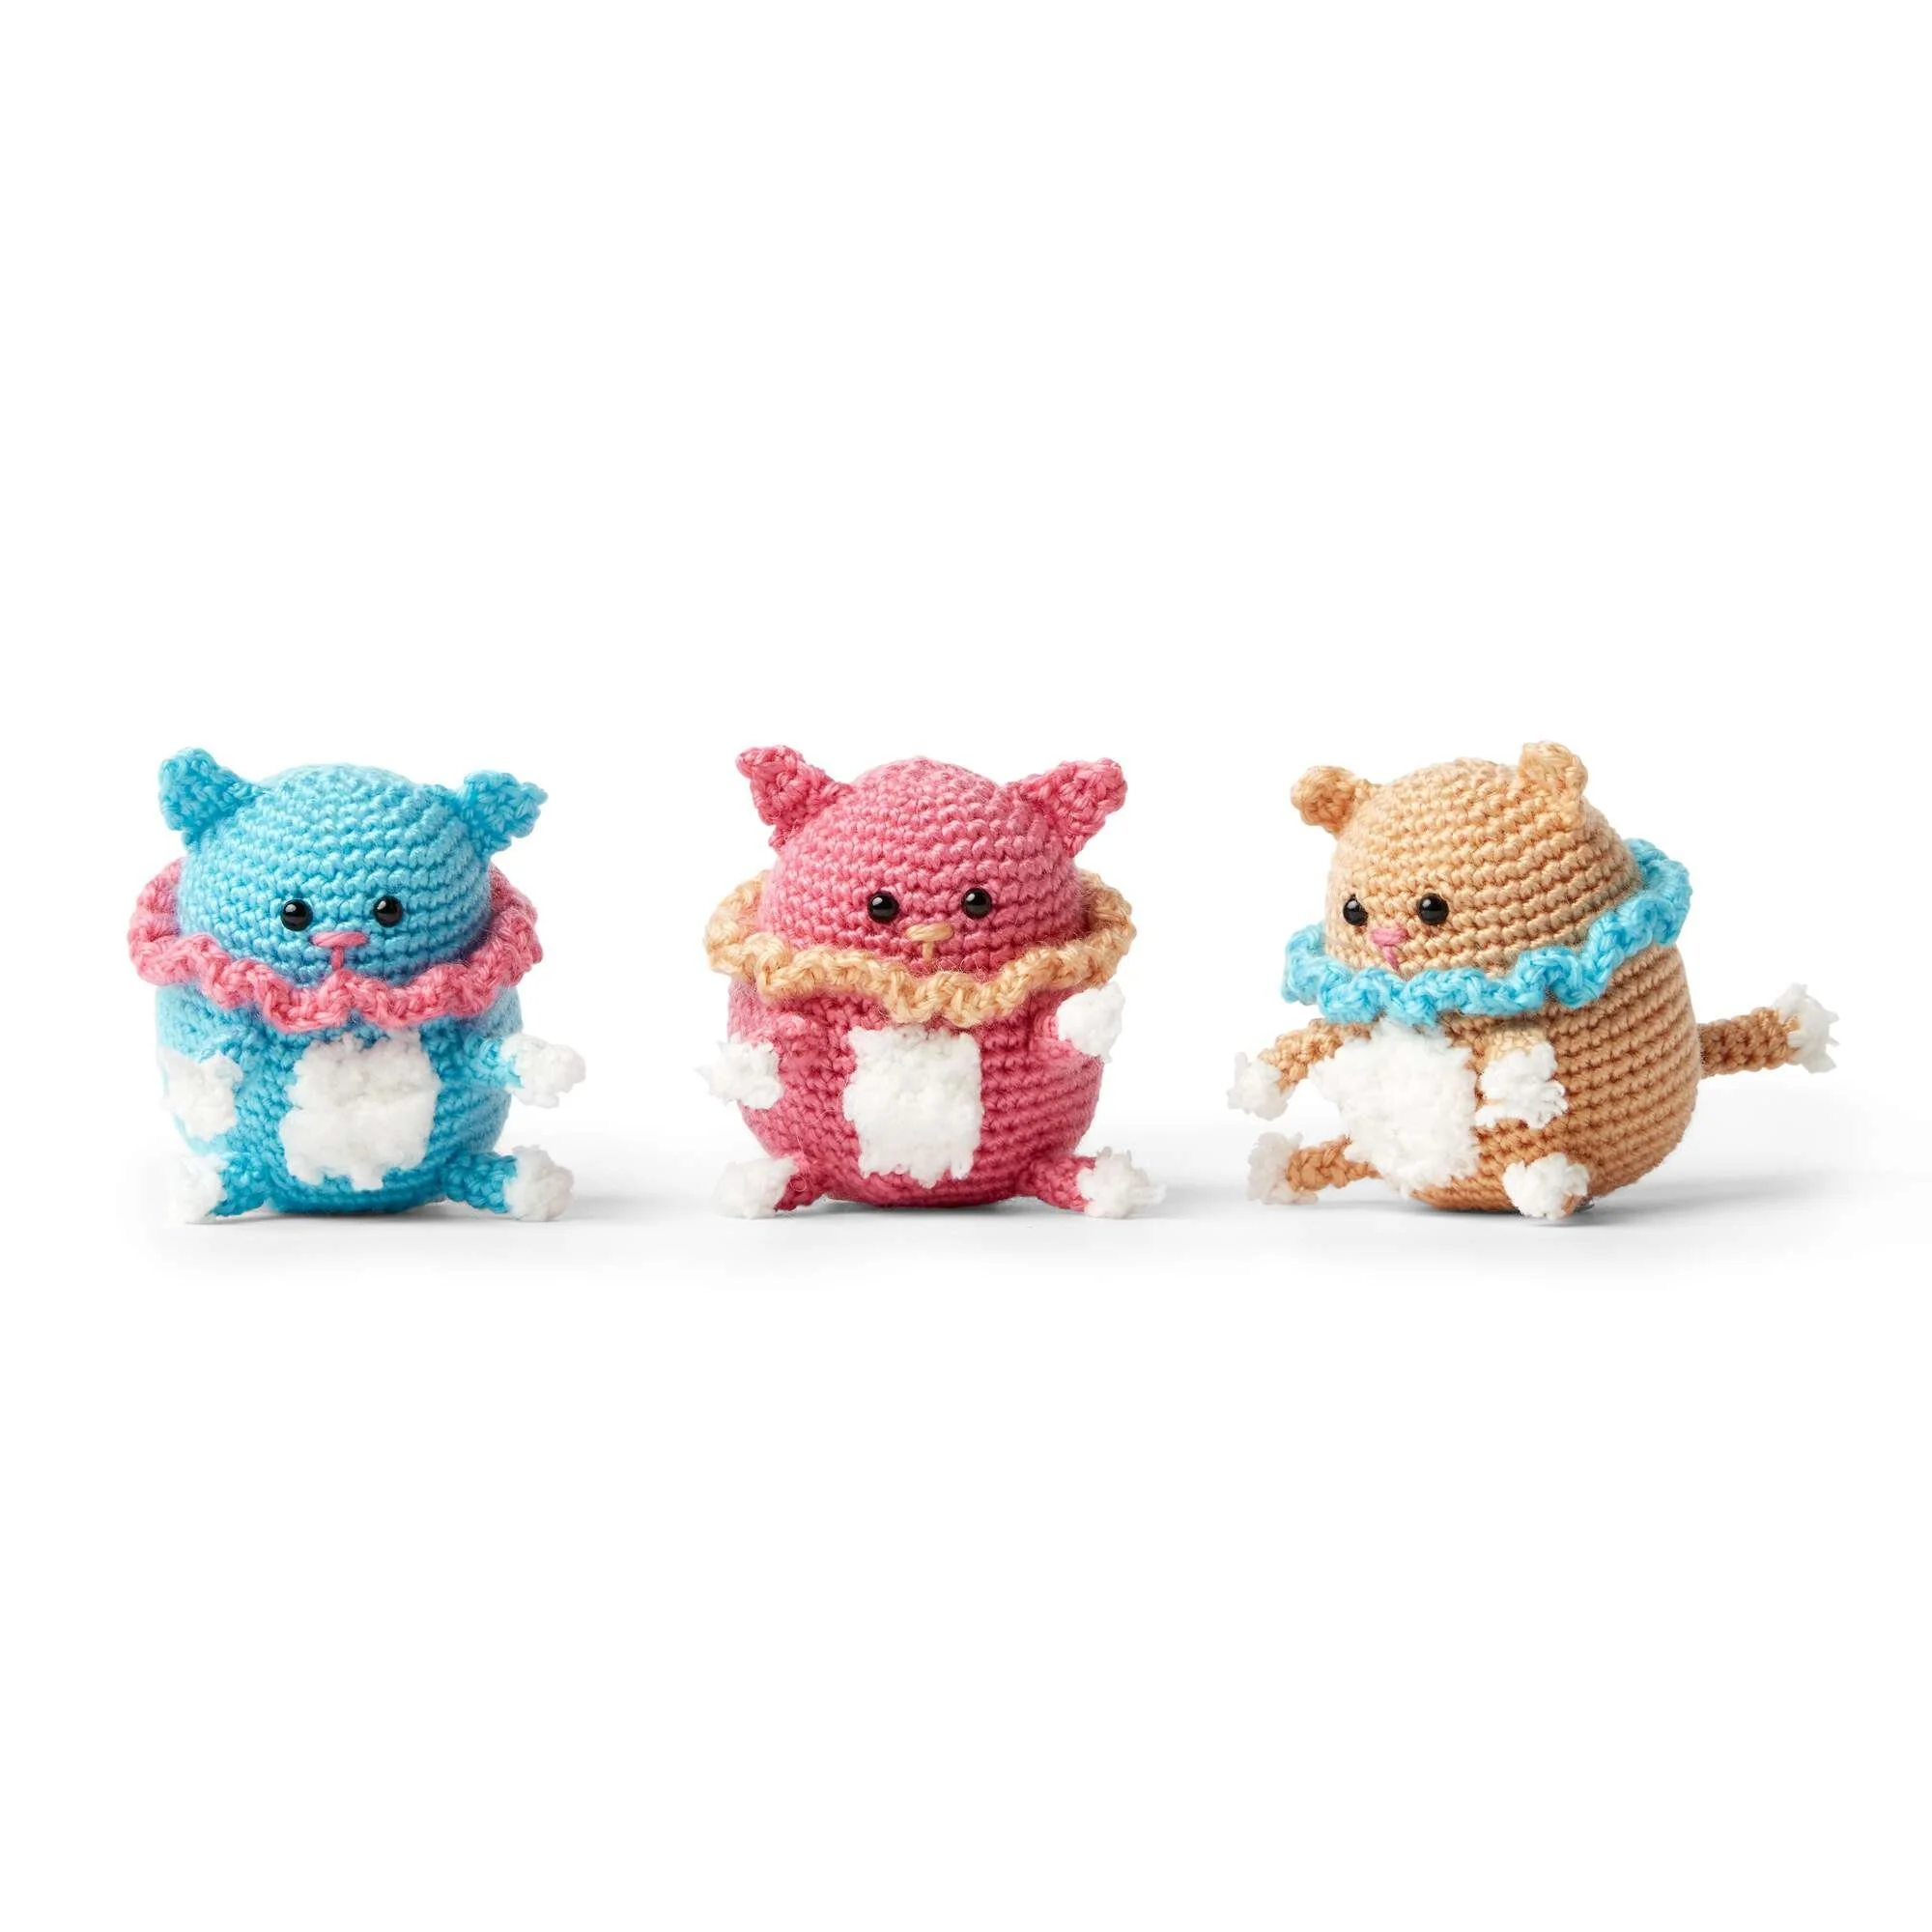
This crochet cat is designed using the amigurumi technique, which involves working in continuous rounds to create stuffed toys. The finished cat will feature a rounded body, cute ears, and a playful tail. With the right materials and a little patience, you can create a lovely cat that you’ll be proud to display or gift to someone special.
Materials
Here’s what you’ll need to get started:
Yarn
- Red Heart® Amigurumi Textures™
- 3.5 oz / 100 g; 242 yds / 221 m
- Color: Cat (9783) (1 ball makes 3 cats)
Crochet Hook
- Size U.S. B/1 (2.25 mm) crochet hook or size needed to obtain gauge.
Stuffing
- Fiberfill stuffing – for filling the body and other parts.
Eyes
- 2 black safety eyes – 1/4″ [6 mm] for each toy.
Notions
- Yarn needle – for weaving in ends and sewing parts together.
Crochet Abbreviations
- ch: chain
- sc: single crochet
- hdc: half double crochet
- st: stitch
- sl st: slip stitch
- sc2tog: single crochet two together
- Rep: repeat
Pattern Notes
- This pattern is worked in rounds and does not require joining unless specified.
- Change yarn colors as indicated in the instructions for the desired visual effect.
Crochet Instructions
Body
Start with Color 1, ch 2
- 1st rnd: 6 sc in 2nd ch from hook. Join. (6 sc)
- 2nd rnd: Ch 1. 2 sc in each sc around. Join. (12 sc)
- 3rd rnd: Ch 1. *1 sc in next sc. 2 sc in next sc. Rep from * around. Join. (18 sc)
- 4th rnd: Ch 1. *1 sc in each of next 2 sc. 2 sc in next sc. Rep from * around. Join. (24 sc)
- 5th rnd: Ch 1. *1 sc in each of next 3 sc. 2 sc in next sc. Rep from * around. Join. (30 sc)
- 6th rnd: Ch 1. *1 sc in each of next 4 sc. 2 sc in next sc. Rep from * around. Join. (36 sc)
- 7th to 12th rnds: Ch 1. 1 sc in each sc around. Join Color 2. Do not break Color 1.
- 13th rnd: With Color 2, ch 2. Working in front loops only, 3 hdc in each sc around. Join Color 1. Break Color 2. (108 hdc)
- 14th rnd: With Color 1, ch 1. Working in back loops only of 12th rnd, *1 sc in each of next 5 sc. 2 sc in next sc. Rep from * around. Join. (42 sc)
- 15th rnd: Ch 1. *1 sc in each of next 6 sc. 2 sc in next sc. Rep from * around. Join. (48 sc)
- 16th to 22nd rnds: Ch 1. 1 sc in each sc around. Join.
- 23rd rnd: Ch 1. *1 sc in each of next 6 sc. Sc2tog. Rep from * around. Join. (42 sts)
- 24th rnd: Ch 1. *1 sc in each of next 5 sc. Sc2tog. Rep from * around. Join. (36 sts)
- 25th rnd: Ch 1. *1 sc in each of next 4 sc. Sc2tog. Rep from * around. Join. (30 sts)
- 26th rnd: Ch 1. *1 sc in each of next 3 sc. Sc2tog. Rep from * around. Join. (24 sts)
- 27th rnd: Ch 1. *1 sc in each of next 2 sc. Sc2tog. Rep from * around. Join. (18 sts)
- 28th rnd: Ch 1. *1 sc in next sc. Sc2tog. Rep from * around. Join. (12 sts)
- 29th rnd: Ch 1. (Sc2tog) 6 times. Join. (6 sts)
- Finishing: Fasten off, leaving a long end. Draw end through rem sts. Pull tightly. Fasten securely.
Secure safety eyes to Body as shown in the accompanying photo. With Color 4, use satin stitch to embroider the nose and straight stitch for the mouth. Stuff the body firmly.
Ears (Make 2)
With Color 1, ch 4 (leave a long end for sewing)
- 1st row: 1 sc in 2nd ch from hook. 1 sc in each ch to end of chain. Turn. (3 sc)
- 2nd row: Ch 1. 1 sc in each sc to end of row. Turn.
- 3rd row: Ch 1. Sc3tog.
- Fasten off.
- Sew ears to body as shown in the photo.
Legs (Make 4)
With Color 1, ch 4 (leave a long end for sewing)
Join with sl st to first ch.
- 1st rnd: Ch 1. 1 sc in each ch around. Join. (4 sc)
- 2nd rnd: Ch 1. 1 sc in each sc around. Join.
- 3rd rnd: Ch 1. 1 sc in each sc around. Join Color 3. Break Color 1.
- 4th rnd: With Color 3, ch 1. (Sc2tog) twice. Join.
- Fasten off.
- Sew legs to body as shown in the photo.
Belly
With Color 3, ch 4
- 1st row: 1 sc in 2nd ch from hook. 1 sc in each ch to end of chain. Turn. (3 sc)
- 2nd row: Ch 1. 2 sc in first sc. 1 sc in next sc. 2 sc in last sc. Turn. (5 sc)
- 3rd row: Ch 1. Sc2tog. 1 sc in next sc. Sc2tog. (3 sts)
- Fasten off, leaving a long end.
- Sew belly to body as shown in the photo.
Tail
With Color 1, ch 6 (leave a long end for sewing)
Join with sl st to first ch.
- 1st rnd: Ch 1. 1 sc in each ch around. Join. (6 sc)
- 2nd to 6th rnds: Ch 1. 1 sc in each sc around. Join Color 3. Break Color 1.
- 7th rnd: With Color 3, ch 1. (Sc2tog) 3 times. Join.
- Fasten off.
- Stuff tail firmly.
- Sew tail to body as shown in the photo.
Finishing
After completing the embroidery and stuffing step, finish the project by attaching:
- Ears to Body
- Legs to Body
- Belly to Body
- Tail to Body
Frequently Asked Questions
What crochet hook is used for this pattern?
The pattern recommends using a Size U.S. B/1 (2.25 mm) crochet hook or a size needed to obtain gauge.
Is this project worked in rows or rounds?
This crochet pattern is primarily worked in rounds, especially for the body and appendages.
Does this crochet project require assembly?
Yes, assembly is necessary. The ears, legs, belly, and tail need to be sewn onto the body after completion.
Conclusion
The Crochet Cat Pattern is a delightful project that combines creativity and skill, allowing you to craft a charming stuffed toy that can bring joy to children and adults alike. With the clear instructions provided, you’ll enjoy every step of the process, culminating in a unique, handmade treasure. Happy crocheting!