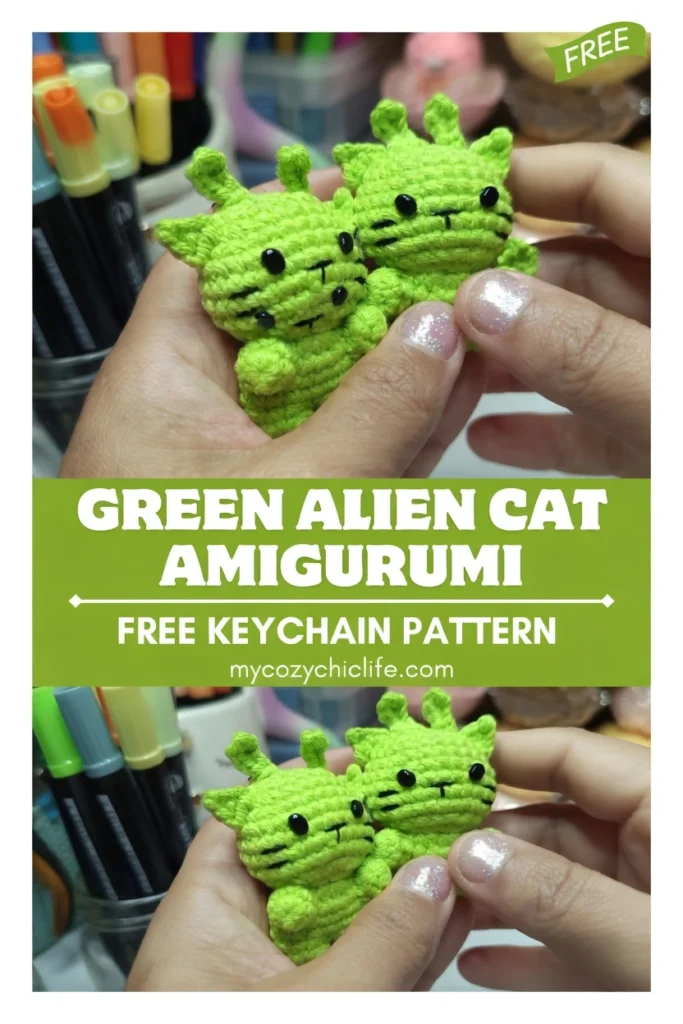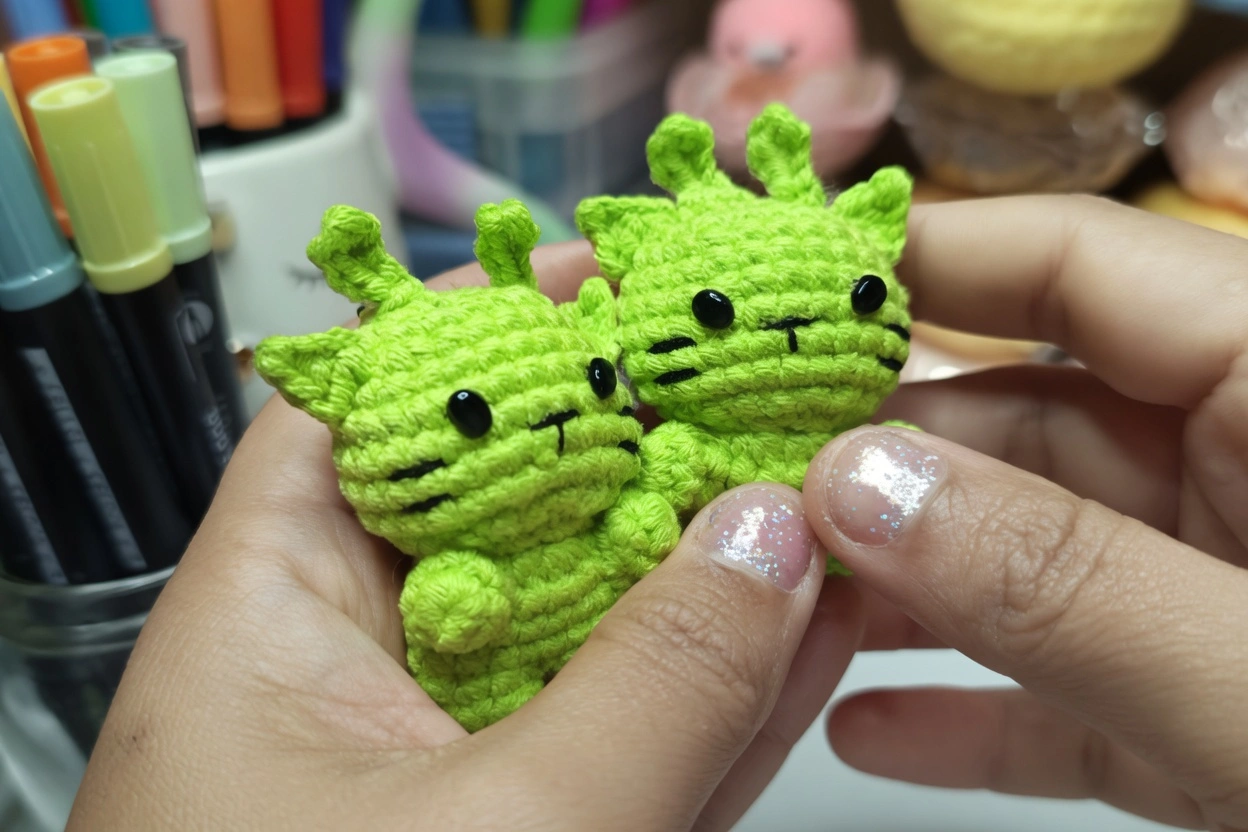
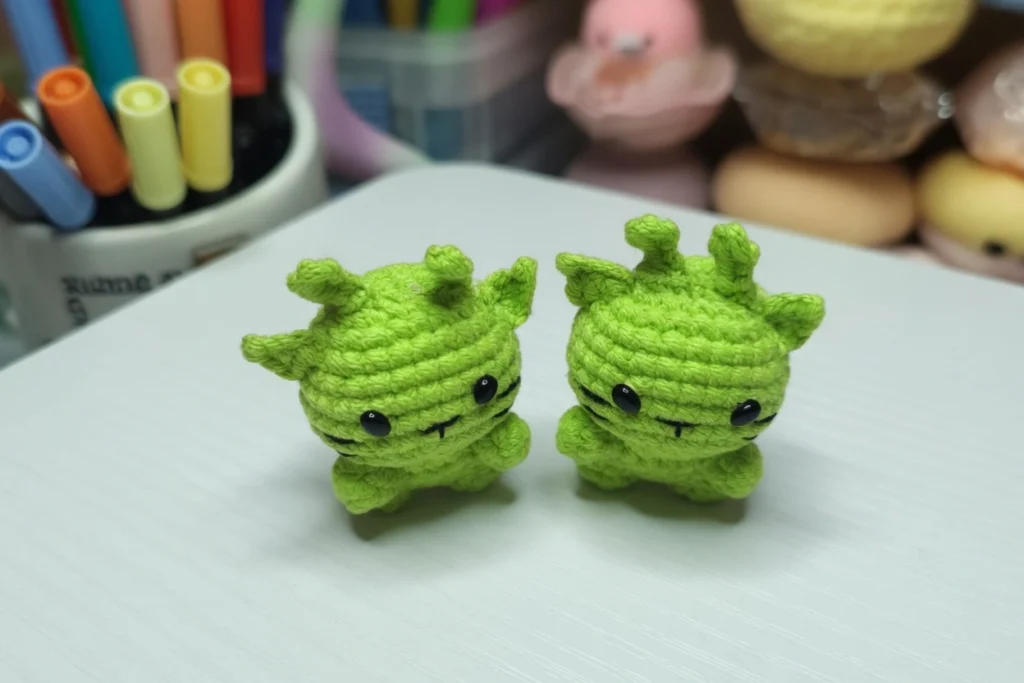
If you love tiny crochet projects that are quick, cute, and actually useful, this Green Alien Cat Amigurumi keychain is about to become your new favorite make. Designed as a beginner-friendly project, this little space-inspired kitty features a rounded head, small triangle ears, sweet whiskers, and a compact body that’s perfectly sized for clipping onto keys, bags, and backpacks. It works up in just a couple of hours and uses only basic amigurumi stitches, making it an ideal project for crocheters who are just getting started with stuffed toys.
Mini amigurumi keychains are one of the most popular trends in the crochet world right now, and for good reason. They make affordable handmade gifts, sell well at craft fairs, and let you practice essential amigurumi skills without committing to a large, time-consuming project. This pattern, credited to Abbie Muunx, delivers all of that in a playful alien-cat package that’s endlessly customizable.
Why This Alien Cat Keychain Is Great for Beginners
Amigurumi can feel intimidating when you’re new to it, but this pattern breaks everything down into small, manageable pieces. The head and body are simple spheres built with increases and decreases. The ears are tiny triangles of just three rounds. The arms and legs are short tubes that get flattened and sewn on. There are no complex color changes, no intricate stitch patterns, and no confusing construction techniques.
What you will practice, though, are the core skills that every amigurumi maker needs: working in continuous rounds, stuffing and shaping pieces, inserting safety eyes, and sewing components together neatly. Once you’ve completed this keychain, you’ll have the confidence and technique to tackle larger amigurumi projects.
The small size is also forgiving. If a stitch is slightly uneven or the shaping isn’t perfectly symmetrical, it barely shows on a piece this small. That makes it a low-pressure way to build your skills while still ending up with something you’re proud to show off.
Materials You’ll Need
Before you begin, gather the following supplies:
- Yarn: Green worsted/Aran weight (#4) yarn — cotton or acrylic both work well. You’ll also need a small amount of black yarn or embroidery floss for the whiskers and mouth.
- Hook: 2.75mm to 3.5mm crochet hook. Using a smaller hook than the yarn label suggests creates tighter stitches so stuffing doesn’t show through — this is standard practice in amigurumi.
- Eyes: 6mm safety eyes (or 8mm for a cuter big-eyed look)
- Stuffing: Polyester fiberfill
- Hardware: Keychain ring (split ring with a short chain, or a lobster clasp)
- Tools: Tapestry needle, stitch markers (or a scrap of contrasting yarn), and scissors
The finished keychain measures approximately 2 to 3 inches (5 to 7.5 cm) tall, depending on your yarn and hook combination.
Crochet Abbreviations
MR – Magic Ring | sc – single crochet | inc – increase (2 sc in the same stitch) | dec – decrease (invisible decrease recommended) | sl st – slip stitch | ch – chain
The Full Pattern
Before You Start
Work in continuous rounds unless stated otherwise. Use a stitch marker to mark the first stitch of each round. Stuff firmly but avoid overstuffing, especially for a keychain where you want a compact, sturdy shape.
Head (Green)
- R1: MR, 6sc [6]
- R2: inc × 6 [12]
- R3: (sc, inc) × 6 [18]
- R4: (2sc, inc) × 6 [24]
- R5: (3sc, inc) × 6 [30]
- R6–R9: sc around (4 rounds) [30]
- R10: (3sc, dec) × 6 [24]
- R11: (2sc, dec) × 6 [18]
Insert safety eyes between R7 and R8, spaced about 5 to 6 stitches apart. Adjust placement depending on the expression you want.
- R12: (sc, dec) × 6 [12]
Stuff the head firmly.
- R13: dec × 6 [6]
Fasten off, close the hole, and weave in the end.
Body (Green)
- R1: MR, 6sc [6]
- R2: inc × 6 [12]
- R3: (sc, inc) × 6 [18]
- R4: (2sc, inc) × 6 [24]
- R5–R7: sc around (3 rounds) [24]
- R8: (2sc, dec) × 6 [18]
Stuff lightly and shape into a rounded bean.
- R9: (sc, dec) × 6 [12]
Stuff a bit more.
- R10: dec × 6 [6]
Fasten off, close the hole, and leave a long tail for attaching the head.
Ears (Make 2, Green)
Small triangle ears give the alien cat its signature look.
- R1: MR, 3sc [3]
- R2: (sc, inc) × 1, sc [4]
- R3: sc around [4]
Fasten off and leave a tail for sewing. Optionally, lightly pinch the ear into a triangle shape as you sew it on.
Arms (Make 2, Green)
- R1: MR, 6sc [6]
- R2–R4: sc around (3 rounds) [6]
Lightly stuff only the very bottom (optional). Flatten the top and sc across 3 stitches to close. Fasten off and leave a tail for sewing.
Legs (Make 2, Green)
- R1: MR, 6sc [6]
- R2: sc around [6]
- R3: (sc, inc) × 3 [9]
- R4: sc around [9]
Lightly stuff the foot area. Flatten the top and sc across 4 to 5 stitches to close. Fasten off and leave a tail for sewing.
Face Details (Whiskers and Mouth)
Using black yarn or embroidery floss and a tapestry needle, add 3 short straight stitches on each side of the face near the lower half of the eyes for the whiskers. Keep them short so they don’t snag on pockets or bag zippers. For the mouth, make a tiny U-shape or a simple small line centered below the eyes. You can optionally add a tiny nose stitch above the mouth — a very small triangle or dot works well. Tie off securely inside the head and weave the ends through the stuffing to hide them completely.
Assembly Instructions
Ears: Place the ears on the top sides of the head, roughly between R3 and R6. Sew firmly around the ear base so they stand slightly outward.
Head to body: Center the head on top of the body. Using the long tail from the body, sew through both pieces with tight, even stitches. Go around at least twice for keychain durability — this piece will get tugged and tossed around, so the head-to-body connection needs to be strong.
Arms: Attach the arms to the sides of the body just below the head seam. Position them slightly forward for a cute hugging look.
Legs: Attach the legs near the lower front of the body, evenly spaced. Make sure the cat can sit level — even for a keychain, symmetry looks best.
Give each part a gentle tug to confirm all seams are secure, then trim and weave in all remaining ends.
Keychain Attachment
You have two options for attaching the keychain hardware:
Yarn loop method (simple and secure): Insert your hook at the top center of the head near the magic ring closure. Pull up green yarn and chain 8 to 12 stitches (depending on your ring size). Slip stitch back into the same spot to form a loop. Weave the yarn tail inside the head and knot securely, hiding the knot inside the stuffing. Thread the keychain ring through the loop.
Direct stitching method (extra durable): Using strong thread or doubled yarn, stitch through the top of the head several times around the small chain of the keychain hardware. Knot inside the head and weave the ends deep into the stuffing.
Tips for Beginners
Count every round. Amigurumi becomes much easier when your stitch counts stay accurate. A missed increase or extra stitch compounds quickly over several rounds.
Learn the invisible decrease. It creates a much smoother surface than a standard decrease and is worth the small extra effort.
Pin the eyes before committing. Insert safety eyes and check their placement from multiple angles before locking the backs on. Eye placement has a huge impact on the expression, and once the backs are on, they’re extremely difficult to remove.
Use a smaller hook than the yarn suggests. This is standard in amigurumi — tight stitches prevent stuffing from peeking through the gaps.
Customization Ideas
This pattern is a perfect canvas for personalizing. Try pastel pink, purple, neon green, or galaxy-style variegated yarn for completely different vibes. You can embroider sleepy eyes instead of using safety eyes, add a tiny fang poking out of the mouth, or stitch blush cheeks with pink thread. For more alien flair, add a mini bow, a tiny belly patch in a contrasting color, or a small star on the forehead. Swap the keychain ring for a lobster clasp and a slightly longer chain loop to turn it into a bag charm instead.
Happy crocheting — and enjoy your new tiny alien kitty companion!