Vintage Style Amigurumi Airplane Inspiration
Amigurumi, the Japanese art of knitting or crocheting small, stuffed yarn creatures, can mesmerize with its charming aesthetic and intricate designs. Vintage-style amigurumi has become increasingly popular among crafters, particularly for its nostalgic appeal and the unique character it brings to any collection. One captivating design that captures this essence is the amigurumi airplane. In this article, we’ll explore vintage style amigurumi airplanes, offering inspiration, patterns, and tips for creating your very own airborne masterpiece.
The History of Amigurumi
Amigurumi dates back to Japan in the early 2000s, but its origins can be traced back even further. The word itself is a combination of the Japanese words “ami,” meaning knitted or crocheted, and “nuigurumi,” meaning stuffed toy. The concept quickly gained traction, morphing into a global phenomenon as crafters embraced this whimsical art form. Vintage designs draw from elements of the past, combining nostalgia with creativity, making them particularly enchanting to collectors and enthusiasts alike.
Vintage Elements in Amigurumi Design
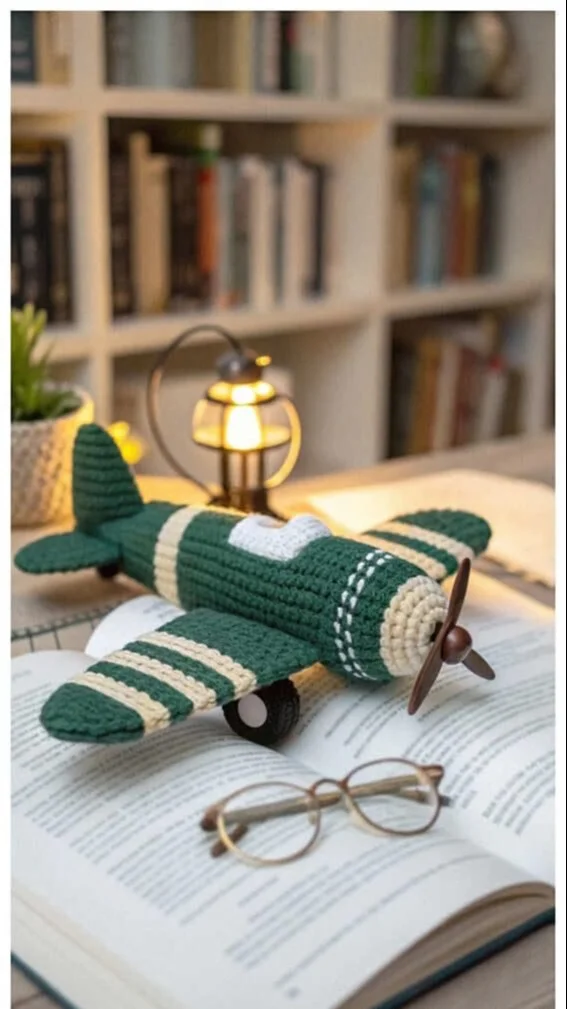
Vintage-style amigurumi is characterized by soft colors, classic patterns, and distinct shapes reminiscent of earlier times. While creating a vintage-style amigurumi airplane, consider the following elements that embody this aesthetic:
-
Color Palette: Vintage colors often include muted pastels or earthy tones. Think soft yellows, dusty blues, and warm pinks. These hues give your airplane a gentle, nostalgic feel.
-
Simple Shapes: Vintage toys often feature simplistic designs. Aim for rounded edges and uncomplicated lines, which embody the charm of bygone toys.
-
Textural Variety: Incorporating different types of yarn for distinct components—like a softer yarn for the body and a textured one for the wings—can add depth and character to your vintage airplane.
-
Details and Accessories: Add nostalgic details, such as retro-style propellers or fabric wings resembling vintage planes, to enhance the overall appeal of your amigurumi creation.
Designing Your Amigurumi Airplane
When designing your vintage airplane, it’s essential to choose a pattern that reflects the elements mentioned above. Here’s a step-by-step breakdown to guide you through the creation process:
Step 1: Gather Your Materials
To make a vintage-style amigurumi airplane, you will need:
- Yarn: Choose cotton or acrylic yarn in your desired colors (body, wings, and propeller).
- Crochet Hook: Select the appropriate size for your yarn, usually recommended on the yarn label.
- Stuffing: Use polyester fiberfill or any soft stuffing material.
- Safety Eyes: If your design includes eyes, opt for safety eyes or embroider them.
- Stitch Markers: Keeping track of your rounds is crucial, especially in circular designs.
Step 2: Select a Pattern
Find a vintage-style amigurumi airplane pattern that resonates with you. Whether you opt for online tutorials or crochet books, ensure the pattern is beginner-friendly if you’re new to this art. You can also personalize your airplane by tweaking the design—perhaps altering the shape of the wings or adding decorative elements like stripes.
Step 3: Start Crocheting
Begin by crocheting the body of the airplane. Most patterns will start with a magic ring to create a rounded shape. Keep your tension consistent, and don’t be discouraged if the initial rounds feel challenging. As you continue crocheting, the airplane will start taking shape.

Next, work on the wings and the propeller. Each element should reflect the vintage aesthetic. For instance, you might consider creating the wings in a contrasting color or using a textured yarn to add character. When assembling, be mindful of the placement of each component, ensuring that your airplane balances well.
Step 4: Add Finishing Touches
Once the main components are crocheted, it’s time for the finishing touches.
- Embellishments: Consider adding small details like embroidered lines or decorative fabric pieces to mimic the look of vintage decals.
- Sewing Components Together: Use a yarn needle to sew the wings and propeller onto the airplane securely. Taking this step carefully will ensure your amigurumi is not just visually appealing but also durable.
- Stuffing: Before closing up, make sure to stuff the airplane adequately so that it maintains its shape without being overly firm.
Displaying Your Vintage Amigurumi Airplane
Once you’ve completed your vintage amigurumi airplane, it’s time to showcase your incredible creation! Here are a few ideas on how to display it beautifully:
-
Kids’ Room Decor: This charming piece can become a focal point on a shelf or dresser in your child’s room.
-
Craft Fair Display: If you intend to sell your amigurumi, display it alongside other vintage-style items for a cohesive look that attracts attention.
-
Gift Ideas: Vintage-style airplanes make delightful gifts for both children and adults. Consider wrapping it in a decorative box or basket.
A Community of Crafters
One of the joys of crocheting is the community of crafters that exists worldwide. Joining amigurumi forums, social media groups, and local crochet clubs can connect you with fellow enthusiasts who share your passion. Sharing your vintage creations not only encourages others but can also inspire you.
Tips for Success
Here are some additional tips to enhance your vintage-style amigurumi airplane experience:
-
Practice Makes Perfect: Don’t fret if your first attempt isn’t perfect. Amigurumi takes practice, and each creation brings you one step closer to mastery.
-
Document Your Progress: Take photos during different stages of your design for personal reflection and sharing with the crafting community.
-
Experiment: After completing a pattern, consider experimenting with variations. Changing colors or modifying patterns can yield unique results that embody your personal style.
Conclusion
Creating a vintage-style amigurumi airplane is not just a rewarding project; it’s an opportunity to connect with nostalgia, creativity, and community. By embracing vintage elements and personalizing your patterns, you can craft a charming piece that stands the test of time. As you embark on your amigurumi airplane adventure, remember that each stitch is a step toward something beautiful. Let your imagination soar, and soon you’ll have your very own timeless treasure!