If you’re a fan of adorable amigurumi and love the charming personality of Shiba Inu dogs, you’re going to fall head over heels for Clover the Chubby Shiba Inu crochet pattern. This irresistibly cute plushie captures all the endearing qualities of the beloved Shiba Inu breed, from the signature curled tail to the sweet facial features and chubby proportions that make this pattern absolutely precious. Whether you’re making this as a gift for a dog lover or adding to your own collection of handmade plushies, Clover is sure to bring joy to everyone who sees him.
What Makes Clover the Chubby Shiba Inu Special?
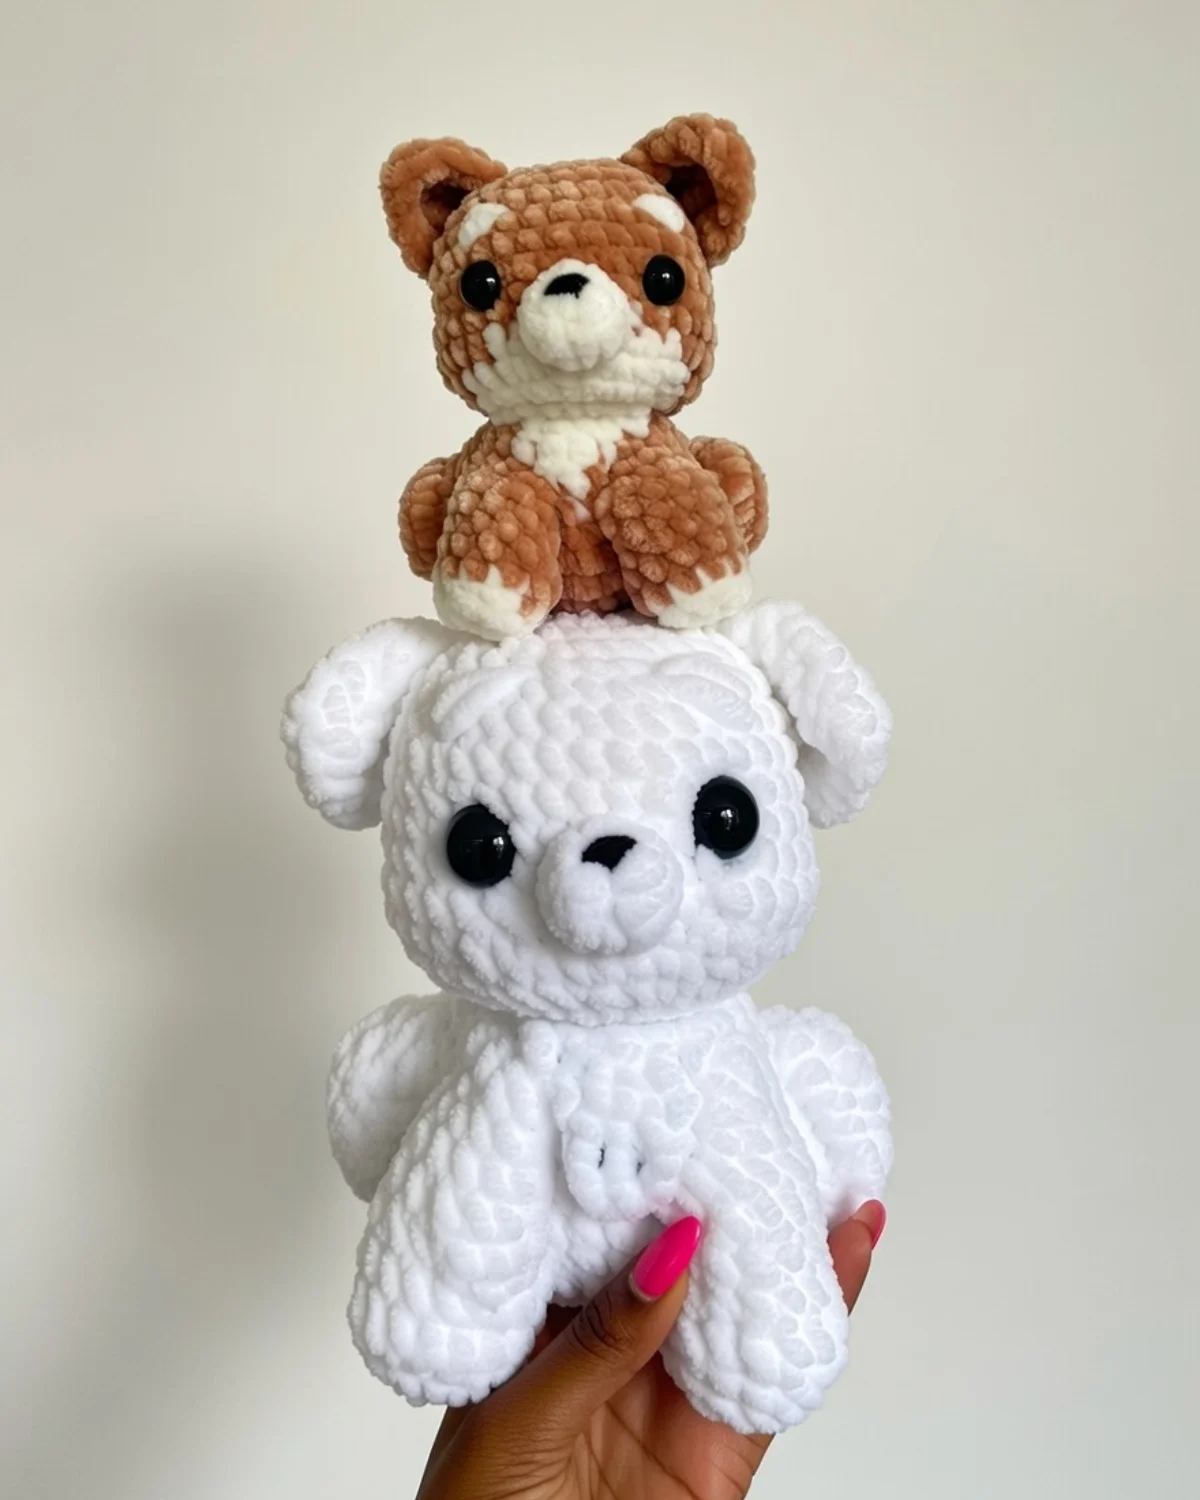
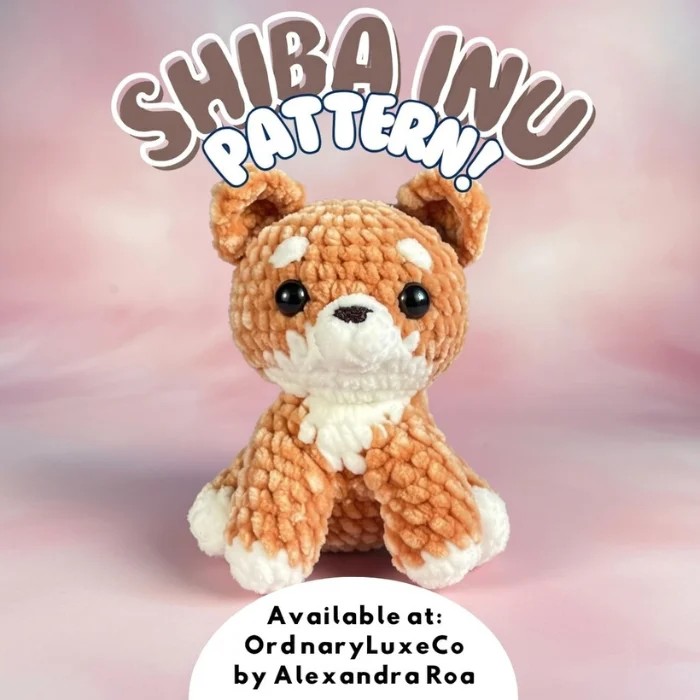
Clover is designed with thoughtful details that bring the Shiba Inu breed to life in amigurumi form. The pattern features the distinctive reddish-tan and white coloring that Shiba Inus are famous for, with careful color placement that mimics the natural markings of these beloved dogs. The chubby, round proportions give Clover an extra dose of cuteness that makes this pattern stand out from standard dog amigurumi.
The design includes all the signature Shiba Inu features: perky triangular ears with optional white felt details, a curled tail that naturally spirals as you crochet, sweet embroidered facial features including eyebrows that give personality, safety eyes positioned for maximum cuteness, and sturdy little legs that allow Clover to sit upright on display.
What makes this pattern particularly special is the clever construction technique where the arms are attached as you work the body, creating a seamless integration that looks professional and polished. The flat-bottomed design means Clover sits perfectly without tipping over, making him ideal for shelf display or as a desk companion.
Download the complete Chubby Shiba Inu Crochet Pattern PDF from our Etsy shop!
Skill Level and Required Knowledge
This pattern is suitable for intermediate crocheters who have experience with basic amigurumi techniques. You should be comfortable working in continuous rounds without joining, as this pattern uses the spiral method throughout. This technique creates smooth, seamless pieces without visible seam lines.
The stitches and techniques you’ll use include magic ring (adjustable ring), single crochet, increases (2 single crochet in one stitch), decreases (single crochet 2 together), color changes, working in front loop only and back loop only, slip stitch, chain stitch, and double crochet for the tail.
You’ll also need skills in assembly techniques like attaching safety eyes securely, sewing pieces together with invisible seams, embroidering facial features (nose and eyebrows), stuffing for proper shape and firmness, and positioning pieces for balanced appearance.
If you’re new to amigurumi, you might want to practice these techniques on a simpler project first. However, if you’re an adventurous beginner with good pattern-reading skills, this pattern provides clear instructions that you can follow successfully.
Complete Materials List
To create your own Clover the Chubby Shiba Inu, gather these essential supplies:
Yarn: You’ll need worsted weight velvet yarn in two colors: reddish tan (or cream with a reddish tone) for the main body color, and white for the markings on the face, chest, and paws. Velvet yarn creates a wonderfully soft, plush texture that’s perfect for cuddly amigurumi. The pattern works beautifully with brands like Bernat Velvet, Himalaya Dolphin Baby, or similar velvet yarns. You can also use standard worsted weight acrylic yarn if you prefer a different texture.
Additionally, you’ll need a small amount of black yarn for embroidering the nose and eyebrows.
Hook Size: A 3.5mm crochet hook is recommended for worsted weight yarn. The key is to crochet tightly enough that your stuffing doesn’t show through the stitches. If you find your stitches are too loose, size down to a 3.0mm or 3.25mm hook. If they’re too tight and difficult to work, size up slightly.
Safety Eyes: You’ll need one pair of safety eyes. The pattern recommends 6mm to 8mm eyes for a cute, proportional look. Safety eyes are inserted between rounds 8 and 9 of the head, positioned 5 visible stitches apart.
Stuffing: Polyester fiberfill stuffing is essential for giving Clover his chubby shape. You’ll need enough to firmly stuff the head, body, and legs, with light stuffing for the arms.
Additional Notions: A darning needle or yarn needle for sewing pieces together and weaving in ends, scissors for cutting yarn, and stitch markers to track your rounds (optional but helpful).
Optional Materials: White felt for creating triangle details inside the ears (adds an extra touch of realism), and fabric glue or hot glue for attaching the felt pieces.
Download the complete Chubby Shiba Inu Crochet Pattern PDF from our Etsy shop!
Understanding the Pattern Structure
Clover is constructed in multiple pieces that are assembled together to create the finished plushie. The pattern uses continuous rounds, which means you’ll spiral around without joining each round with a slip stitch. This creates smooth, seamless pieces that look professional.
The pieces you’ll create include: one head with attached snout, one body with integrated arms, two ears, one curled tail, two complete legs (each made from a foot and base piece), and embroidered facial features.
The pattern uses standard amigurumi notation where numbers in parentheses indicate the total stitch count for that round. For example, “8 sc in MR (8)” means you’ll work 8 single crochet stitches into a magic ring for a total of 8 stitches.
Creating the Head: Step-by-Step Instructions
The head is where Clover’s personality really shines. You’ll start with the main head piece and then create a separate snout that gets sewn on later.
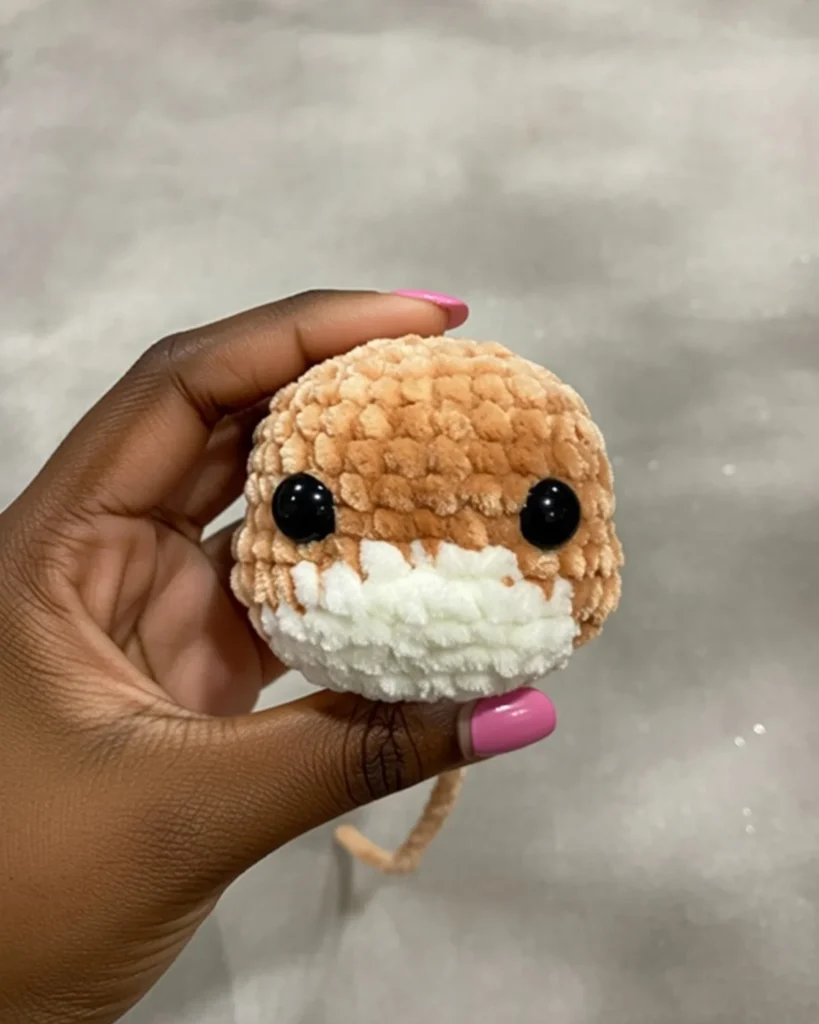
Main Head Construction:
Starting in reddish cream (your main tan color), begin with a magic ring.
Round 1: Work 8 single crochet into the magic ring. Pull the ring tight to close. (8 stitches)
Round 2: Work 8 increases (2 single crochet in each stitch around). (16 stitches)
Round 3: Work 1 single crochet, 1 increase, repeating this pattern 8 times around. (24 stitches)
Round 4: Work 2 single crochet, 1 increase, repeating 8 times. (32 stitches)
Rounds 5 through 9: Work single crochet in each stitch around for 5 rounds, maintaining 32 stitches. These rounds build up the height of the head.
Inserting Safety Eyes: After completing round 9, position your safety eyes between rounds 8 and 9, with 5 visible stitches between them. Insert the eyes from the right side, push through the fabric, and secure with the backing washers on the wrong side. Make sure they’re pushed on firmly as they cannot be adjusted once secured.
Color Change to White: For the next rounds, you’ll incorporate white to create the Shiba Inu’s distinctive facial markings. Change to white yarn where indicated in the pattern.
Round 10: Work 4 increases, 4 single crochet, 4 single crochet, 4 single crochet, 4 increases, 12 single crochet. (40 stitches)
Round 11: Work 10 single crochet, 8 single crochet, 22 single crochet. (40 stitches)
Decreasing for Shape:
Round 12: Work (2 single crochet, decrease) 2 times, (2 single crochet, decrease, 2 single crochet) 2 times, (2 single crochet, decrease) 5 times. (31 stitches)
Round 13: Decrease, single crochet, decrease, 12 single crochet, (single crochet, decrease) 4 times, 2 single crochet. (25 stitches)
Round 14: Decrease, single crochet, (single crochet, decrease) 4 times, (single crochet, decrease) 3 times, single crochet. (17 stitches)
Before finishing, stuff the head firmly with fiberfill. Make sure to shape it as you stuff, creating a nice round head shape. Once stuffed, finish off and hide the yarn tail by weaving it through several stitches inside the head.
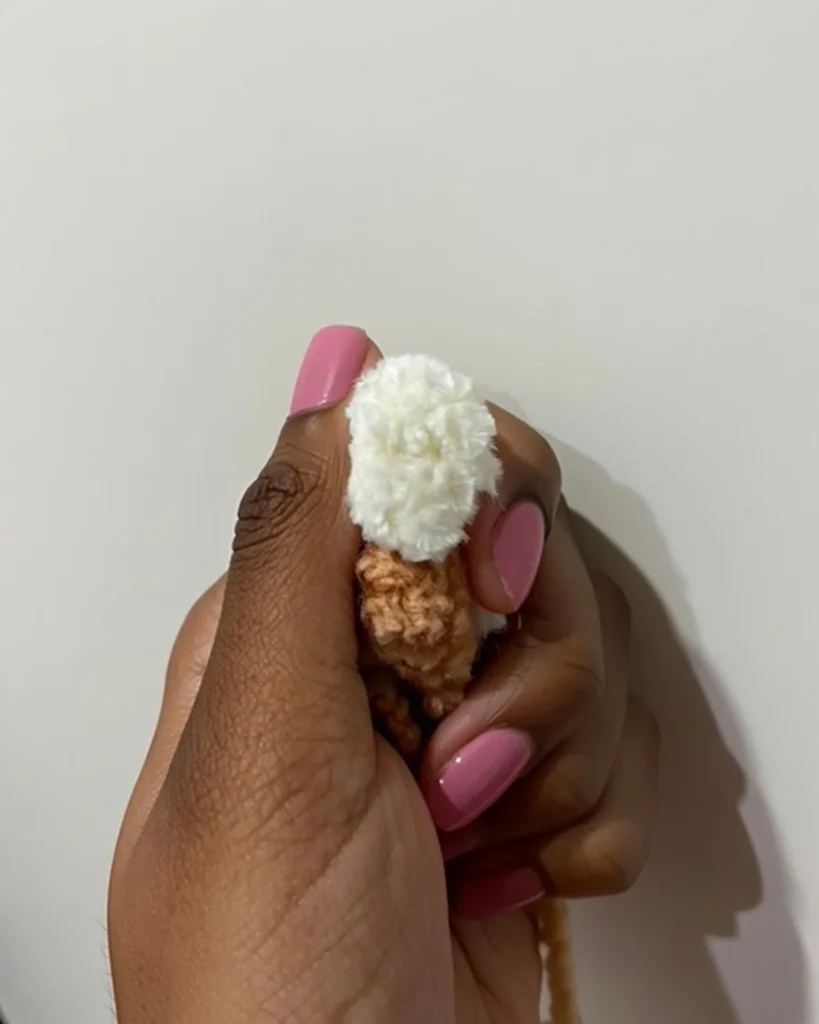
Creating the Snout:
The snout is a separate piece worked in white that gives Clover his adorable muzzle.
Starting in white yarn, work 8 single crochet into a magic ring. Close the round with a slip stitch to join.
Finish off, leaving a long tail for sewing (about 12-15 inches). This tail will be used to attach the snout to the head during assembly.
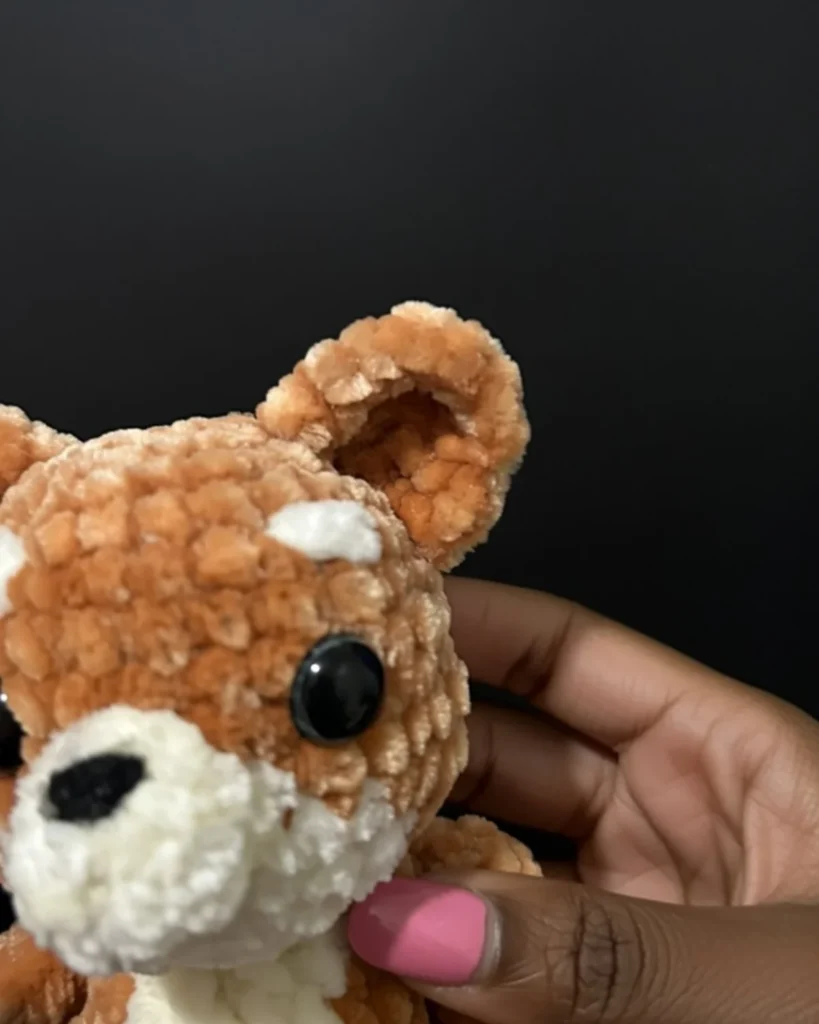
Making the Ears: Achieving the Perfect Pointed Shape
Shiba Inus are known for their perky, triangular ears, and this pattern captures that shape beautifully.
Starting in white yarn (for the inner ear color):
Round 1: Work 5 single crochet into a magic ring. (5 stitches)
Round 2: Work 5 increases. (10 stitches)
Change color to reddish tan for the outer ear.
Rounds 3 through 7: Work single crochet in each stitch around for 5 rounds. (10 stitches)
Stuff the ears very lightly, just enough to give them a bit of body without making them stiff or bulky. Finish off without closing the hole at the base.
Optional Felt Detail: For extra realism, cut small triangles from white felt and glue them into the center of each ear to create the white inner ear marking that Shiba Inus have. This is a lovely finishing touch that makes Clover look even more authentic.
Important Note: Make sure to create two ears! They’ll be attached to the head during final assembly.
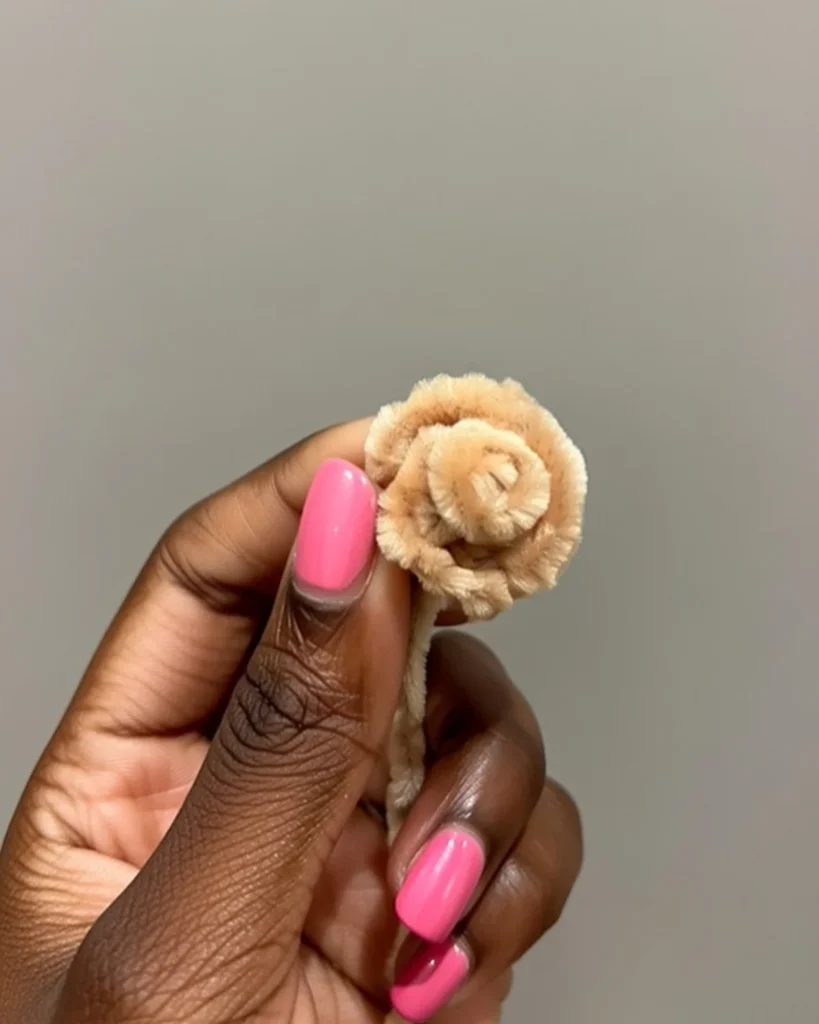
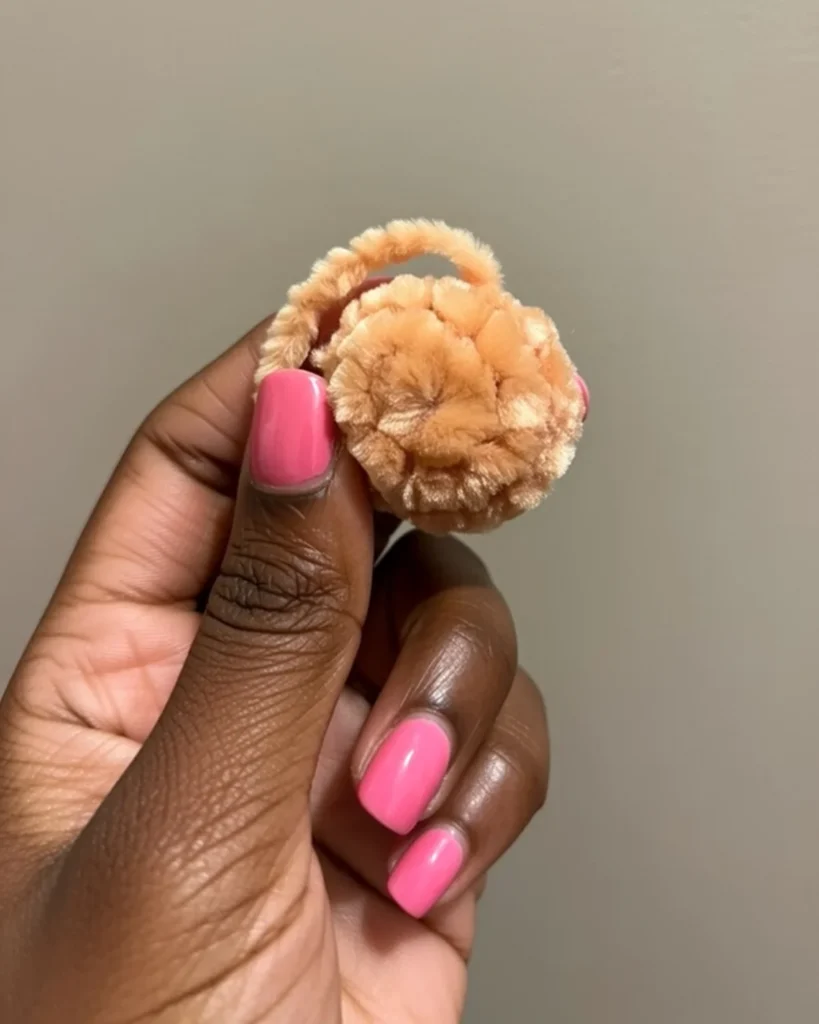
Crafting the Distinctive Curled Tail
One of the most recognizable features of a Shiba Inu is their curled tail, and this pattern creates that curl automatically as you crochet!
Starting in reddish cream:
Step 1: Chain 8.
Step 2: Starting in the 2nd chain from your hook, work 2 double crochet stitches into every chain across.
As you work these double crochet increases, you’ll notice the tail naturally begins to curl up on itself. This is exactly what you want! The curl happens because you’re working many more stitches than the foundation chain can accommodate, forcing the piece to spiral.
Finish off, leaving a long tail (12-15 inches) for sewing the tail onto the body later.
Creating the Arms: Important First Step
The arms are a crucial component to make before starting the body because they’ll be integrated into the body as you crochet it. This technique creates a seamless attachment that looks professional.
Starting in reddish cream, make two arms following these instructions:
Round 1: Work 8 single crochet into a magic ring. (8 stitches)
Round 2: Work 8 increases. (16 stitches)
Round 3: Work 1 single crochet, 1 increase, repeating 8 times. (24 stitches)
Round 4: Work 2 single crochet, 1 increase, repeating 8 times. (32 stitches)
Rounds 5 through 8: Work single crochet in each stitch around for 4 rounds. (32 stitches)
Change to white where indicated in the pattern for the paw coloring.
Continue working rounds as specified, incorporating the color changes for the white chest and belly area.
Stuff the arms lightly. You want them to have shape but remain flexible enough to position naturally against the body. Finish off without closing the opening, leaving the yarn tails attached for later closing.
Critical Note: Set these completed arms aside. You’ll attach them to the body during round 10 of the body construction, so keep them easily accessible.
Building the Body: Integrating the Arms
The body construction is where the pattern gets clever with the integrated arm technique.
Download the complete Chubby Shiba Inu Crochet Pattern PDF from our Etsy shop!
Starting in reddish cream:
Round 1: Work 8 single crochet into a magic ring. (8 stitches)
Round 2: Work 8 increases. (16 stitches)
Round 3: Work 1 single crochet, 1 increase, repeating 8 times. (24 stitches)
Round 4: Work 2 single crochet, 1 increase, repeating 8 times. (32 stitches)
Rounds 5 through 8: Work single crochet in each stitch around for 4 rounds. (32 stitches)
Change to white for the belly marking where indicated in the pattern.
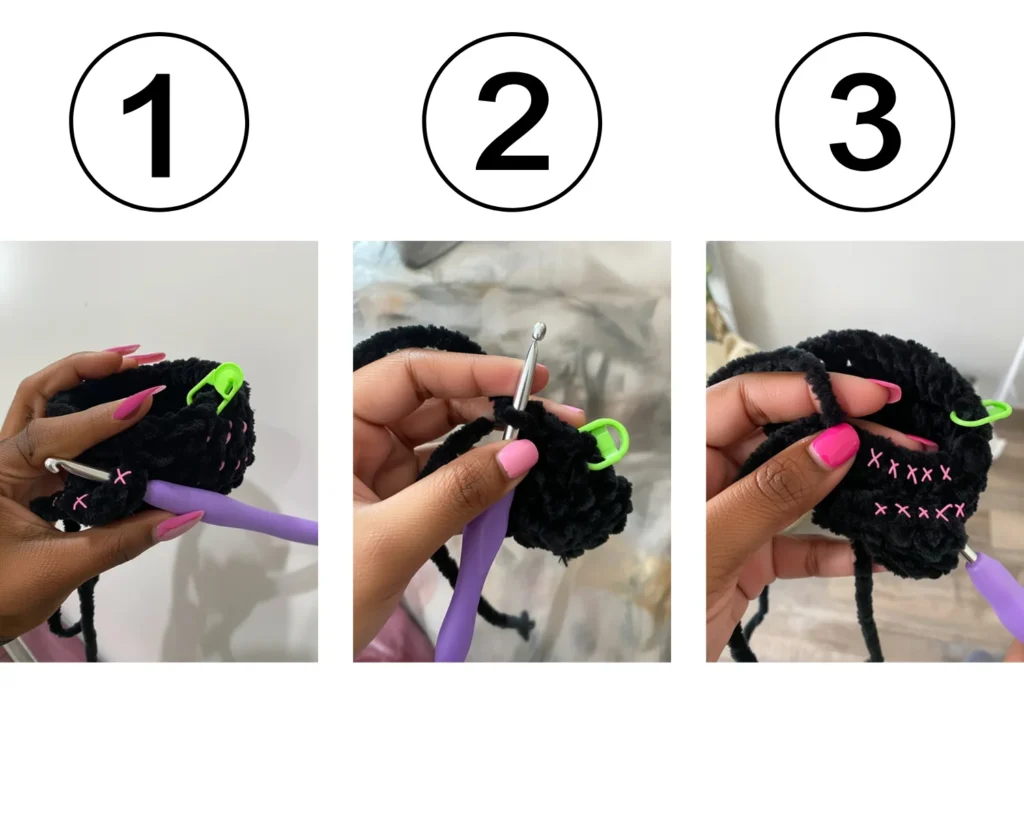
Round 10 – Attaching the Arms: This is the most important round of the body. Work 5 single crochet into the body stitches. Now, take your first arm and work 5 single crochet into the arm, going through the arm stitches. Leave the remaining arm stitches unworked and skip 5 body stitches. Work 2 single crochet into the body. Take the second arm and work 5 single crochet into it, leaving the rest unworked and skipping 5 body stitches. Finish with 15 single crochet into the body. (32 stitches total)
This technique joins the arms to the body seamlessly. The images in the original pattern show exactly how to position your hook through both the arm and body stitches.
Round 11: Work 10 single crochet, 2 single crochet, 10 single crochet, 5 decreases. (27 stitches)
Round 12: Work 9 single crochet, 4 single crochet, 10 single crochet, 2 decreases. (25 stitches)
Round 13: Decrease, 6 single crochet, 6 single crochet, 7 single crochet, 2 decreases. (22 stitches)
Stuffing the Body: Before finishing, stuff the body firmly. The pattern specifies to make sure the bottom stays flat, which is crucial for Clover’s ability to sit properly. Shape the stuffing so the body is nicely rounded but has a stable, flat base.
Finish off, leaving a long tail for sewing the body to the head during assembly.
Closing the Arm Gaps: After finishing the body, use the yarn tails you left on the arms to close the small holes between the body and the back of the arms. This creates a seamless appearance and secures the arms firmly in place.
Download the complete Chubby Shiba Inu Crochet Pattern PDF from our Etsy shop!
Making the Legs: Two-Part Construction
Each leg consists of two pieces: a foot and a base. You’ll make two complete legs following these instructions.
Foot (Make 2):
Starting in reddish cream:
Round 1: Work 8 single crochet into a magic ring. (8 stitches)
Round 2: Work 8 increases. (16 stitches)
Round 3: Work single crochet in each stitch around. (16 stitches)
Round 4: Work 2 single crochet, decrease, repeating 4 times. (12 stitches)
Stuff lightly if needed to give the foot shape. Finish off, leaving a long tail for assembly.
Repeat to create a second foot.
Download the complete Chubby Shiba Inu Crochet Pattern PDF from our Etsy shop!
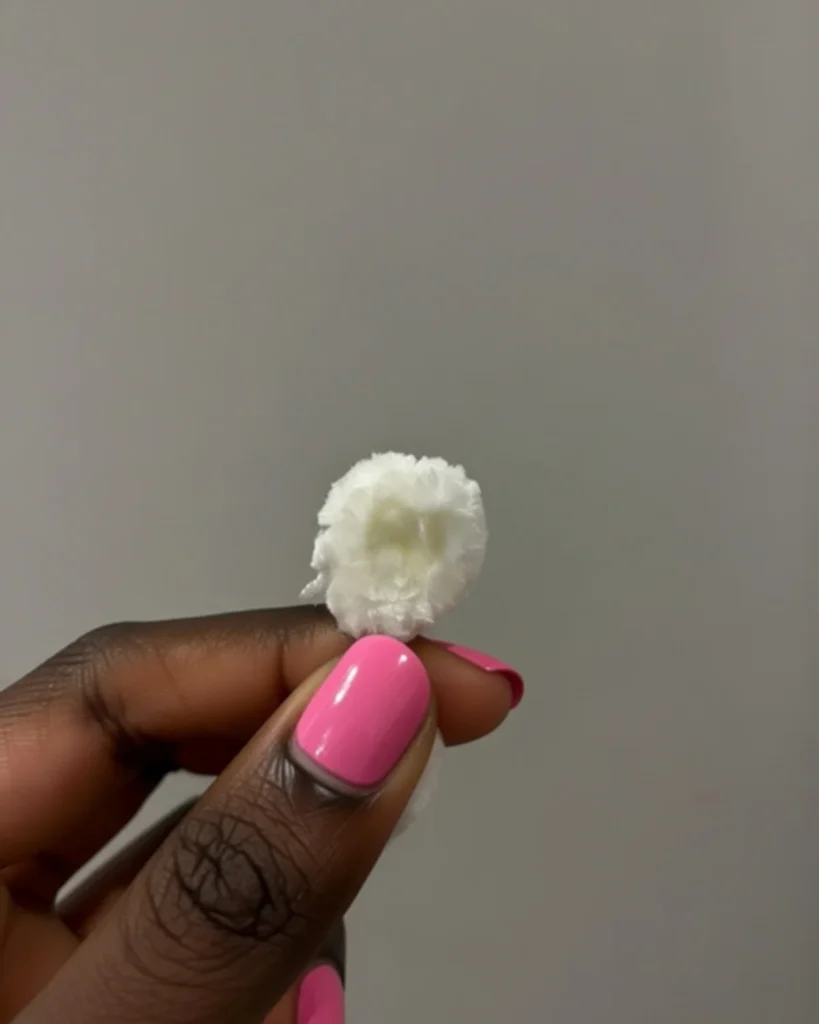
Base of Legs (Make 2):
Starting in white:
Round 1: Work 4 single crochet into a magic ring. (4 stitches)
Rounds 2 through 3: Work single crochet in each stitch around for 2 rounds. (4 stitches)
Round 4: Fold the piece in half and work 2 single crochet through both sides together to close. (2 stitches)
No stuffing is needed for this piece. Finish off, leaving a long tail for sewing.
Repeat to create a second base piece.
Assembling the Legs: Before attaching to the body, sew each foot piece to its corresponding base piece. The base piece creates the white paw pad detail on the bottom of each foot. Position the base centered on the bottom of the foot and sew securely. You should now have two complete legs ready for final assembly.
Complete Assembly Instructions
Now comes the exciting part where Clover really comes to life! Follow these steps for professional-looking results.
Attaching the Snout: Position the white snout on the front of the head between the safety eyes. It should sit between rounds 9 and 11 of the head. Using the long tail you left on the snout, sew it securely to the head using a whip stitch or mattress stitch. Make sure it’s centered between the eyes and sits flat against the head.
Embroidering the Nose: Using black acrylic yarn and your darning needle, embroider a small triangular nose onto the snout. Start at the top center of the snout and create an upside-down triangle shape. You can use satin stitch to fill in the triangle solidly, or use an outline stitch for a lighter look.
Attaching the Ears: Position the ears on top of the head between rounds 2 and 7. The inside edges of the ears should align with the placement of the safety eyes, creating a symmetrical appearance. Make sure both ears are angled slightly outward for that characteristic Shiba Inu alert expression. Sew securely using the yarn tails, working around the base of each ear to attach it firmly to the head.
Embroidering the Eyebrows: This is what gives Clover his sweet, expressive face! Using black yarn, embroider small curved lines above each eye between rounds 5 and 6. The eyebrows should curve slightly, following the natural shape above the eyes. Keep them subtle and symmetrical for the best effect.
Attaching the Head to Body: This step requires careful positioning for a balanced look. Align the front of the head with the front of the body, matching up the white chest marking with the white facial marking. Sew approximately 10 stitches together where the front of the head meets the body. For the back and sides of the head, sew it to rounds 12-13 of the body so the head lies flat and stable. This creates a natural-looking neck area.
Positioning and Attaching the Legs: Use a knitting needle or amigurumi positioning stick to hold the legs in place while you determine the best position. Place the legs on opposite sides of the body between rounds 5 and 9. Before sewing, set Clover down to make sure he sits flat and stable. Adjust the leg position as needed, then sew them securely in place. The legs should be positioned so Clover can sit upright without tipping.
Attaching the Tail: Position the curled tail on the back of the body between rounds 6 and 7. It should be centered between the ears and the back feet when viewing Clover from above. The tail should curl over the back in that classic Shiba Inu style. Sew it securely, making sure the curl faces the direction you prefer.
Final Checks: Once everything is attached, check all your seams to ensure they’re secure. Weave in any remaining yarn ends. Shape Clover’s features by adjusting the stuffing if needed and position the arms and legs for the most appealing pose.
Tips for Perfect Results
Maintain Consistent Tension: Amigurumi requires tight, even tension to prevent stuffing from showing through. If you tend to crochet loosely, size down your hook. Practice maintaining consistent tension throughout each piece.
Use Stitch Markers: Mark the beginning of each round with a stitch marker or contrasting yarn. This helps you track where you are in the pattern and ensures accurate stitch counts, especially during increases and decreases.
Stuff as You Go: Don’t wait until the end to stuff pieces. Add stuffing gradually as the opening gets smaller, which makes it easier to achieve good shaping and firm, even stuffing throughout.
Count Your Stitches: After completing each round, count your stitches to verify you have the correct number. This is especially important in rounds with multiple increases or decreases. Catching mistakes early saves time and frustration.
Take Your Time with Color Changes: When changing colors, carry the unused color along the inside of your work if you’ll use it again soon. For cleaner color changes, complete the last yarn over of the previous stitch with the new color.
Test Eye Placement: Before securing safety eyes permanently, place them without the backs to test the position. Check from multiple angles to ensure they’re symmetrical and give Clover the expression you want. Once you’re happy with the placement, push the backs on firmly.
Invisible Seaming: When sewing pieces together, use a technique like mattress stitch or whip stitch that creates invisible seams. Match your yarn color to the piece you’re sewing, and take small, careful stitches for the neatest appearance.
Block if Needed: If any pieces seem misshapen, you can gently steam block them to even out stitches and improve the overall appearance. Hold a steamer or iron (on steam setting) a few inches away from the piece and let the steam relax the stitches. Shape with your hands and let dry.
Customization Ideas
While Clover is adorable in the traditional reddish-tan and white Shiba Inu coloring, you can customize this pattern to create other variations.
Color Variations: Try black and tan for a black and tan Shiba Inu, cream and white for a lighter-colored dog, red and white for a more vibrant Shiba, or sesame coloring using a variegated yarn in brown tones.
Size Variations: Use different yarn weights and corresponding hook sizes to create different sized Shiba Inus. Bulky yarn with a 5mm hook creates a larger plushie, while sport weight yarn with a 2.5mm hook makes a miniature version perfect for keychains or ornaments.
Accessories: Add a tiny crocheted collar, make a small bandana to tie around the neck, create a miniature leash for display purposes, or crochet a small sweater for your Shiba.
Expression Changes: Adjust the eyebrow embroidery to change Clover’s expression. Raised eyebrows create a surprised look, angled eyebrows can make him look thoughtful or skeptical, and curved, friendly eyebrows (as in the original pattern) create a sweet, happy expression.
Felt Details: Beyond the ear details, you can add felt pieces for tongue, inner mouth details when creating an open-mouth variation, or paw pad details on the bottoms of the feet.

Displaying and Caring for Your Clover
Once completed, Clover makes a wonderful display piece or cuddle companion. His flat-bottomed design allows him to sit securely on shelves, desks, or bedside tables without toppling over.
For long-term care, spot clean as needed using a damp cloth and mild soap. If using velvet yarn, be gentle as the pile can mat if rubbed too vigorously. Allow to air dry completely. For deeper cleaning, you can hand wash in cool water with gentle detergent, but make sure to reshape while drying and avoid wringing or twisting.
If Clover becomes dusty, use a soft brush or lint roller to remove surface dust. Store in a clean, dry place away from direct sunlight to prevent fading, especially if you’ve used vibrant colors.
Why This Pattern Is Perfect for Dog Lovers
The Shiba Inu breed has captured hearts worldwide with their fox-like appearance, spirited personality, and undeniable charm. This pattern allows you to celebrate that love in handmade form, creating a permanent companion that requires no feeding, walking, or vet visits!
Clover makes an exceptional gift for Shiba Inu owners who want a plushie version of their beloved pet, dog lovers who appreciate the breed’s unique characteristics, children who love stuffed animals with personality, or anyone who enjoys collecting amigurumi animals.
The chubby proportions give Clover an extra dose of cuteness that appeals to people of all ages. Unlike realistic dog plushies, this stylized amigurumi version has a sweet, kawaii aesthetic that makes it feel approachable and huggable.
Get the PDF Pattern for Easy Printing
Want a convenient, ad-free version of this pattern? Download the complete Chubby Shiba Inu Crochet Pattern PDF from our Etsy shop! The beautifully formatted PDF includes all the instructions, detailed photos, and helpful tips in a printer-friendly format that you can keep in your project binder or read on your tablet while you crochet. No scrolling through ads or worrying about losing the pattern if the webpage changes.
Download the complete Chubby Shiba Inu Crochet Pattern PDF from our Etsy shop!
Sharing Your Creation
When you complete your Clover the Chubby Shiba Inu, we would love to see your creation! Share your finished plushie in the comments below or tag us on Pinterest @CozyChicLife_ to be featured. Seeing the variations and interpretations other crocheters create is inspiring for the entire amigurumi community.
You’re welcome to sell finished Clovers you create from this pattern, making it a great option if you’re building a small handmade business or selling at craft fairs. Just remember to credit the original pattern designer when selling or posting your work.
Final Thoughts
Clover the Chubby Shiba Inu is more than just an amigurumi pattern; it’s a labor of love that results in an adorable companion. The thoughtful construction techniques, from the integrated arms to the naturally curling tail, show the designer’s skill and attention to detail.
Whether you’re making Clover for yourself or as a heartfelt gift, this pattern offers an engaging and rewarding crochet experience. The combination of straightforward techniques and clever construction makes it accessible to intermediate crocheters while teaching valuable skills that apply to other amigurumi projects.
The end result is a charming plushie that captures the essence of the beloved Shiba Inu breed in the most huggable form possible. From the perky ears to the curled tail, every detail comes together to create something truly special. Grab your hook and yarn, and get ready to fall in love with Clover!
Download the complete Chubby Shiba Inu Crochet Pattern PDF from our Etsy shop!