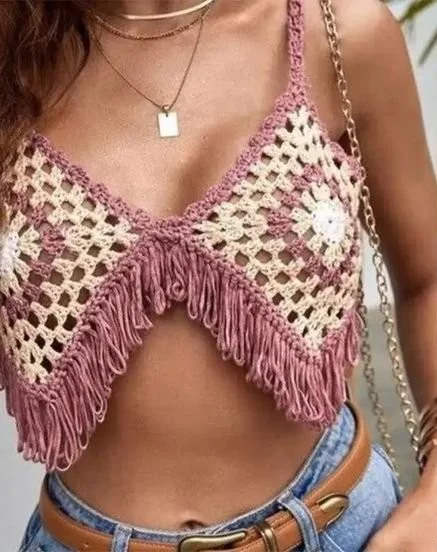
How to Crochet a Granny Square Top for Beginners
Crocheting is not just a relaxing hobby; it’s also a fantastic way to create unique pieces of clothing and accessories. One delightful project that is perfect for beginners is making a granny square top. This trendy piece not only showcases your handiwork but also allows you to play with various colors and patterns. This step-by-step guide will take you through everything you need to know, from basic stitches to assembling your granny squares into a beautiful top.
What is a Granny Square?
A granny square is a classic crochet motif made up of double crochet and chain stitches, forming a square shape that can be joined together to create larger items, like blankets, bags, and tops. The beauty of granny squares lies in their versatility; you can mix and match colors, sizes, and patterns to create something truly unique.
Materials Needed
Before you start your granny square top, gather the following materials:
- Yarn: Choose a worsted weight cotton yarn (medium 4). Stock up on several different colors.
- Crochet Hook: A size H (5.0 mm) hook is ideal for worsted weight yarn, but refer to your yarn label for recommendations.
- Scissors: For cutting your yarn.
- Tapestry Needle: To weave in ends and assemble the squares.
- Measuring Tape: To measure your granny squares and the final top.
- Stitch Marker (optional): For marking rows or stitches.
Understanding Basic Crochet Stitches
If you are new to crocheting, it’s essential to familiarize yourself with the basic stitches. Here are the primary stitches you’ll need for your granny squares:
- Chain (ch): This is the foundation of most crochet projects. To make a chain stitch, yarn over and pull through the loop on your hook.
- Double Crochet (dc): Yarn over, insert your hook into the stitch, yarn over again, pull through (three loops on the hook), yarn over, pull through the first two loops, yarn over again, and pull through the last two loops.
Making the Granny Squares
Now that you understand the basic materials and stitches, let’s dive into the step-by-step process of making the granny squares.
Step 1: Start with a Slip Knot
Begin by creating a slip knot on your hook. This will be the starting point for your granny square.
Step 2: Create Your Foundation Chain
Chain 4 and join with a slip stitch to form a ring. This ring will be the center of your granny square.
Step 3: First Round of Double Crochets
Now you will work into the ring. Chain 3 (this counts as your first double crochet), then make 2 double crochets into the ring. Chain 2 and repeat this pattern three more times (total of 4 groups of 3 double crochets with chain 2 spaces in between). Join the round with a slip stitch to the top of the starting chain 3.
Step 4: Second Round
To begin the second round, slip stitch into the chain 2 space. Chain 3 (counts as the first double crochet) and then make 2 double crochets into the same chain 2 space. Chain 2, and then in the next chain 2 space from the first round, make 3 double crochets followed by a chain 2. Repeat this in each chain 2 space until you have completed the round, linking it all together with a slip stitch at the end.
Step 5: Repeat Rounds
To increase the size of your granny square, repeat the process for additional rounds. Each round will involve working into the chain 2 spaces and adding more groups of 3 double crochets with chain 2 spaces between them. You can continue adding rounds until your granny square reaches your desired size.
Step 6: Clipping Ends
Once you finish your last round, cut the yarn, leaving a tail for weaving in. Pull the tail through the last loop to secure it. Use a tapestry needle to weave in any loose ends.
Step 7: Create More Squares
You will need several granny squares to make your top. Depending on your size and design, aim for anywhere between 9 and 16 squares.

Assembling the Granny Squares into a Top
Once you’ve completed your granny squares, it’s time to assemble them.
Step 1: Arrangement
Lay out your squares on a flat surface to determine your desired arrangement. Mix and match different colors to find the perfect balance. You can create a symmetrical design or a more eclectic look.
Step 2: Joining Squares
To join the squares, you can use either the whip stitch or the slip stitch method.
Whip Stitch Method:
- Place two squares right sides together.
- Using your tapestry needle, thread the yarn through the top corner stitches of both squares.
- Pull tight and continue along the edge until you’ve connected the squares.
Slip Stitch Method:
- Place squares right sides together.
- Insert your hook into the first stitch of both squares.
- Yarn over and pull through, put the yarn through the loop on your hook and repeat until you reach the end.
Step 3: Creating Armholes
To create armholes, choose where you want your armhole to be when connecting squares. Leave a few squares unjoined in the areas you want to create openings for your arms.
Step 4: Adding Straps
To finish off your top, consider adding crochet straps. For each strap, chain enough to reach from the armhole to the back neckline. Once you’re satisfied with the length, attach it securely to both ends of the square.
Step 5: Final Touches
Weave in all loose ends using a tapestry needle. You can also block your top for a more polished look, helping to keep the shape of your granny squares.
Customization Tips
One of the great aspects of crocheting is the ability to make design choices. Here are some ideas for personalizing your granny square top:
- Color Variations: Use a gradient of colors or go for a monochrome look. The options are endless!
- Different Patterns: Try using different crochet stitches in your granny squares, like shells or puff stitches, for a unique texture.
- Embellishments: Consider adding fringe, lace, or small crochet flowers for added flair.
- Sizing: Play around with the size of your squares or the number of squares to better suit your size and fit preferences.
Conclusion
Crocheting a granny square top is a rewarding project for beginners that combines creativity and skill. With a little practice and patience, you can create a stylish top that reflects your personal style. Whether you opt for bold hues or soft pastels, your homemade granny square top will surely be a unique addition to your wardrobe.
So grab your yarn and hook, and start crocheting your very own granny square top today!
