
Cute Quokka With Heart Amigurumi: A Delightful Crochet Project
If you’re in search of a cheerful and cute crochet project, look no further than the adorable quokka with a heart amigurumi! These charming little creatures, often referred to as the ‘happiest animals on Earth,’ make for the perfect crochet companions. In this article, we’ll walk you through the process of creating your own cute quokka amigurumi, ensuring that you have a delightful experience as you stitch your way to crafting a perfect piece.
What is Amigurumi?
Amigurumi is a Japanese art form that involves knitting or crocheting small stuffed animals and anthropomorphic creatures. The term "amigurumi" comes from two words: "ami," meaning "crocheted or knitted," and "nuigurumi," which means "stuffed toy." With its origins in Japan, amigurumi has gained immense popularity worldwide, allowing crafters to express their creativity and create whimsical, lovable characters.
Why Choose a Quokka as Your Next Crochet Project?
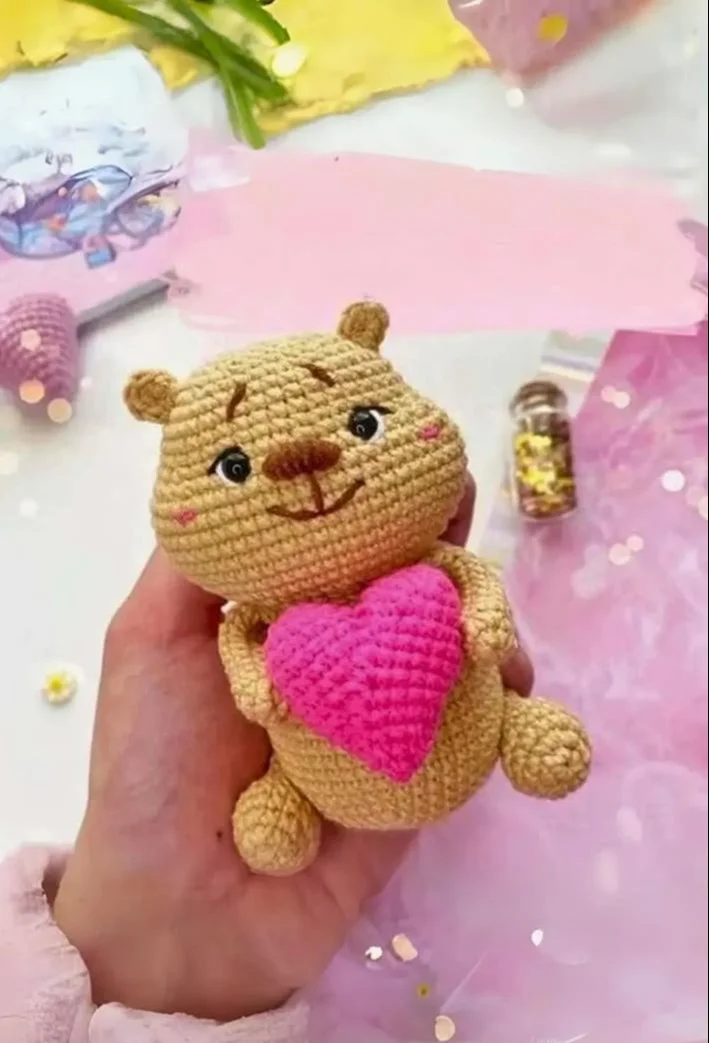
Quokkas are small marsupials native to Australia, known for their adorable round faces and perpetual smiles. These fascinating creatures have a friendly disposition, which makes them highly endearing. Crocheting your own quokka amigurumi allows you to capture that joy and create a lovely piece for display or gifting.
Materials You’ll Need
Before we get started on your cute quokka amigurumi, make sure you have the following materials ready:
- Yarn: Choose soft, plush yarn, preferably in brown for the quokka’s body, white for the belly patch, and any color you’d like for the heart.
- Crochet Hook: A 3.5mm (E) crochet hook is typically perfect for amigurumi projects.
- Stuffing: Fiberfill or polyester stuffing for the quokka.
- Stitch Marker: Helpful for keeping track of your rounds.
- Safety Eyes: 8mm safety eyes for the quokka’s face.
- Tapestry Needle: Used for sewing and weaving in ends.
- Scissors: For cutting yarn.
Basic Crochet Stitches for Amigurumi
Before diving into the quokka pattern, let’s quickly review some basic crochet stitches commonly used in amigurumi:
- Magic Ring: This technique creates a tight center for your first round of stitches.
- Single Crochet (sc): This is the foundation stitch for amigurumi.
- Increase (inc): To increase the number of stitches, crochet two single crochets into the same stitch.
- Decrease (dec): To decrease, crochet two stitches together.
If you’re familiar with these stitches, it’s time to jump into creating your cute quokka amigurumi!
Step-by-Step Pattern for Quokka Amigurumi
Head
- Start with a Magic Ring: Create a magic ring and crochet 6 single crochets (sc) into the ring. (6)
- Increase: 2 sc in each stitch around. (12)
- Continue Increasing: 1 sc, 1 inc around. (18)
- Keep Going: 2 sc, 1 inc around. (24)
- Finish the Head: Crochet 6 rounds of 24 sc each.
- Decrease: 2 sc, 1 dec around. (18)
- Add Safety Eyes: Insert safety eyes between rounds 7 and 8.
- Shape the Head: 1 sc, 1 dec around. (12)
- Stuff Head: Lightly stuff the head and complete with 1 dec around. (6)
- Close off and leave a tail for sewing.
Body
- Repeat Magic Ring: Just like the head, start with a magic ring and work 6 sc. (6)
- Increase: 2 sc in each stitch around. (12)
- Keep Increasing: 1 sc, 1 inc around. (18)
- Continue: 2 sc, 1 inc around. (24)
- Body Rounds: Crochet 5 more rounds of 24 sc each.
- Decrease: 2 sc, 1 dec around. (18)
- Final Rounds: 1 sc, 1 dec around. (12)
- Stuff Body: Lightly stuff the body and complete with 1 dec around. (6)
- Close off and leave a tail for sewing.
Arms (Make Two)
- Magic Ring: Start with a magic ring, work 6 sc. (6)
- Increase: 1 sc, 1 inc around. (9)
- Body of Arm: Crochet 4 rounds of 9 sc each.
- Finish Off: Close off, leave a tail for sewing.
Legs (Make Two)
- Magic Ring: Work 6 sc in a magic ring. (6)
- Increase: 2 sc in each stitch around. (12)
- Body of Leg: Crochet 5 rounds of 12 sc each.
- Finish Off: Close off, leave a tail for attaching.
Ears (Make Two)
- Magic Ring: Work 6 sc in a magic ring. (6)
- Increase: 2 sc in each stitch around. (12)
- Finish Off: Leave a long tail for attaching.
Assembly
- Sew the Head: Attach the head to the body securely.
- Position Arms: Sew the arms onto the sides of the body.
- Attach Legs: Position and sew the legs at the bottom.
- Ears: Attach the ears to the top of the head.
- Add Heart: To create a heart for your quokka, crochet a small heart shape with red or pink yarn. Sew it onto the quokka’s chest area.
Finishing Touches
- Embroider a Nose: Use black yarn to embroider a small nose.
- Make it Unique: Feel free to personalize your quokka with different colors or accessories.
- Weaving Ends: Make sure to weave in any loose yarn tails to keep your creation tidy.
Tips for Successful Amigurumi
- Tension Control: Keep your tension consistent throughout your project for an even look.
- Use a Stitch Marker: This helps you keep track of your rounds and ensures you don’t lose count.
- Practice Makes Perfect: If you find the process challenging, don’t hesitate to try multiple versions until you’re satisfied.
Why Amigurumi Makes a Great Gift
Handcrafted gifts carry a sentimental value that enhances the act of giving. A homemade quokka amigurumi can be a delightful present for birthdays, holidays, or special occasions. It’s a project that reflects your personality and creativity while bringing joy to the recipient.
Additionally, crocheting can be a relaxing activity, helping you unwind and express your artistic side. As you stitch the little details of your quokka, you’ll find a sense of fulfillment in creating a unique piece that stands out.
Share Your Creation!
Once you’ve completed your cute quokka amigurumi, share your creation with friends, family, or online crochet communities! Social media platforms are a great way to showcase your work, find inspiration from fellow crafters, and even get advice on future projects.
Conclusion
Crocheting a cute quokka with a heart amigurumi is not only a satisfying craft but also a wonderful way to add some cuteness to your home or to gift to a loved one. With a range of colorful yarns and creative liberties, the possibilities are endless. Whether you’re an experienced crocheter or just starting, this project will certainly bring joy to your crochet journey.
Gather your materials and start stitching today!
