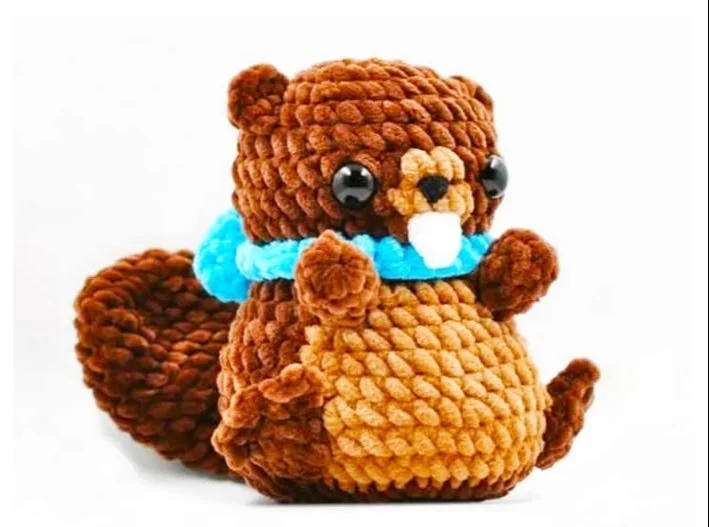
Cute Beaver Amigurumi Free Crochet Pattern
If you’re a crochet enthusiast looking to create something adorable, the Cute Beaver Amigurumi is the perfect project for you! This free crochet pattern allows you to craft a charming little beaver that can brighten up any space in your home. Whether you are an experienced crocheter or a beginner eager to explore the world of amigurumi, this pattern is simple and enjoyable. Plus, it’s a great gift for friends and family or a delightful item to sell at craft fairs.
Materials Needed
Before diving into the pattern, gather the necessary materials to ensure a smooth crochet experience:
- Yarn: Choose a soft yarn in brown for the body, black for the nose and claws, and white for the teeth. Worsted weight yarn is recommended.
- Crochet Hook: A size G (4.0 mm) crochet hook works well for this project.
- Fiberfill: You’ll need stuffing to give your beaver that cuddly shape.
- Safety Eyes or Black Yarn: For the beaver’s eyes; safety eyes are recommended for a secure and neat look.
- Stitch Markers: Useful for keeping track of your rounds.
- Tapestry Needle: For weaving in ends and sewing pieces together.
- Scissors: For cutting yarn.
Abbreviations
To help you navigate this pattern easily, here are some common crochet abbreviations used:
- ch: chain
- sc: single crochet
- inc: increase (2 sc in one stitch)
- dec: decrease (sc two stitches together)
- sl st: slip stitch
- st(s): stitch(es)
- rnd: round
The Basic Amigurumi Shape
The first step in crocheting your Cute Beaver Amigurumi is to create the basic shape of the body, head, and limbs. The following sections guide you through each step of this process.
Making the Body
- Start with a Magic Ring: This creates a tight center for your beaver’s body.
- Round 1: 6 sc in the magic ring. (6)
- Round 2: Inc in each st around. (12)
- Round 3: Sc in next st, inc in next st repeat around. (18)
- Round 4–7: Sc in each st around. (18)
- Round 8: Sc in next st, dec in next st repeat around. (12)
- Round 9: Dec around until closed, stuffing as you go.
This creates a rounded and soft body for your beaver.
Crafting the Head
- Magic Ring with Yarn: Similar to the body, start with a magic ring.
- Rounds 1–7: Repeat the above body rounds until you reach your desired head size.
- Flatten the bottom and attach it to the body using needle and thread or yarn, ensuring it’s securely sewn.
Creating the Limbs
Arms (Make 2)
- Magic Ring: 6 sc in the magic ring. (6)
- Round 2: Inc in each st around. (12)
- Rounds 3-4: Sc in each st around. (12)
- Stuff Lightly and then sew the arms onto the body.
Legs (Make 2)
- Magic Ring: Just like the arms, start with 6 sc.
- Rounds 2 and 3: Work in the same manner for consistency.
- Round 4: Continue with sc for about 2 more rounds and attach.
Making the Beaver’s Tail
The tail is a special feature of your amigurumi beaver.
- Start with a Chain: Ch 12.
- Row 1: Sc in each st across (12).
- Rows 2–5: Sc in each st across, but adjust the number of rows for desired thickness.
- Curve the tail and sew it onto the back of the beaver.

Adding Features
Eyes
If you are using safety eyes, insert them between rows 5 and 6 of the head. If using black yarn, simply embroider two small dots where the eyes should go.
Nose and Mouth
To create the nose, use black yarn or fabric:
- For the Nose: Make a small oval shape and attach it to the face.
- Embroider a smile just below the nose.
Teeth
Cut two small rectangles from white yarn to act as the teeth. Sew these onto the front of the beaver’s mouth.
Finishing Touches
Make sure all parts are securely stitched. Weave in any yarn ends with your tapestry needle, ensuring your creation remains neat and tidy. You can lightly stuff the head if desired for a puffier look.
Customizing Your Beaver
One of the joys of crochet is personalizing your projects. Feel free to get creative with colors! You could change the body to a lighter shade of brown, or add fun accessories like a little scarf or a hat for an extra touch of cuteness.
Care Instructions
For cleaning your Cute Beaver Amigurumi, it is best to spot clean with a damp cloth and mild soap. Avoid submerging it in water, as this can lead to damage or loss of shape.
Conclusion
Creating your Cute Beaver Amigurumi can be a delightful project that showcases your crochet skills and provides a charming creation you can cherish or gift to a loved one. Follow the pattern step-by-step, and you will have a sweet beaver that adds a whimsical touch to your crochet collection.
With the right materials and a little bit of time, your plushie can be a wonderful companion, perfect for snuggling or displaying as part of your home decor. Happy crocheting!